Thông tin liên hệ
- 036.686.3943
- admin@nguoicodonvn2008.info
Magento là một nền tảng thương mại điện tử miễn phí và mã nguồn mở được viết bằng PHP. Nền tảng này đơn giản, dễ sử dụng, có thể tùy chỉnh và cho phép bạn lưu trữ cửa hàng trực tuyến của mình trong vòng vài phút. Bạn có thể lưu trữ nhiều cửa hàng trên một máy chủ duy nhất và quản lý chúng bằng một giao diện duy nhất. Magento là một trong những nền tảng thương mại điện tử được sử dụng rộng rãi nhất trên thế giới do có nhiều tính năng.
Bài viết này sẽ chỉ cho bạn cách cài đặt Magento 2 với Apache và Let's Encrypt SSL trên AlmaLinux.
Magento sử dụng MariaDB làm cơ sở dữ liệu và chạy trên web server. Vì vậy, trước tiên hãy cài đặt máy chủ web Apache và gói máy chủ MariaDB bằng lệnh sau:
dnf install httpd mariadb-server -y
Sau khi cài đặt cả hai gói, hãy khởi động service Apache và MariaDB, cho phép chúng bắt đầu khi khởi động lại hệ thống:
systemctl start httpd mariadb
systemctl enable httpd mariadb
Tiếp theo, bạn sẽ cần cài đặt PHP và các tiện ích mở rộng bắt buộc khác vào máy chủ của mình. Theo mặc định, phiên bản PHP mới nhất không được bao gồm trong kho lưu trữ mặc định của AlmaLinux. Vì vậy, bạn phải thêm kho lưu trữ EPEL và Remi PHP vào hệ thống. Bạn có thể cài đặt cả hai bằng lệnh sau:
rpm -Uvh https://dl.fedoraproject.org/pub/epel/epel-release-latest-8.noarch.rpm
dnf install -y https://rpms.remirepo.net/enterprise/remi-release-8.rpm
Tiếp theo, đặt lại kho lưu trữ PHP mặc định và bật kho lưu trữ PHP7.4 bằng lệnh sau:
dnf module reset php
dnf module install php:remi-7.4
Tiếp theo, cài đặt PHP với tất cả các tiện ích mở rộng cần thiết bằng lệnh sau:
dnf install php php-cli php-soap php-pdo php-bcmath php-mysqlnd php-opcache php-xml php-gd php-intl php-mbstring php-json php-iconv php-zip unzip git -y
Sau khi cài đặt, hãy chỉnh sửa file php.ini và thực hiện một số thay đổi được đề xuất:
nano /etc/php.ini
Thay đổi các giá trị sau:
memory_limit = 1024M
upload_max_filesize = 200M
zlib.output_compression = On
max_execution_time = 300
date.timezone = Asia/Kolkata
Lưu và đóng file khi bạn hoàn tất.
Đầu tiên, bảo mật cài đặt MariaDB và đặt mật khẩu root MariaDB bằng lệnh sau:
mysql_secure_installation
Trả lời tất cả các câu hỏi như hiển thị bên dưới:
Enter current password for root (enter for none):
Set root password? [Y/n] Y
New password:
Re-enter new password:
Remove anonymous users? [Y/n] Y
Disallow root login remotely? [Y/n] Y
Remove test database and access to it? [Y/n] Y
Reload privilege tables now? [Y/n] Y
Sau khi hoàn tất, hãy đăng nhập vào MariaDB bằng lệnh sau:
mysql -u root -p
Sau khi đăng nhập, hãy tạo cơ sở dữ liệu và người dùng cho Magento bằng lệnh sau:
MariaDB [(none)]> CREATE DATABASE magento2;
MariaDB [(none)]> GRANT ALL ON magento2.* TO magento2@localhost IDENTIFIED BY 'password';
Tiếp theo, xóa các đặc quyền và thoát khỏi MariaDB bằng lệnh sau:
MariaDB [(none)]> flush privileges;
MariaDB [(none)]> exit;
Trước khi tải xuống Magento 2, bạn sẽ cần cài đặt Composer vào hệ thống của mình.
Chạy lệnh sau để cài đặt Composer:
curl -sS https://getcomposer.org/installer | php
Bạn sẽ thấy kết quả sau:
All settings correct for using Composer
Downloading...

Composer (version 2.1.3) successfully installed to: /root/composer.phar
Use it: php composer.phar
Tiếp theo, di chuyển file nhị phân Composer đến vị trí hệ thống bằng lệnh sau:
mv composer.phar /usr/local/bin/composer
Tiếp theo, xác minh phiên bản Composer:
composer --version
Đầu ra:
Composer version 2.1.3 2021-06-09 16:31:20Next, change the directory to Apache web root and download the latest version of Magento:
cd /var/www/html/
wget https://github.com/magento/magento2/archive/2.3.zip
Sau khi Magento 2 được tải xuống, hãy giải nén file đã tải xuống bằng lệnh sau:
unzip 2.3.zip
Tiếp theo, đổi tên thư mục đã giải nén thành magento2:
mv magento2-2.3 magento2
Tiếp theo, thay đổi thư mục thành magento2 và cập nhật composer bằng lệnh sau:
cd magento2 composer update
composer install
Tiếp theo, tạo một cron job cho Magento:
./bin/magento cron:install
Tiếp theo, liệt kê tất cả cron job cho Magento bằng lệnh sau:
crontab -l
Bạn sẽ thấy kết quả sau:
#~ MAGENTO START f73db5f5dcf223372d4c9fab56bef0c1730eece898fad5cbee0c313b46b0dd1f
* * * * * /usr/bin/php /var/www/html/magento2/bin/magento cron:run 2>&1 | grep -v "Ran jobs by schedule" >> /var/www/html/magento2/var/log/magento.cron.log
#~ MAGENTO END f73db5f5dcf223372d4c9fab56bef0c1730eece898fad5cbee0c313b46b0dd1f
Tiếp theo, thiết lập quyền và quyền sở hữu thích hợp cho thư mục magento2:
chown -R apache:apache /var/www/html/magento2
chmod -R 755 /var/www/html/magento2
Tiếp theo, bạn sẽ cần tạo file cấu hình máy chủ ảo Apache cho Magento 2. Bạn có thể tạo file này bằng lệnh sau:
nano /etc/httpd/conf.d/magento.conf
Thêm các dòng sau:
<VirtualHost *:80>
ServerAdmin admin@example.com
ServerName magento.example.com
DocumentRoot /var/www/html/magento2/
DirectoryIndex index.php
<Directory /var/www/html/magento2/>
Options Indexes FollowSymLinks MultiViews
AllowOverride All
Order allow,deny
allow from all
</Directory>
ErrorLog /var/log/httpd/magento_error.log
CustomLog /var/log/httpd/magento_access.log combined
</VirtualHost>
Lưu và đóng file, sau đó khởi động lại service Apache để áp dụng các thay đổi cấu hình:
systemctl restart httpd
Bạn có thể kiểm tra trạng thái Apache bằng lệnh sau:
systemctl status httpd
Bạn sẽ nhận được kết quả sau:
? httpd.service - The Apache HTTP Server
   Loaded: loaded (/usr/lib/systemd/system/httpd.service; disabled; vendor preset: disabled)
   Active: active (running) since Sat 2021-07-17 00:20:14 EDT; 8s ago
     Docs: man:httpd.service(8)
 Main PID: 10134 (httpd)
   Status: "Started, listening on: port 80"
    Tasks: 213 (limit: 25014)
   Memory: 30.8M
   CGroup: /system.slice/httpd.service
           ??10134 /usr/sbin/httpd -DFOREGROUND
           ??10135 /usr/sbin/httpd -DFOREGROUND
           ??10136 /usr/sbin/httpd -DFOREGROUND
           ??10137 /usr/sbin/httpd -DFOREGROUND
           ??10138 /usr/sbin/httpd -DFOREGROUND

Jul 17 00:20:14 AlmaLinux systemd[1]: Starting The Apache HTTP Server...
Tiếp theo, bạn sẽ cần cho phép các cổng 80 và 443 qua tường lửa. Bạn có thể cho phép chúng bằng lệnh sau:
firewall-cmd --permanent --add-service=http
firewall-cmd --permanent --add-service=https
Tiếp theo, load lại dịch vụ tường lửa để áp dụng các thay đổi:
firewall-cmd --reload
Tiếp theo, bạn sẽ cần thực hiện cài đặt Magento 2 từ giao diện dòng lệnh. Vì trình hướng dẫn cài đặt web Magento đã bị xóa kể từ phiên bản 2.3.7.
Đổi thư mục thành Magento2 và chạy lệnh sau để hoàn tất cài đặt:
cd /var/www/html/magento2/
bin/magento setup:install --admin-firstname="Hitesh" --admin-lastname="Jethva" --admin-email="admin@example.com" --admin-user="admin" --admin-password="Admin@1981" --db-name="magento2" --db-host="localhost" --db-user="magento2" --db-password="password" --language=en_US --currency=USD --timezone=UTC --cleanup-database --base-url=http://"magento.example.com"
Sau khi cài đặt thành công, bạn sẽ nhận được kết quả sau:
[Progress: 701 / 706]
Installing admin user...
[Progress: 702 / 706]
Caches clearing:
Cache cleared successfully
[Progress: 703 / 706]
Disabling Maintenance Mode:
[Progress: 704 / 706]
Post installation file permissions check...
For security, remove write permissions from these directories: '/var/www/html/magento2/app/etc'
[Progress: 705 / 706]
Write installation date...
[Progress: 706 / 706]
[SUCCESS]: Magento installation complete.
[SUCCESS]: Magento Admin URI: /admin_j6pqhm
Nothing to import.
Bây giờ, bạn có thể truy cập giao diện người dùng web Magento 2 bằng URL http://magento.example.com/admin_j6pqhm. Nếu gặp bất kỳ lỗi ngoại lệ nào trên trình duyệt web, bạn sẽ cần chạy lệnh sau để giải quyết sự cố:
cd /var/www/html/magento2
php bin/magento setup:upgrade
php bin/magento setup:di:compile
php bin/magento setup:static-content:Deploy -f
chmod -R 777 var/* generated/* pub/static/
Bây giờ, hãy làm mới trang web Magento. Bạn sẽ thấy trang đăng nhập Magento:
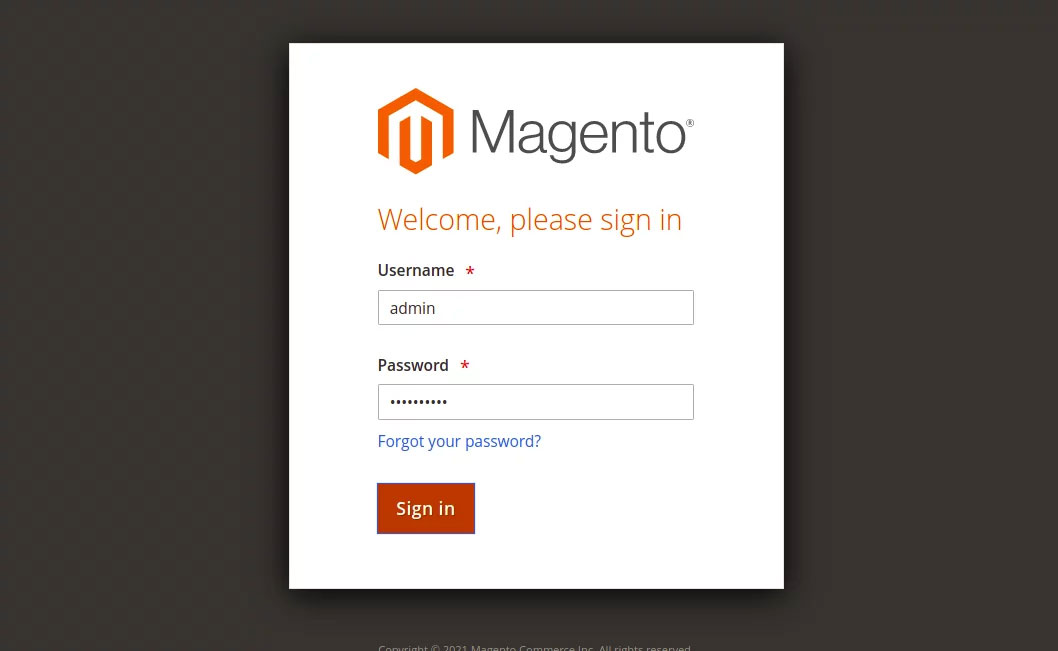
Cung cấp tên người dùng, mật khẩu admin và nhấp vào nút Sign in. Bạn sẽ thấy bảng điều khiển Magento trên trang sau:

Tiếp theo, bạn sẽ cần cài đặt client Certbot để cài đặt Let's Encrypt SSL cho Magento. Bạn có thể cài đặt bằng lệnh sau:
dnf install epel-release -y
dnf install letsencrypt python3-certbot-apache
Tiếp theo, hãy lấy và cài đặt chứng chỉ SSL cho domain lets của bạn bằng lệnh sau:
certbot --apache -d magento.example.com
Bạn sẽ được yêu cầu cung cấp địa chỉ email và chấp nhận điều khoản dịch vụ:
Saving debug log to /var/log/letsencrypt/letsencrypt.log
Plugins selected: Authenticator apache, Installer apache
Enter email address (used for urgent renewal and security notices)
 (Enter 'c' to cancel): hitjethva@gmail.com

- - - - - - - - - - - - - - - - - - - - - - - - - - - - - - - - - - - - - - - -
Please read the Terms of Service at
https://letsencrypt.org/documents/LE-SA-v1.2-November-15-2017.pdf. You must
agree in order to register with the ACME server. Do you agree?
- - - - - - - - - - - - - - - - - - - - - - - - - - - - - - - - - - - - - - - -
(Y)es/(N)o: Y

- - - - - - - - - - - - - - - - - - - - - - - - - - - - - - - - - - - - - - - -
Would you be willing, once your first certificate is successfully issued, to
share your email address with the Electronic Frontier Foundation, a founding
partner of the Let's Encrypt project and the non-profit organization that
develops Certbot? We'd like to send you email about our work encrypting the web,
EFF news, campaigns, and ways to support digital freedom.
- - - - - - - - - - - - - - - - - - - - - - - - - - - - - - - - - - - - - - - -
(Y)es/(N)o: Y
Account registered.
Requesting a certificate for magento.example.com
Performing the following challenges:
http-01 challenge for magento.example.com
Waiting for verification...
Cleaning up challenges
Deploying Certificate to VirtualHost /etc/httpd/conf.d/magento.conf
Redirecting all traffic on port 80 to ssl in /etc/httpd/conf.d/magento.conf

- - - - - - - - - - - - - - - - - - - - - - - - - - - - - - - - - - - - - - - -
Congratulations! You have successfully enabled https://magento.example.com
- - - - - - - - - - - - - - - - - - - - - - - - - - - - - - - - - - - - - - - -
Subscribe to the EFF mailing list (email: hitjethva@gmail.com).
IMPORTANT NOTES:
 - Congratulations! Your certificate and chain have been saved at:
   /etc/letsencrypt/live/magento.example.com/fullchain.pem
   Your key file has been saved at:
   /etc/letsencrypt/live/magento.example.com/privkey.pem
   Your certificate will expire on 2021-06-09. To obtain a new or
   tweaked version of this certificate in the future, simply run
   certbot again with the "certonly" option. To non-interactively
   renew *all* of your certificates, run "certbot renew"
 - If you like Certbot, please consider supporting our work by:

   Donating to ISRG / Let's Encrypt:   https://letsencrypt.org/donate
   Donating to EFF:                    https://eff.org/donate-le
Sau khi trang web của bạn được bảo mật bằng Let's Encrypt SSL. Bạn có thể tiến hành bước tiếp theo.
Vậy là xong! Bạn đã cài đặt thành công Magento 2 với apache và Let's Encrypt SSL trên AlmaLinux 8. Bây giờ, bạn có thể tạo cửa hàng trực tuyến của riêng mình từ bảng điều khiển Magento.
Nguồn tin: Quantrimang.com:
Ý kiến bạn đọc
Những tin mới hơn
 Cách chèn khoảng trống trong HTML (23/06/2025)
 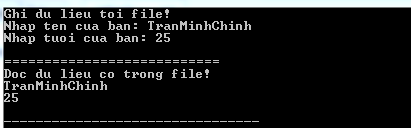 Đọc/ghi File trong C++ | fstream trong C++ (23/06/2025)
 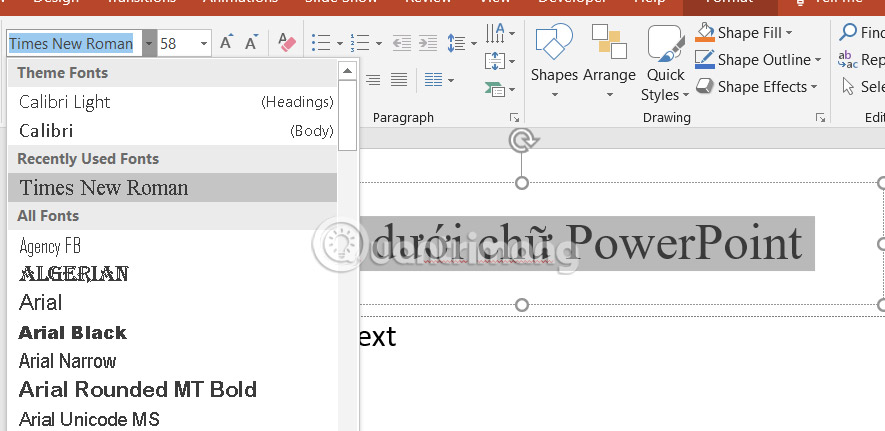 Hướng dẫn chèn ảnh dưới chữ trong PowerPoint (23/06/2025)
  18 giải pháp khắc phục sự cố bàn phím Surface Pro chuyên nghiệp (23/06/2025)
 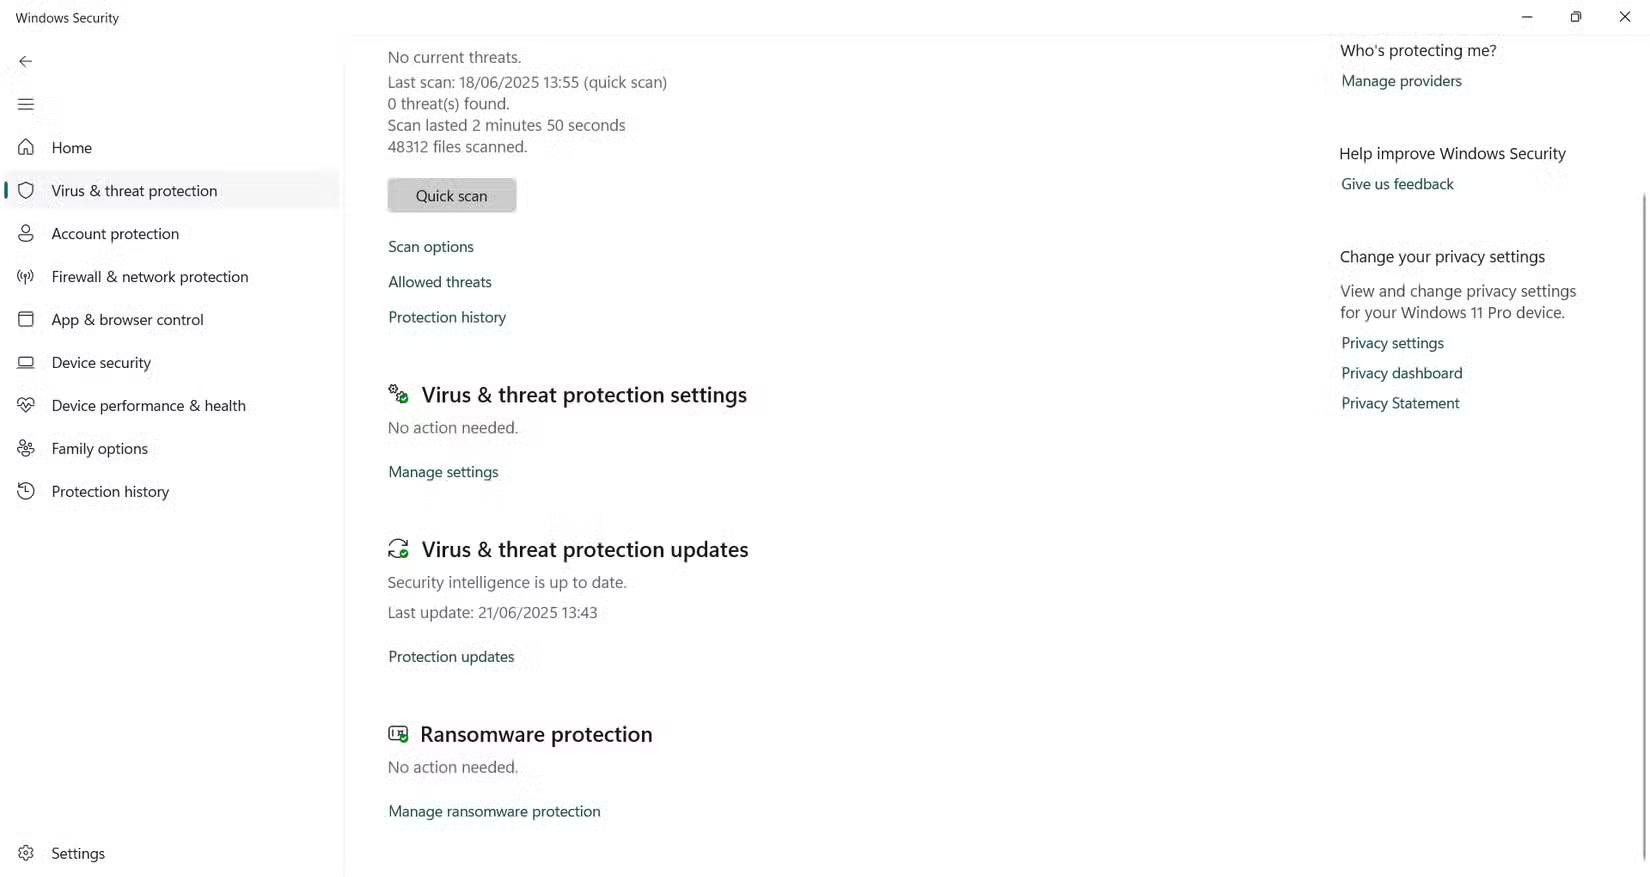 Hầu hết mọi người không sử dụng những tính năng ẩn này trong Windows Security (24/06/2025)
  Các hàm Python tích hợp sẵn (24/06/2025)
  Fix lỗi Outlook bị sập khi mở hoặc tạo email (24/06/2025)
  Đổi server LMHT VNG, đổi máy chủ LOL VNG (24/06/2025)
  Cách tắt đèn led của chuột và bàn phím máy tính khi Shutdown (24/06/2025)
  Cách cài đặt Python trên Windows, macOS, Linux (24/06/2025)
 Những tin cũ hơn
 Cách xác định số sê-ri của laptop HP (23/06/2025)
  Mảng (Array) trong C/C++ (23/06/2025)
 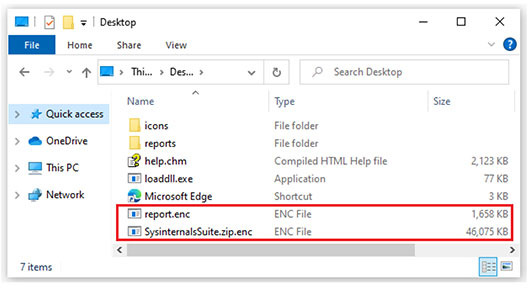 File ENC là gì? (23/06/2025)
 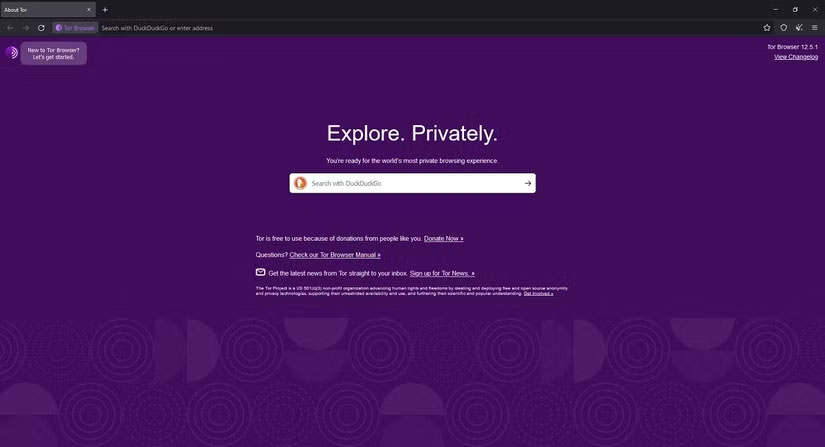 7 trình duyệt web tốt nhất dựa trên Firefox (23/06/2025)
  Cách tìm kiếm trên Dark Web (23/06/2025)
 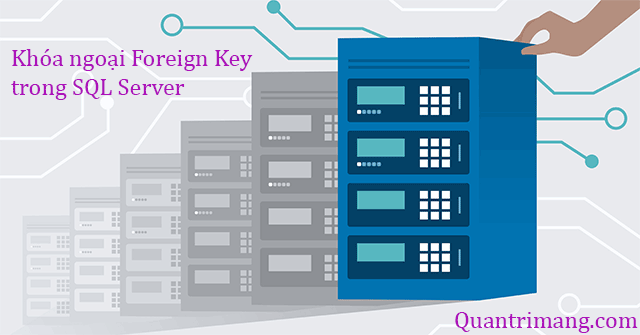 Khóa ngoại Foreign Key trong SQL Server (21/06/2025)
 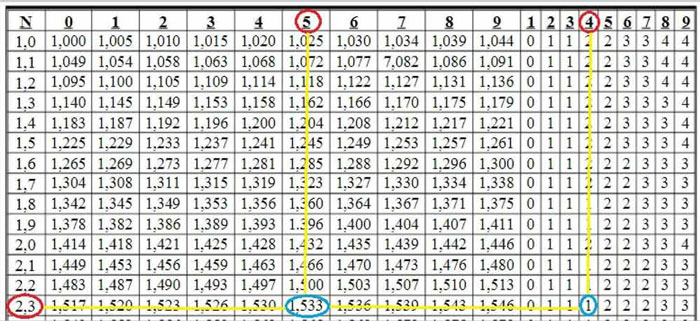 Căn bậc 2, cách tính căn bậc 2 (21/06/2025)
  Cách dọn dẹp và khôi phục không gian trên ổ C Windows (21/06/2025)
  Cách cài đặt và sử dụng IMOU trên máy tính đơn giản (21/06/2025)
  Hàm MID: Hàm lấy chuỗi ký tự trong Excel (20/06/2025)
  Sự khác biệt giữa Zapier MCP, Zapier SDK và Zapier CLI
 12 cài đặt Claude Code bạn nên kích hoạt ngay bây giờ
 TOP trợ lý AI sắp xếp lịch tốt nhất
 8 framework Agentic AI đáng chú ý nhất năm 2026 mà lập trình viên AI nên biết
 Prompt tạo giấy mời họp phụ huynh đầu năm
 Prompt biến poster phim thành tranh vẽ chì màu ngộ nghĩnh
 Tạo một agent trong Microsoft Copilot Studio
 Hướng dẫn tạo video tranh cát cho bài thơ, câu chuyện
 Prompt ChatGPT theo vai trò giải quyết mọi công việc
 TOP nền tảng tích hợp API tốt nhất năm 2026
 Cách khắc phục lỗi công thức Excel bằng Claude AI
 Prompt tạo infographic truyện tranh từ kiến thức bài học
 Prompt chụp ảnh sản phẩm phong cách studio tối giản
 TOP công cụ AI cho Microsoft Teams tốt nhất
 Sự khác biệt giữa OpenClaw và Zapier
 Cách tắt và ẩn Meta AI trên Facebook, Instagram, Messenger và WhatsApp
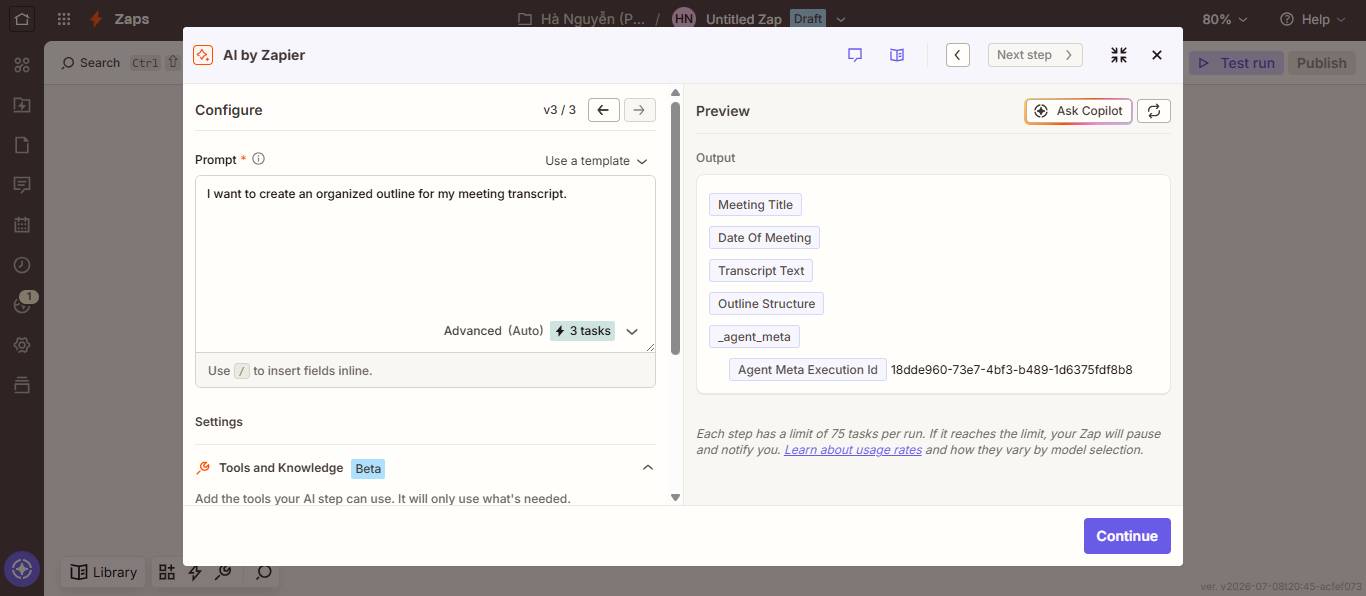 Tìm hiểu về AI by Zapier: Dễ dàng thêm các AI step vào workflow của bạn
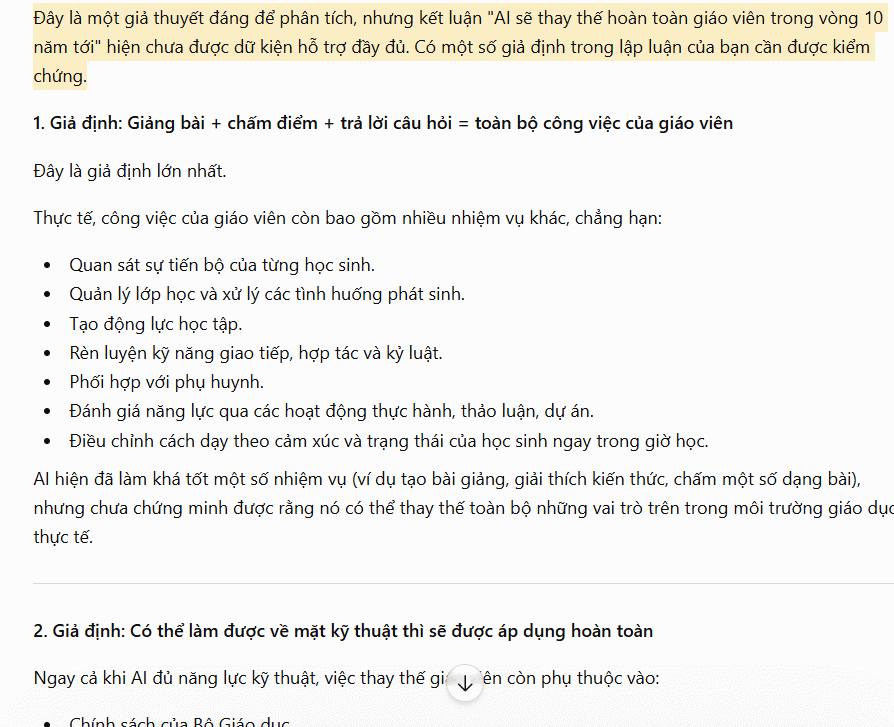 Mẹo tùy chỉnh ChatGPT phản biện thông minh hơn
 Prompt tạo ảnh chân dung trong ô tô dưới trời mưa cực điện ảnh
 TOP công cụ AI cho Microsoft Outlook tốt nhất