Tự động "dọn sạch" Recycle Bin trên Windows
- Thứ năm - 24/08/2023 10:40
- In ra
- Đóng cửa sổ này
Recycle Bin là nơi lưu trữ các tập tin và thư mục tạm thời mà bạn vô tình xóa mất. Tuy nhiên để dọn sạch các tập tin không cần thiết nữa, bạn sẽ phải thực hiện thêm một thao tác nữa là dọn sạch Recycle Bin. Thay vì mất công thao tác nhiều bước như vậy bạn có thể thiết lập tự động dọn sạch Recycle Bin mỗi khi mở máy tính Windows của mình lên.

1. Cách tự động "dọn sạch" Recycle Bin bằng cài đặt hệ thống
Thật dễ dàng để cấu hình Windows tự động dọn sạch Recycle Bin. Tất cả những gì bạn cần làm là mở System settings, thực hiện một số thao tác. Thế là xong!
Tuy nhiên, tính năng này chỉ áp dụng cho tài khoản người dùng hiện tại. Những người dùng khác trên cùng một máy tính sẽ không tự động dọn sạch Recycle Bin cho đến khi họ điều chỉnh cài đặt này. Nói cách khác, nếu bạn đang sử dụng máy tính dùng chung thì sẽ không ảnh hưởng đến bất kỳ ai khác.
Đây là cách thực hiện:
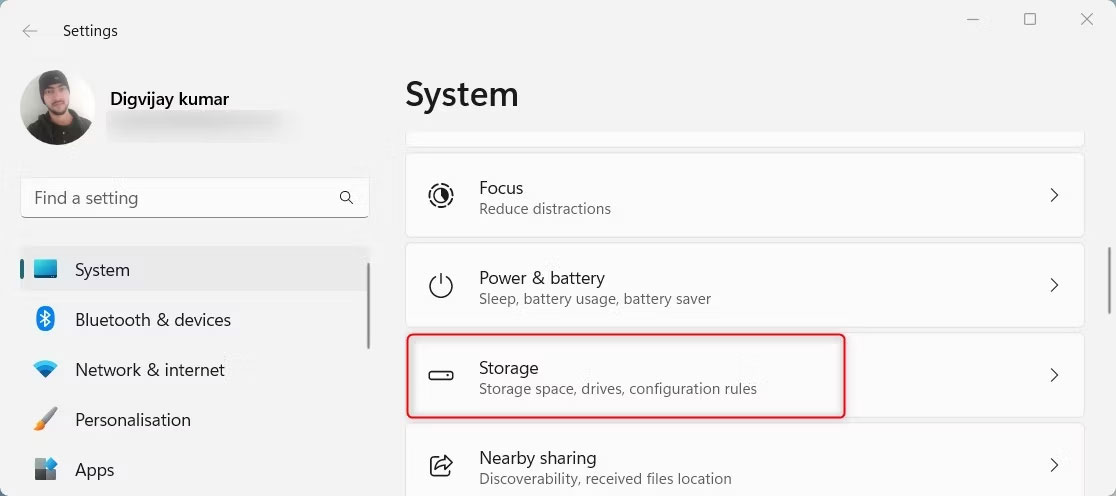
2. Từ bảng điều khiển bên trái, chọn tab System.
3. Cuộn xuống và nhấp vào Storage ở phía bên tay phải. Tại đây, bạn sẽ tìm thấy nhiều tùy chọn quản lý và lưu trữ dữ liệu máy tính khác nhau.
4. Bây giờ, bạn sẽ thấy một công tắc chuyển đổi trong Storage Sense. Nếu nó bị tắt, hãy nhấp để bật nó lên. Tính năng này cho phép Windows tự động xóa các file không còn cần thiết.
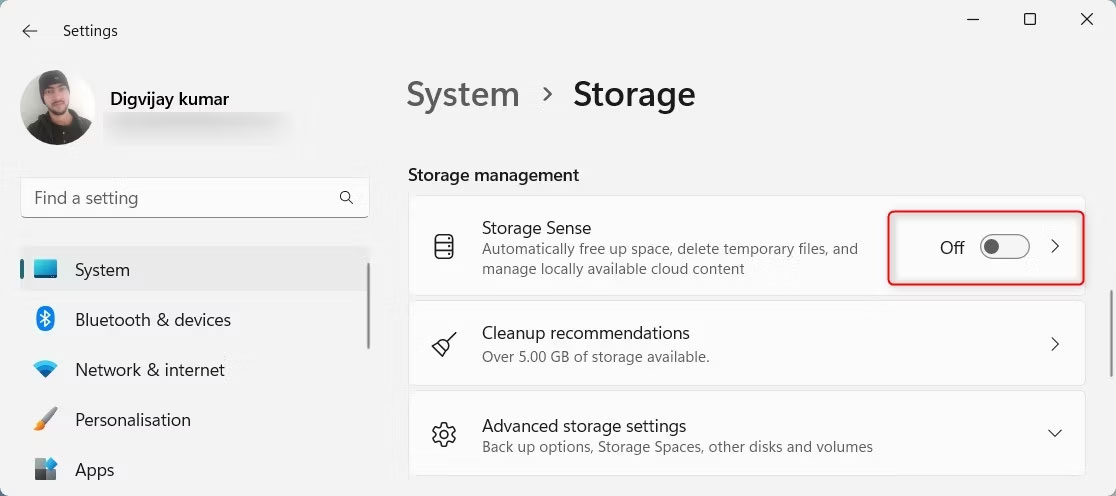
5. Khi Storage Sense được kích hoạt, hãy nhấp vào mũi tên nhỏ bên cạnh để mở rộng các tùy chọn.
6. Trên màn hình tiếp theo, bạn sẽ tìm thấy tùy chọn có nội dung Delete files in my recycle bin if they have been there for over. Nhấp vào menu drop-down bên cạnh và chọn khoảng thời gian, sau đó Windows sẽ tự động dọn sạch Recycle Bin.
7. Chọn 1 ngày nếu bạn muốn Windows xóa những mục này hàng ngày. Hoặc chọn một phương án khác phù hợp với nhu cầu của bạn hơn.
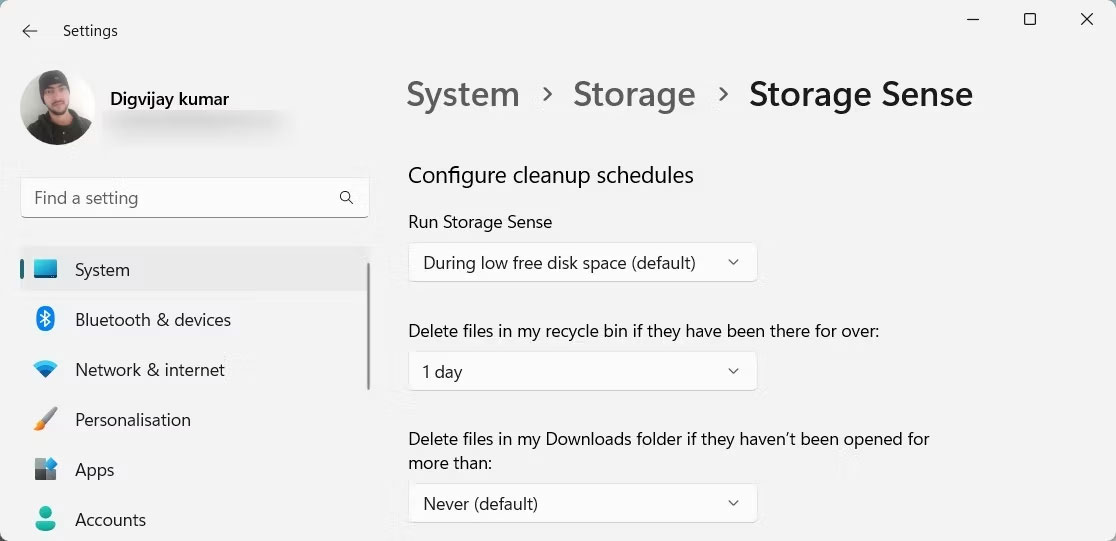
8. Bạn cũng có thể cấu hình hệ thống để xóa các file đã tải xuống không được sử dụng trong vài ngày. Để làm như vậy, hãy nhấp vào menu drop-down Delete files in my Downloaded folder if they haven't been opened for more than và chọn tùy chọn mong muốn.
Khi bạn đã hoàn tất, hãy đóng cửa sổ Settings. Windows sẽ tự động dọn sạch Recycle Bin của bạn kể từ bây giờ.
2. Cách tự động hóa Recycle Bin bằng Task Scheduler
Nếu muốn kiểm soát nhiều hơn quy trình, bạn có thể sử dụng Windows Task Scheduler để dọn sạch Recycle Bin. Đây là cách thực hiện:
1. Nhấn Win + R trên bàn phím để mở cửa sổ Run.
2. Gõ taskchd.msc và nhấn Enter hoặc nhấn OK để mở chương trình Task Scheduler.
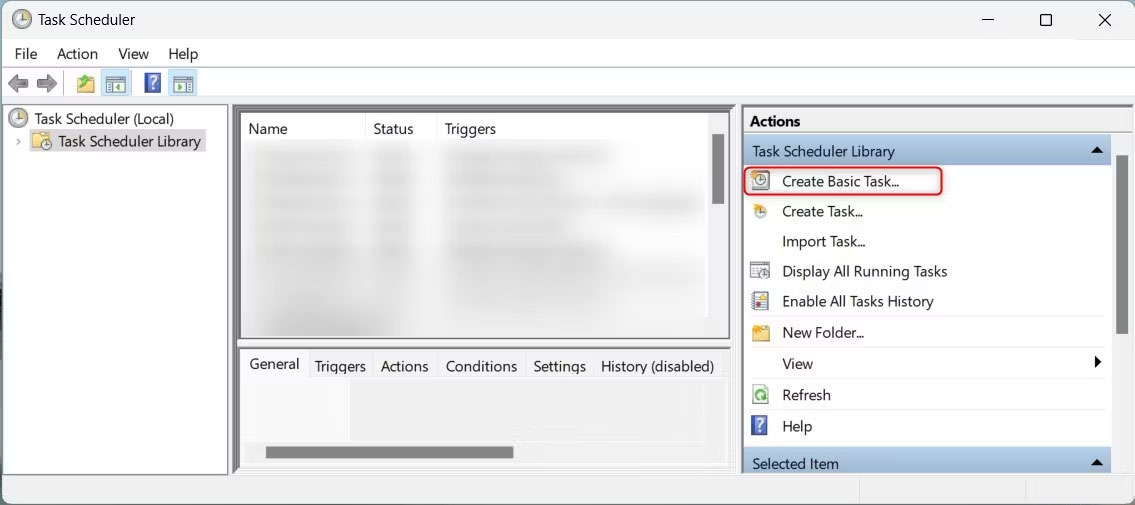
3. Ở phía bên trái của cửa sổ, chọn Task Scheduler Library.
4. Bây giờ, hãy nhấp vào Create Basic Task từ bảng điều khiển bên phải. Nó sẽ mở một cửa sổ khác nơi bạn có thể cấu hình cài đặt tác vụ của mình.
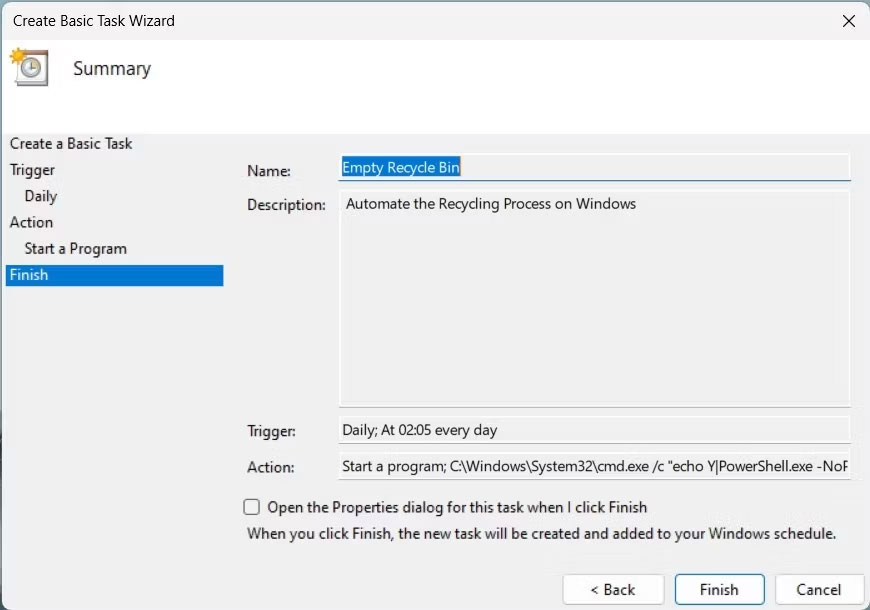
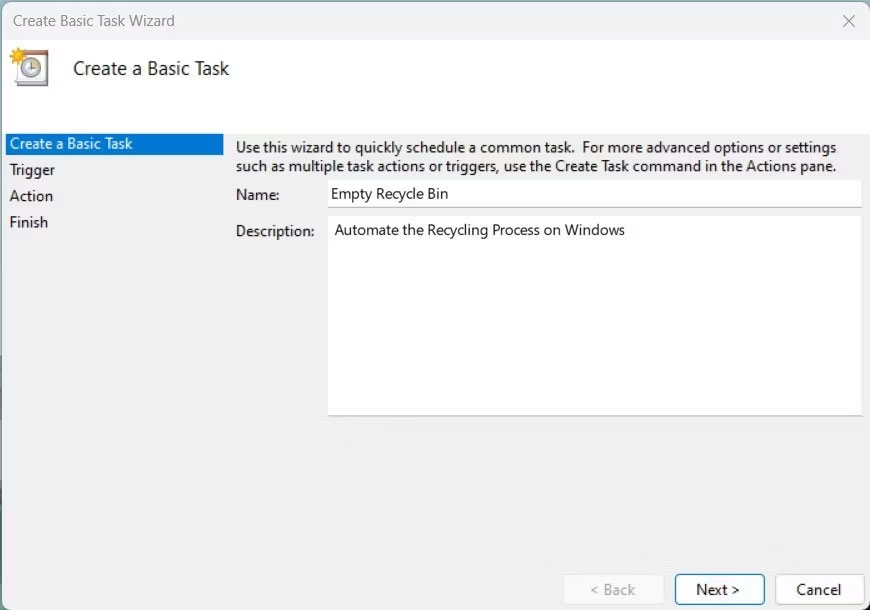
5. Nhập tên cho tác vụ của bạn (ví dụ: Empty Recycle Bin) và mô tả ngắn gọn nếu bạn muốn. Sau đó, nhấp vào nút Next.
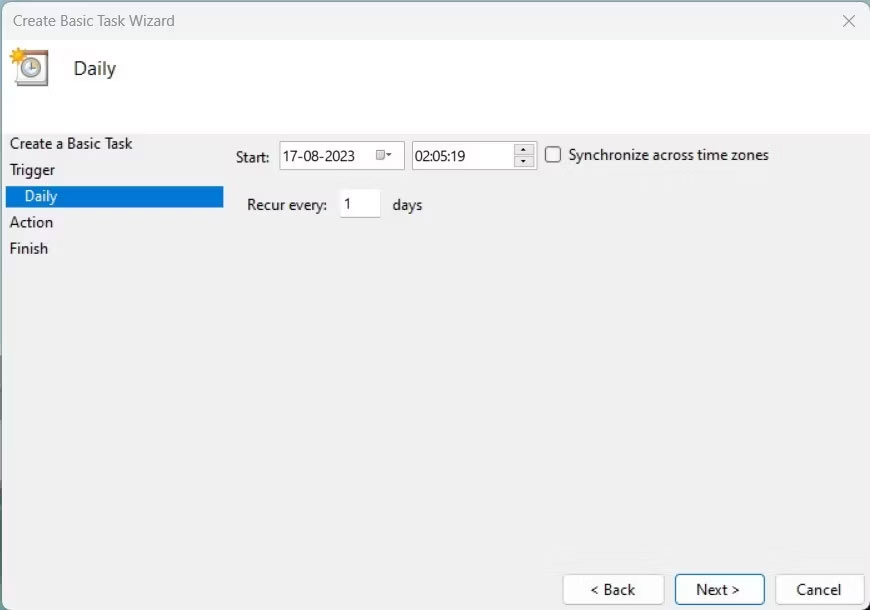
6. Cửa sổ sau yêu cầu bạn chọn tần suất Windows sẽ dọn dẹp Recycle Bin của bạn. Bạn có thể chọn Daily, Weekly, Monthly hoặc One time only. Khi bạn đã chọn tần suất ưa thích của mình, hãy nhấp vào Next.
7. Sau đó, đặt ngày và giờ bắt đầu cho nhiệm vụ của bạn. Ngoài ra, hãy chọn Recur every để chỉ định tổng thời lượng của mỗi phiên dọn dẹp. Sau đó, nhấp vào Next.
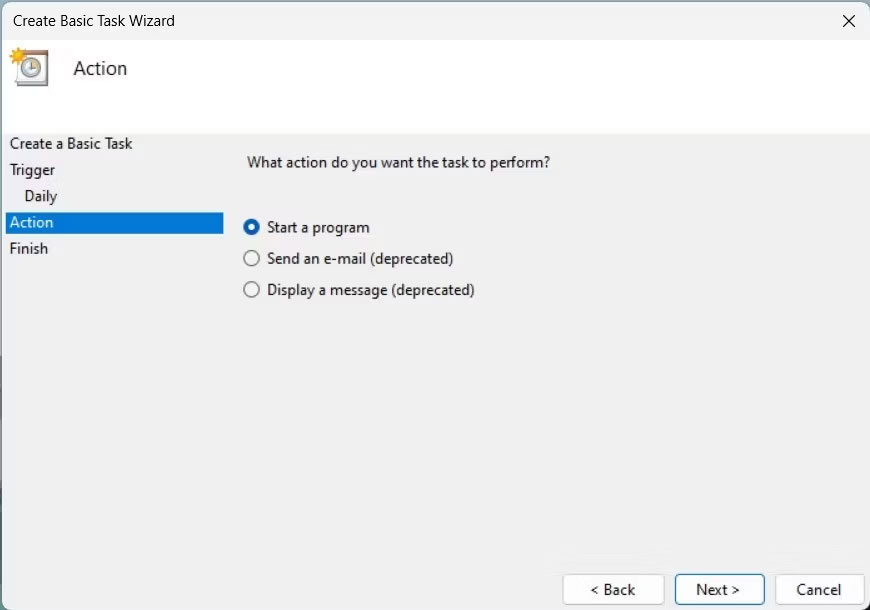
8. Bạn phải chỉ định hành động nào Windows sẽ thực hiện khi tác vụ này chạy. Nhấp vào tùy chọn Start a program và nhấp vào Next lần nữa.
9. Trong hộp Program/script, nhập C:\Windows\System32\cmd.exe. Sau đó, trong trường Add arguments (optional), nhập lệnh sau:
/c "echo Y|PowerShell.exe -NoProfile -Command Clear-RecycleBin"
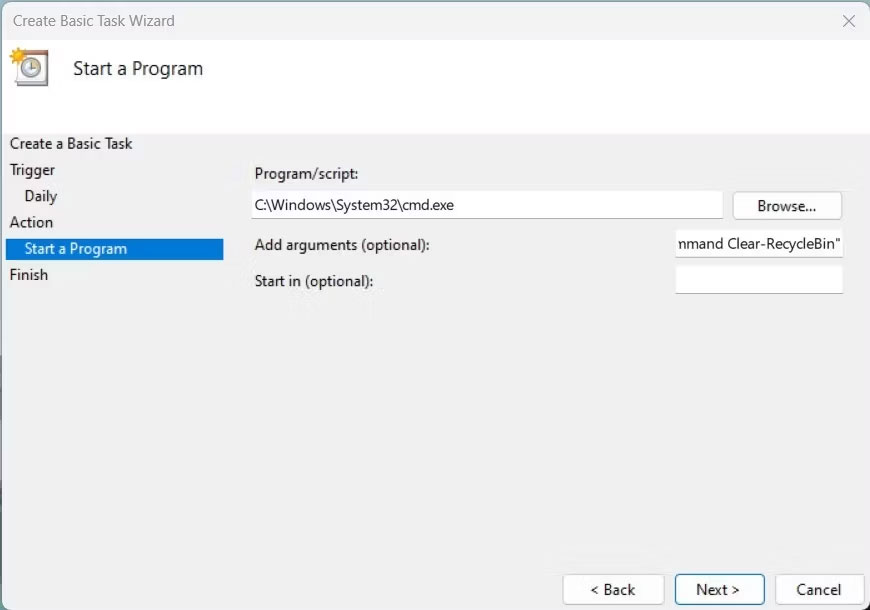
10. Chạy lệnh này sẽ xóa nội dung Recycle Bin của bạn. Nhấn Next để tiếp tục.
11. Bây giờ, bạn có thể xem lại cài đặt của mình và đánh dấu Open the Properties dialog for this task when I click Finish nếu bạn muốn thực hiện bất kỳ thay đổi nào. Khi hoàn tất, nhấn nút Finish.
Khi bạn đã hoàn tất, hãy đóng cửa sổ Task Scheduler. Từ giờ trở đi, Windows sẽ dọn sạch Recycle Bin theo tần suất bạn đã chỉ định.
Chúc các bạn thành công!
