Sửa lỗi OBS Studio không thể ghi âm trên Windows 11
- Thứ năm - 02/02/2023 22:46
- In ra
- Đóng cửa sổ này

OBS Studio là một ứng dụng miễn phí cho phép bạn ghi lại quá trình chơi game và phát trực tuyến. Tuy nhiên, giống như bất kỳ ứng dụng nào khác, nó có những sai sót riêng. Nhiều người dùng đã báo cáo rằng OBS Studio không ghi được âm thanh trên PC chạy Windows 11.
May mắn thay, đó là một vấn đề rất phổ biến và có thể nhanh chóng được giải quyết. Dưới đây là tất cả các giải pháp hiệu quả sẽ giúp bạn khắc phục lỗi OBS Studio không thể ghi lại âm thanh.
1. Khởi động lại OBS Studio
Trước khi bắt đầu các bước khắc phục sự cố nâng cao, hãy cân nhắc khởi động lại OBS Studio. Cách tốt nhất là khởi chạy Task Manager và đóng tất cả các tiến trình liên quan đến OBS Studio.
Tiếp theo, khởi chạy lại OBS Studio và kiểm tra xem nó có thể ghi lại âm thanh hay không. Nếu không, đã đến lúc cần một số bước sửa chữa phức tạp hơn.
2. Khởi chạy OBS Studio với quyền admin
Thông thường, các sự cố trong ứng dụng của bên thứ ba xảy ra do thiếu đặc quyền admin. Nó có thể xảy ra ngay cả khi bạn đang sử dụng tài khoản admin trên máy tính của mình.
Cách tốt nhất để giải quyết vấn đề này là cấu hình OBS Studio để luôn khởi chạy với quyền admin. Để làm điều đó, hãy thực hiện theo các bước dưới đây:
1. Nhấp chuột phải vào biểu tượng OBS Studio và chọn Properties từ menu ngữ cảnh.
2. Trong cửa sổ Properties, chuyển sang tab Compatibility.
3. Tích vào tùy chọn Run this program as an administrator.
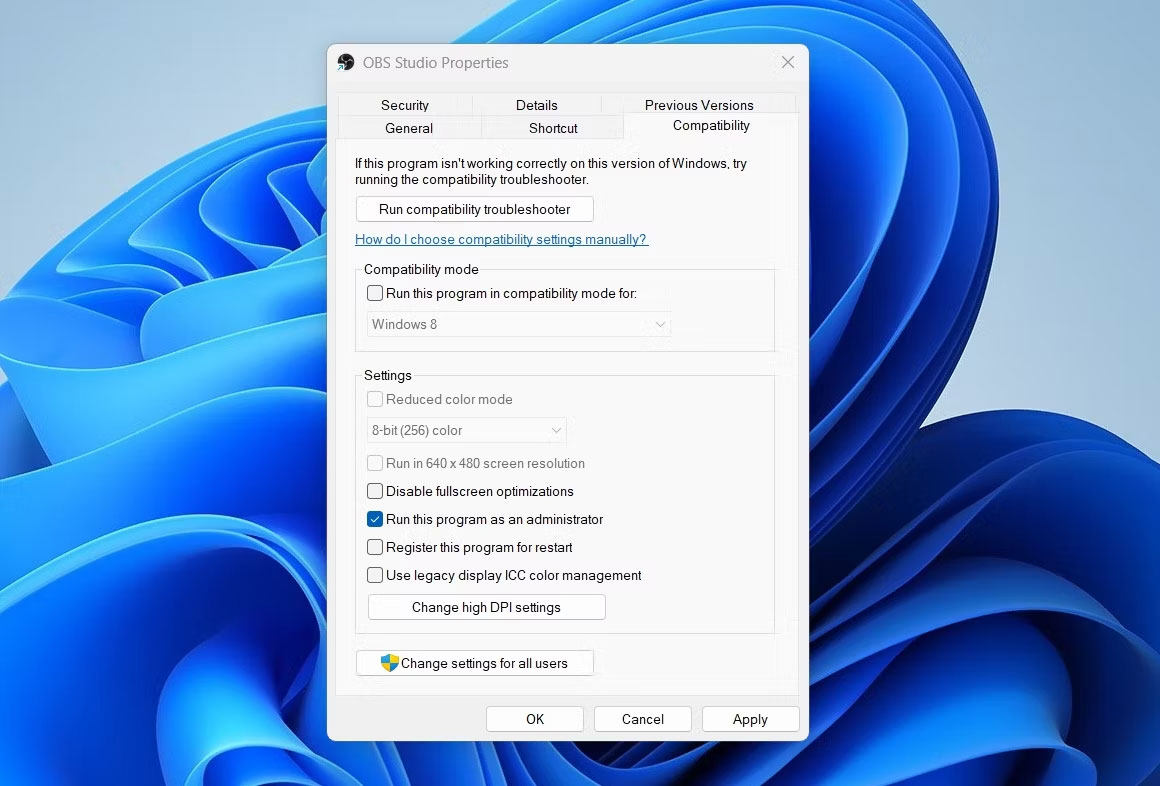
4. Nhấp vào Apply > OK để lưu cài đặt.
3. Bật tiếng OBS Studio trong ứng dụng Settings
OBS Studio sẽ không ghi được âm thanh nếu bị tắt tiếng trong ứng dụng Settings. Dưới đây là cách kiểm tra và thay đổi cài đặt âm thanh OBS Studio trong ứng dụng Settings.
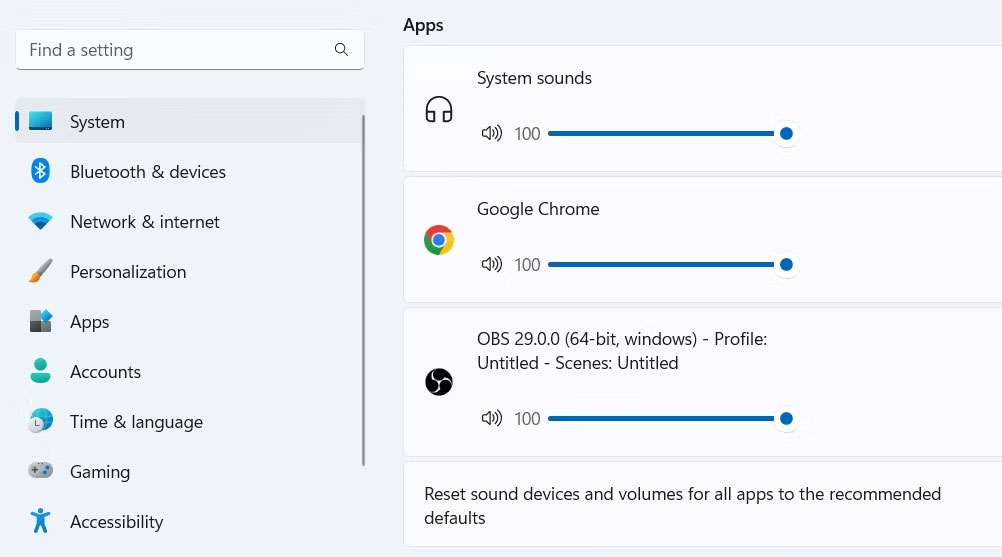
1. Mở ứng dụng Settings và chọn System từ thanh bên trái.
2. Chọn Sound từ khung bên phải.
3. Trong phần Advanced section, chọn tùy chọn Volume Mixer.
4. Trong phần Apps section, bật tiếng OBS Studio nếu nó bị tắt tiếng và điều chỉnh thanh trượt cho phù hợp.
5. Ngoài ra, hãy nhấp vào biểu tượng drop-down bên cạnh OBS Studio, sau đó chọn đúng thiết bị đầu vào.
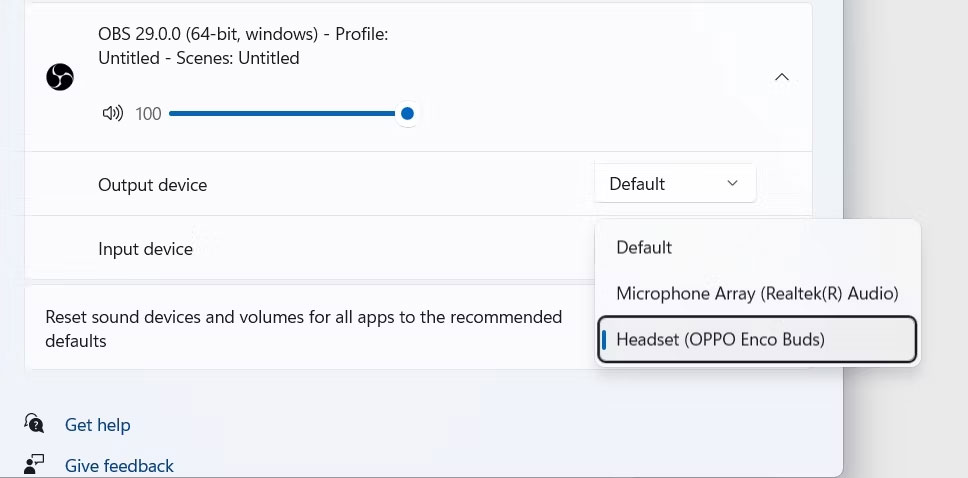
Khởi động lại OBS Studio và kiểm tra xem sự cố có tiếp diễn không.
4. Sử dụng đúng thiết bị ghi âm
Windows cho phép bạn chọn thủ công các thiết bị ghi và phát. Nhưng nếu đã chọn sai thiết bị ghi âm trong Settings, thì bạn có thể gặp phải sự cố này. Để khắc phục điều này, bạn sẽ phải cấu hình đúng thiết bị làm tùy chọn ghi mặc định. Đây là cách để làm điều đó:
1. Mở ứng dụng Settings và đi tới System > Sound.
2. Chọn More sound settings trong phần Advanced section.
3. Chuyển sang tab Recording.
4. Nhấp chuột phải vào thiết bị ghi chính xác và chọn tùy chọn Set as Default Device từ menu ngữ cảnh.
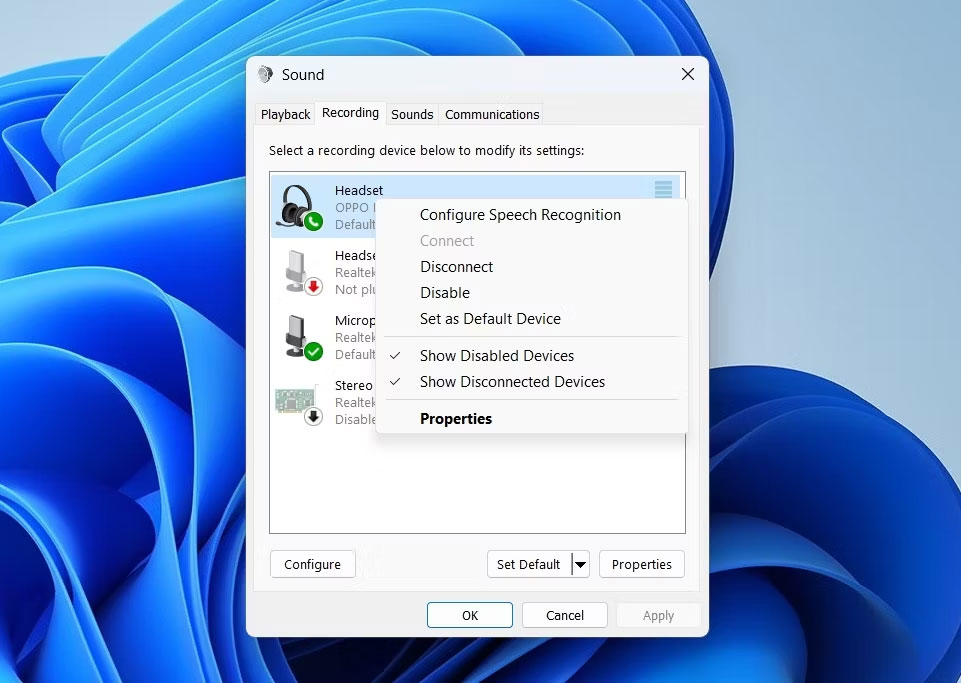
5. Nhấp vào Apply > OK.
5. Cho phép OBS Studio truy cập micro
Windows 11 chú trọng đến quyền riêng tư và bảo mật. Hệ điều hành để bạn cho phép hoặc hạn chế các ứng dụng truy cập một số dịch vụ nhất định trên máy tính. Chẳng hạn, bạn có thể hạn chế các ứng dụng sử dụng micro trên máy tính của mình.
Do đó, nếu bạn đã nhầm lẫn hạn chế OBS Studio truy cập micro, thì bạn sẽ gặp phải sự cố âm thanh. Giải pháp ở đây là cho phép OBS Studio truy cập micro. Đây là cách thực hiện:
1. Mở ứng dụng Settings và chọn Privacy & Security từ thanh bên trái.
2. Trong phần App permission, hãy chọn tùy chọn Microphone.
3. Bật nút chuyển đổi bên cạnh tùy chọn Microphone access.
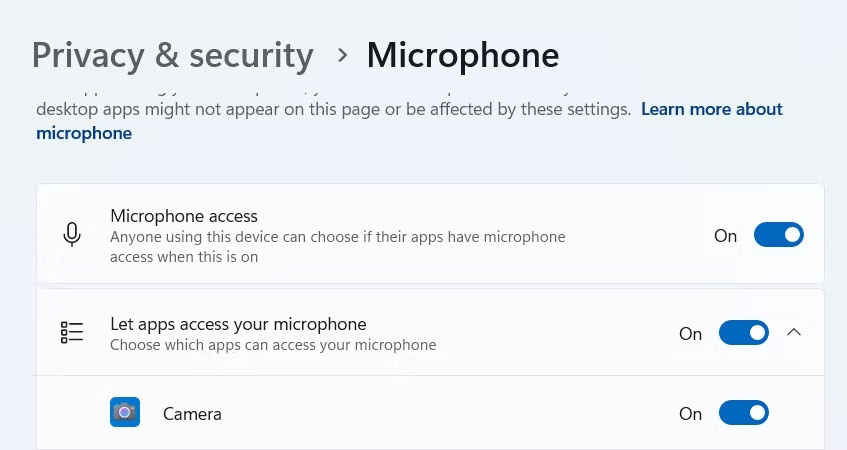
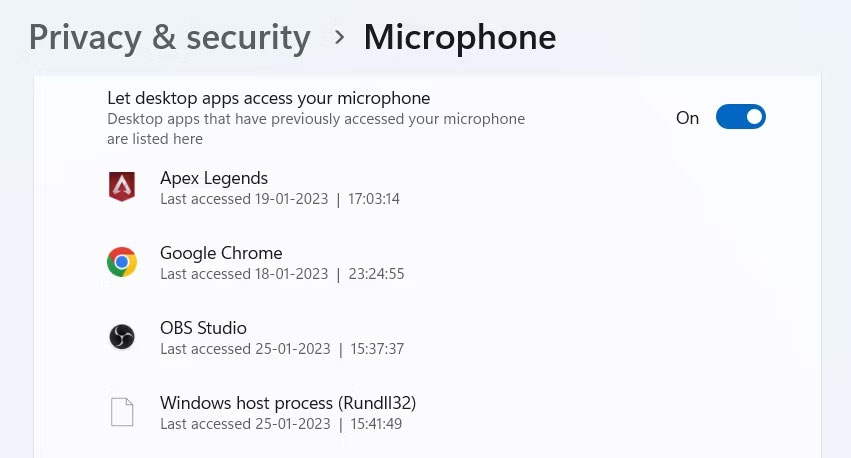
4. Tiếp theo, bật nút chuyển đổi bên cạnh Let desktop apps to access your microphone.
6. Thay đổi cài đặt OBS Studio
OBS Studio cho phép bạn đặt thiết bị âm thanh theo cách thủ công và điều chỉnh cài đặt của chúng theo sở thích. Tuy nhiên, OBS Studio sẽ không thể ghi âm nếu bạn chọn sai thiết bị âm thanh trong cài đặt của nó.
Vì vậy, hãy đi tới cài đặt âm thanh OBS Studio và chọn đúng thiết bị âm thanh để giải quyết vấn đề. Dưới đây là các bước để làm điều đó:
1. Khởi chạy OBS Studio và chọn File từ góc trên cùng bên trái.
2. Chọn Settings từ menu ngữ cảnh.
3. Trong cửa sổ Settings, chọn Audio từ thanh bên trái.
4. Trong phần Global Audio Devices, nhấp vào biểu tượng drop-down bên cạnh Desktop Audio và Desktop Audio 2, rồi chọn Default trong cả hai tùy chọn.
5. Tiếp theo, nhấp vào biểu tượng drop-down bên cạnh Mic/Auxiliary Audio và Mic/Auxiliary Audio 2, rồi chọn Default trong cả hai tùy chọn.
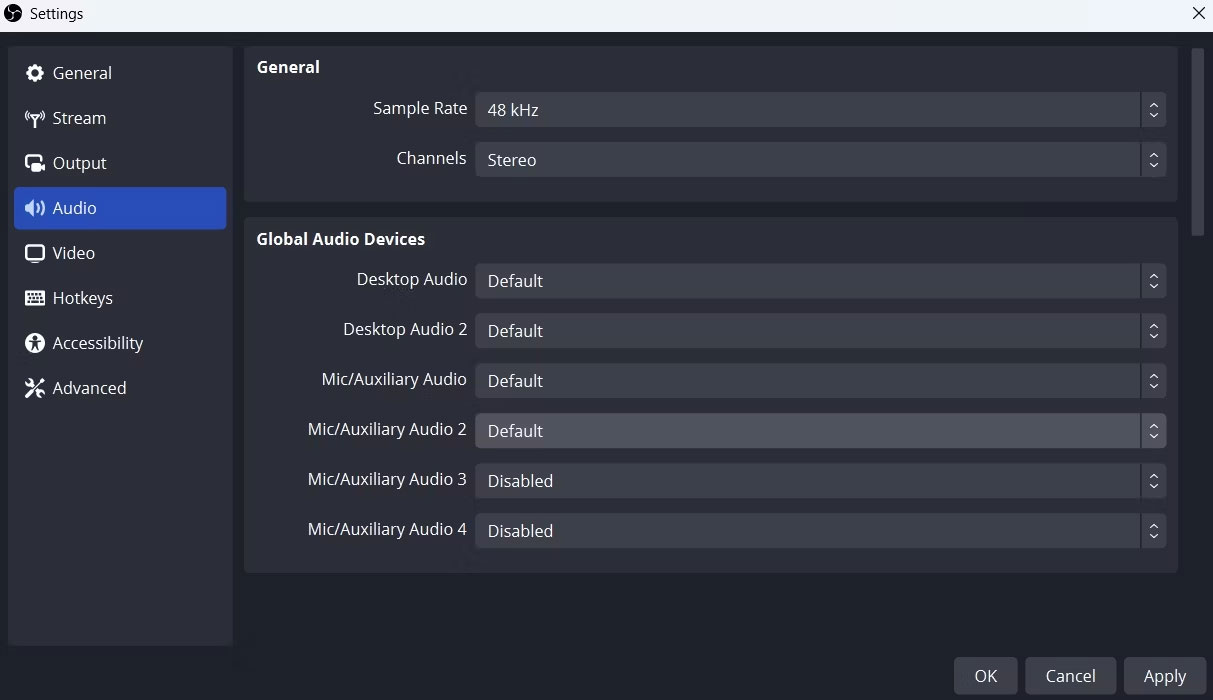
6. Chọn Apply > OK để lưu các thay đổi.
7. Điều chỉnh cài đặt Audio Mixer
Giải pháp tiếp theo trong danh sách là điều chỉnh cài đặt Audio Mixer của OBS Studio. Đây là cách thực hiện:
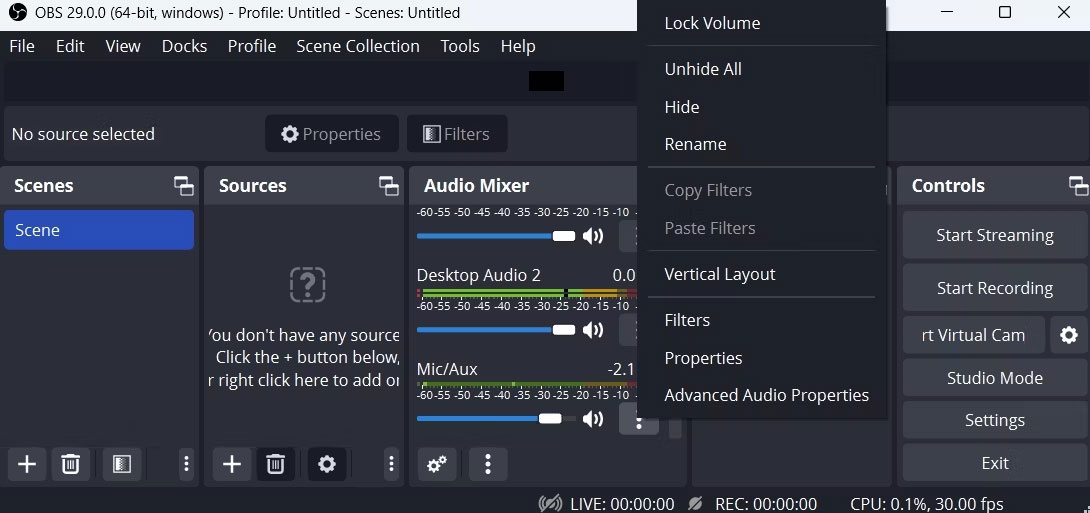
1. Mở OBS Studio.
2. Trong phần Audio Mixer, điều chỉnh thanh trượt Mic/Aux thành -2.1dB.
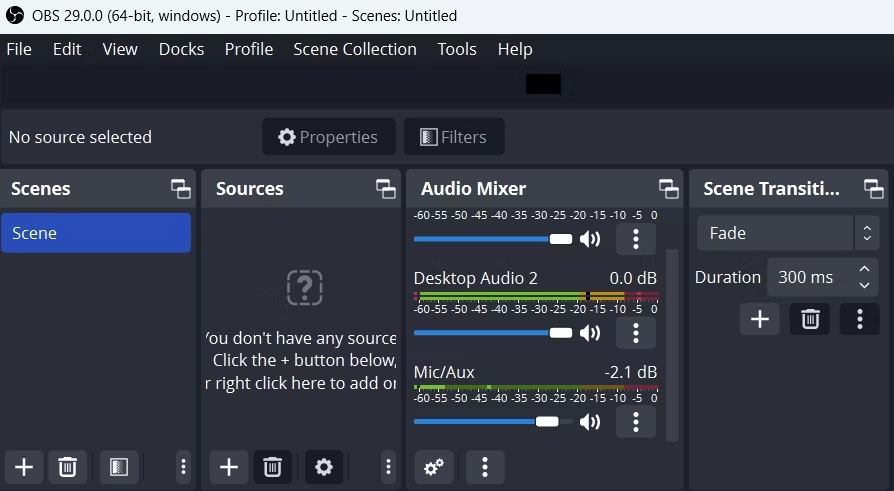
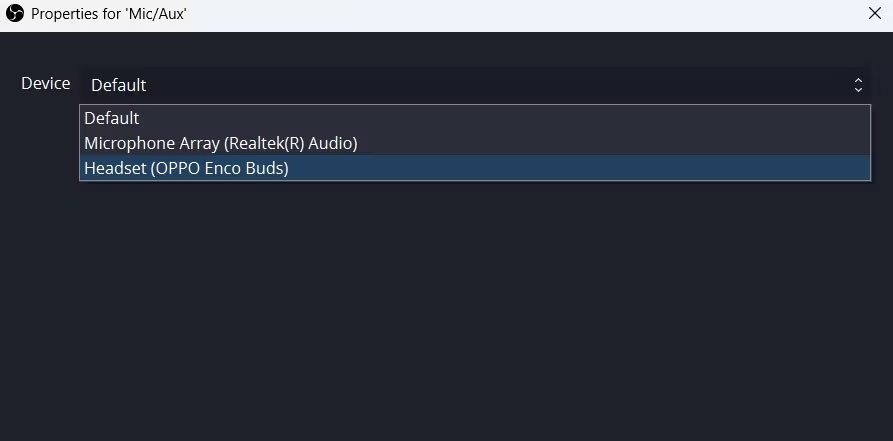
3. Nhấp vào ba dấu chấm bên cạnh Mic/Aux và chọn Properties.
4. Nhấp vào biểu tượng drop-down bên cạnh Device, chọn thiết bị ghi âm mặc định và nhấp vào OK.
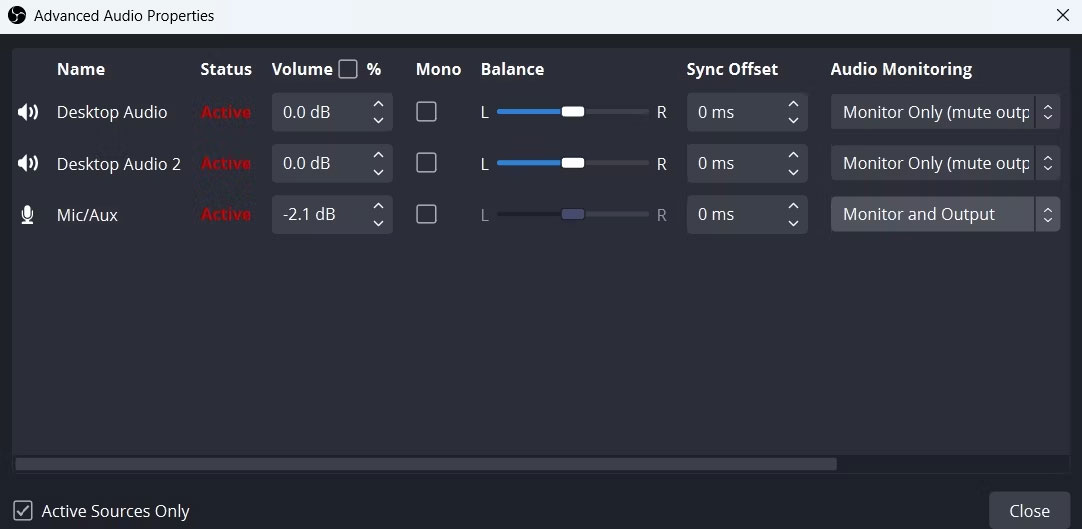
5. Tiếp theo, nhấp lại vào ba dấu chấm bên cạnh Mic/Aux và chọn Advanced Audio Properties.
6. Trong tab Audio Monitoring, chọn Monitor and Output cho Desktop Audio và Monitor Only (mute output) cho Mic/Aux.
8. Tải xuống bản cập nhật driver âm thanh mới nhất
Driver âm thanh bị hỏng hoặc lỗi thời cũng có thể là lý do chính khiến OBS Studio không thể ghi lại âm thanh. Để khắc phục điều này, bạn sẽ phải cập nhật driver âm thanh trên Windows.
Bạn có thể làm điều đó bằng cách thực hiện theo các bước dưới đây:
1. Nhấn Win + X và chọn Device Manager từ danh sách.
2. Bấm đúp vào node Sound, video, and game controllers để mở rộng nó.
3. Nhấp chuột phải vào thiết bị ghi âm mặc định và chọn Update driver từ menu ngữ cảnh.
4. Chọn tùy chọn Search automatically for drivers trong cửa sổ hiện ra.
Tiếp theo, cho phép Windows tìm kiếm và tải xuống mọi bản cập nhật driver có sẵn cho thiết bị ghi âm của bạn.
9. Cài đặt lại OBS Studio
Nếu lỗi vẫn không được giải quyết, thì nghĩa là có gì đó không ổn với file cài đặt OBS Studio đã gây ra sự cố. Giải pháp duy nhất trong trường hợp này là cài đặt lại OBS Studio.
