Sửa lỗi Full Disk 100% trên Windows với 14 thủ thuật sau
- Thứ tư - 27/08/2025 23:38
- In ra
- Đóng cửa sổ này
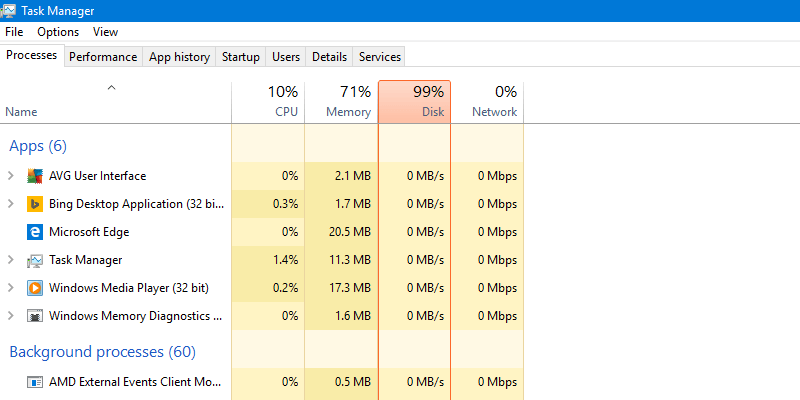
Lỗi này khiến Windows khởi động rất chậm, luôn báo đỏ Disk nếu mở Task Manager
Lỗi Full Disk 100% hay lỗi 100 disk có lẽ không còn xa lạ gì đối với những người dùng Windows 10/8.1. Không chỉ trên Windows 8.1 mà bạn có thể gặp lỗi Full Disk 100% trên Windows 7 hay Windows 8. Mỗi lần mở Task Manager để xem chi tiết các hoạt động thì thấy tab Disk luôn đỏ lòm, với chỉ số 99%, 100% hoặc luôn chiếm từ 90% trở lên.
Advertisement
Lỗi này vẫn xuất hiện ngay cả khi không có tiến trình nào chạy nền và CPU khoảng 2-10%. Vậy làm sao để khắc phục lỗi Full Disk 100%, mời bạn cùng tham khảo bài viết dưới đây của Quản trị mạng.
Hướng dẫn fix lỗi 100% disk bằng video:
1. Set Ram ảo bằng thủ công thay vì để chế độ Automatically
Để Ram ở chế độ Automatically (tự động) cũng là một trong những nguyên nhân khiến máy tính bạn bị dính lỗi Full Disk. Thay vì để chế độ Auto thì bạn nên Set cứng RAM ảo. Cách thực hiện như ảnh ở dưới:

Tại Tab Virtual Memory, bỏ dấu tick ở Automatically manage paging file size for all drives. Chọn ổ đĩa cài Hệ điều hành của bạn (thường là ổ C). Sau đó tích vào Custom size.
Tại mục Maximum size và Initial size. Bạn set cứng cho Ram ảo bằng 1/2 Ram thật của bạn. Ở đây mình có 4GB Ram nên sẽ Set một nửa là 2GB Ram = 2048MB, tương tự các bạn làm với máy tính của bạn.

Cuối cùng ấn OK để lưu, và khởi động để thay đổi có hiệu lực.
2. Xử lý Troubleshooting
Bạn vào Control Panel, gõ Troubleshooting trên ô tìm kiếm và nhấn vào Troubleshooting.

Cửa sổ mới hiện ra, kích đúp chuột vào System and Security:

Cửa sổ mới hiện ra, kích vào System Maintenance:

Nhấn Next:

Sau đó cứ để cho máy nó làm việc khi xuất hiện thông báo System Maintenance như hình thì nhấn vào mục Try troubleshooting as an administrator:

Sau đó ngồi đợi, chờ cho nó chạy đến khi nào có chữ Close thì nhấn vào.
3. Tắt Maintenance
Cũng ở Control Panel, chọn System and Security và Action Center:

Tiếp theo nhấp chuột vào mũi tên đở phần thiết lập Maintenance, chọn Settings:

Bạn tích vào Never check for solutions (Not recommended) và OK:

4. Tắt Windows SmartScreen
Vẫn ở cửa sổ Action Center, chọn Change Windows SmartScreen Settings, sau đó tích vào Don’t do anything (Turn off Windows SmartScreen).

5. Tắt Service Superfetch
Các bạn ấn tổ hợp phím Windows + R để mở Run gõ Services.msc. Sau đó tìm Superfetch (ấn S rồi tìm cho nhanh), kích đúp vào nó và chọn Disabled.

6. Tắt Service Windows Search
Các bạn cũng làm tương tự như trên nhưng tìm Windows Search (ấn W rồi tìm), kích đúp vào nó và chọn Disabled.

7. Tắt Disk Diagnostics: Configure execution level
Các bạn vào Run gõ gpedit.msc. Sau đó tìm đến đường dẫn sau:
Computer Configuration / Adminnistrative Templates / System / Troubleshooting and Diagnostics / Disk Diagnostics
Nhìn sang cửa sổ bên phải bạn sẽ thấy Disk Diagnostics: Configure execution level, kích đúp vào nó.

Chọn Disabled và OK để lưu.

8. Chống phân mảnh ổ cứng
Hiện nay có rất nhiều phần mềm để chống phân mảnh ổ cứng nhưng trong bài này mình sẽ sử dụng công cụ của Windows.
Phần mềm đồ họaMở This PC. Sau đó bạn nhấp vào một phân vùng bất kỳ, rồi chọn Manage -> Optimize.

Chọn phân vùng mà bạn muốn chống phân mảnh (nên chọn ổ cài ổ chứa HDH trước) rồi nhấn vào Optimize để tiến hành chống phân mảnh và tối ưu hóa phân vùng.

Ngoài ra, các bạn có thể sử dụng phần mềm bên thứ 3 như Smart Defrag 3, ưu điểm của phần mềm này là dễ sử dụng, hỗ trợ ngôn ngữ tiếng việt và hoàn toàn Miễn phí, các bạn có thể tải về và sử dụng tại:
Phần mềm đồ họa
9. Sử dụng các phần mềm dọn rác và sửa lỗi Registry
Mở This PC, sau đó bạn nhấp vào một phân vùng mà bạn cài hệ điều hành (thường là ổ C). Chuột phải > Properties > Disk Cleanup.
Máy tính xách tay chơi gamePhần mềm đồ họa

Nếu muốn nhanh hơn thì các bạn có thể dùng phần mềm CCleaner, các bạn tải tại đây:

10. Gỡ các phần mềm không cần thiết, tắt các phần mềm không cần dùng lúc Windows khởi động
- Để gỡ các phần mềm không cần thiết các bạn có thể dùng chức năng có sẵn của Windows hoặc phần mềm bên thứ 3 như Revo Uninstaller, CCleaner,...
Phần mềm đồ họa
- Còn tắt các phần mềm, các bạn có thể sử dụng công cụ Startup ở thanh Task Manager, rồi Disable phần mềm mà bạn thấy không cần thiết (lưu ý không Disable Driver của hệ thống nhé).
Phần mềm đồ họa
11. Windows Update
Tải các bản vá lỗi của Mircosoft để sửa lỗi cho Windows của bạn.

12. Chạy CheckDisk
1. Click Start, sau đó nhập cmd vào khung Search. Trên danh sách kết quả tìm kiếm, kích chuột phải vào Command Prompt chọn Run as administrator.
2. Trên cửa sổ Command prompt, bạn nhập câu lệnh dưới đây vào để kiểm tra và tự động khắc phục các lỗi trên ổ đĩa cứng của bạn:
chkdsk /f' /r C:
Lưu ý: Trong câu lệnh trên, thay thế "C" bằng tên các ổ đĩa cứng chính trên máy tính Windows của bạn.
3. Lúc này trên màn hình bạn sẽ nhận được thông báo ổ đĩa cứng đang sử dụng, nếu muốn chạy CheckDisk khởi động lại hệ thống. Nhấn Y để khởi động lại máy tính của bạn.
4. CheckDisk sẽ chạy sau khi máy tính của bạn khởi động. Quá trình diễn ra sẽ khá lâu, do đó bạn cần phải kiên nhẫn. Quá trình kết thúc và lỗi sẽ không còn xuất hiện nữa.

13. Vô hiệu hóa Tips About Windows
Đôi khi trong một số trường hợp, người dùng có thể vô hiệu hóa Tips About Windows để khắc phục lỗi.
Để vô hiệu hóa Tips About Windows, bạn vào Start => Settings => System => Notification & actions. Chuyển đổi tùy chọn Show me tips about Windows sang OFF là xong.

14. Thay đổi vị trí Pagefile
Pagefile là một file trên ổ đĩa cứng để hỗ trợ khả năng ghi có “hạn” của RAM trong máy tính trong trường hợp cần thiết.
Máy tính của bạn sẽ ưu tiên sử dụng RAM để lưu trữ dữ liệu bởi vì khả năng truy suất của nó nhanh hơn ổ cứng. Tuy nhiên, khi bộ nhớ RAM đầy hoặc quá tải thì Windows sẽ tự động chuyển các dữ liệu từ RAM sang Pagefile trong ổ cứng.
Tuy nhiên trong một số trường hợp nguyên nhân gây lỗi Disk Usage có thể là do Pagefile được sử dụng liên tục.
Để khắc phục lỗi, giải pháp đầu tiên bạn có thể áp dụng là cấy thêm RAM. Tuy nhiên để không phải mất tiền oan, bạn có thể áp dụng cách khác là di chuyển pagefile sang ổ không phải là ổ cứng hệ thống. Để làm được điều này:
1. Kích chuột phải vào My Computer hoặc This PC, chọn Properties.
Máy tính xách tay chơi game2. Tiếp theo vào Advanced system settings => Settings (dưới mục Performance) => Advanced => Change.
3. Theo mặc định pagefile sẽ được chọn, bạn chọn No paging file rồi click chọn Set.
4. Tiếp theo chọn ổ đĩa cứng mà bạn muốn di chuyển pagefile sang, sau đó click chọn “System managed size” => Set.
5. Click chọn OK và khởi động lại máy tính của bạn.

Sau tất cả, nếu những cách trên đều không có tác dụng với bạn thì hãy "bóp miệng" nâng cấp ổ cứng lên SSD nhé, đảm bảo lỗi full disk 100% này sẽ biến mất.
Chúc các bạn thành công!
