Hướng dẫn sửa lỗi “Network path was not found” trong Windows
- Thứ năm - 29/06/2023 10:15
- In ra
- Đóng cửa sổ này
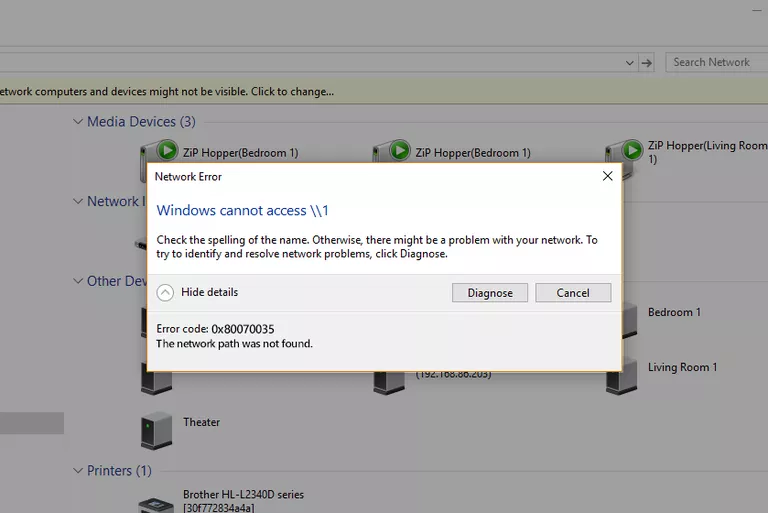
Khi một máy tính, thiết bị di động hoặc máy in cố gắng kết nối qua mạng với máy tính Microsoft Windows chẳng hạn, thông báo lỗi "network path was not found" — Lỗi 0x80070035 có thể xuất hiện. Máy tính không thể thực hiện kết nối qua mạng với thiết bị kia.
Thông báo lỗi này thường được hiển thị: The Network Path Cannot Be Found.
Hình ảnh thông báo lỗi The network path was not found sẽ như thế này:
Bất kỳ vấn đề kỹ thuật nào trên mạng cũng có thể gây ra lỗi này. Hãy thử các phương pháp xử lý sự cố được liệt kê ở đây để giải quyết hoặc khắc phục sự cố này.
Cách 1: Sử dụng tên đường dẫn hợp lệ khi gặp lỗi Network Path Cannot Be Found
Lỗi 0x80070035 có thể xảy ra khi người dùng nhập sai tên đường dẫn mạng. Đường dẫn được chỉ định phải trỏ đến tài nguyên được chia sẻ hợp lệ trên thiết bị từ xa. Phải bật tính năng chia sẻ file hoặc máy in Windows trên thiết bị từ xa và người dùng từ xa phải có quyền truy cập tài nguyên.
Đây là cách bạn có thể chia sẻ ổ được nhắm mục tiêu trên máy tính từ xa:
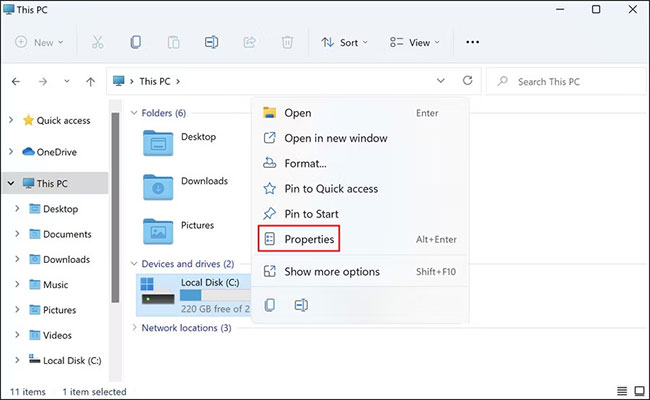
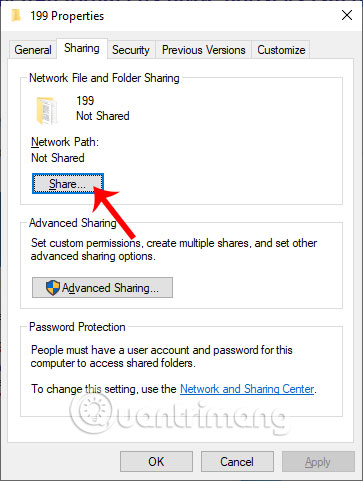
1. Nhấp chuột phải vào ổ được nhắm mục tiêu và chọn Properties từ menu ngữ cảnh.
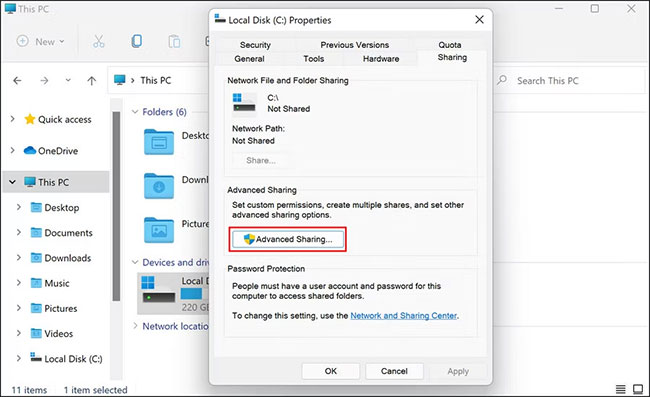
2. Trong hộp thoại sau, hãy chuyển đến tab Sharing và kiểm tra trạng thái của Network Path.
3. Nếu trạng thái hiển thị là Not Shared, thì hãy nhấp vào nút Advanced Sharing.
4. Đánh dấu vào ô được liên kết với Share this folder và lưu ý tên chia sẻ (Share name) của ổ đĩa.
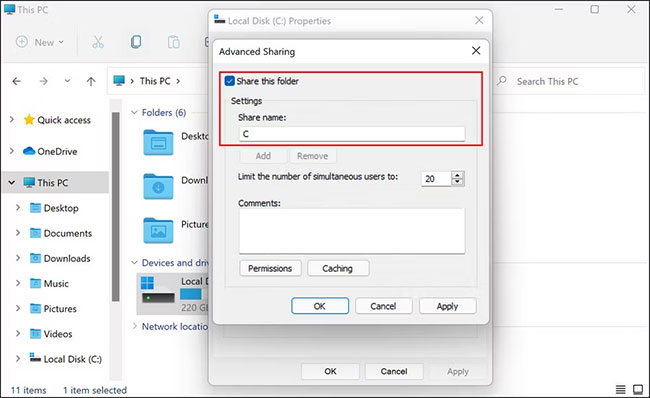
5. Sau khi hoàn tất, hãy nhấp vào Apply > OK để lưu các thay đổi.
Bây giờ, bạn có thể kiểm tra xem ổ có thể truy cập được không sau khi làm theo các bước ở trên.
Cách 2: Một số phương pháp sửa lỗi cơ bản khác
Bất cứ điều bất thường nào trong hệ thống, bao gồm cả lỗi Network Path Cannot Be Found có thể xảy ra khi đồng hồ trên hai thiết bị không được thiết lập giống nhau. Hãy luôn để các thiết bị Windows trên mạng cục bộ được đồng bộ thông qua Network Time Protocol. Điều này có thể giúp bạn tránh gặp phải lỗi Network Path Cannot Be Found.
Đảm bảo sử dụng đúng tên người dùng và mật khẩu hợp lệ khi kết nối với các tài nguyên từ xa.
Nếu bất kỳ dịch vụ hệ thống Microsoft nào liên quan đến việc chia sẻ file và chia sẻ máy in trong mạng bị lỗi, lỗi Network Path Cannot Be Found cũng có thể xảy ra.
Khởi động lại máy tính có thể khôi phục chức năng bình thường.
Cách 3: Vô hiệu hóa tường lửa cục bộ/phần mềm diệt virus của bên thứ ba
Tường lửa bị định cấu hình sai hoặc đang chạy không đúng trên thiết bị Windows khởi tạo có thể gây ra lỗi Network Path Cannot Be Found. Tạm thời vô hiệu hóa tường lửa, tường lửa Windows tích hợp hoặc phần mềm tường lửa của bên thứ ba, sau đó kiểm tra thử lại xem lỗi Network Path Cannot Be Found còn xảy ra hay không.
Nếu lỗi không còn xuất hiện nữa, người dùng nên thực hiện các bước bổ sung để thay đổi cài đặt tường lửa nhằm tránh kích hoạt lại lỗi này. Lưu ý rằng máy tính để bàn ở nhà đã được bảo vệ bằng tường lửa của router băng thông rộng nên không cần cài đặt tường lửa riêng cho chúng nữa, còn các thiết bị di động thì lại cần tường lửa riêng để bảo vệ.
Một thủ phạm phổ biến khác thường ngăn người dùng kết nối với mạng, chia sẻ file và tải xuống ứng dụng từ các nguồn của bên thứ ba là việc phần mềm diệt virus bảo vệ quá mức.
Công việc của phần mềm diệt virus là xác định các hoạt động độc hại và ngăn chặn chúng, nhưng đôi khi những chương trình bảo mật này cũng bắt đầu gắn nhãn các tiến trình hợp pháp là mối đe dọa, chặn chúng hoàn toàn.
Nếu đang sử dụng chương trình bảo mật của bên thứ ba trên hệ điều hành của mình, bạn nên tạm thời vô hiệu hóa chương trình đó rồi thử kết nối với máy tính từ xa và chia sẻ file. Nếu phần mềm diệt virus đang gây ra sự cố, việc tắt phần mềm diệt virus sẽ khắc phục sự cố cho bạn.
Bạn cũng có thể thử tắt Windows Defender nếu đang sử dụng nó và xem điều đó có hữu ích không. Tuy nhiên, sau khi chia sẻ xong các file, hãy đảm bảo rằng bạn bật lại phần mềm diệt virus ngay lập tức vì việc tắt phần mềm này trong thời gian dài có thể khiến PC của bạn gặp phải các mối đe dọa.
Cách 4: Reset TCP/IP
Những người dùng bình thường không mấy quan tâm đến các vấn đề kỹ thuật liên quan đến hoạt động của hệ điều hành, nhưng một số người dùng khác lại muốn tìm hiểu các tùy chọn khắc phục sự cố nâng cao. Một phương pháp phổ biến để làm việc kết nối với mạng Windows ổn định hơn là reset lại các thành phần của Windows đang chạy trong nền hỗ trợ lưu lượng mạng TCP/IP.
Các bước tiến hành cụ thể sẽ tùy thuộc vào phiên bản Windows đang sử dụng. Tuy nhiên cách tiếp cận này thường liên quan đến việc mở Command Prompt trên Windows và nhập lệnh "netsh". Ví dụ, lệnh:
netsh int ip reset
Lệnh này sẽ reset lại TCP/IP trên Windows 8 và Windows 8.1. Khởi động lại máy tính sau khi thực thi lệnh này sẽ đưa Windows về trạng thái mặc định ban đầu.
Cách 5: Chỉnh sửa cài đặt NetBIOS
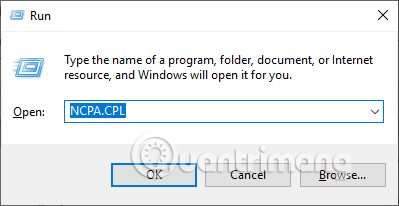
Chúng ta nhấn tổ hợp phím Windows + R để mở hộp thoại Run rồi nhập từ khóa NCPA.CP. Sau đó nhấn chuột phải vào mạng đang truy cập rồi chọn Properties.
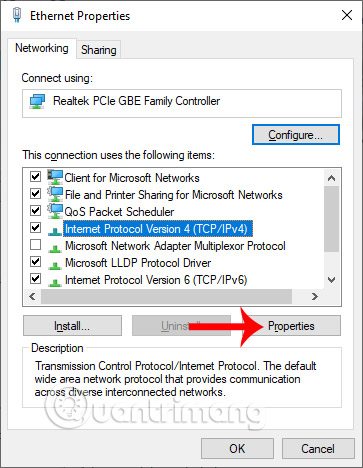
Hiển thị giao diện mới người dùng nhấn chọn vào Internet Protocol Version 4 (TCP/IPv4) trong danh sách bên dưới rồi nhấn tiếp vào Properties.
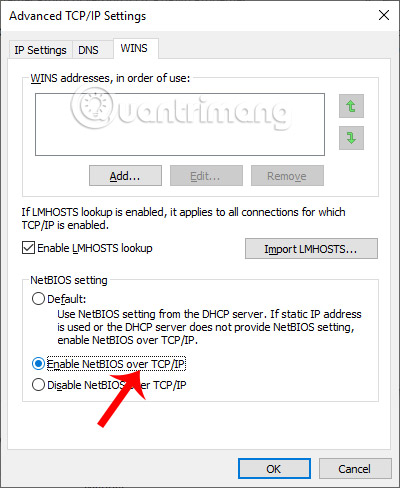
Chuyển sang hộp thoại mới bạn nhấn vào Advanced, rồi chọn vào tab WINS, tích chọn vào Enable NetBIOS over TCP/IP và nhấn OK để lưu lại.
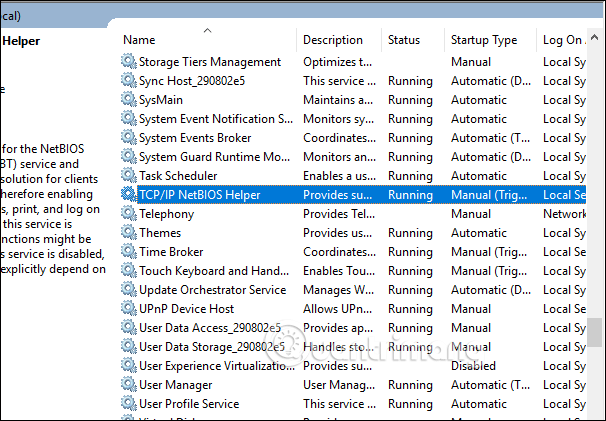
Cách 6: Chuyển service TCP/IP NetBIOS Helper sang trạng thái hoạt động
Chúng ta truy cập vào giao diện Windows Services trên máy tính, rồi kiểm tra xem service TCP/IP NetBios Helper đã ở trạng thái hoạt động hay chưa. Nếu chưa thì click trực tiếp vào service rồi chuyển sang chế độ hoạt động.
Ngoài ra, bạn cũng nên khởi động lại service này để đảm bảo rằng nó hoạt động. Dưới đây là những gì bạn cần làm:
1. Mở Run bằng cách nhấn Win + R.
2. Nhập services.msc trong Run và nhấn Enter.
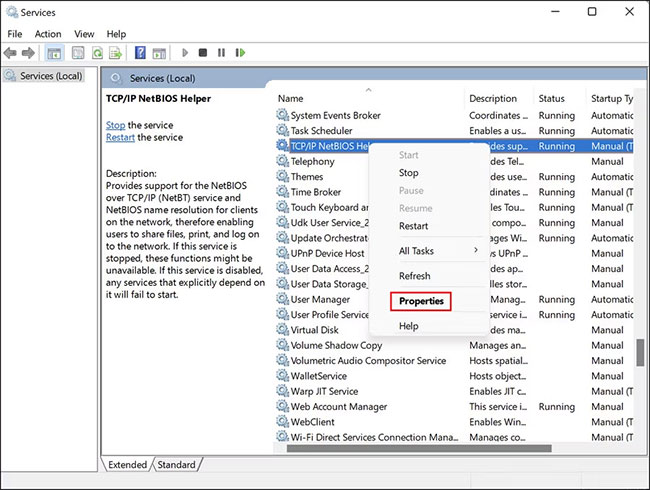
3. Trong cửa sổ Services, tìm TCP/IP NetBIOS Helper và nhấp chuột phải vào nó.
4. Chọn Properties từ menu ngữ cảnh.
5. Trong hộp thoại sau, nhấp vào nút Stop.
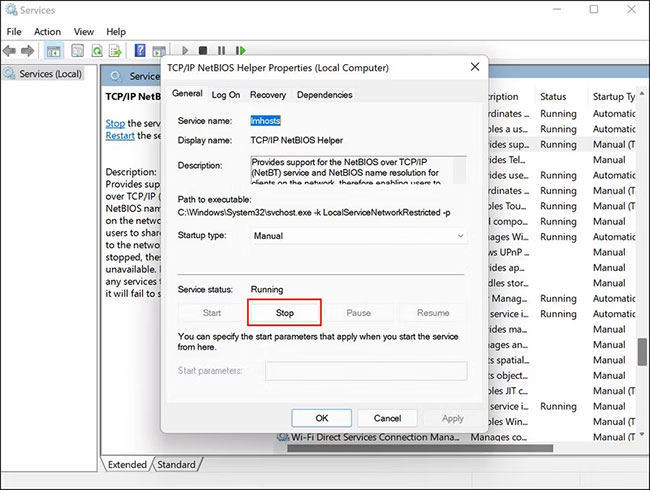
6. Chờ trong vài giây và sau đó nhấp vào Restart.
7. Bây giờ, hãy mở rộng menu drop-down Startup type và chọn Automatic.
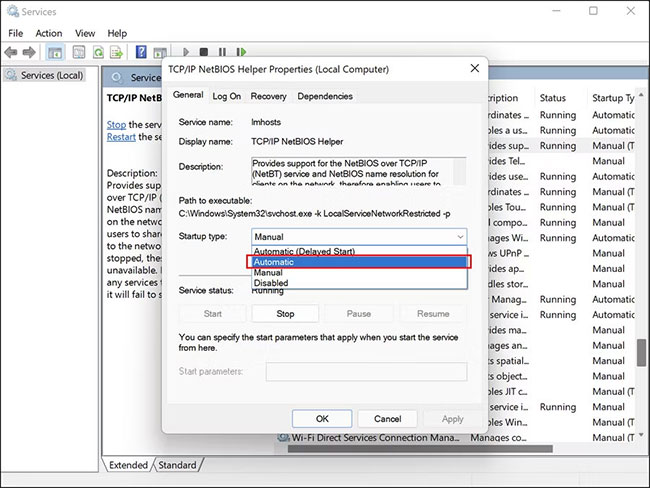
8. Nhấp vào Apply > OK để lưu các thay đổi.
Sau khi hoàn tất, hãy kiểm tra xem điều đó có khắc phục được sự cố cho bạn hay không.
Cách 7: Chuyển Network access: Sharing and security model for local account thành Classic
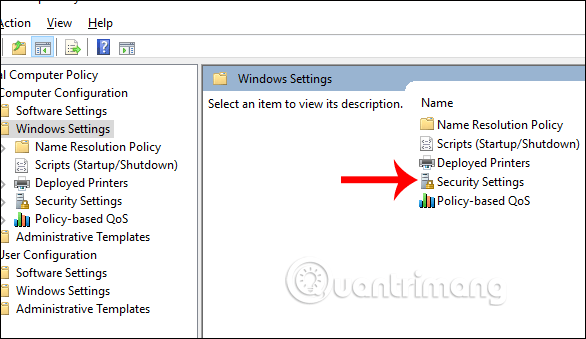
Chúng ta nhập từ khóa gpedit.msc vào hộp thoại Run để truy cập Local Group Policy Editor. Tiếp đến người dùng nhấn vào Computer Configuration, chọn Window Settings ở bên phải, chọn tiếp Security Settings.
Tiếp đến nhấn vào Local Policies rồi nhấn tiếp vào Security Options rồi nhìn sang bên phải tìm tới khóa Account: Limit local acc use of blank password to…
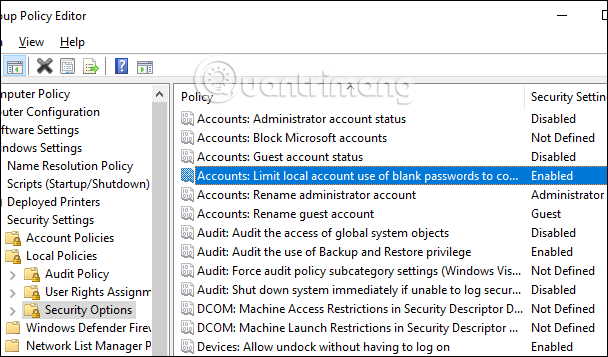
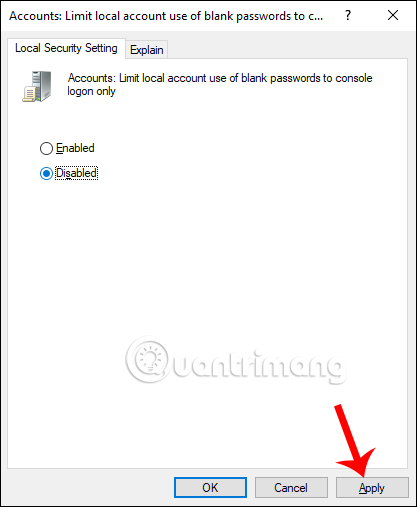
Chúng ta sẽ chuyển về Disable bằng cách click đúp chuột vào khóa này. Nhấn Apply để lưu lại.
Tiếp đến bạn tìm tới key Network access: Sharing and security model for local account để chuyển về Classic.
Quay lại giao diện máy tính chúng ta mở hộp thoại Run rồi nhập từ khóa cmd. Tiếp đến người dùng nhập lệnh gpupdate /force để update lại gpedit.

Cách 8: Chỉnh sửa cài đặt bảo mật cục bộ
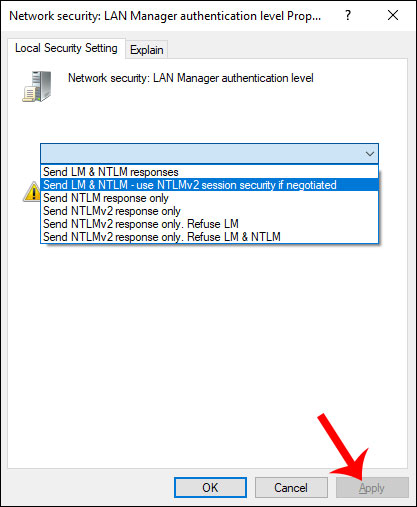
Người dùng cũng truy cập vào Local Group Policy Editor, rồi thực hiện theo đường dẫn Computer Configuration > Windows Settings > Security Settings > Local policies > Securiy Options.

Tiếp đến chúng ta tìm tới key Network security: LAN Manager Authentication level rồi chuyển về Send LM & NTLM -user NTLMv2 senssion security if negotiated. Nhấn Apply để lưu lại.
Cuối cùng mở hộp thoại Run rồi nhập cmd, nhập lệnh gpupdate /force để cập nhật lại gpedit.
Cách 9: Xác minh ổ đã được chia sẻ chưa
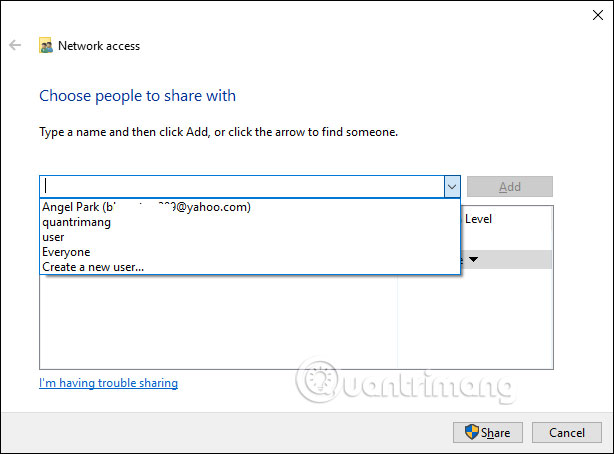
Chúng ta sẽ tiến hành xác minh ổ đĩa được chia sẻ hay chưa, bằng cách nhấn chuột phải vào thư mục cần chia sẻ rồi chọn Properies. Nhấn tiếp vào tab Sharing rồi kiểm tra xem thư mục đã được chia sẻ chưa. Nếu chưa bạn nhấn nút Share để chia sẻ.
Sau đó chúng ta chọn người muốn chia sẻ rồi cấp phép cho người đó là được.
Cách 10: Kiểm tra lại địa chỉ IP của máy đã kết nối
Chúng ta cần kiểm tra lại địa chỉ IP của máy đã kết nối vì có thể xảy ra trường hợp địa chỉ mạng không được kết nối đúng.
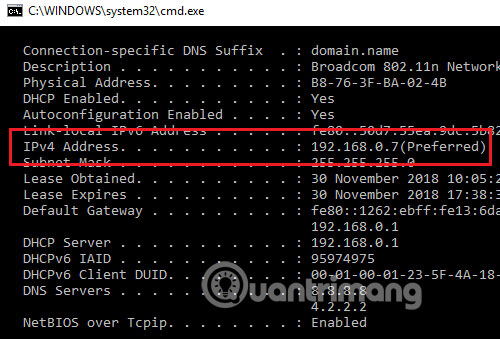
Chúng ta nhấn Windows + R để mở hộp thoại Run trong máy tính đích rồi nhập lệnh cmd. Trong giao diện nhập lệnh bạn nhấn ipconfig / all. Hiển thị các thông số và bạn cần chú ý tới thông số IPv4.
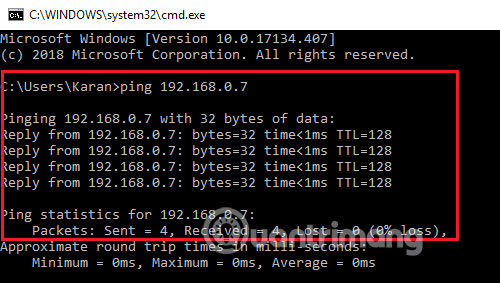
Tại máy tính chia sẻ chúng ta cũng nhập cmd trong hộp thoại Run, sau đó nhập lệnh ping <địa chỉ IPv4 của máy tính đích> rồi nhấn Enter.
Kết quả hiển thị sẽ cho 4 thông tin dưới đây để biểu thị cho việc đã liên kết.
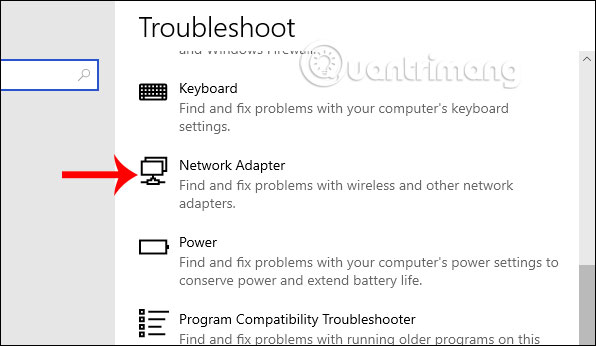
Hoặc chúng ta có thể truy cập vào Troubleshoot trong Windows Settings, rồi nhấn vào Network Adapter Troubleshooter để chạy trình kiểm tra lỗi kết nối.
Cách 11: Kích hoạt SMB 1.0
SMB là một giao thức mạng cho phép người dùng truy cập vào các file và máy in được chia sẻ trên Windows. Tính năng này bị tắt theo mặc định trong Windows, nhưng việc bật tính năng này có thể giúp bạn kết nối với thiết bị từ xa và chia sẻ file qua mạng.
Trong phương pháp này, bạn sẽ cần kích hoạt SMB để chia sẻ các file. Tuy nhiên, bài viết đặc biệt khuyên bạn nên vô hiệu hóa SMB sau khi sử dụng vì nó được biết là có một số lỗ hổng bảo mật có thể làm rối loạn hệ thống của bạn.
Dưới đây là những gì bạn cần làm:
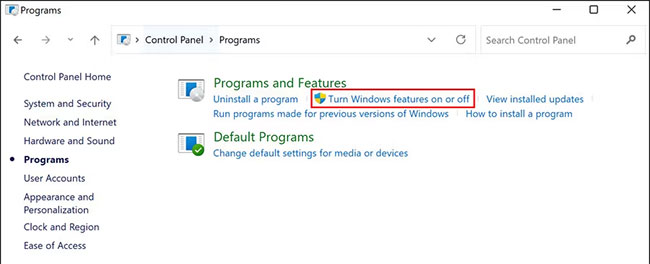
1. Nhập Control Panel trong tìm kiếm của Windows và nhấp vào Open.
2. Trong cửa sổ sau, đi tới Programs > Programs and Features.
3. Chọn Turn Windows features on or off từ ngăn bên trái.
4. Bây giờ, hãy tìm SMB 1.0/CIFS File sharing support và đánh dấu vào hộp tương ứng.
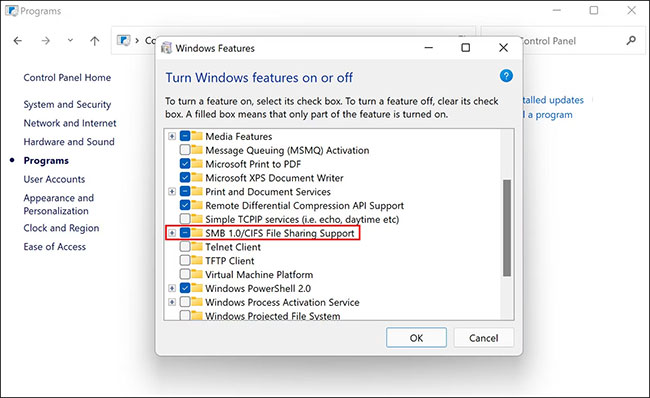
5. Nhấp vào OK để lưu các thay đổi và kiểm tra xem lỗi hiện đã được khắc phục chưa.
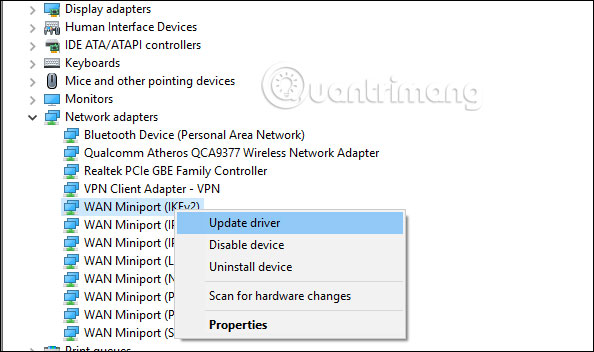
Cách 12: Cập nhật driver
Trong giao diện hộp thoại Run bạn nhập từ khóa devmgmt.msc. Sau đó chúng ta tìm tới phần Network adapers rồi click chuột vào từng trình điều khiển rồi chọn Update driver.
Như vậy bạn đã có rất nhiều cách sửa, kiểm tra lại máy tính khi không thể kết nối các máy tính trong mạng LAN, với báo lỗi Network Path Cannot Be Found.
Hy vọng bài viết này hữu ích với bạn!
