Hướng dẫn sử dụng File History để sao lưu, khôi phục dữ liệu
- Thứ ba - 21/07/2020 00:59
- In ra
- Đóng cửa sổ này

File History là một trong những công cụ sao lưu chính được tích hợp trên Windows 10 và Windows 8/8.1, đây là công cụ sao lưu chứa đầy đủ các tính năng. File History được giới thiệu đầu tiên trên hệ điều hành Windows 8. Nhờ có công cụ này, bạn có thể chọn dữ liệu cần sao lưu để backup mà không cần phải cài thêm các phần mềm của bên thứ 3 hay sao lưu bằng tay nữa. Khi có vấn đề cũng có thể nhanh chóng khôi phục lại dữ liệu mình cần.
Sau khi thiết lập File History, bạn có thể kết nối một ổ cứng rời với máy tính và Windows sẽ tự động sao lưu tất cả các file. Vậy làm cách nào kích hoạt và sử dụng tính năng File History có sẵn này để sao lưu dữ liệu, ổ cứng trên máy tính? Đây cũng chính là nội dung chính mà Quản Trị Mạng giới thiệu với các bạn trong bài viết này. Hãy cùng theo dõi nhé.
Cách thiết lập File History trên Windows 10
Để bắt đầu với File History trong phiên bản Windows 10 mới nhất, hãy làm theo các bước sau:
1. Mở ứng dụng Settings và đi đến Update & Security > Backup.
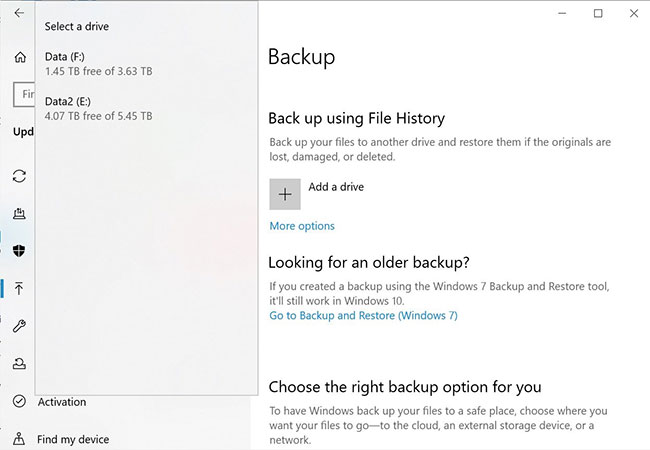
2. Nhấp vào + bên cạnh Add a drive.
3. Chọn ổ cứng chính hoặc ổ cứng ngoài của bạn.
Sau khi được chọn, File History sẽ bắt đầu lưu trữ dữ liệu. Nếu bạn muốn tắt nó đi, hãy sử dụng công tắc chuyển đổi sẽ xuất hiện bên dưới Automatically back up my files trên cùng một trang.
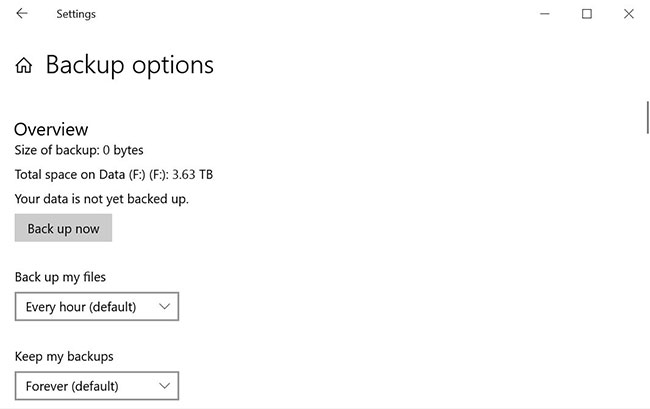
Bên dưới Automatically back up my files, hãy nhấp vào More options và bây giờ, bạn có thể cấu hình Backup options. Bạn có thể sử dụng các menu drop-down để thay đổi tần suất của các bản sao lưu.
Sao lưu các thư mục tùy chỉnh với File History
Theo mặc định, File History của Windows 10 được cấu hình để lưu các thư mục dữ liệu mặc định trong thư mục %UserProfile% của người dùng tại C:\users\[user]. Windows cho phép thêm các thư mục bạn chọn và bắt đầu lưu nội dung có trong các thư mục.
Nếu bạn muốn thêm một thư mục tùy chỉnh, thậm chí một thư mục từ ổ khác ngoài C:, bạn có thể thêm nó bằng các bước sau:
1. Trong Settings > Update & Security > Backup, nhấp vào More options.
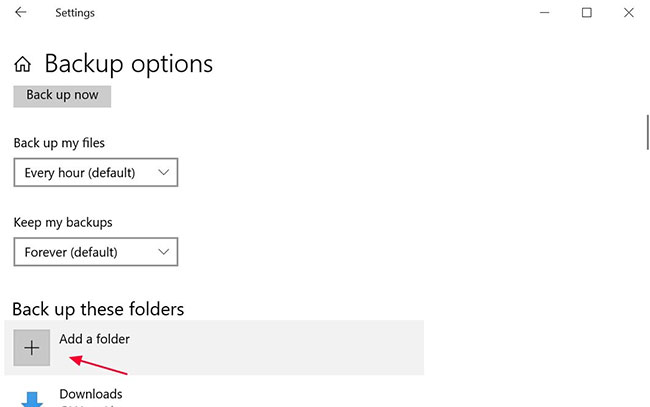
2. Nhấp vào Add a folder trong Back up these folder.
3. Nhấp vào Add a folder sẽ hiển thị màn hình Select Folder có thể được sử dụng để chọn thư mục bạn muốn sao lưu.
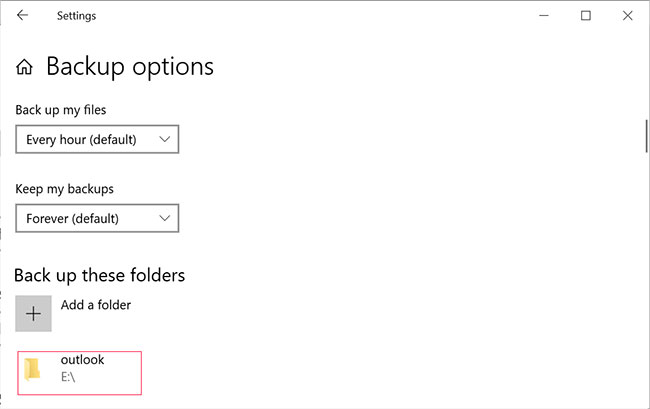
Ví dụ, bài viết đã thêm thư mục E:\outlook để nó được sao lưu bằng File History. Như được hiển thị trong ảnh chụp màn hình bên dưới, một khi thư mục được chọn, giờ đây nó sẽ được thêm vào danh sách các thư mục sao lưu.
Nếu bạn muốn sử dụng ổ ngoài, hãy kết nối nó với PC và chọn tùy chọn để cấu hình ổ cho File History từ thông báo. Hoặc quay lại Settings và chọn ổ mới thay thế.
Khôi phục file hoặc thư mục bằng File History
Khi sao lưu file bằng File History, Windows 10 sẽ lưu trữ các phiên bản khác nhau của file khi chúng được sao lưu.
Ngay cả khi một file bị mất, hỏng hoặc bị xóa, điều này cho phép bạn khôi phục file bạn cần từ một ngày sao lưu cụ thể.
Để khôi phục file bằng File History, bạn nên làm theo các bước sau:
1. Mở File Explorer và điều hướng đến thư mục có file bạn muốn khôi phục.
Ở đầu màn hình File Explorer, bên dưới tab Home, là một nút có tên History như hiển thị bên dưới.
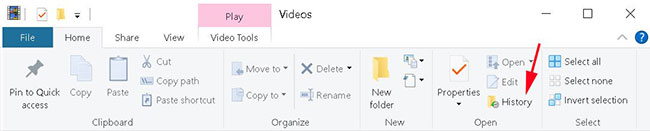
2. Nhấp vào nút History và màn hình File History sẽ được hiển thị, cho thấy bản sao lưu mới nhất của thư mục này.
Nếu bạn đã sao lưu thư mục này vào nhiều ngày, thì bạn sẽ có thể chuyển sang các ngày khác nhau để tìm file cụ thể muốn khôi phục.
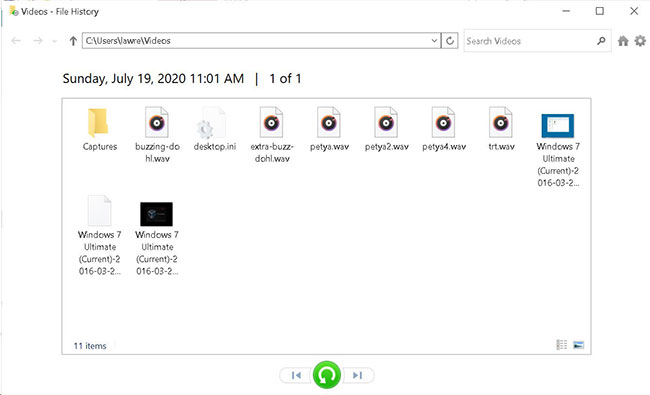
3. Để xem nội dung của file trước khi khôi phục, bạn có thể nhấp chuột phải vào file và chọn Preview.
4. Khi bạn đã tìm thấy file muốn khôi phục, hãy chọn nó bằng cách nhấp chuột trái vào file một lần và sau đó nhấp vào nút khôi phục màu xanh lục.
5. Khi đã khôi phục xong các file, bạn có thể đóng các cửa sổ File History và File Explorer.
Lưu ý rằng bạn cũng có thể khôi phục toàn bộ thư mục cùng một lúc, bằng cách điều hướng đến thư mục phía trên, rồi chọn và khôi phục thư mục thay vì file.
