Dấu “X” màu đỏ trên các thư mục Windows có nghĩa là gì?
- Thứ hai - 06/03/2023 00:00
- In ra
- Đóng cửa sổ này
Bạn có thấy một vòng tròn màu đỏ có chữ thập màu trắng ở bên trái các file, thư mục hoặc ổ Windows của mình không? Nếu vậy, điều đó có nghĩa là OneDrive không đồng bộ và các thư mục bị ảnh hưởng bởi sự cố này không được đồng bộ đúng cách.
Các nguyên nhân khác có thể gây ra sự cố này bao gồm cài đặt OneDrive bị cấu hình sai, sự cố với Windows File Explorer hoặc những biểu tượng bị hỏng. Nếu bạn phát ngán khi nhìn thấy những biểu tượng này, thì bài viết này sẽ chỉ cho bạn cách loại bỏ chúng.
Trước khi bắt đầu…
Trước tiên, hãy thực hiện các bước kiểm tra sơ bộ sau, vì chúng có thể giúp bạn tìm ra gốc rễ của vấn đề:
- Đảm bảo sự cố không phải là tạm thời bằng cách khởi động lại thiết bị một lần.
- Nếu bạn đang gặp sự cố này trên một thư mục cụ thể, hãy kiểm tra xem thư mục đó có file nào bị hỏng hay không. Bạn có thể sửa các file bị hỏng bằng các công cụ Windows tích hợp.
- Đảm bảo không có ứng dụng lưu trữ hoặc đồng bộ nào hiện đang mở trên Windows.
- Nếu OneDrive đang mở trên web, hãy đóng nó.
- Nếu bạn sử dụng gói cao cấp của Microsoft OneDrive, hãy đảm bảo rằng gói đó chưa hết hạn.
Nếu các bước kiểm tra trên không hỗ trợ xác định nguyên nhân, hãy áp dụng các cách khắc phục còn lại.
Cạc loại bỏ dấu “X” màu đỏ trên các thư mục Windows
1. Đăng nhập vào OneDrive và bắt đầu đồng bộ
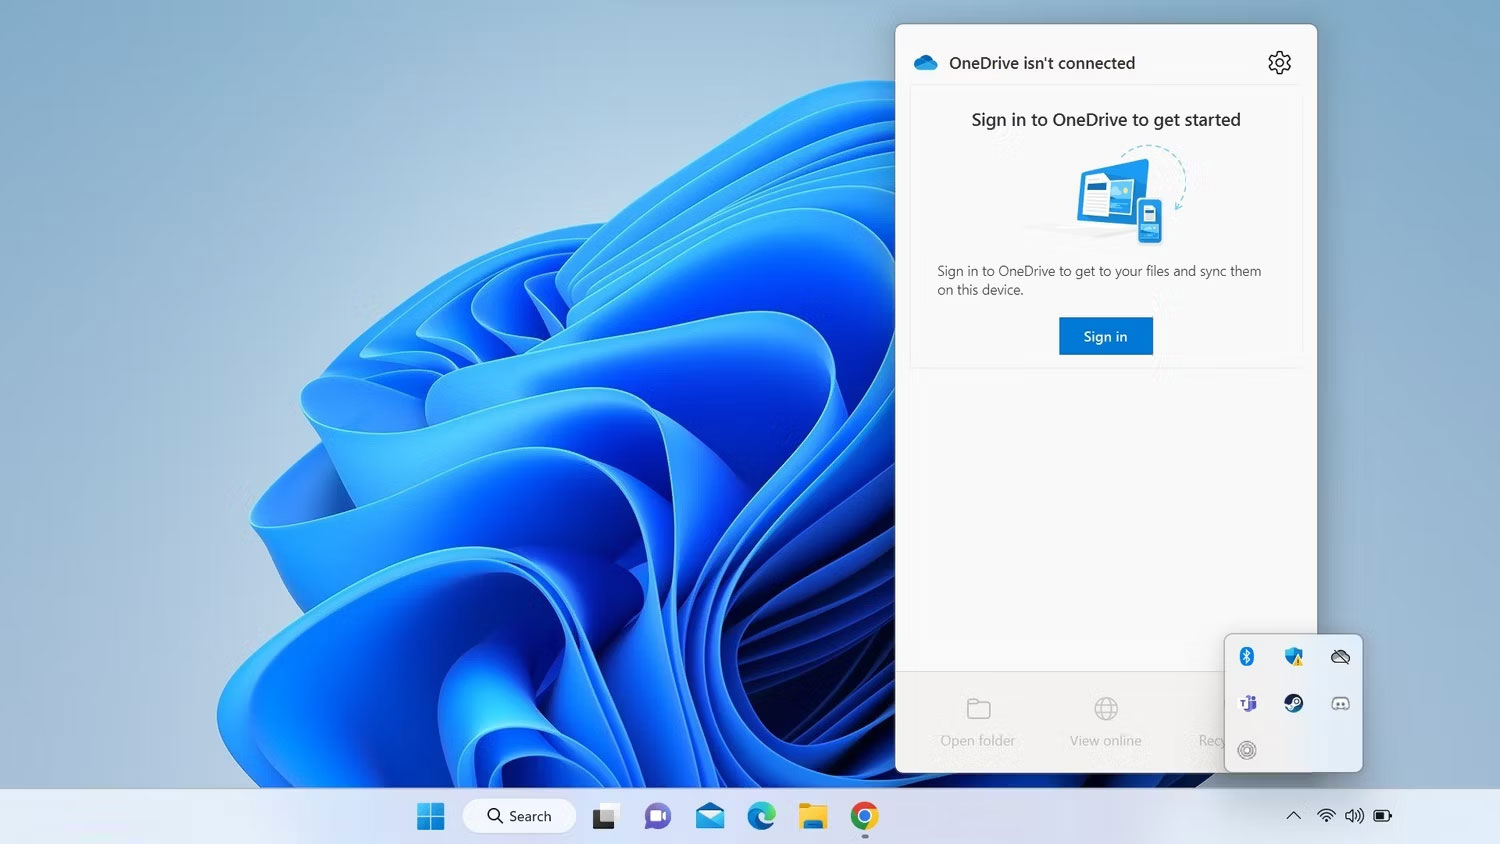
Tìm biểu tượng OneDrive ở cuối bên phải của thanh tác vụ, còn được gọi là khu vực thông báo hoặc khay hệ thống. Nhìn thấy dấu gạch chéo màu đỏ hoặc dấu gạch ngang nghiêng trên biểu tượng OneDrive có nghĩa là bạn không còn đăng nhập vào OneDrive và các file của bạn không được đồng bộ. Vì vậy, bạn sẽ cần phải đăng nhập lại để bắt đầu đồng bộ. Thực hiện theo các bước sau:
1. Chuyển đến khay hệ thống và nhấp vào biểu tượng OneDrive.
2. Nhấp vào nút Sign in.
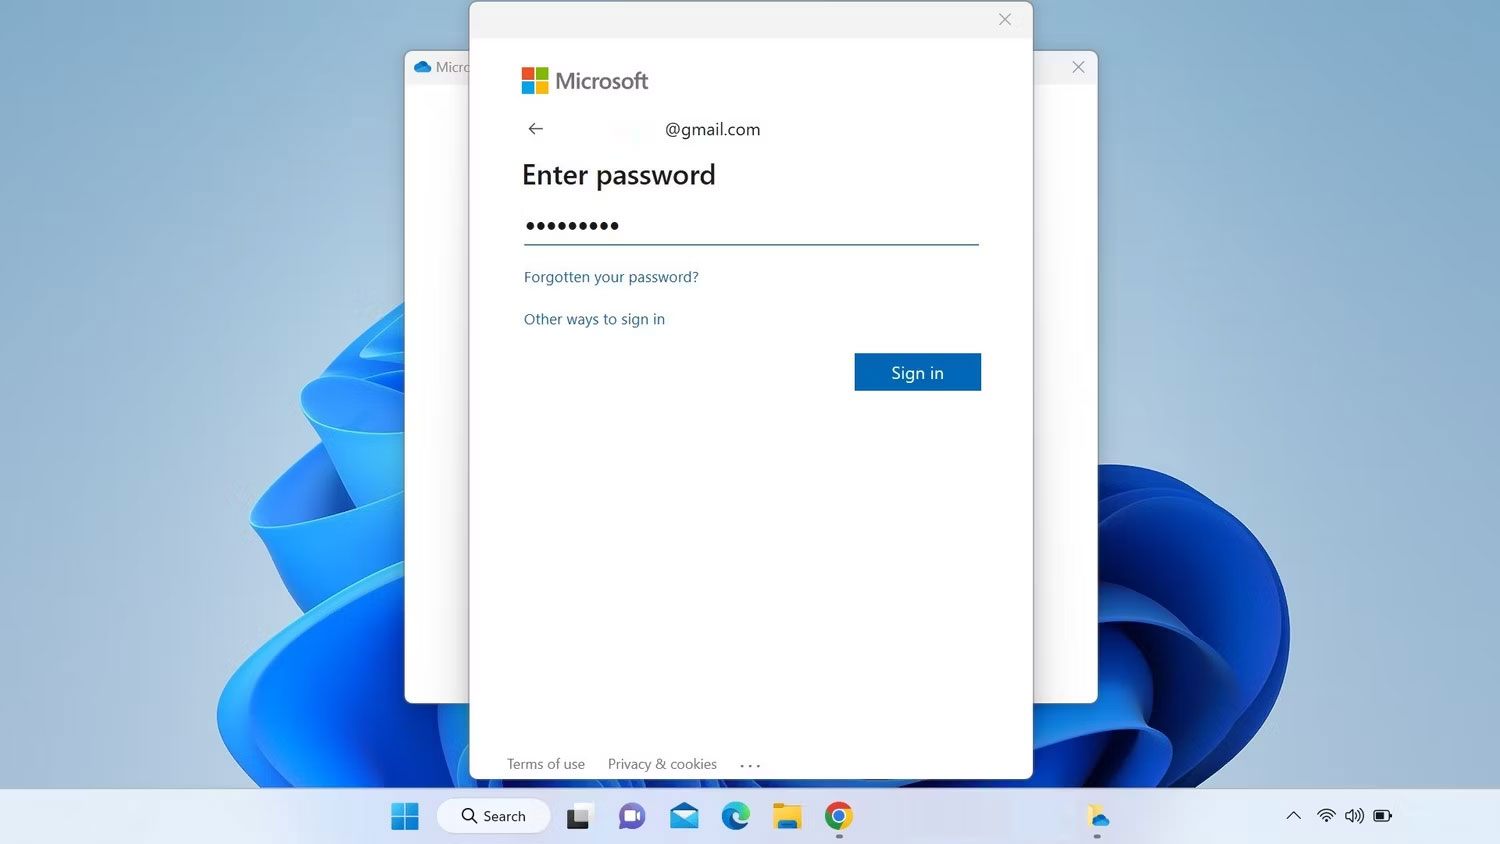
3. Nhập địa chỉ email được liên kết với tài khoản Microsoft của bạn và nhấp vào Sign in. Nếu bạn muốn đồng bộ hóa dữ liệu của mình với tài khoản OneDrive được tạo bằng chính tài khoản Microsoft mà bạn đang sử dụng trên thiết bị của mình, bạn sẽ không phải nhập mật khẩu.
4. Chọn một vị trí thư mục OneDrive hoặc bấm vào Next để sử dụng vị trí mặc định.
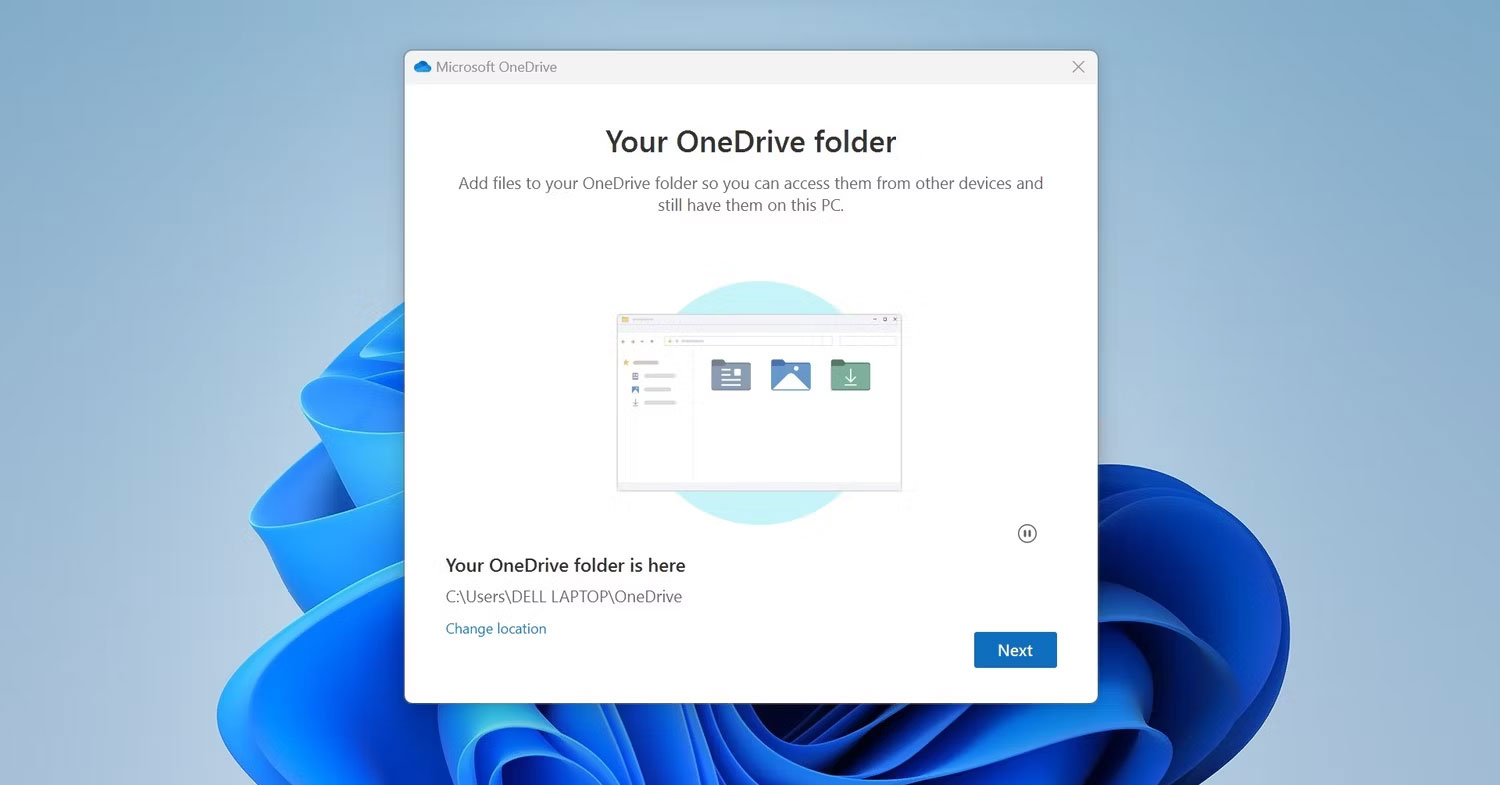
5. Sau đó, làm theo một số hướng dẫn trên màn hình để đăng nhập vào OneDrive.
Sau khi đăng nhập, hãy khởi động lại thiết bị. Hy vọng rằng một lần đồng bộ mới sẽ giải quyết vấn đề với các biểu tượng thư mục. Nếu không, hãy chuyển sang phương pháp tiếp theo.
2. Liên kết lại tài khoản OneDrive
Nếu tài khoản của bạn đã được đăng nhập trên OneDrive nhưng bạn đang gặp phải sự cố này thì có thể đã xảy ra sự cố khi đồng bộ. Do đó, hãy hủy liên kết tài khoản đã được liên kết rồi liên kết lại tài khoản đó. Thực hiện theo các bước dưới đây để làm điều đó:
1. Nhấp vào biểu tượng OneDrive trên khay hệ thống.
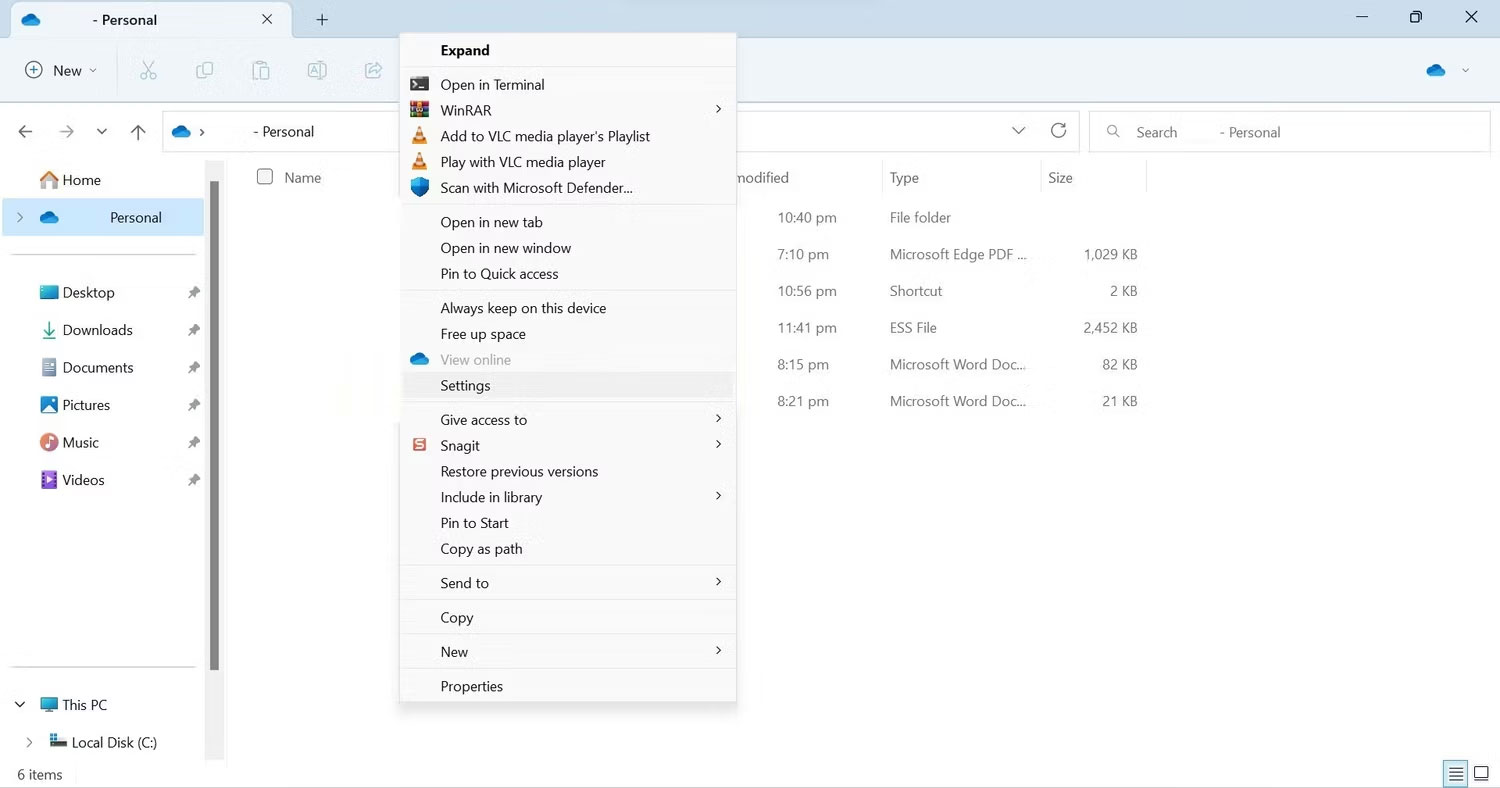
2. Nhấp vào biểu tượng bánh răng ở góc trên bên phải.
3. Chọn Settings từ menu.
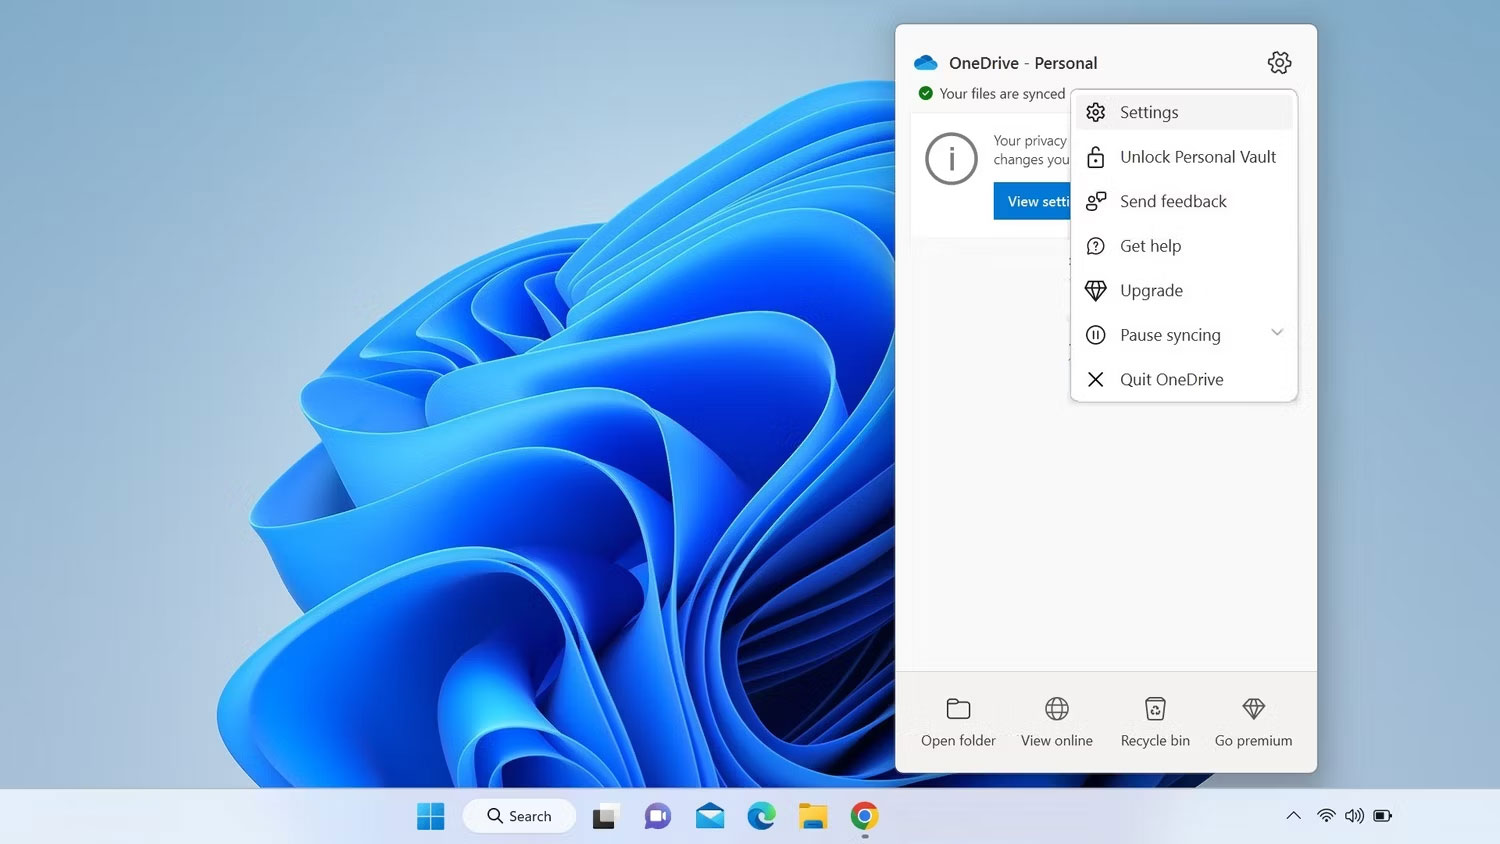
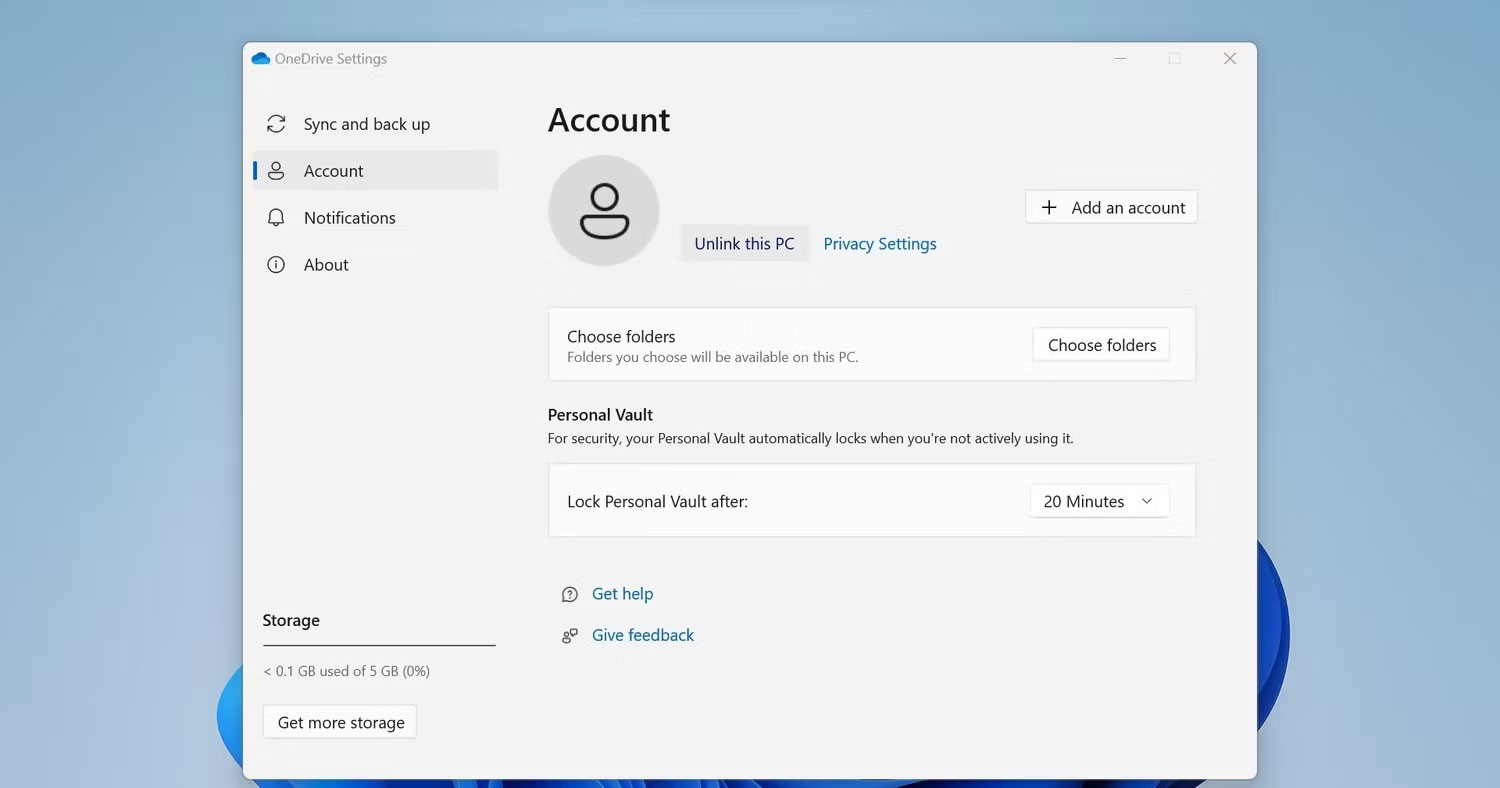
4. Chuyển đến tab Account trong cửa sổ OneDrive Settings.
5. Sau đó bấm vào Unlink this PC.
6. Trong cửa sổ xác nhận, nhấp vào Unlink account.
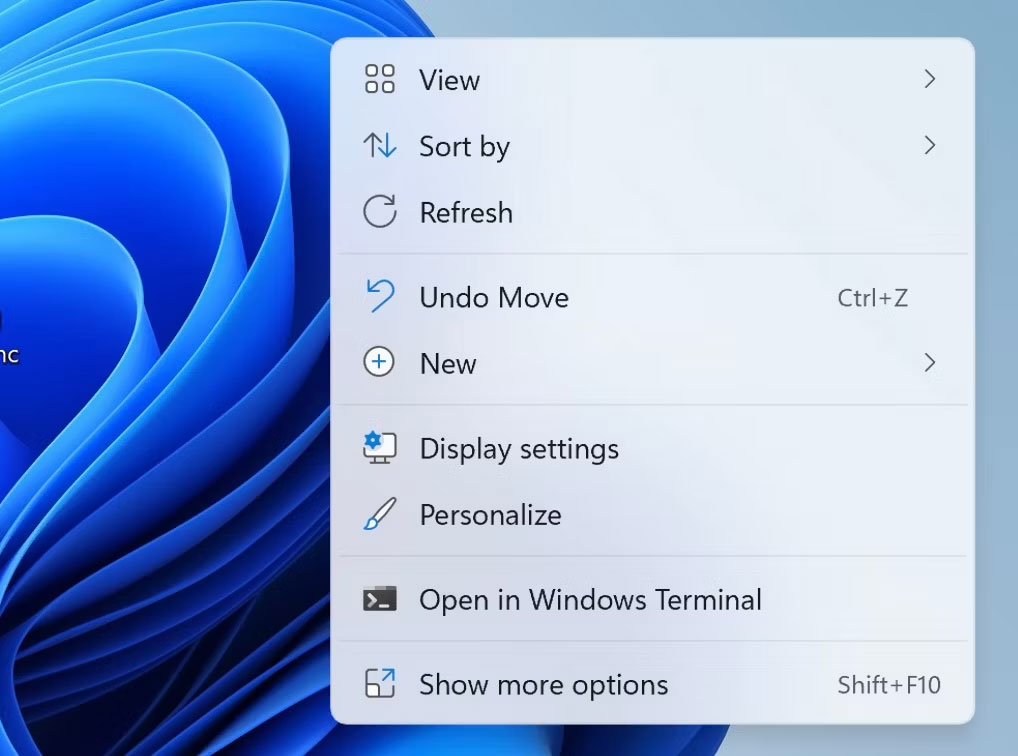
7. Sau khi hủy liên kết tài khoản, hãy mở Windows File Explorer hoặc thư mục nơi bạn nhìn thấy vòng tròn màu đỏ có chữ thập màu trắng.
8. Nhấp chuột phải để hiển thị menu ngữ cảnh, sau đó nhấp vào Refresh.
Hy vọng rằng việc hủy liên kết tài khoản OneDrive sẽ khắc phục được sự cố. Nếu đúng như vậy, hãy đăng nhập lại vào OneDrive bằng cách làm theo hướng dẫn trong lần khắc phục đầu tiên.
3. Thay đổi cài đặt OneDrive
Nếu bạn thấy các vòng tròn màu đỏ gạch chéo bên cạnh các file hoặc thư mục khi sử dụng tính năng Metered Connection hoặc chế độ tiết kiệm pin, thì có thể bạn đã cấu hình OneDrive không đồng bộ file trong các tình huống này. Vì vậy, bạn nên thay đổi các cài đặt này nếu đúng như vậy. Hãy làm theo các bước sau:
1. Mở File Explorer.
2. Trên thanh bên trái, nhấp chuột phải vào OneDrive và nhấp vào Show more options.
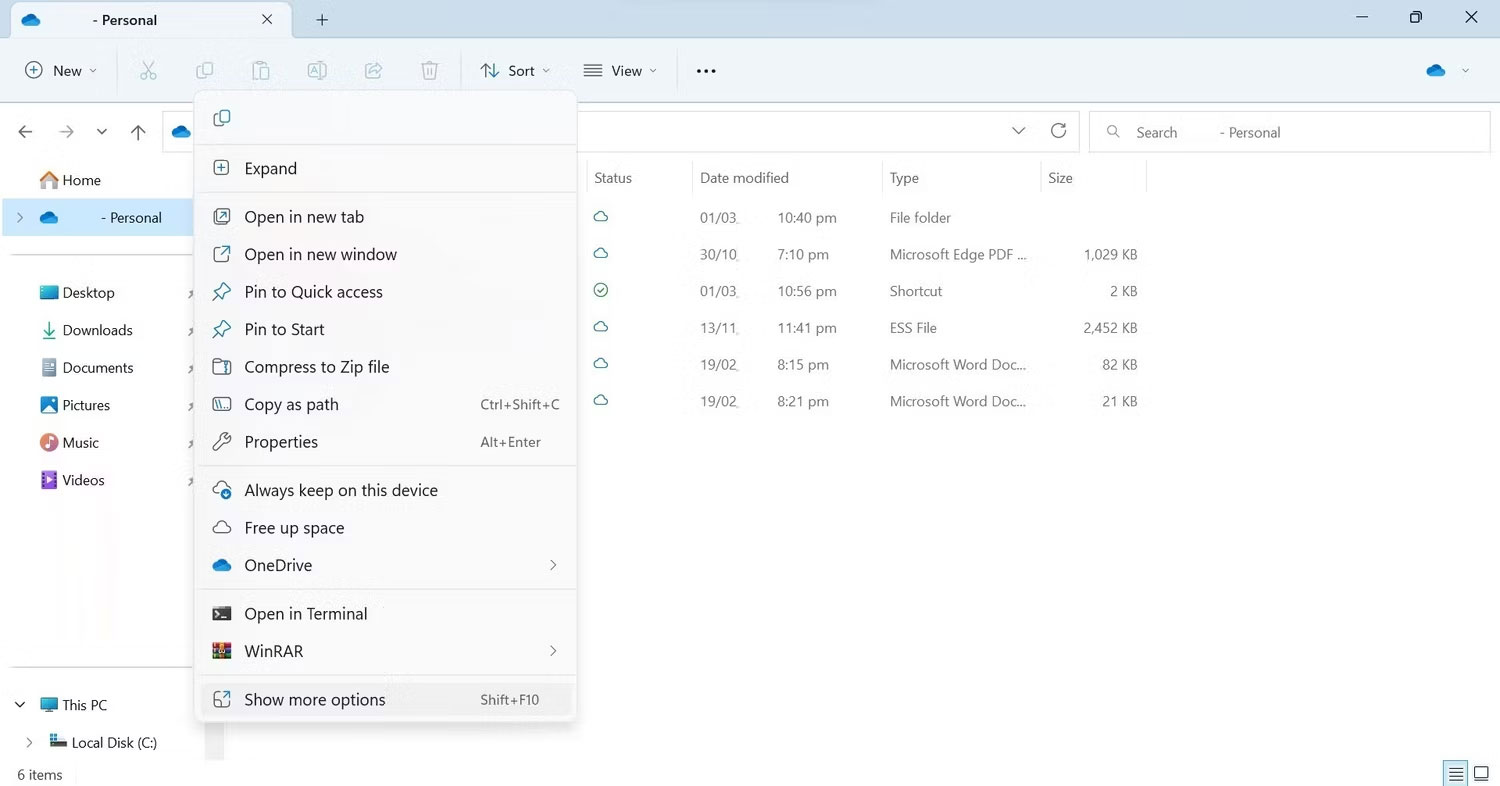
3. Chọn Settings từ menu ngữ cảnh.
4. Chuyển đến tab Sync and backup trong cửa sổ OneDrive Settings.
5. Trong cài đặt Preferences, hãy tắt các nút bên cạnh Pause syncing when this device is in battery saver mode và Pause syncing when this device is on a metered connection.
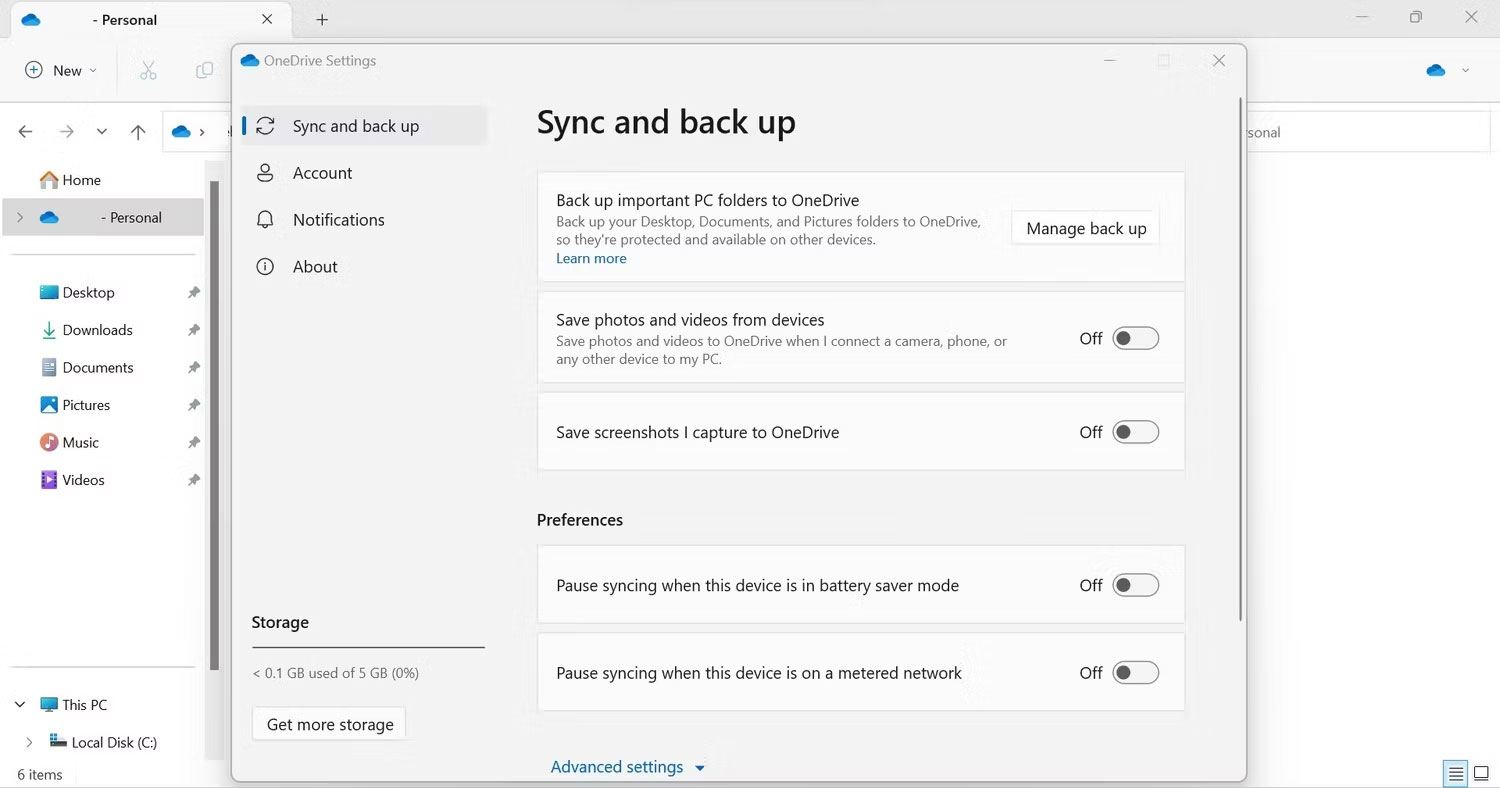
Khi bạn tắt hai tùy chọn này, quá trình đồng bộ OneDrive sẽ không dừng khi thiết bị của bạn được kết nối qua Metered Connection hoặc được đặt ở chế độ tiết kiệm năng lượng.
4. Đảm bảo OneDrive có đủ dung lượng trống
Sự cố đang thảo luận cũng có thể xảy ra nếu không có đủ dung lượng trong OneDrive để đồng bộ dữ liệu bổ sung. Do đó, nếu bạn không thành công trong việc giải quyết sự cố với các bản sửa lỗi trên, bạn nên kiểm tra dung lượng trống trong tài khoản OneDrive của mình.
Để kiểm tra điều đó, hãy đi tới trang đăng nhập của OneDrive. Sau đó, nhập thông tin đăng nhập của bạn để truy cập OneDrive. Sau khi đăng nhập, nhấp vào biểu tượng bánh răng ở góc trên bên phải và đi đến Options. Tại đây, bạn sẽ thấy bạn có bao nhiêu dung lượng lưu trữ.
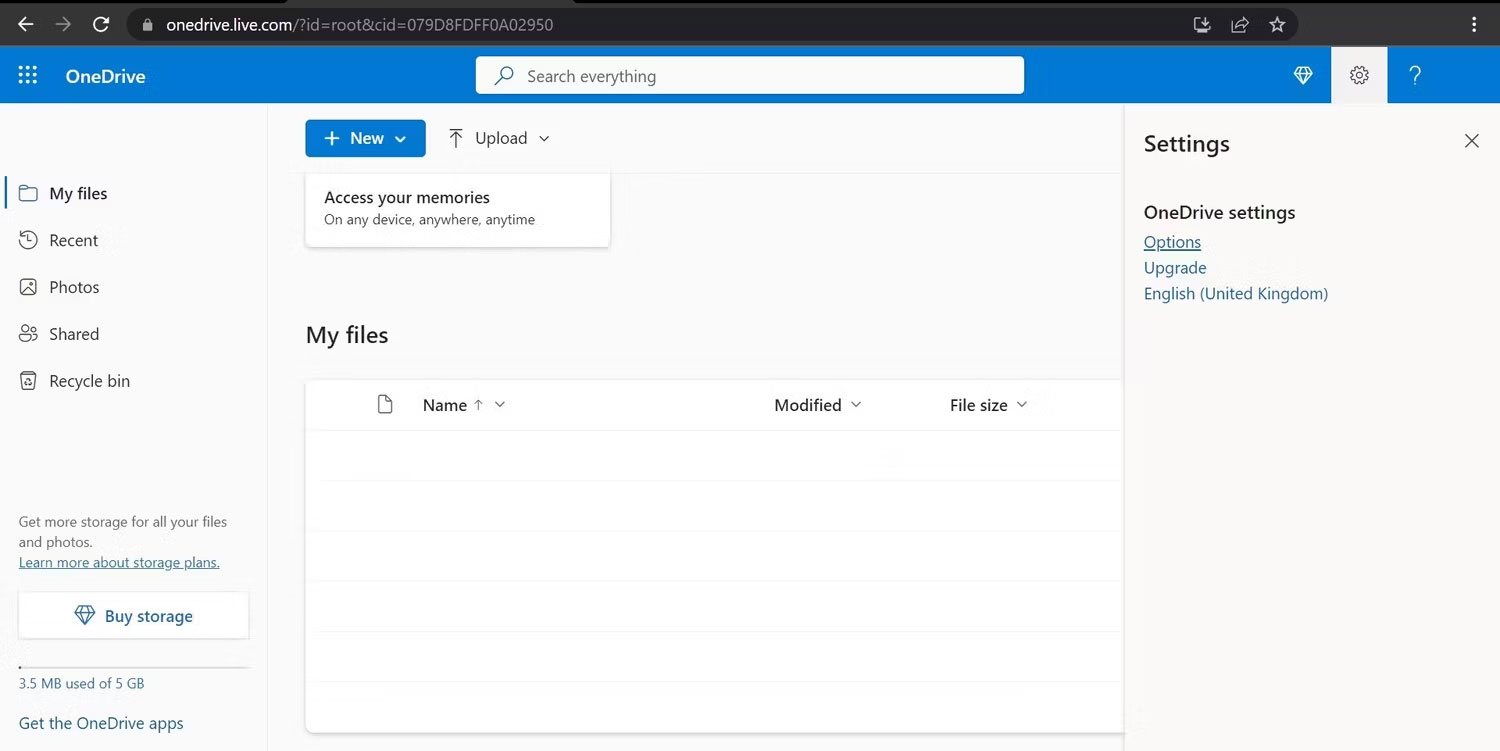
Trong trường hợp bộ nhớ OneDrive đầy, bạn sẽ cần xóa một số dữ liệu của mình được lưu trữ ở đó hoặc bạn sẽ cần bỏ chọn một số thư mục trong OneDrive để ngăn chúng đồng bộ. Hơn nữa, nếu bạn đang sử dụng gói miễn phí với 5GB dung lượng miễn phí, không đủ để chứa dữ liệu, thì bạn nên cân nhắc nâng cấp.
Nếu bạn có đủ dung lượng lưu trữ trống trong OneDrive, nghĩa là dung lượng lưu trữ thấp không phải là vấn đề, thì bạn có thể chuyển sang bước tiếp theo.
5. Khởi động lại tiến trình Windows Explorer
Khởi động lại tiến trình Windows Explorer sẽ giải quyết hầu hết các sự cố trực quan trên PC Windows. Do đó, nếu bạn chưa khởi động lại nó, bạn nên thực hiện ngay bây giờ. Nếu bạn không quen với tiến trình này, hãy xem hướng dẫn của Quantrimang.com về cách khởi động lại File Explorer.
6. Cài đặt lại OneDrive
Nếu sự cố vẫn tiếp diễn mặc dù đã áp dụng các bản sửa lỗi trên, bạn nên cài đặt lại OneDrive. Hãy làm theo các bước sau:
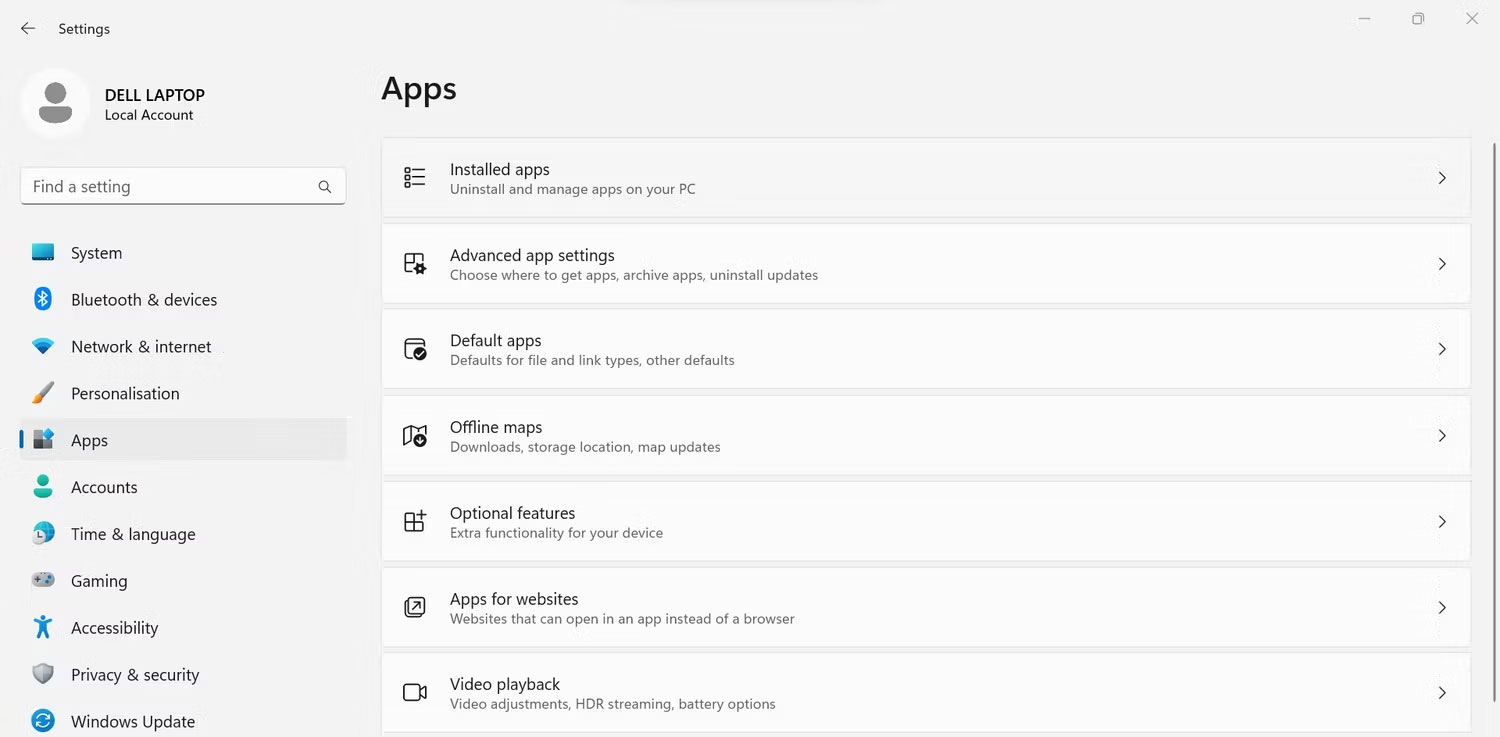
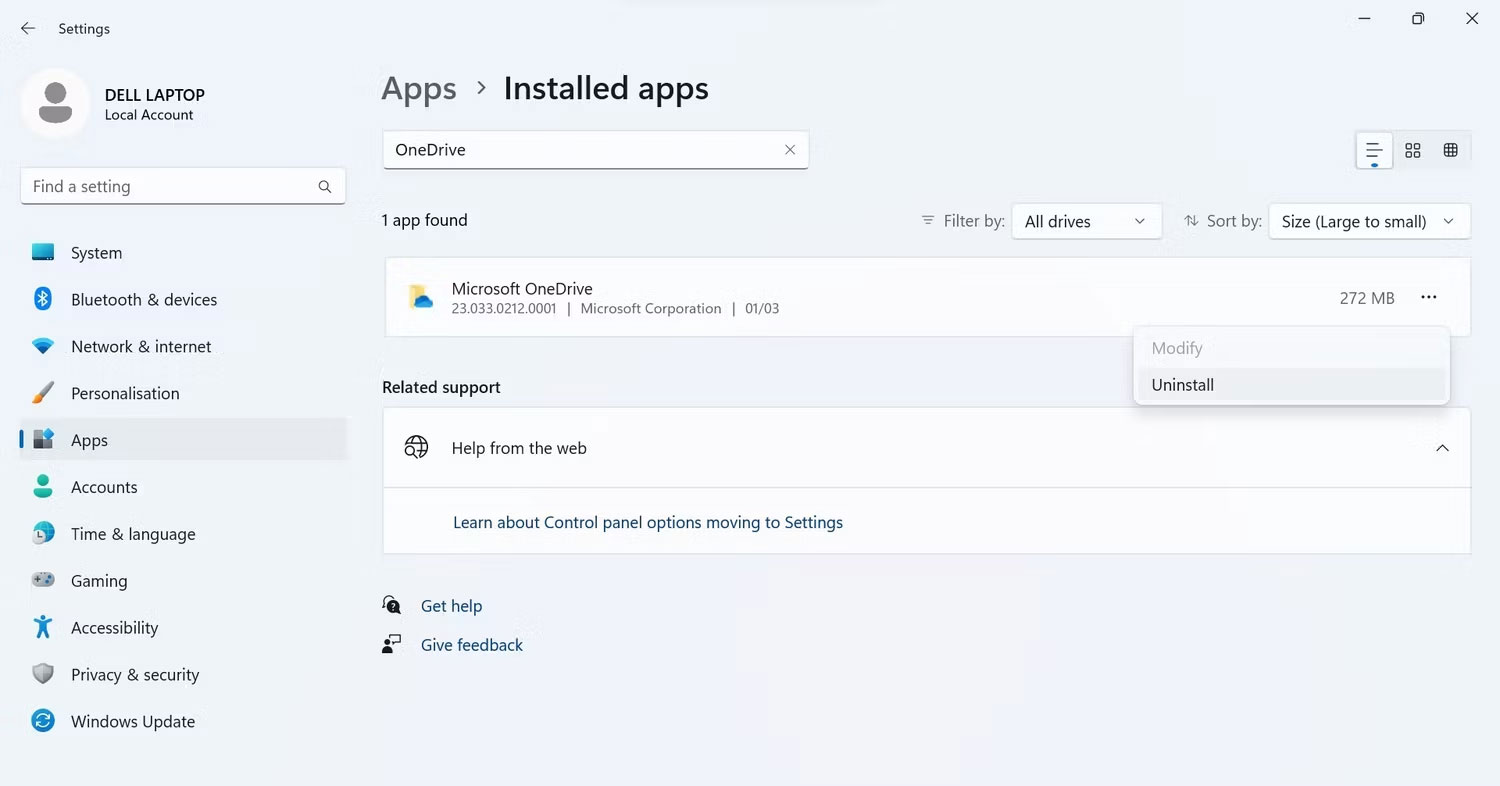
1. Nhấp chuột phải vào nút Start của Windows và chọn Settings.
2. Chuyển đến tab Apps ở bên trái.
3. Điều hướng đến Installed apps hoặc Apps and Features từ bên phải.
4. Trong trường Search apps, hãy nhập OneDrive.
5. Sau đó nhấp vào ba dấu chấm ngang bên cạnh Microsoft OneDrive và nhấp vào Uninstall.
6. Sau đó, hãy truy cập trang tải xuống OneDrive hoặc liên kết sau để tải xuống lại OneDrive.
https://quantrimang.com/download/onedrive-trong-windows-10-la-gi-172470
7. Sau đó, chạy file setup và đợi nó cài đặt xong.
8. Khởi động lại thiết bị sau khi cài đặt hoàn tất.
9. Sau đó, đăng nhập lại để bắt đầu đồng bộ.
Nhìn thấy các vòng tròn màu đỏ trên các thư mục Windows sẽ cho cảm giác rằng máy tính của mình đang gặp sự cố nghiêm trọng. Hy vọng, bây giờ bạn đã hiểu tại sao những dấu hiệu khó chịu này xuất hiện trên các thư mục. Bên cạnh đó, các bản sửa lỗi được thảo luận trong bài viết sẽ giúp bạn giải quyết vấn đề khó chịu này.
