Cách vô hiệu hóa khu vực thông báo trong Windows 10
- Thứ ba - 11/07/2023 09:36
- In ra
- Đóng cửa sổ này
Lần cuối cùng bạn khởi chạy thứ gì đó từ khu vực thông báo của Windows là khi nào? Khu vực thông báo, còn được gọi là khay hệ thống, nằm ở bên phải của thanh tác vụ Windows, ngay bên trái đồng hồ hệ thống. Nó chứa các biểu tượng cho những ứng dụng đang chạy và gửi thông báo cho PC của bạn, chẳng hạn như các bản cập nhật.
Nếu khu vực thông báo Windows đang chiếm quá nhiều diện tích màn hình của bạn, đây là cách loại bỏ nó và lấy lại phần không gian quý giá trên thanh tác vụ. Bạn có thể nhận được tất cả các thông báo và cập nhật quan trọng theo những cách dễ dàng khác.
1. Sử dụng Local Group Policy cho tất cả người dùng
Tinh chỉnh này chỉ hoạt động nếu bạn đang chạy phiên bản Pro, Enterprise hoặc Education của Windows 10 và bạn phải đăng nhập với quyền admin để hiển thị hoặc ẩn khu vực thông báo. Đây là những việc cần làm.
1. Nhấn Win + R để mở Run.
2. Nhập “gpedit.msc” và nhấp vào OK.
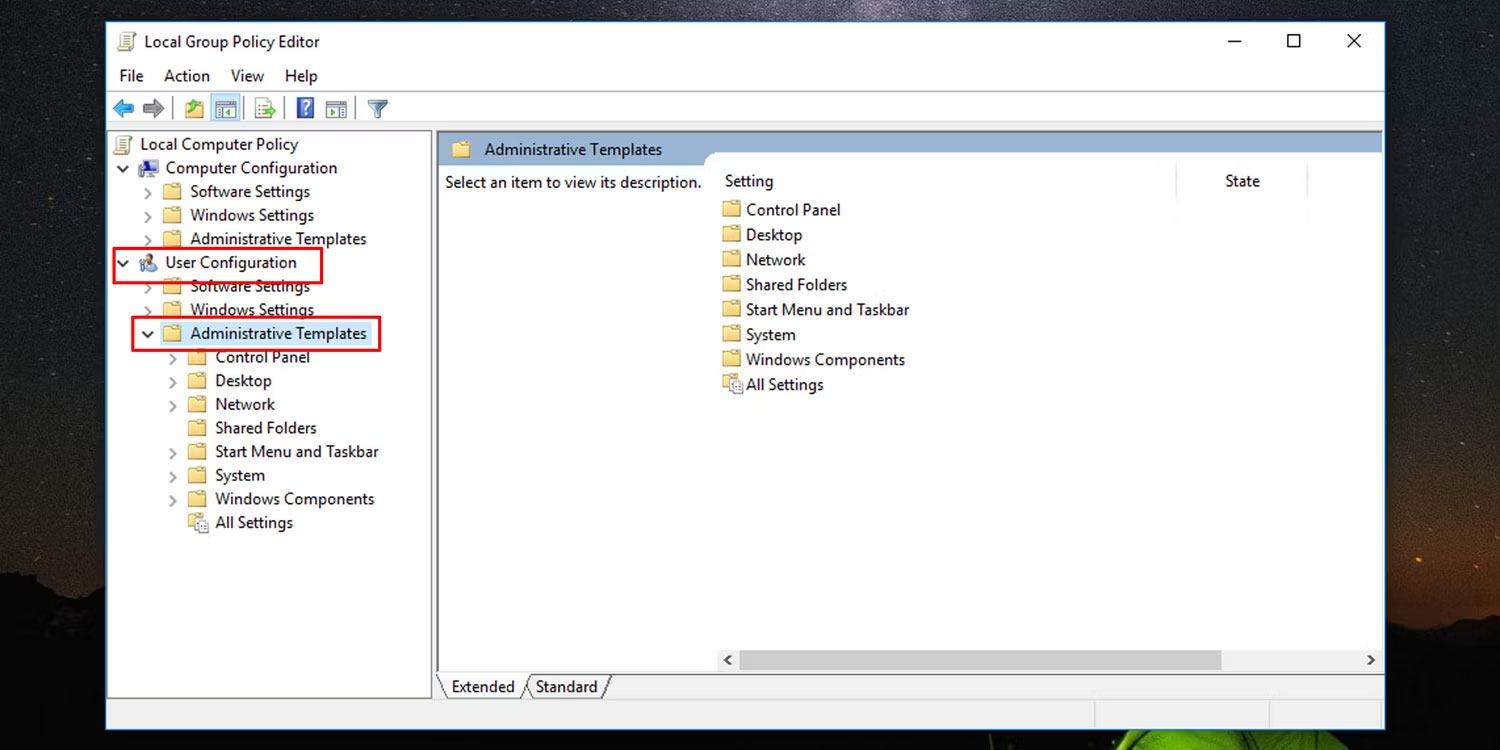
3. Trong bảng điều khiển bên trái của Local Group Policy Editor, bên dưới User Configuration, mở rộng Administrative Templates.
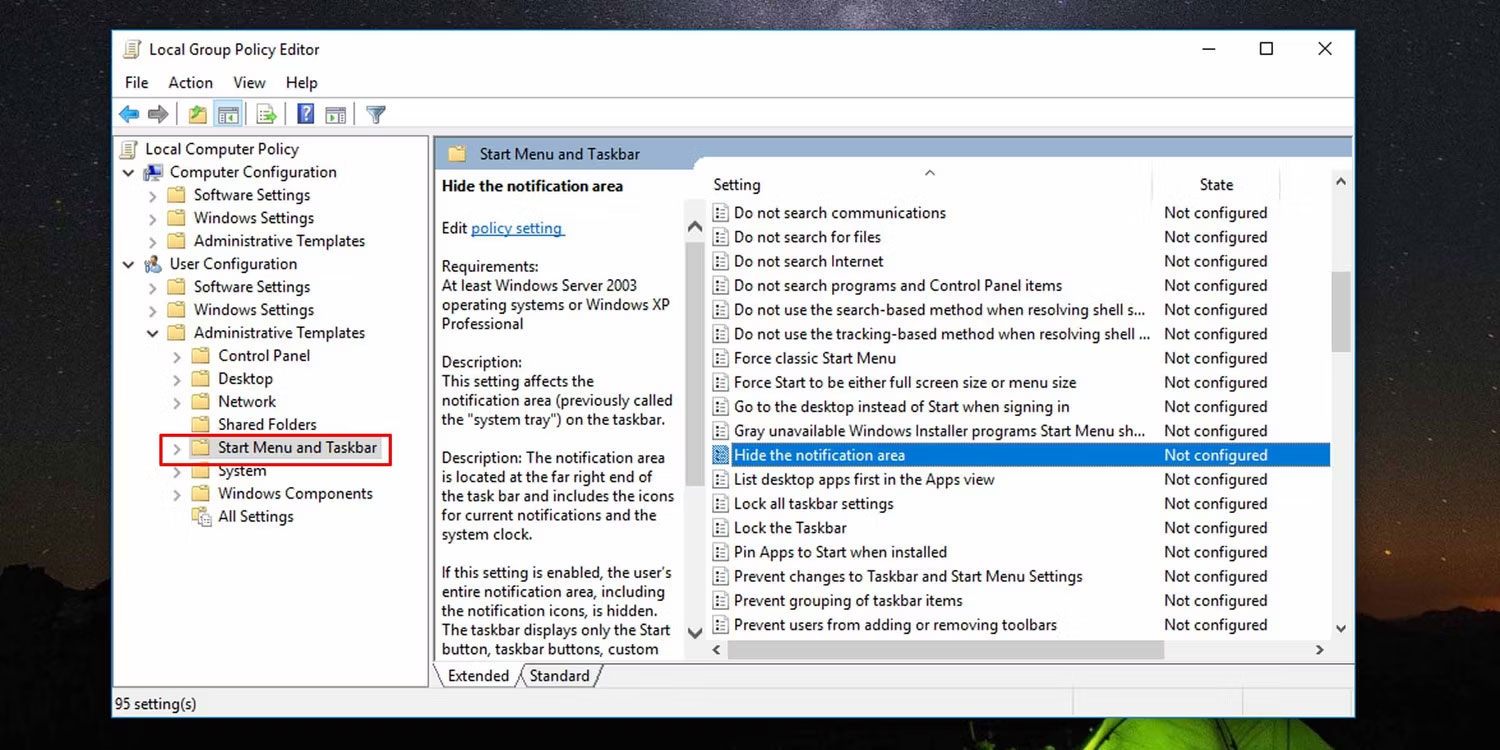
4. Nhấp vào Start Menu and Taskbar để mở cài đặt của nó.
5. Trong bảng bên phải, nhấp đúp vào Hide the notification area.
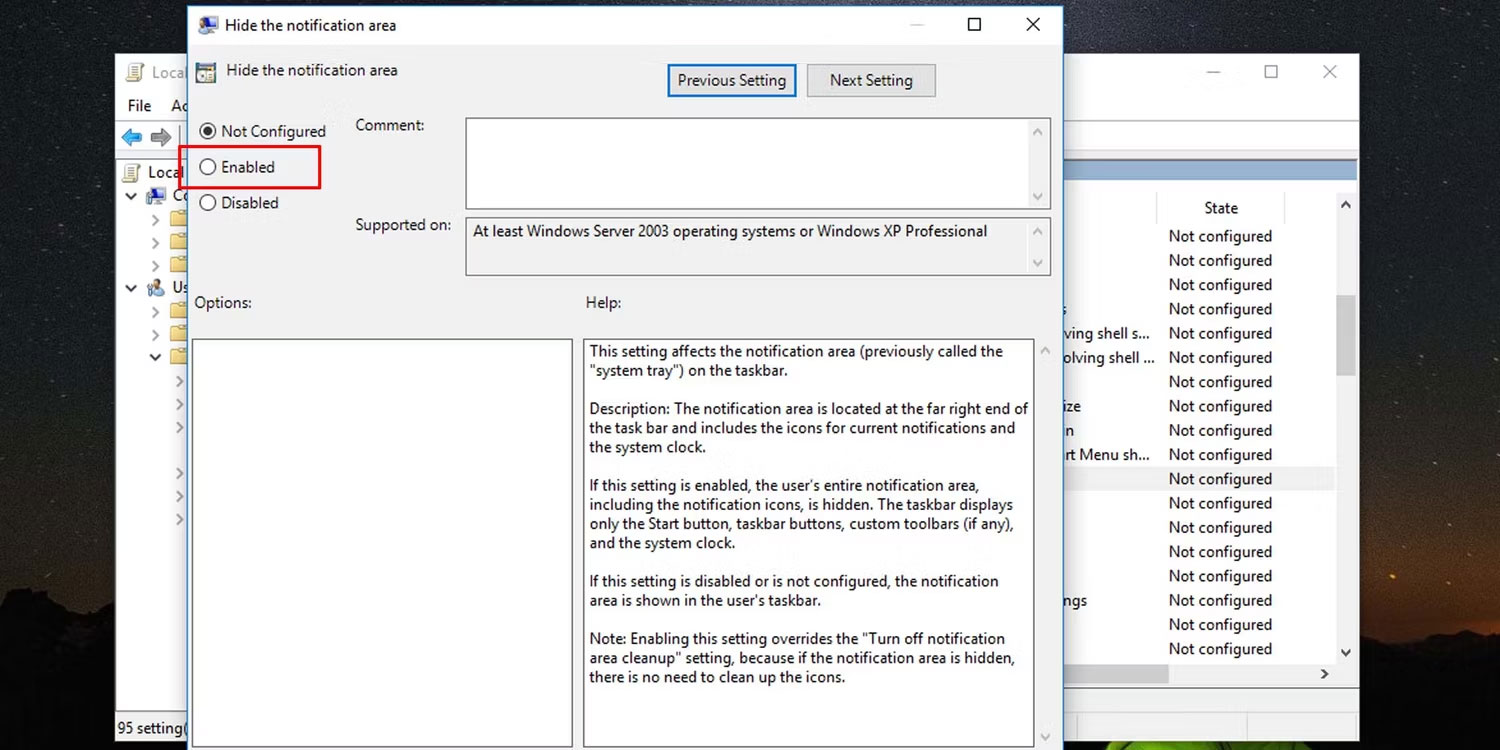
6. Chọn Enabled trong cửa sổ mở ra và nhấp vào OK để ẩn khu vực thông báo trên thanh tác vụ của Windows.
7. Nếu bạn muốn bỏ ẩn vùng thông báo trên thanh tác vụ, hãy chọn Not Configured ở bước 6.
Bạn sẽ cần khởi động lại File Explorer để các thay đổi có hiệu lực.
2. Sử dụng Local Group Policy cho một người dùng cụ thể
Bạn cũng có thể áp dụng thay đổi này cho một người dùng hoặc nhóm người dùng cụ thể. Để thực hiện việc này, trước tiên bạn cần thiết lập Local Group Policy cho (những) người dùng cụ thể.
Khi đã xong, nhấp đúp vào file được tạo để sửa đổi Local Group Policy cho một người dùng cụ thể để mở bảng điều khiển cho người dùng hoặc nhóm đó và làm theo các bước từ 3 đến 7 được liệt kê ở trên để ẩn hoặc bỏ ẩn khu vực thông báo trong Windows.
3. Sử dụng Registry Editor
Registry Editor là một công cụ mạnh mẽ mà bạn có thể sử dụng để khiến Windows hoạt động theo cách bạn muốn. Đây là cách ẩn khu vực thông báo bằng cách chỉnh sửa Windows Registry.
2. Thực hiện các bước từ 3 đến 6 cho mỗi thư mục sau trong registry:
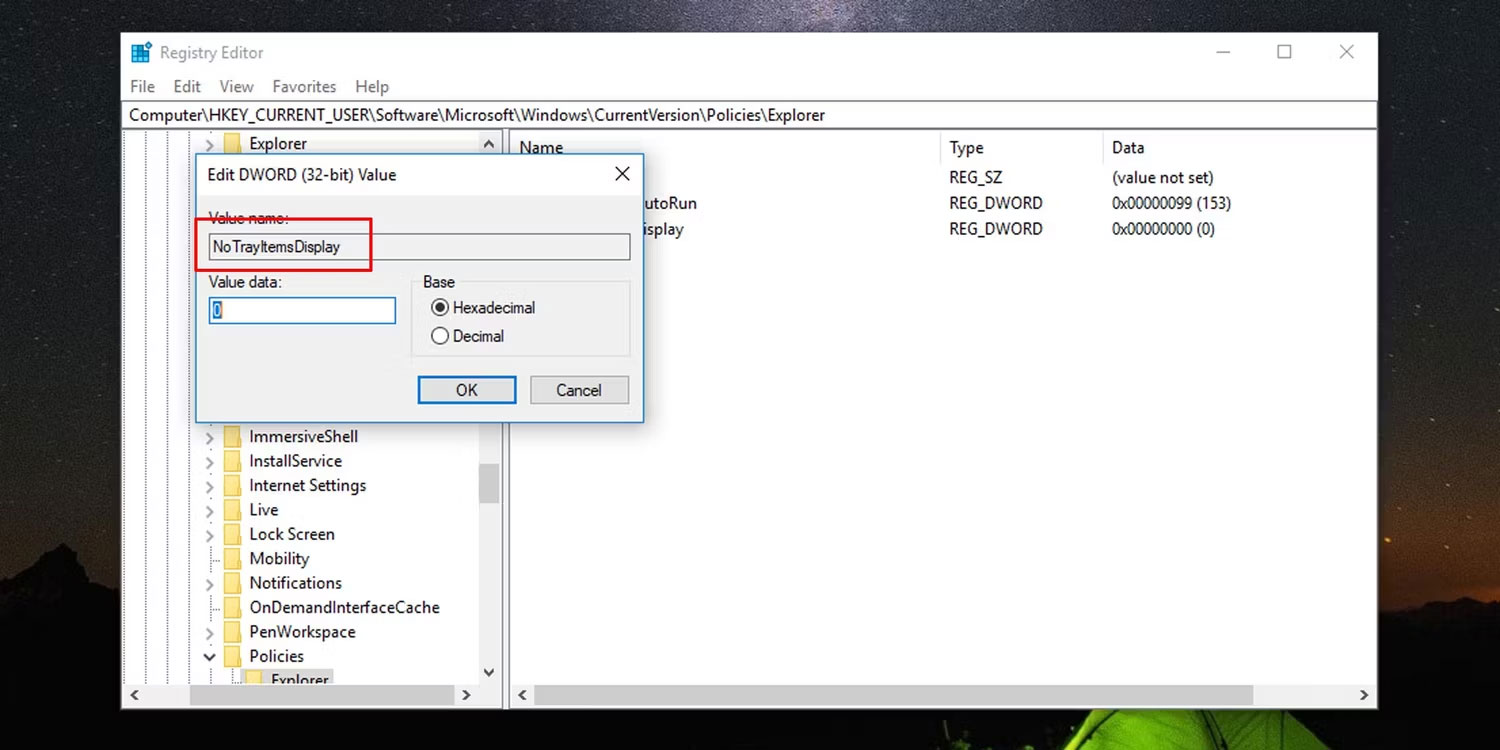
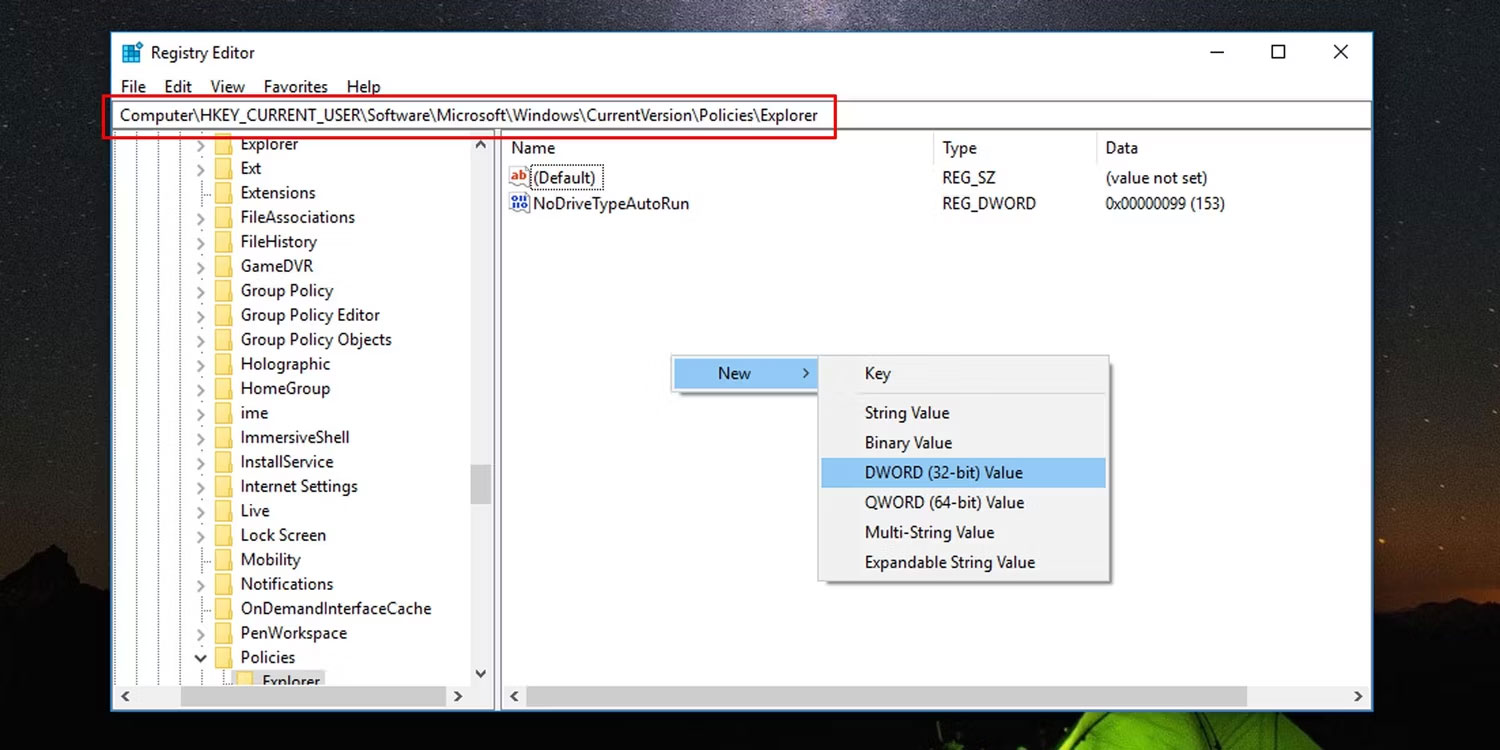
HKEY_CURRENT_USER\Software\Microsoft\Windows\CurrentVersion\Policies\Explorer
HKEY_LOCAL_MACHINE\SOFTWARE\Microsoft\Windows\CurrentVersion\Policies\Explorer
3. Để ẩn khu vực thông báo trên thanh tác vụ trong Windows, nhấp chuột phải vào khoảng đen trên bảng điều khiển bên phải và chọn New > DWORD.
4. Đổi tên nó thành NoTrayItemsDisplay.
5. Nhấp đúp vào DWORD mới tạo này và đặt giá trị của nó thành “1”.
6. Để hiển thị hoặc bỏ ẩn khu vực thông báo trong Windows, hãy xóa DWORD tại mỗi vị trí của registry.
