Cách thoát khỏi quảng cáo trên thiết bị Windows 11
- Thứ bảy - 13/07/2024 02:32
- In ra
- Đóng cửa sổ này
Microsoft đã thực hiện rất nhiều thay đổi đối với Windows 11, nhưng đáng tiếc là quảng cáo vẫn còn hiện diện. Ngoài những quảng cáo thông thường, Microsoft còn bổ sung thêm nhiều quảng cáo khác vào hệ điều hành mới thông qua những gợi ý, khuyến nghị, thủ thuật và trực tiếp trên giao diện người dùng.
Tuy nhiên, điều này không có nghĩa là bạn nên sống chung với chúng và để mình trở thành mục tiêu quảng cáo. Rất may, Microsoft cho phép người dùng tắt quảng cáo khỏi Windows 11, nhưng quá trình này không đơn giản. Đây là những cách khác nhau để xóa quảng cáo trên thiết bị Windows 11.
Cách xóa quảng cáo khỏi menu Start Windows 11
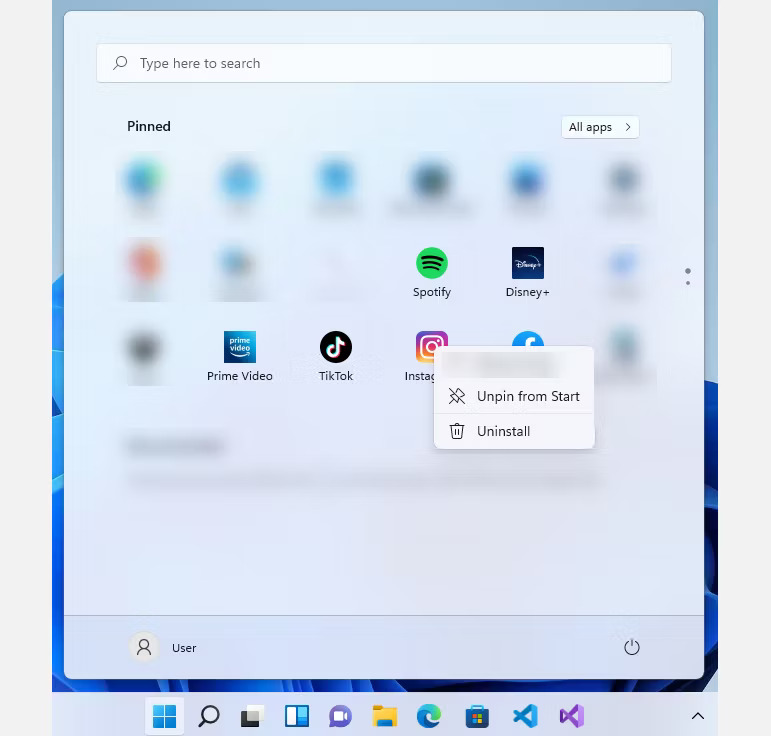
Giống như phiên bản trước, Windows 11 quảng bá nhiều ứng dụng khác nhau trong menu Start. Các ứng dụng này vốn không phải là một phần của hệ điều hành nhưng khi cài đặt Windows 11 hoặc mua thiết bị chạy hệ điều hành này, Microsoft thêm chúng vào máy tính mà không cần sự chấp thuận của bạn. Bạn sẽ thấy chúng được cài đặt trong menu Start.
Một số ứng dụng trong quảng cáo này được cài đặt trên máy tính, trong khi những ứng dụng khác chỉ là shortcut đến trang tải xuống trong cửa hàng Microsoft. Thật không may, một số người thậm chí sẽ không chú ý đến chúng và những ứng dụng này đang ngốn một phần dung lượng lưu trữ quý giá trên Windows. Nếu muốn loại bỏ các ứng dụng được quảng cáo trên Windows 11, hãy làm theo các bước dưới đây:
- Mở menu Start bằng cách nhấp vào biểu tượng Start hoặc nhấn phím Windows.
- Xác định vị trí ứng dụng muốn xóa, nhấp chuột phải vào chúng và nhấn Uninstall đối với các ứng dụng được cài đặt trong hệ thống hoặc nhấp vào Unpin nếu tùy chọn Uninstall không khả dụng.
Rất tiếc, không có cách nào để tự động xóa tất cả ứng dụng được quảng cáo cùng một lúc. Đồng thời, Microsoft không có danh sách tất cả các phần mềm mà họ quảng cáo. Đôi khi, họ cũng có thể thay đổi chúng tùy thuộc vào hợp đồng quảng cáo với nhà phát triển ứng dụng.
Cách chặn quảng cáo từ màn hình khóa Windows 11
Một vị trí khác sẽ thấy quảng cáo trên thiết bị Windows 11 là màn hình khóa. Microsoft có thể gọi chúng là “mẹo, thủ thuật, v.v...” nhưng về cơ bản chúng chỉ là những quảng cáo trá hình. Đây là cách để xóa chúng khỏi màn hình khóa:
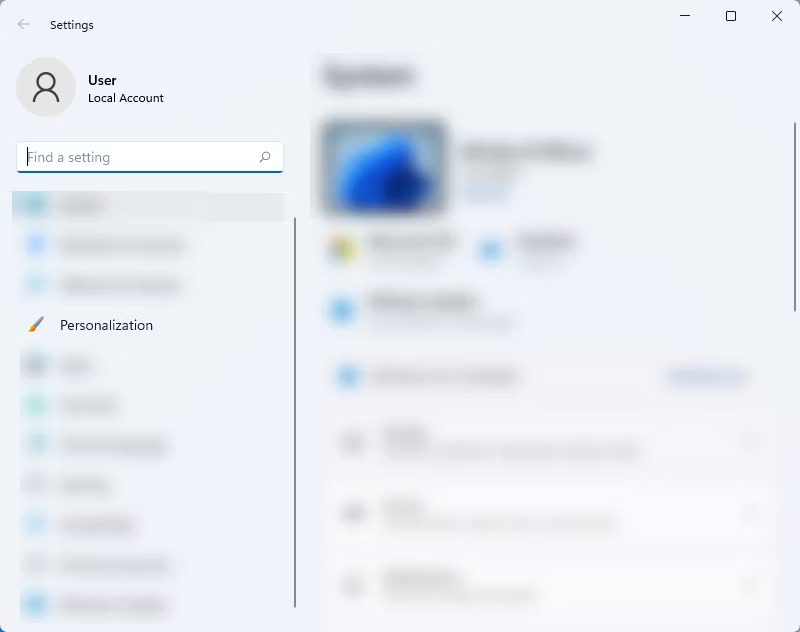
1. Nhấn Win + I để mở Settings.
2. Ở phần điều hướng bên trái của Settings, nhấp vào Personalization.
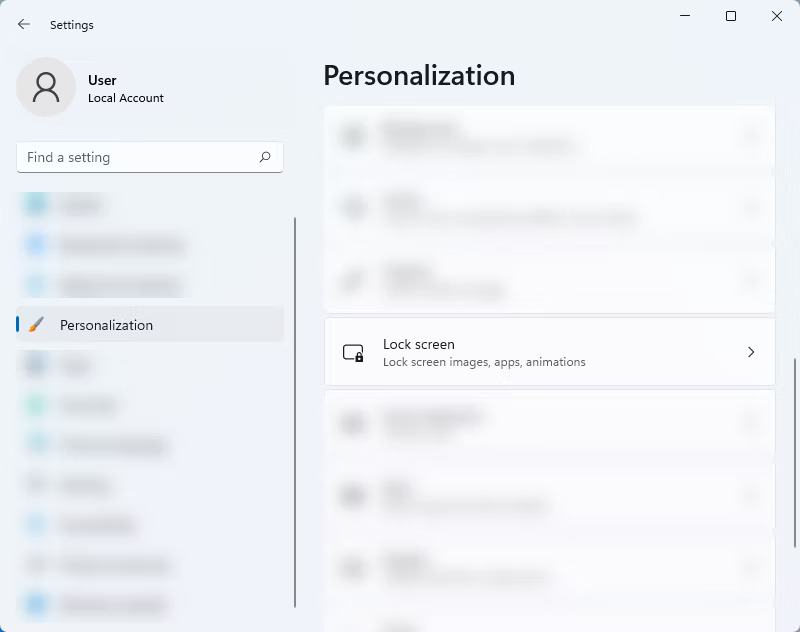
3. Trong phần Personalization, hãy nhấp vào Lock screen.
4. Trên cài đặt Lock screen, bỏ chọn hộp bên cạnh Get fun facts, tips, tricks, and more on your lock screen.
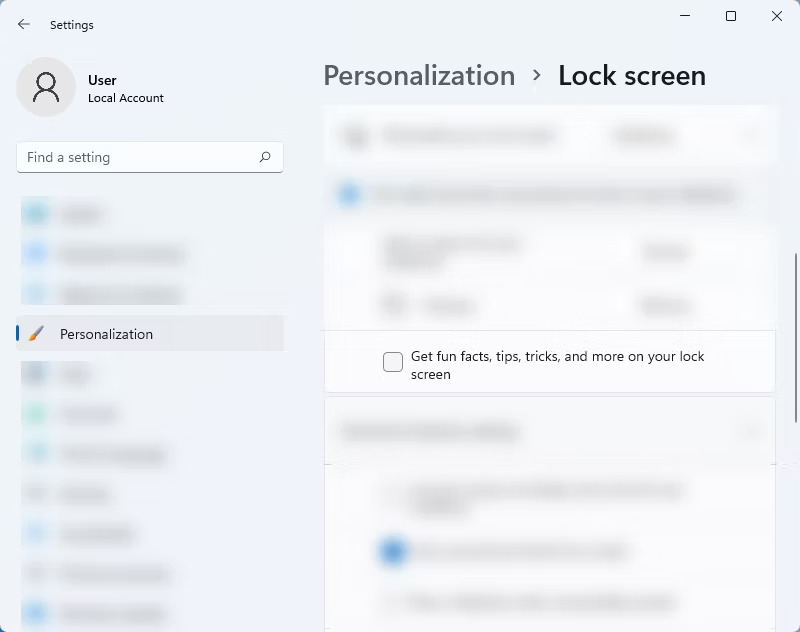
Lưu ý: Chỉ có thể tắt quảng cáo trên màn hình khóa Windows 11 nếu đang sử dụng Picture hoặc Slideshow cho nó. Tuy nhiên, nếu màn hình khóa được đặt thành Windows Spotlight, sẽ không có cách nào chặn quảng cáo trên đó.
Cách tắt quảng cáo hiển thị trong Notifications Windows 11
Ngoài màn hình khóa và menu Start, quảng cáo cũng được đặt một cách chiến lược trong Notifications Windows 11 và nhiều nơi khác nhau như Action Center, Taskbar, ứng dụng mặc định, v.v... Những quảng cáo này được hiển thị dưới dạng “gợi ý” và “mẹo” khi sử dụng máy tính hoặc thậm chí khi cấu hình một số cài đặt.
Nếu không muốn nhìn thấy “đề xuất” và “mẹo” ở những nơi khác nhau trong hệ thống, hãy làm theo các bước sau:
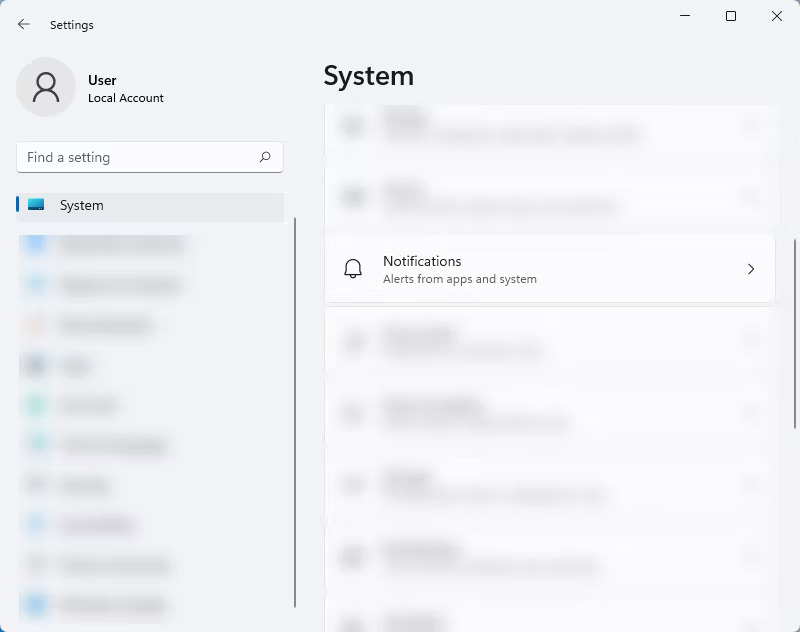
1. Mở Settings bằng cách nhấn Win + I.
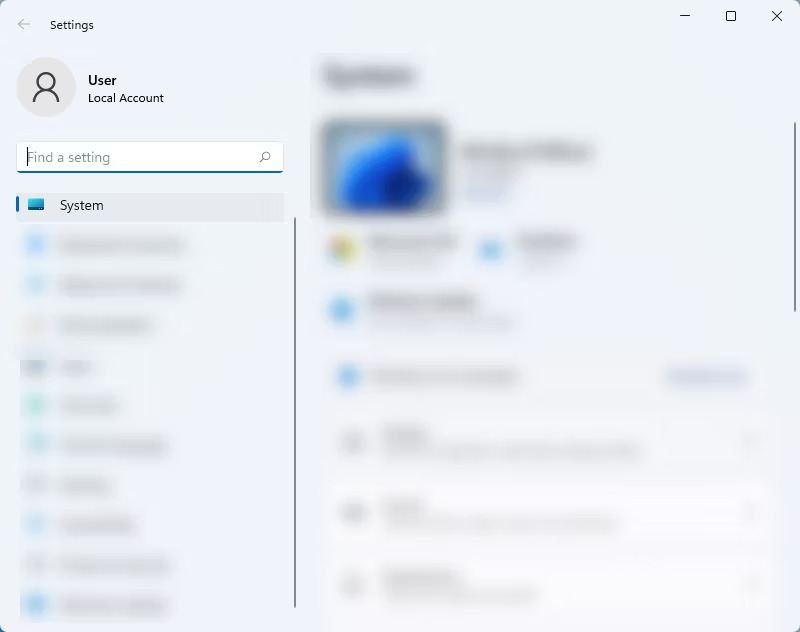
2. Trên menu bên trái của trang Settings, chọn System.
3. Trong System, nhấp vào Notifications.
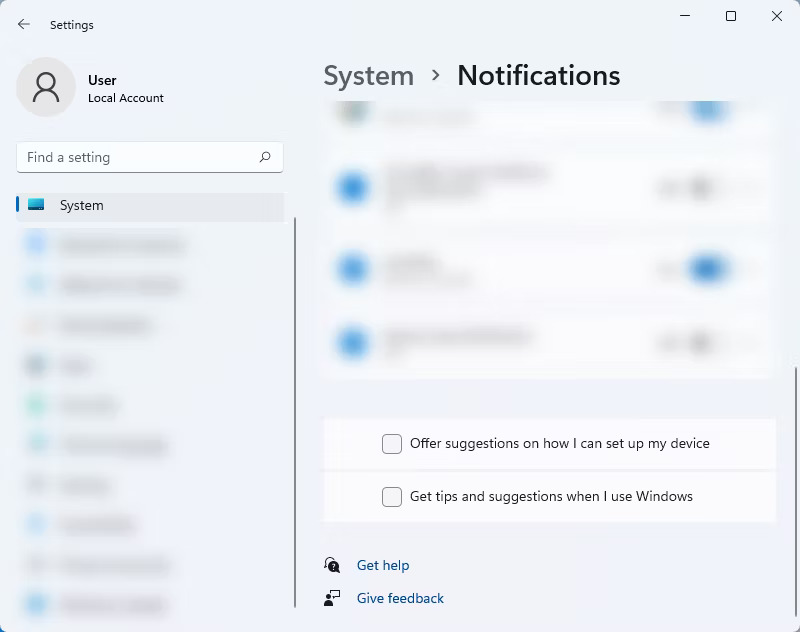
4. Trên cài đặt Notifications, cuộn xuống phía dưới và tắt Offer suggestions on how I can set up my device và Get tips and suggestions when I use Windows. Điều này sẽ loại bỏ các quảng cáo xâm nhập trong hệ thống.
Cách xóa quảng cáo khỏi Settings Windows 11
Bạn có thể ngạc nhiên với số lượng quảng cáo mà Microsoft đang đưa ra trong Windows 11. Ngoài những quảng cáo được đề cập ở trên, ứng dụng Settings là một vị trí khác dành cho quảng cáo trên thiết bị Windows 11. Mặc dù chưa có quảng cáo nào được đặt trên ứng dụng Settings nhưng có một tùy chọn trong đó gợi ý rằng Microsoft sẽ triển khai quảng cáo trong ứng dụng vào một thời điểm nào đó.
Dưới đây là cách xóa quảng cáo trong cửa sổ Settings của Windows 11:
1. Để mở Settings, nhấn Win + I.
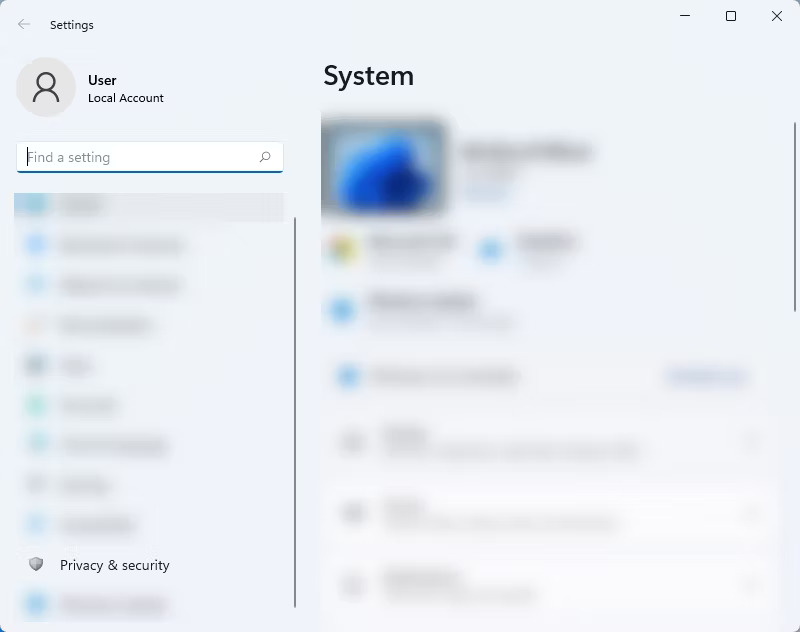
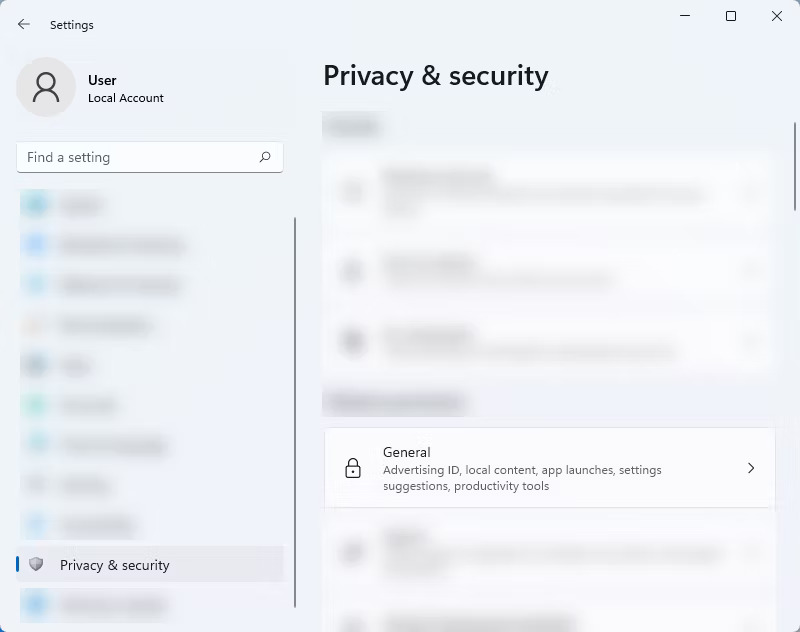
2. Trên thanh bên trái, nhấp vào Privacy & security.
3. Sau đó, chọn General từ cài đặt Private & security.
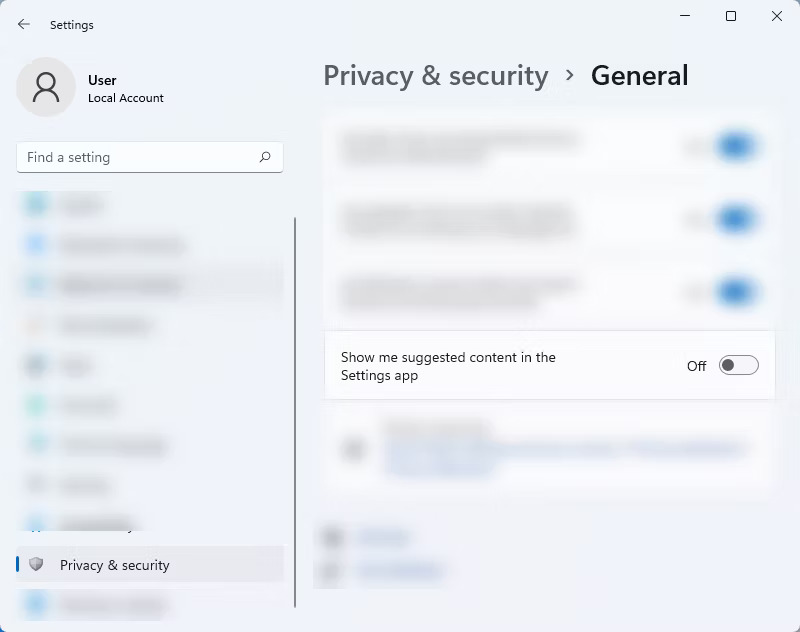
4. Trong phần General, hãy tìm Show me suggested content in the Settings app và tắt nút chuyển đổi.
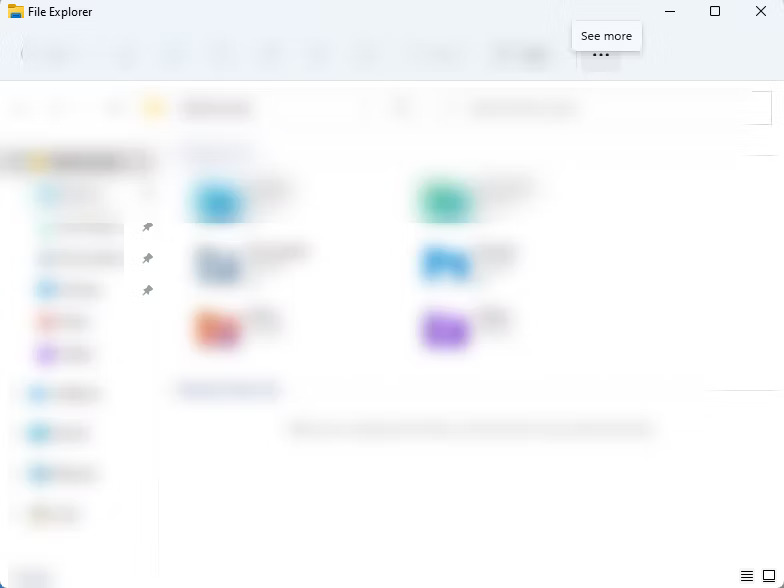
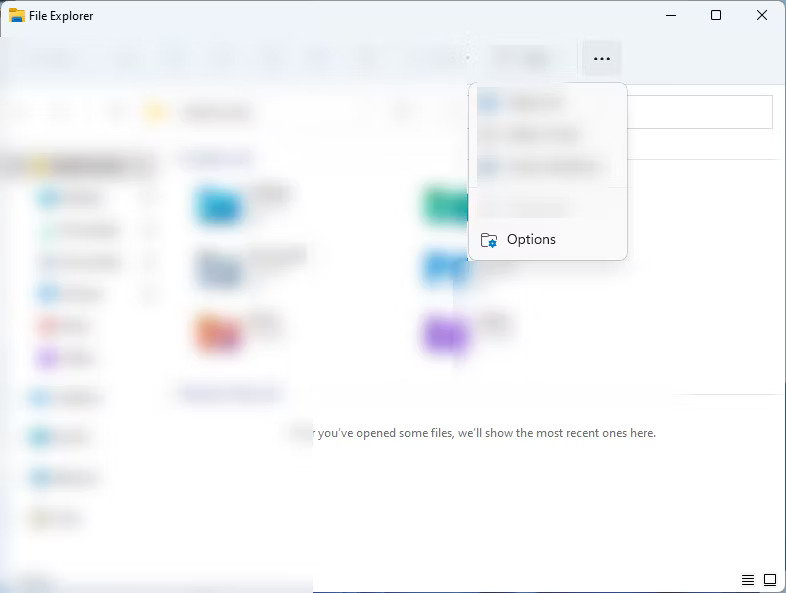
Cách tắt quảng cáo trong Windows 11 File Explorer
Giống như Windows 10, Windows 11 File Explorer cũng là một không gian quảng cáo. Thật không may, thật khó để thoát khỏi tất cả những quảng cáo này, đặc biệt là khi chúng được đặt ở những vị trí mà bạn ít mong đợi nhất. Nhưng đừng lo lắng, bạn có thể vô hiệu hóa chúng một cách dễ dàng. Đây là cách thực hiện:
1. Truy cập cửa sổ File Explorer.
2. Sau đó, nhấp vào ba dấu chấm nằm ở cuối bên phải của menu trên cùng.

3. Tiếp theo, chọn Options từ menu drop-down.

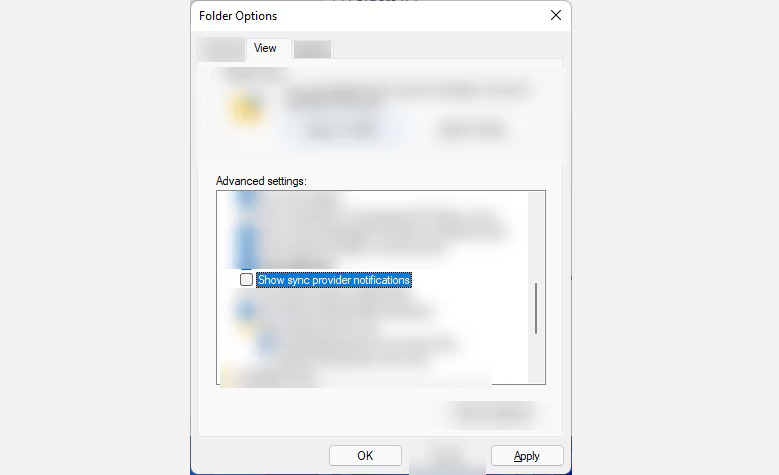
4. Trên cửa sổ pop-up Folder Options, nhấp vào tab View.

5. Trong phần View, bỏ chọn tùy chọn Show sync provider notifications, nhấn Apply > OK.
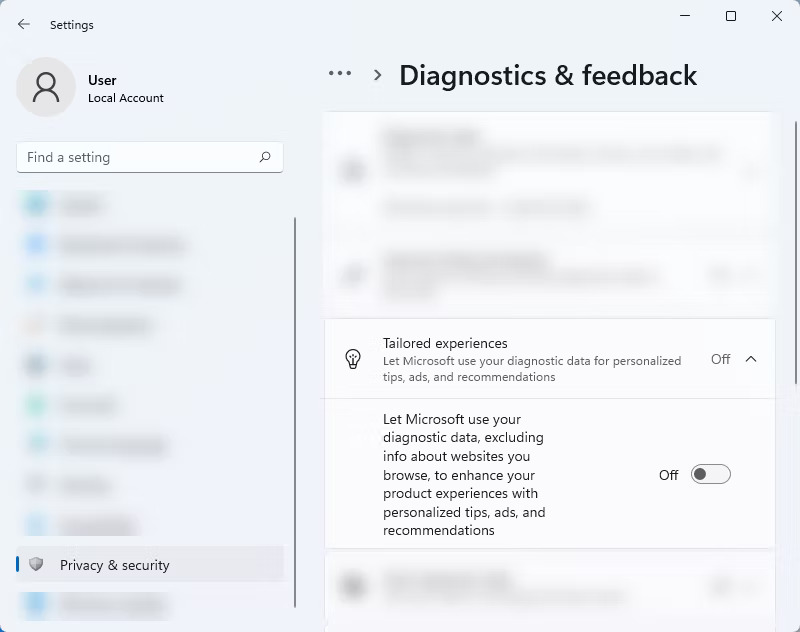
Cách ngăn Microsoft sử dụng dữ liệu chẩn đoán để gửi quảng cáo cho bạn
Microsoft sẽ phân tích dữ liệu chẩn đoán và gửi các quảng cáo được tùy chỉnh cho phù hợp với profile cá nhân này cho bạn. Dữ liệu chẩn đoán bao gồm các chi tiết về thiết bị, cài đặt và khả năng cũng như hiệu suất hiện tại của thiết bị. Đó là lý do tại sao trong một số trường hợp, một số quảng cáo bạn nhìn thấy có liên quan đến tình trạng hiện tại của thiết bị.
Để ngăn Windows 11 làm như vậy, hãy làm theo các bước sau:
1. Mở Settings bằng cách nhấn Win + I hoặc nhấn Start > Settings.
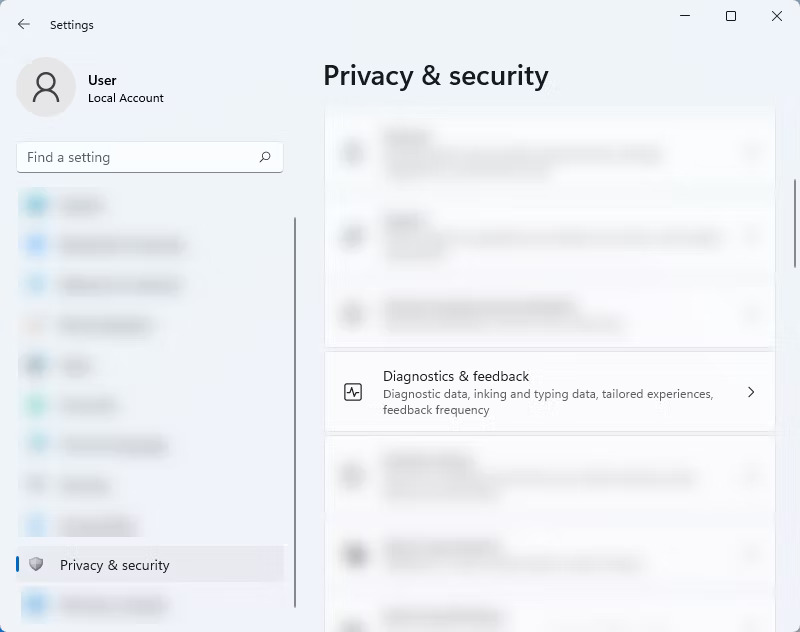
2. Trong Settings, chọn Privacy & security ở menu bên trái.

3. Từ trang này, hãy nhấp vào Diagnostics & feedback.
4. Sau đó, trong menu drop-down Tailored experiences, hãy tắt nút Let Microsoft use your diagnostic data, excluding info about websites you browse, to enhance your product experiences with personalized tips, ads, and recommendations.
Cách tắt quảng cáo trong Windows 11 File Explorer
Giống như Windows 10, Windows 11 File Explorer cũng là một không gian quảng cáo. Thật không may, rất khó để thoát khỏi tất cả những quảng cáo này, đặc biệt là khi chúng được đặt ở những vị trí mà bạn ít mong đợi nhất. Nhưng đừng lo lắng, bạn có thể vô hiệu hóa chúng một cách dễ dàng. Đây là cách thực hiện:
1. Trên cửa sổ File Explorer.
2. Sau đó, nhấp vào ba dấu chấm (xem thêm) nằm ở cuối bên phải của menu trên cùng.
3. Tiếp theo, chọn Options từ menu drop-down.
4. Trên cửa sổ pop-up Folder Options, nhấp vào tab View.

5. Trong phần View, bỏ chọn tùy chọn Show sync provider notifications, nhấn Apply > OK.

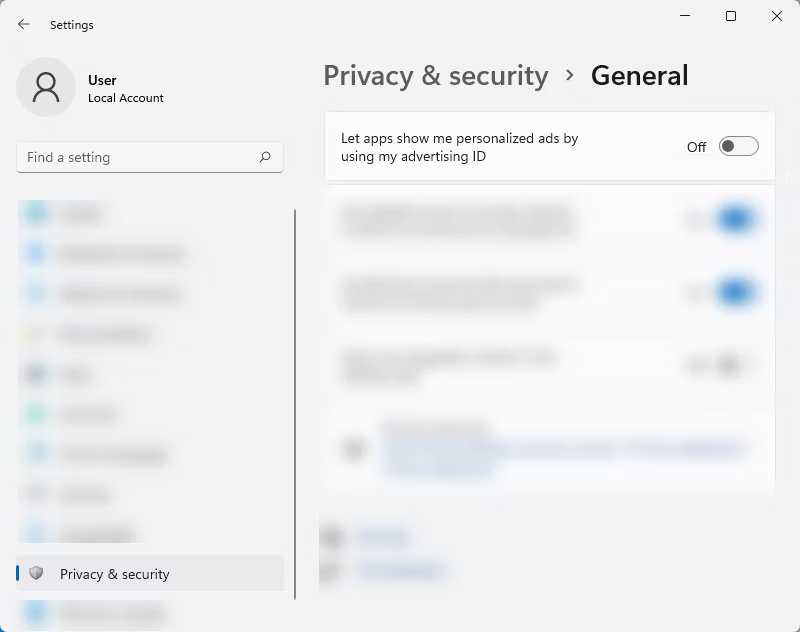
Cách ngăn Microsoft hiển thị quảng cáo được cá nhân hóa
Nếu bạn muốn tăng cường quyền riêng tư của mình hơn nữa và ngăn Microsoft sử dụng dữ liệu của bạn để gửi quảng cáo được cá nhân hóa, bạn có tùy chọn tắt tính năng này. Quảng cáo được cá nhân hóa có thể có hại vì nó chứa những thứ bạn quan tâm, thôi thúc bạn nhấp vào chúng. Tuy nhiên, một số người dùng thấy những quảng cáo này có lợi vì nó có thể giúp họ tránh những thứ họ không cần. Lựa chọn tùy vào mỗi người.
Nếu bạn muốn ngăn Microsoft tạo profile quảng cáo được cá nhân hóa, hãy làm theo các bước sau:
1. Mở Settings bằng cách nhấn Win + I.
2. Trên menu bên trái của trang Settings, chọn Privacy & security.

3. Trong System, nhấp vào General.

4. Từ trang General, hãy tắt tùy chọn Let apps show me personalized ads by using my advertising ID.
Mặc dù những quảng cáo này được mong đợi từ phiên bản Windows mới nhất, nhưng vẫn đáng ngạc nhiên là hầu hết những quảng cáo này đều được đặt ở nơi mà chúng ta ít mong đợi nhất. Nhưng đừng lo lắng, sau khi làm theo tất cả các phương pháp trên, bạn sẽ có trải nghiệm Windows 11 gần như không có quảng cáo. Tuy nhiên, hãy nhớ rằng bạn vẫn sẽ thấy quảng cáo trên máy tính nếu bạn đang sử dụng các ứng dụng và chương trình của bên thứ ba. Bạn vẫn cần chặn chúng theo cách thủ công để có trải nghiệm Internet thực sự không có quảng cáo.
