Cách thêm các mục vào menu ngữ cảnh "Create New" trong Windows 10
- Thứ ba - 02/08/2022 00:58
- In ra
- Đóng cửa sổ này
Ảnh tài khoản người dùng là ảnh profile mà bạn thấy trên màn hình đăng nhập Windows 11, menu Start và trong Settings. Ảnh tài khoản có thể là bất kỳ hình ảnh nào bạn muốn.
Nhiều người dùng muốn dùng ảnh của chính họ hoặc hình ảnh yêu thích làm ảnh ảnh tài khoản. Nếu bạn muốn làm điều tương tự, đây là cách bạn có thể thay đổi hình ảnh tài khoản người dùng cho cả tài khoản Windows cục bộ và tài khoản Microsoft trên Windows 11.
Cách thay đổi ảnh tài khoản người dùng đối với tài khoản cục bộ
Nếu bạn đăng nhập vào Windows 11 mà không có tài khoản Microsoft, thì tài khoản người dùng của bạn là tài khoản cục bộ. Tài khoản đó sẽ có ảnh profile chung mặc định của Windows 11 trừ khi bạn chọn thêm hình ảnh tùy chỉnh. Bạn có thể thay đổi hình ảnh tài khoản người dùng của mình trong Settings như sau:
1. Đầu tiên, thêm hình ảnh profile tài khoản phù hợp vào một thư mục trên PC.
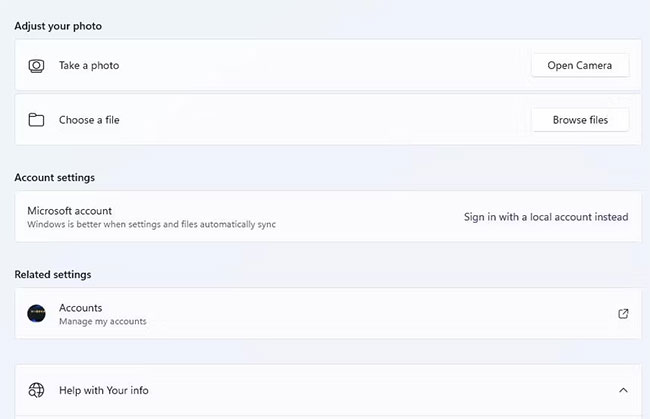
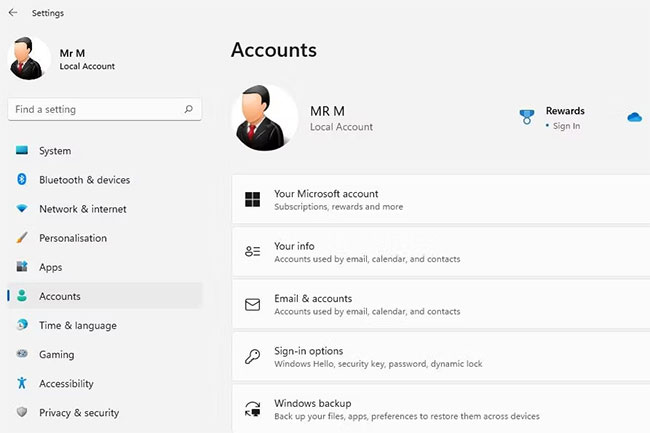
2. Khởi chạy Settings (nhấn Win + I) và chọn tab Accounts.
3. Nhấp vào Your info để xem các tùy chọn tài khoản.
4. Nhấn nút Browse files.
5. Sau đó, chọn hình ảnh tài khoản từ thư mục bạn đã lưu nó.
6. Nhấp vào tùy chọn Choose picture.
Bây giờ, bạn sẽ thấy ngay hình ảnh tài khoản người dùng mới được chọn trong Settings và trên menu Start. Đăng xuất khỏi Windows để xem nó trên màn hình đăng nhập. Lưu ý rằng việc chọn ảnh profile mới qua Settings cũng sẽ thay đổi ảnh tài khoản Microsoft của bạn, nếu bạn đăng nhập vào Windows bằng tài khoản MS.
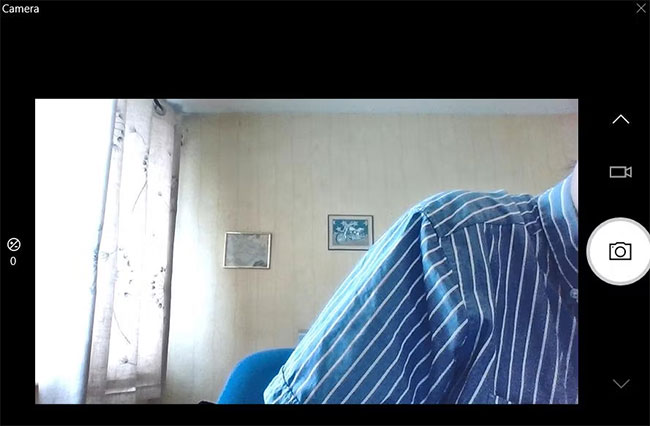
Ngoài ra, bạn có thể chọn chụp ảnh chính mình làm ảnh tài khoản bằng camera của PC. Nhấn nút Open Camera sẽ hiển thị ứng dụng cài sẵn của Windows 11 để chụp ảnh. Sau đó nhấn tùy chọn Take Photo trong camera và chọn Done để áp dụng các thay đổi.
Cách thay đổi ảnh tài khoản người dùng cho tài khoản Microsoft
Windows 11 hiển thị ảnh tài khoản Microsoft của người dùng cho những người đăng nhập bằng tài khoản MS của họ. Những người dùng đó có thể thay đổi ảnh profile người dùng Windows của họ thông qua cài đặt tài khoản MS. Ảnh profile bạn chọn cho tài khoản MS của mình sẽ hiển thị trong tất cả các ứng dụng được sử dụng với nó.
Dưới đây là cách thay đổi ảnh profile người dùng của PC trong tài khoản Microsoft:
1. Lưu file hình ảnh người dùng trên PC hoặc chụp một file bằng ứng dụng Camera.
2. Mở trang tài khoản Microsoft trong trình duyệt web.
3. Đăng nhập vào tài khoản Microsoft của bạn nếu chưa thực hiện.
4. Sau đó nhấp vào liên kết Your info ở đầu trang.
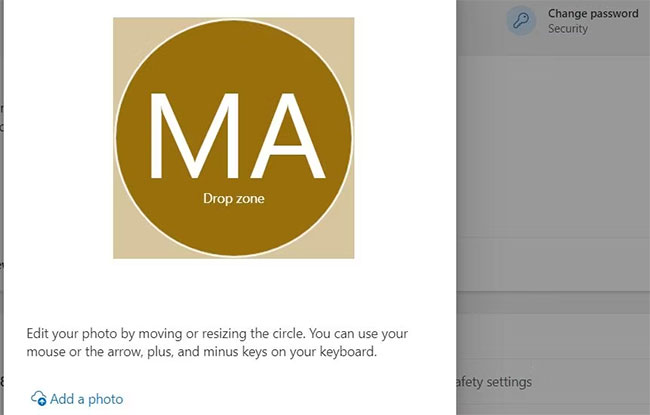
5. Nhấp vào nút Add a Photo.
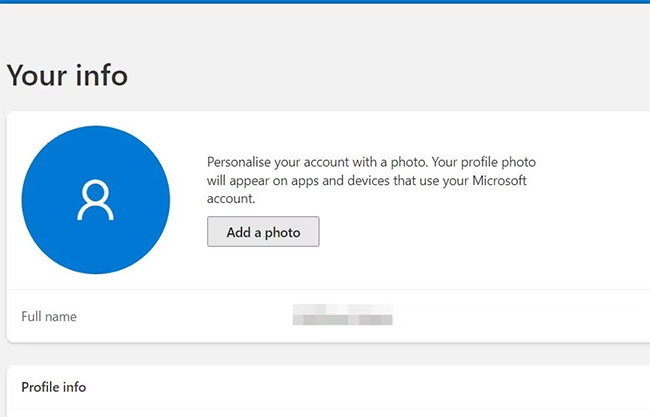
6. Chọn tùy chọn Add a Photo.
7. Sau đó, chọn hình ảnh cho tài khoản Microsoft của bạn trong thư mục bạn đã lưu.
8. Nhấp vào Open trong cửa sổ điều hướng thư mục.
9. Kéo hình ảnh vào vị trí trong vòng tròn của hộp preview.
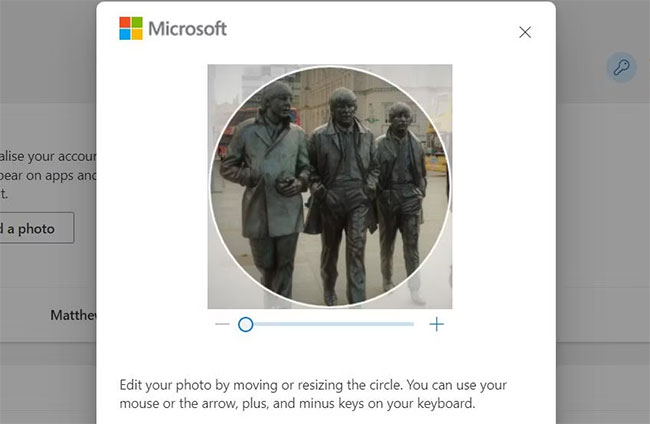
10. Nhấp vào nút - và + để phóng to hoặc thu nhỏ ảnh.
11. Nhấn Save để thêm hình ảnh mới.
Cách thay đổi ảnh tài khoản người dùng mặc định của Windows 11
Khi chưa đặt bất kỳ hình ảnh tài khoản người dùng cục bộ tùy chỉnh nào, bạn sẽ thấy ảnh profile hình đại diện trống mặc định trong Windows 11. Tuy nhiên, bạn có thể thay đổi hình ảnh tài khoản mặc định của Windows 11 thành một hình ảnh khác mà bạn chọn. Không có bất kỳ tùy chọn tích hợp nào có sẵn để thay đổi nó, nhưng bạn có thể thay đổi hình ảnh mặc định trong thư mục User Accounts Pictures. Sau đó, Windows sẽ hiển thị ảnh tài khoản người dùng mặc định mới trong thư mục đó.
Trước tiên, bạn sẽ cần một ảnh profile thay thế để thêm vào thư mục đó. Bạn có thể tìm thấy rất nhiều hình ảnh phù hợp trên trang web IconArchive. Nhập hình ảnh tài khoản người dùng vào hộp tìm kiếm ở đó, sau đó chọn một hình ảnh profile thay thế; nhấp vào tùy chọn Download PNG và nhấp chuột phải vào hình ảnh để chọn Save As. Chọn một thư mục cho hình ảnh và nhấp vào Save để tải xuống.

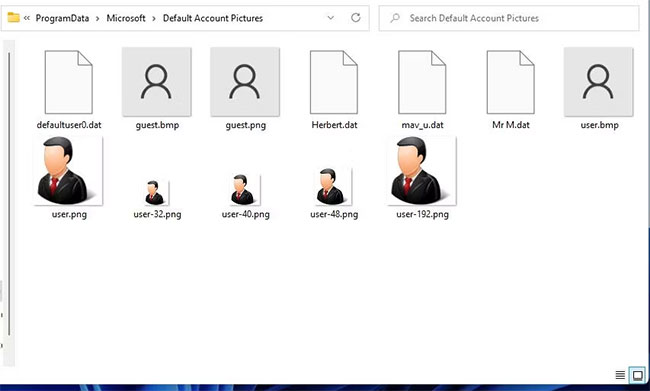
Ảnh profile được tải xuống từ IconArchive sẽ có kích thước mặc định 256 x 256 tính bằng pixel. Bạn sẽ cần tạo 5 bản sao đã thay đổi kích thước của hình ảnh đó với các kích thước khác nhau. Những hình ảnh đó phải được thay đổi kích thước, cũng như lưu với các kích thước pixel và tên file sau:
- user-32.png – 32 x 32
- user-40.png – 40 x 40
- user-48.png – 48 x 48
- user-192.png – 192 x 192
- user.png – 448 x 448
Bạn có thể thay đổi kích thước ảnh profile bằng ứng dụng MS Paint của Windows 11. Hướng dẫn thay đổi kích thước ảnh trong Microsoft Paint bao gồm hướng dẫn đầy đủ về cách thực hiện. Khi đã thay đổi ảnh thành kích thước phù hợp, hãy nhấp vào File > Save as > PNG Picture. Sau đó, nhập tên file cho kích thước được chỉ định trong danh sách ở trên, chọn một thư mục và nhấp vào tùy chọn Save.
Sau khi đã hoàn thành tất cả những điều đó, bạn sẽ cần di chuyển các file PNG đó vào thư mục User Account Pictures. Bạn cũng sẽ cần di chuyển các file PNG gốc sang một thư mục khác nếu bạn muốn giữ chúng. Đây là cách bạn có thể di chuyển các file PNG vào thư mục đó để thay đổi ảnh tài khoản người dùng mặc định:
1. Để mở trình quản lý file của Windows 11, hãy nhấn vào nút có biểu tượng thư mục trên thanh tác vụ.
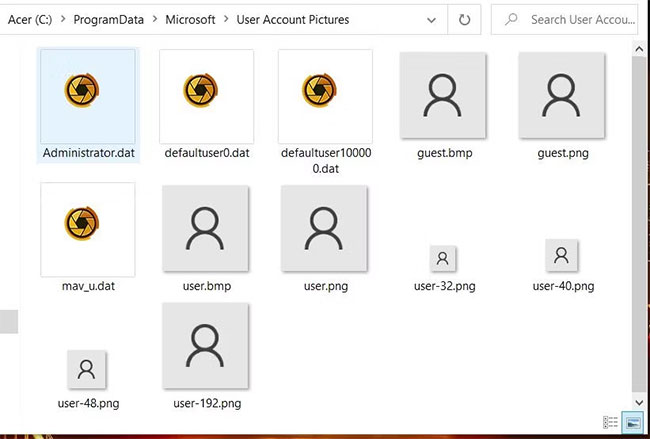
2. Tiếp theo, mở thư mục C:\ProgramData\Microsoft\User Account Pictures được hiển thị ngay bên dưới bằng cách nhập đường dẫn đó vào thanh địa chỉ của Explorer.
3. Di chuyển các file user-40.png, user-48.png, user-32.png, user.png và user-192.png ra khỏi thư mục đó bằng cách nhấp chuột trái vào chúng và kéo chúng vào thư mục Pictures trên thanh bên của Explorer .
4. Sau đó, kéo và thả file ảnh PNG user-32, user-40, user-48, user-192 và user mới mà bạn đã thiết lập trong Paint vào thư mục User Account Pictures.
5. Khởi động lại Windows 11 để áp dụng thay đổi.
Giờ đây, bạn sẽ thấy ảnh tài khoản người dùng mặc định mới của mình trên menu Start, trong Settings và các nơi khác trong Windows 11. Ảnh profile người dùng mặc định đó sẽ được áp dụng cho tất cả các tài khoản Windows trên PC mà không có bộ ảnh tùy chỉnh.
Bạn có thể khôi phục ảnh profile mặc định ban đầu bằng cách di chuyển ảnh mới bạn đã thêm ra khỏi thư mục User Account Pictures, hoặc xóa các file đó. Sau đó, di chuyển các file PNG gốc trở lại thư mục đó.
Một cách thay thế để lưu giữ các file profile gốc là thay đổi phần mở rộng của chúng thành BAK. Bạn có thể thay đổi các phần mở rộng đó bằng cách nhấp chuột phải vào chúng và chọn Rename. Lưu ý rằng tùy chọn phần mở rộng tên của File Explorer cũng cần được chọn để sửa đổi phần mở rộng. Các file sau khi thay đổi sẽ là:
- user-32.bak
- user-40.bak
- user-48.bak
- user-192.bak
- user.bak
Việc sửa đổi phần mở rộng của các file đó sẽ ngăn hình ảnh PNG mới ghi đè lên chúng khi được chuyển vào cùng một thư mục. Sau đó, bạn có thể khôi phục ảnh profile mặc định ban đầu bằng cách xóa ảnh mới trong thư mục User Account Pictures và thay đổi file BAK trở lại định dạng PNG.
Ngoài ra, bạn cũng có thể đổi ảnh tài khoản Windows 11 thành video hoạt hình.
Thay đổi ảnh tài khoản người dùng Windows thành ảnh bạn chọn bằng các phương pháp đó sẽ làm cho ảnh dễ nhận dạng hơn. Bạn sẽ ngay lập tức có thể nhận ra tài khoản của mình bằng một hình ảnh tùy chỉnh mà bạn đã thêm vào. Hình ảnh tùy chỉnh cũng sẽ mang lại cho tài khoản của bạn nét cá nhân hơn.
