<!DOCTYPE html>
    <html lang="vi" xmlns="http://www.w3.org/1999/xhtml" prefix="og: http://ogp.me/ns#">
    <head>
<title>Cách thay đổi biểu tượng mặc định trên Windows 10</title>
<meta name="description" content="Cách thay đổi biểu tượng mặc định trên Windows 10 - Savefile - Tin Tức -...">
<meta name="author" content=".: Nguoicodonvn2008.info - Cõi lòng người cô đơn :.">
<meta name="copyright" content=".: Nguoicodonvn2008.info - Cõi lòng người cô đơn :. [admin@nguoicodonvn2008.info]">
<meta name="robots" content="index, archive, follow, noodp">
<meta name="googlebot" content="index,archive,follow,noodp">
<meta name="msnbot" content="all,index,follow">
<meta name="generator" content="NukeViet v4.5">
<meta http-equiv="Content-Type" content="text/html; charset=utf-8">
<meta property="og:title" content="Cách thay đổi biểu tượng mặc định trên Windows 10">
<meta property="og:type" content="website">
<meta property="og:description" content="Savefile - Tin Tức - https&#x3A;&#x002F;&#x002F;www.nguoicodonvn2008.info&#x002F;vi&#x002F;news&#x002F;savefile&#x002F;kien-thuc-may-tinh&#x002F;cach-thay-doi-bieu-tuong-mac-dinh-tren-windows-10-2972.html">
<meta property="og:site_name" content=".&#x3A; Nguoicodonvn2008.info - Cõi lòng người cô đơn &#x3A;.">
<meta property="og:url" content="https://www.nguoicodonvn2008.info/vi/news/savefile/kien-thuc-may-tinh/cach-thay-doi-bieu-tuong-mac-dinh-tren-windows-10-2972.html">
<link rel="shortcut icon" href="https://www.nguoicodonvn2008.info/favicon.ico">
<link rel="canonical" href="https://www.nguoicodonvn2008.info/vi/news/savefile/kien-thuc-may-tinh/cach-thay-doi-bieu-tuong-mac-dinh-tren-windows-10-2972.html">
<link rel="alternate" href="https://www.nguoicodonvn2008.info/vi/news/rss/" title="Tin Tức" type="application/rss+xml">
<link rel="alternate" href="https://www.nguoicodonvn2008.info/vi/news/rss/karaoke-dual/" title="Tin Tức - Karaoke Dual" type="application/rss+xml">
<link rel="alternate" href="https://www.nguoicodonvn2008.info/vi/news/rss/nhac-tre/" title="Tin Tức - Nhạc trẻ" type="application/rss+xml">
<link rel="alternate" href="https://www.nguoicodonvn2008.info/vi/news/rss/tru-tinh/" title="Tin Tức - Trữ tình" type="application/rss+xml">
<link rel="alternate" href="https://www.nguoicodonvn2008.info/vi/news/rss/nuoc-ngoai/" title="Tin Tức - Nước ngoài" type="application/rss+xml">
<link rel="alternate" href="https://www.nguoicodonvn2008.info/vi/news/rss/remix/" title="Tin Tức - Remix" type="application/rss+xml">
<link rel="alternate" href="https://www.nguoicodonvn2008.info/vi/news/rss/tam-su-tinh-yeu/" title="Tin Tức - Tâm sự tình yêu" type="application/rss+xml">
<link rel="alternate" href="https://www.nguoicodonvn2008.info/vi/news/rss/tho-suu-tam/" title="Tin Tức - Thơ sưu tầm" type="application/rss+xml">
<link rel="alternate" href="https://www.nguoicodonvn2008.info/vi/news/rss/cuoc-song/" title="Tin Tức - Cuộc sống" type="application/rss+xml">
<link rel="alternate" href="https://www.nguoicodonvn2008.info/vi/news/rss/phan-mem/" title="Tin Tức - Phần mềm" type="application/rss+xml">
<link rel="alternate" href="https://www.nguoicodonvn2008.info/vi/news/rss/kien-thuc-may-tinh/" title="Tin Tức - Kiến thức máy tính" type="application/rss+xml">
<link rel="alternate" href="https://www.nguoicodonvn2008.info/vi/news/rss/hoc-tap/" title="Tin Tức - Học tập" type="application/rss+xml">
<link rel="alternate" href="https://www.nguoicodonvn2008.info/vi/news/rss/tai-lieu/" title="Tin Tức - Tài liệu" type="application/rss+xml">
<link rel="alternate" href="https://www.nguoicodonvn2008.info/vi/news/rss/de-thi/" title="Tin Tức - Đề thi" type="application/rss+xml">
<link rel="preload" as="style" href="https://www.nguoicodonvn2008.info/assets/css/font-awesome.min.css" type="text/css">
<link rel="preload" as="style" href="https://www.nguoicodonvn2008.info/themes/default/css/bootstrap.non-responsive.css" type="text/css">
<link rel="preload" as="style" href="https://www.nguoicodonvn2008.info/themes/default/css/style.css" type="text/css">
<link rel="preload" as="style" href="https://www.nguoicodonvn2008.info/themes/default/css/style.non-responsive.css" type="text/css">
<link rel="preload" as="style" href="https://www.nguoicodonvn2008.info/themes/default/css/news.css" type="text/css">
<link rel="preload" as="style" href="https://www.nguoicodonvn2008.info/themes/default/css/custom.css" type="text/css">
<link rel="preload" as="script" href="https://www.nguoicodonvn2008.info/assets/js/jquery/jquery.min.js" type="text/javascript">
<link rel="preload" as="script" href="https://www.nguoicodonvn2008.info/assets/js/language/vi.js" type="text/javascript">
<link rel="preload" as="script" href="https://www.nguoicodonvn2008.info/assets/js/DOMPurify/purify3.js" type="text/javascript">
<link rel="preload" as="script" href="https://www.nguoicodonvn2008.info/assets/js/global.js" type="text/javascript">
<link rel="preload" as="script" href="https://www.nguoicodonvn2008.info/assets/js/site.js" type="text/javascript">
<link rel="preload" as="script" href="https://www.nguoicodonvn2008.info/themes/default/js/news.js" type="text/javascript">
<link rel="preload" as="script" href="https://www.nguoicodonvn2008.info/themes/default/js/main.js" type="text/javascript">
<link rel="preload" as="script" href="https://www.nguoicodonvn2008.info/themes/default/js/custom.js" type="text/javascript">
<link rel="preload" as="script" href="https://www.nguoicodonvn2008.info/themes/default/js/bootstrap.min.js" type="text/javascript">
<link rel="stylesheet" href="https://www.nguoicodonvn2008.info/assets/css/font-awesome.min.css">
<link rel="stylesheet" href="https://www.nguoicodonvn2008.info/themes/default/css/bootstrap.non-responsive.css">
<link rel="stylesheet" href="https://www.nguoicodonvn2008.info/themes/default/css/style.css">
<link rel="stylesheet" href="https://www.nguoicodonvn2008.info/themes/default/css/style.non-responsive.css">
<link rel="StyleSheet" href="https://www.nguoicodonvn2008.info/themes/default/css/news.css">
<link rel="stylesheet" href="https://www.nguoicodonvn2008.info/themes/default/css/custom.css">
<style type="text/css">
	body{background: #fff;}
</style>
    </head>
    <body>
<div id="print">
	<div id="hd_print">
		<h2 class="pull-left">.&#x3A; Nguoicodonvn2008.info - Cõi lòng người cô đơn &#x3A;.</h2>
		<p class="pull-right"><a title=".&#x3A; Nguoicodonvn2008.info - Cõi lòng người cô đơn &#x3A;." href="https://www.nguoicodonvn2008.info/">https://www.nguoicodonvn2008.info</a></p>
	</div>
	<div class="clear"></div>
	<hr />
	<div id="content">
		<h1>Cách thay đổi biểu tượng mặc định trên Windows 10</h1>
		<ul class="list-inline">
			<li>Thứ tư - 28/10/2020 00:50</li>
			<li class="hidden-print txtrequired"><em class="fa fa-print">&nbsp;</em><a title="In ra" href="javascript:;" onclick="window.print()">In ra</a></li>
			<li class="hidden-print txtrequired"><em class="fa fa-power-off">&nbsp;</em><a title="Đóng cửa sổ này" href="javascript:;" onclick="window.close()">Đóng cửa sổ này</a></li>
		</ul>
		<div class="clear"></div>
		<div id="hometext">
		</div>
				<div class="imghome">
			<img alt="Cách thay đổi biểu tượng mặc định trên Windows 10" src="https://st.quantrimang.com/photos/image/2017/02/27/Windows-10-icon-Taskbar.jpg" width="460" class="img-thumbnail" />
		</div>
		<div class="clear"></div>
		<div id="bodytext" class="clearfix">
			<p style="text-align: justify;">Thông thường, các biểu tượng icon trên Windows đều được mặc định và Windows 10 cũng không hề ngoại lệ. Tuy nhiên, nếu bạn muốn tùy chỉnh các icon đó, chẳng hạn&nbsp;thay đổi kích thước thu nhỏ hoặc phóng to các biểu tượng, sử dụng biểu tượng khác thay thế,... thì cũng thực hiện rất đơn giản. Chúng ta có thể sử dụng tính năng thay đổi biểu tượng có sẵn trên hệ thống, hoặc sử dụng công cụ hỗ trợ. Trong bài viết dưới đây, chúng tôi sẽ hướng dẫn bạn đọc cách có thể thay đổi biểu tượng hệ thống trên Windows 10.</p>

<h2 id="mcetoc_1elk5pkcvck" style="text-align: justify;">Nơi tìm các biểu tượng tùy chỉnh cho Windows 10</h2>

<p style="text-align: justify;">Trước khi bắt đầu thay đổi các biểu tượng Windows 10, bạn cần có một số biểu tượng để thay thế chúng. Hệ điều hành có một vài biểu tượng bổ sung được tích hợp sẵn, nhưng chúng không quá tuyệt vời.</p>

<p style="text-align: justify;"><strong>Flaticon.com</strong>&nbsp;là một tài nguyên tuyệt vời cho mọi nhu cầu về biểu tượng Windows. Trang web chứa hơn một triệu biểu tượng chất lượng cao được sắp xếp trong hàng nghìn gói tiện lợi. Bạn có thể lấy mọi thứ trong một gói cùng lúc hoặc tải xuống các biểu tượng đơn lẻ.</p>

<figure>
<div style="text-align: justify;"><img alt="Flaticon là một tài nguyên tuyệt vời cho mọi nhu cầu về biểu tượng Windows" data-i="0" data-src="https://st.quantrimang.com/photos/image/2020/10/27/doi-bieu-tuong-mac-dinh-5.jpg" data-was-processed="true" height="477" src="https://st.quantrimang.com/photos/image/2020/10/27/doi-bieu-tuong-mac-dinh-5.jpg" width="650" /></div>

<figcaption>
<div style="text-align: justify;">Flaticon là một tài nguyên tuyệt vời cho mọi nhu cầu về biểu tượng Windows</div>
</figcaption>
</figure>

<p style="text-align: justify;">
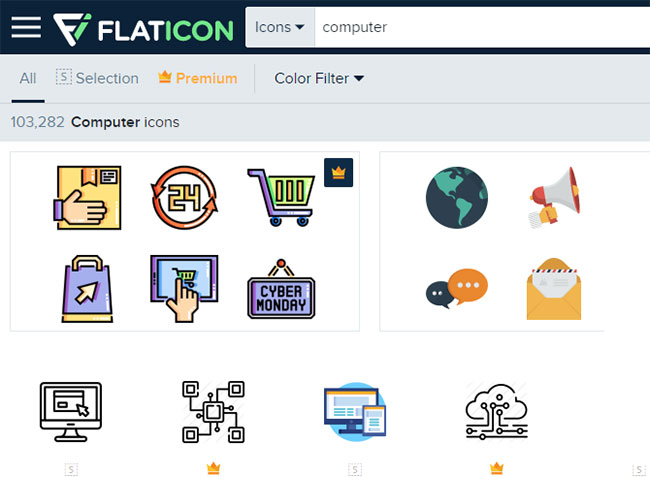
Trang web cung cấp các bản tải xuống ở nhiều định dạng, nhưng bài viết khuyên bạn nên tải chúng xuống ở dạng PNG để dễ dàng chuyển đổi sang định dạng ICO. Giữ tất cả các bản tải xuống nguyên bản trong một thư mục có tên là&nbsp;<strong>PNG Icons</strong>&nbsp;hoặc tương tự.</p>

<p style="text-align: justify;">Nếu bạn không tìm thấy thứ mình đang tìm kiếm ở đây, hãy thử&nbsp;<strong>Findicons.com, IconArchive.com</strong>&nbsp;hoặc&nbsp;<strong>GraphicBurger.com.</strong></p>

<div style="text-align: justify;">&nbsp;</div>

<h3 id="mcetoc_1elk5pkcvcl" style="text-align: justify;">Chuyển đổi hình ảnh PNG thành biểu tượng ICO</h3>

<p style="text-align: justify;">Windows sử dụng file ICO cho các biểu tượng. Do đó, bạn sẽ cần chuyển đổi hình ảnh từ PNG (hoặc các định dạng khác) trước khi sử dụng chúng làm biểu tượng.</p>

<p style="text-align: justify;"><strong>ConvertICO.com</strong>&nbsp;cung cấp một cách dễ dàng để thực hiện việc này. Bạn có thể upload tối đa 50 hình ảnh PNG cùng một lúc để chuyển đổi chúng sang định dạng ICO. Nếu muốn, bạn cũng có thể nhập URL của hình ảnh muốn chuyển đổi.</p>

<figure>
<div style="text-align: justify;"><img alt="ConvertICO.com cung cấp một cách dễ dàng để chuyển file PNG sang ICO" data-i="1" data-src="https://st.quantrimang.com/photos/image/2020/10/27/doi-bieu-tuong-mac-dinh-6.jpg" data-was-processed="true" height="473" src="https://st.quantrimang.com/photos/image/2020/10/27/doi-bieu-tuong-mac-dinh-6.jpg" width="650" /></div>

<figcaption>
<div style="text-align: justify;">ConvertICO.com cung cấp một cách dễ dàng để chuyển file PNG sang ICO</div>
</figcaption>
</figure>

<p style="text-align: justify;">
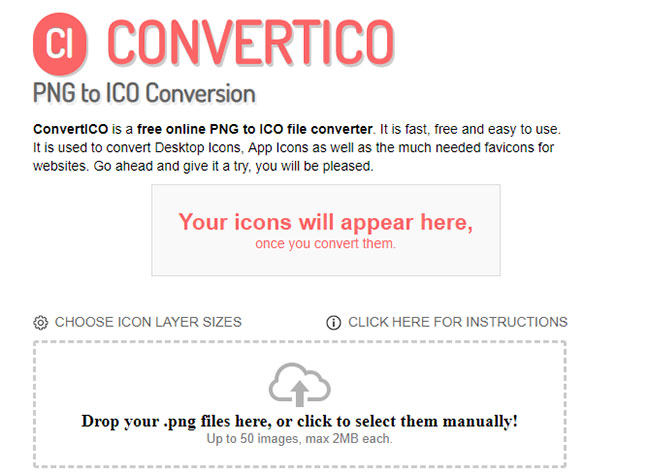
Hãy giữ tất cả các file ICO trong thư mục riêng của chúng. Đảm bảo rằng bạn đặt nó ở một nơi cố định, vì việc di chuyển các file biểu tượng sau khi thiết lập sẽ gây ra sự cố.</p>

<h2 id="mcetoc_1elk3rg4j0" style="text-align: justify;">1. Thay đổi icon biểu tượng trên desktop</h2>

<p style="text-align: justify;">Với các biểu tượng ở giao diện màn hình như Computer, Recycle Bin,... chúng ta hoàn toàn có thể thay đổi sang bất cứ một biểu tượng yêu thích nào khác dễ dàng.</p>

<p style="text-align: justify;"><strong>Bước 1:</strong></p>

<p style="text-align: justify;">Tại&nbsp;<strong>thanh tìm kiếm</strong>&nbsp;trên Windows 10, chúng ta nhập từ khóa&nbsp;<strong>icon</strong>&nbsp;và sau đó click vào tùy chọn&nbsp;<strong>Show or hide common icons on the desktop</strong>.</p>

<p style="text-align: justify;"><img alt="Tìm kiếm từ khóa icon trên Windows 10" data-i="2" data-src="https://st.quantrimang.com/photos/image/2017/02/27/Windows-10-icon-search.jpg" data-was-processed="true" height="441" src="https://st.quantrimang.com/photos/image/2017/02/27/Windows-10-icon-search.jpg" title="Tìm kiếm từ khóa icon trên Windows 10" width="350" /></p>

<p style="text-align: justify;"><strong>Bước 2:</strong></p>

<p style="text-align: justify;">Xuất hiện hộp thoại Desktop Icon Settings. Tại đây, bạn hãy chọn một<strong>&nbsp;biểu tượng trên giao diện màn hình</strong>&nbsp;nào đó muốn thay đổi rồi click vào&nbsp;<strong>Change Icon...</strong></p>

<p style="text-align: justify;"><strong><img alt="Thay đổi icon trên giao diện desktop" data-i="3" data-src="https://st.quantrimang.com/photos/image/2017/02/27/Windows-10-icon-desktop.jpg" data-was-processed="true" height="455" src="https://st.quantrimang.com/photos/image/2017/02/27/Windows-10-icon-desktop.jpg" title="Thay đổi icon trên giao diện desktop" width="400" /></strong></p>

<p style="text-align: justify;"><strong>Bước 3:</strong></p>

<p style="text-align: justify;">Tại hộp thoại Change Icon, chúng ta có thể chọn lựa&nbsp;<strong>biểu tượng mới muốn thay đổi</strong>&nbsp;có trong danh sách, hoặc nhấn vào Browse để mở thư mục chứa biểu tượng.&nbsp;<strong>Lưu ý với người dùng</strong>, biểu tượng muốn thay đổi cần phải ở định dạng exe, dll hoặc ico.</p>

<p style="text-align: justify;">Khi đã chọn được biểu tượng muốn thay đổi, nhấn&nbsp;<strong>OK</strong>&nbsp;để sử dụng.</p>

<p style="text-align: justify;"><img alt="Thay đổi biểu tượng trên desktop" data-i="4" data-src="https://st.quantrimang.com/photos/image/2017/02/27/Windows-10-icon-change.jpg" data-was-processed="true" height="357" src="https://st.quantrimang.com/photos/image/2017/02/27/Windows-10-icon-change.jpg" title="Thay đổi biểu tượng trên desktop" width="292" /></p>

<p style="text-align: justify;"><strong>Bước 4:</strong></p>

<p style="text-align: justify;">Cuối cùng, chúng ta chỉ cần nhấn&nbsp;<strong>Apply</strong>&nbsp;và chọn&nbsp;<strong>OK</strong>&nbsp;để thay đổi được áp dụng.</p>

<p style="text-align: justify;"><img alt="Sử dụng biểu tượng mới cho icon trên desktop" data-i="5" data-src="https://st.quantrimang.com/photos/image/2017/02/27/Windows-10-icon-apply.jpg" data-was-processed="true" height="455" src="https://st.quantrimang.com/photos/image/2017/02/27/Windows-10-icon-apply.jpg" title="Sử dụng biểu tượng mới cho icon trên desktop" width="400" /></p>

<p style="text-align: justify;">Nếu bạn muốn sử dụng lại&nbsp;<strong>biểu tượng icon mặc định trên Windows 10</strong>&nbsp;thì chỉ cần mở hộp thoại Desktop Icon Settings, click vào biểu tượng muốn trở về như cũ rồi nhấn&nbsp;<strong>Restore Default</strong>&nbsp;là được.</p>

<p style="text-align: justify;"><img alt="Trở về icon mặc định Windows 10" data-i="6" data-src="https://st.quantrimang.com/photos/image/2017/02/27/Windows-10-icon-mac-dinh.jpg" data-was-processed="true" height="455" src="https://st.quantrimang.com/photos/image/2017/02/27/Windows-10-icon-mac-dinh.jpg" title="Trở về icon mặc định Windows 10" width="400" /></p>

<div style="text-align: justify;">&nbsp;</div>

<h2 id="mcetoc_1elk3rg4j5" style="text-align: justify;">2. Thay đổi biểu tượng thư mục Windows 10</h2>

<p style="text-align: justify;">Với trường hợp chúng ta muốn thay đổi biểu tượng thư mục mặc định trên Windows, cũng thực hiện rất đơn giản như khi thay đổi các biểu tượng trên giao diện desktop.</p>

<p style="text-align: justify;"><strong>Bước 1:</strong></p>

<p style="text-align: justify;">Tại thư mục chúng ta muốn thay đổi biểu tượng, click chuột phải và chọn&nbsp;<strong>Properties</strong>.</p>

<p style="text-align: justify;"><img alt="Chọn Properties" data-i="7" data-src="https://st.quantrimang.com/photos/image/2017/02/27/Windows-10-icon-properties.jpg" data-was-processed="true" height="523" src="https://st.quantrimang.com/photos/image/2017/02/27/Windows-10-icon-properties.jpg" title="Chọn Properties" width="300" /></p>

<p style="text-align: justify;"><strong>Bước 2:</strong></p>

<p style="text-align: justify;">Xuất hiện hộp thoại Properties. Tại đây, chúng ta nhấn chọn vào mục&nbsp;<strong>Customize</strong>&nbsp;rồi chọn tiếp&nbsp;<strong>Change Icon</strong>&nbsp;ở bên dưới.</p>

<p style="text-align: justify;"><img alt="Chọn Change icon thay đổi biểu tượng" data-i="8" data-src="https://st.quantrimang.com/photos/image/2017/02/27/Windows-10-icon-customize.jpg" data-was-processed="true" height="481" src="https://st.quantrimang.com/photos/image/2017/02/27/Windows-10-icon-customize.jpg" title="Chọn Change icon thay đổi biểu tượng" width="363" /></p>

<p style="text-align: justify;"><strong>Bước 3:</strong></p>

<p style="text-align: justify;">Việc tiếp theo đó là lựa chọn&nbsp;<strong>biểu tượng thư mục muốn thay đổi</strong>&nbsp;có sẵn trong danh sách, hoặc sử dụng biểu tượng ngoài khi nhấn vào Browse. Nhấn&nbsp;<strong>OK</strong>&nbsp;để lưu lại.</p>

<p style="text-align: justify;"><img alt="Chọn icon mới cho thư mục " data-i="9" data-src="https://st.quantrimang.com/photos/image/2017/02/27/Windows-10-icon-folder.jpg" data-was-processed="true" height="357" src="https://st.quantrimang.com/photos/image/2017/02/27/Windows-10-icon-folder.jpg" title="Chọn icon mới cho thư mục " width="292" /></p>

<p style="text-align: justify;">Ngoài ra, nếu người dùng muốn sử dụng hình ảnh cá nhân hay bất cứ hình ảnh nào đó để đặt cho icon thư mục, có thể sử dụng phần mềm IconCool Studio trong bài viết&nbsp;Thay đổi hình đại diện cho thư mục bằng IconCool Studio. Hoặc đơn giản hơn với việc thay đổi màu sắc cho thư mục bằng Folder bằng Folder Colorizer, trong bài viết&nbsp;Đổi màu tên tập tin hoặc thư mục bất kỳ trong Windows.</p>

<h2 id="mcetoc_1elk3rg4j9" style="text-align: justify;">3. Thay icon cho shortcut trên Windows 10</h2>

<p style="text-align: justify;">Khi có thể thay đổi biểu tượng trên desktop, biểu tượng thư mục thì việc chọn một icon khác cho shortcut cũng rất dễ dàng.</p>

<p style="text-align: justify;"><strong>Bước 1:</strong></p>

<p style="text-align: justify;">Click chuột phải tại<strong>&nbsp;biểu tượng shortcut</strong>&nbsp;trên màn hình máy tính và chọn&nbsp;<strong>Properties</strong>.</p>

<p style="text-align: justify;"><img alt="Thay đổi biểu tượng cho shortcut Windows 10" data-i="10" data-src="https://st.quantrimang.com/photos/image/2017/02/27/Windows-10-icon-shortcut.jpg" data-was-processed="true" height="386" src="https://st.quantrimang.com/photos/image/2017/02/27/Windows-10-icon-shortcut.jpg" title="Thay đổi biểu tượng cho shortcut Windows 10" width="300" /></p>

<p style="text-align: justify;"><strong>Bước 2:</strong></p>

<p style="text-align: justify;">Xuất hiện hộp thoại Properties. Tại đây, chúng ta sẽ nhấn chọn vào tab&nbsp;<strong>Shortcut</strong>&nbsp;và chọn&nbsp;<strong>Change Icon...</strong></p>

<p style="text-align: justify;"><strong><img alt="Chọn Change icon cho shortcut" data-i="11" data-src="https://st.quantrimang.com/photos/image/2017/02/27/Windows-10-icon-shortcut-icon.jpg" data-was-processed="true" height="509" src="https://st.quantrimang.com/photos/image/2017/02/27/Windows-10-icon-shortcut-icon.jpg" title="Chọn Change icon cho shortcut" width="363" /></strong></p>

<p style="text-align: justify;"><strong>Bước 3:</strong></p>

<p style="text-align: justify;">Tiếp theo, người dùng chọn lựa<strong>&nbsp;biểu tượng muốn thay đổi cho shortcut thư mục</strong>. Cũng nhấn&nbsp;<strong>OK</strong>&nbsp;và&nbsp;<strong>Apply</strong>&nbsp;để lưu lại thay đổi này.</p>

<p style="text-align: justify;"><img alt="Sử dụng icon mới cho shortcut" data-i="12" data-src="https://st.quantrimang.com/photos/image/2017/02/27/Windows-10-icon-shortcut-change.jpg" data-was-processed="true" height="509" src="https://st.quantrimang.com/photos/image/2017/02/27/Windows-10-icon-shortcut-change.jpg" title="Sử dụng icon mới cho shortcut" width="363" /></p>

<h2 id="mcetoc_1elk3rg4jd" style="text-align: justify;">4. Đổi biểu tượng trên thanh Taskbar</h2>

<p style="text-align: justify;">Với những ứng dụng, công cụ đã được ghim trên thanh Taskbar, chúng ta cũng có thể thay đổi biểu tượng hiển thị, với các thao tác thực hiện tương tự như các mục trên.</p>

<p style="text-align: justify;"><strong>Bước 1:</strong></p>

<p style="text-align: justify;">Tại thanh Taskbar, chúng ta click chuột phải vào biểu tượng phần mềm, ứng dụng muốn thay icon rồi chọn&nbsp;<strong>Properties</strong>.</p>

<p style="text-align: justify;"><img alt="Thay icon phần mềm tại Taskbar " data-i="13" data-src="https://st.quantrimang.com/photos/image/2017/02/27/Windows-10-icon-Taskbar.jpg" data-was-processed="true" height="304" src="https://st.quantrimang.com/photos/image/2017/02/27/Windows-10-icon-Taskbar.jpg" title="Thay icon phần mềm tại Taskbar " width="557" /></p>

<p style="text-align: justify;"><strong>Bước 2:</strong></p>

<p style="text-align: justify;">Tại hộp thoại Properties, chúng ta click vào tab&nbsp;<strong>Shortcut</strong>&nbsp;rồi chọn&nbsp;<strong>Change Icon....</strong></p>

<p style="text-align: justify;"><strong><img alt="Thay icon cho phần mềm tại Taskbar" data-i="14" data-src="https://st.quantrimang.com/photos/image/2017/02/27/Windows-10-icon-Taskbar-icon.jpg" data-was-processed="true" height="509" src="https://st.quantrimang.com/photos/image/2017/02/27/Windows-10-icon-Taskbar-icon.jpg" title="Thay icon cho phần mềm tại Taskbar" width="363" /></strong></p>

<p style="text-align: justify;">Sau khi đã chọn lựa biểu tượng mới cho ứng dụng, phần mềm được ghim trên Taskbar chúng ta cũng nhấn&nbsp;<strong>Apply</strong>&nbsp;và&nbsp;<strong>OK</strong>&nbsp;để lưu lại thay đổi.</p>

<div style="text-align: justify;">&nbsp;</div>

<h2 id="mcetoc_1elk3rg4jg" style="text-align: justify;">5. Cách đổi icon mặc định của định dạng tập tin</h2>

<p style="text-align: justify;">Mỗi một tập tin, file trên máy tính đều có biểu tượng định dạng đặc trưng. Tuy nhiên, nếu người dùng muốn thay đổi những biểu tượng định dạng cho tập tin trên Windows, thì có thể sử dụng sự trợ giúp của công cụ File Types Manager.</p>

<ul>
	<li style="text-align: justify;">Tải công cụ File Types Manager:&nbsp;<strong><span style="color:rgb(192, 57, 43);">http://www.nirsoft.net/utils/file_types_manager.html</span></strong></li>
</ul>

<p style="text-align: justify;"><strong>Bước 1:</strong></p>

<p style="text-align: justify;">Sau khi tải File Types Manager, chúng ta tiến hành&nbsp;<strong>giải nén tập tin</strong>&nbsp;và khởi chạy phần mềm.</p>

<p style="text-align: justify;"><img alt="Giải nén tập tin File Types Manage" data-i="15" data-src="https://st.quantrimang.com/photos/image/2017/02/27/Windows-10-icon-FileTypesMan.jpg" data-was-processed="true" height="261" src="https://st.quantrimang.com/photos/image/2017/02/27/Windows-10-icon-FileTypesMan.jpg" title="Giải nén tập tin File Types Manage" width="610" /></p>

<p style="text-align: justify;"><strong>Bước 2:</strong></p>

<p style="text-align: justify;">Xuất hiện giao diện hộp thoại File Types Manager. Tại đây, chúng ta chỉ cần chọn&nbsp;<strong>định dạng file muốn đổi</strong>, click chuột phải và chọn&nbsp;<strong>Edit Selected File Type</strong>.</p>

<p style="text-align: justify;"><img alt="Thay đổi icon định dạng file" data-i="16" data-src="https://st.quantrimang.com/photos/image/2017/02/27/Windows-10-icon-FileTypesMan-Edit.jpg" data-was-processed="true" height="416" src="https://st.quantrimang.com/photos/image/2017/02/27/Windows-10-icon-FileTypesMan-Edit.jpg" title="Thay đổi icon định dạng file" width="550" /></p>

<p style="text-align: justify;"><strong>Bước 3:</strong></p>

<p style="text-align: justify;">Tại hộp thoại Edit File Type, chúng ta tìm tới mục&nbsp;<strong>Default Icon</strong>&nbsp;rồi chọn&nbsp;<strong>biểu tượng 3 dấu chấm</strong>.</p>

<p style="text-align: justify;"><img alt="Nhấn chọn Default Icon " data-i="17" data-src="https://st.quantrimang.com/photos/image/2017/02/27/Windows-10-icon-FileTypesMan-Icon.jpg" data-was-processed="true" height="461" src="https://st.quantrimang.com/photos/image/2017/02/27/Windows-10-icon-FileTypesMan-Icon.jpg" title="Nhấn chọn Default Icon " width="400" /></p>

<p style="text-align: justify;">Sau đó bạn cũng chọn&nbsp;<strong>biểu tượng muốn thay thế</strong>&nbsp;cho file định dạng và nhấn OK là xong.</p>

<p style="text-align: justify;"><img alt="Chọn icon định dạng file mới" data-i="18" data-src="https://st.quantrimang.com/photos/image/2017/02/27/Windows-10-icon-FileTypesMan-change.jpg" data-was-processed="true" height="352" src="https://st.quantrimang.com/photos/image/2017/02/27/Windows-10-icon-FileTypesMan-change.jpg" title="Chọn icon định dạng file mới" width="292" /></p>

<h2 id="mcetoc_1elk5pkcvcm" style="text-align: justify;">6. Cách tạo biểu tượng thanh tác vụ trống</h2>

<p style="text-align: justify;">Thông thường, tất cả các biểu tượng thanh tác vụ xuất hiện dọc theo nhau. Nếu bạn muốn thêm một số không gian, chẳng hạn để tách các biểu tượng theo loại, bạn có thể làm điều này thông qua một giải pháp.</p>

<h3 id="mcetoc_1elk5pkcvcn" style="text-align: justify;">Tạo file dummy batch</h3>

<p style="text-align: justify;">Để bắt đầu, hãy tạo một thư mục mới ở nơi bạn có thể giữ nó vĩnh viễn. Đặt tên cho nó là&nbsp;<strong>Spaces</strong>&nbsp;hoặc một cái gì đó tương tự. Bên trong thư mục này, nhấp chuột phải một lần nữa và chọn&nbsp;<strong>New &gt; Text document</strong>. Nhấp đúp để mở file.</p>

<p style="text-align: justify;">
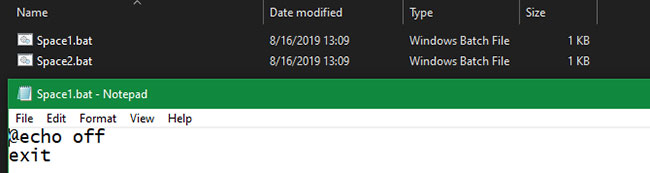
Bên trong file văn bản này, nhập thông tin sau. Thao tác này sẽ tạo ra một file dummy batch, ngay lập tức mở và đóng cửa sổ&nbsp;Command Prompt&nbsp;nếu bạn nhấp vào nó.</p>

<pre id="pre0">
<code>@echo off
 exit</code></pre>

<p style="text-align: justify;">Sau đó, đi tới&nbsp;<strong>File &gt; Save As</strong>. Trong hộp thoại lưu, đặt tên cho file kết thúc bằng .BAT. Nếu bạn muốn tạo nhiều khoảng trắng, hãy sao chép, dán và đổi tên file theo kiểu như Space1.bat, Space2.bat, v.v...</p>

<figure>
<div style="text-align: justify;"><img alt="Tạo file dummy batch" data-i="19" data-src="https://st.quantrimang.com/photos/image/2020/10/27/doi-bieu-tuong-mac-dinh-1.jpg" data-was-processed="true" height="173" src="https://st.quantrimang.com/photos/image/2020/10/27/doi-bieu-tuong-mac-dinh-1.jpg" width="650" /></div>

<figcaption>
<div style="text-align: justify;">Tạo file dummy batch</div>
</figcaption>
</figure>

<h3 id="mcetoc_1elk5pkcvco" style="text-align: justify;">Thiết lập một biểu tượng trống</h3>

<p style="text-align: justify;">Windows có các biểu tượng trống được tích hợp sẵn. Nhưng trong thử nghiệm, chúng xuất hiện dưới dạng các ô vuông màu đen trên thanh tác vụ thay vì các ô trong suốt, điều này không ổn lắm và đồng nghĩa với việc bạn sẽ cần nhanh chóng tạo biểu tượng &quot;trống&quot; của riêng mình.</p>

<p style="text-align: justify;">Mở một trình chỉnh sửa hình ảnh (bài viết đã sử dụng Paint.NET) và tạo một canvas hình vuông (256 x 256). Nhấn&nbsp;<strong>Ctrl + A</strong>&nbsp;để chọn toàn bộ hình ảnh, sau đó nhấn&nbsp;<strong>Del</strong>&nbsp;để xóa nó. Điều này sẽ tạo ra một hình vuông trong suốt khi được lưu dưới dạng PNG.</p>

<p style="text-align: justify;">Tuy nhiên, nếu bạn để nó như vậy, bạn sẽ gặp phải vấn đề khối đen tương tự. Do đó, bạn cần sử dụng công cụ&nbsp;<strong>Pencil</strong>, phóng to và sử dụng nó để vẽ một pixel duy nhất ở một góc của hình ảnh.</p>

<figure>
<div style="text-align: justify;"><img alt="Thiết lập một biểu tượng trống" data-i="20" data-src="https://st.quantrimang.com/photos/image/2020/10/27/doi-bieu-tuong-mac-dinh-2.jpg" data-was-processed="true" height="475" src="https://st.quantrimang.com/photos/image/2020/10/27/doi-bieu-tuong-mac-dinh-2.jpg" width="478" /></div>

<figcaption>
<div style="text-align: justify;">Thiết lập một biểu tượng trống</div>
</figcaption>
</figure>

<p style="text-align: justify;">Lưu file dưới dạng PNG, sau đó sử dụng công cụ chuyển đổi trực tuyến như đã đề cập ở trên để chuyển file này thành file ICO.</p>

<h3 id="mcetoc_1elk5pkcvcp" style="text-align: justify;">Tạo và ghim shortcut</h3>

<p style="text-align: justify;">
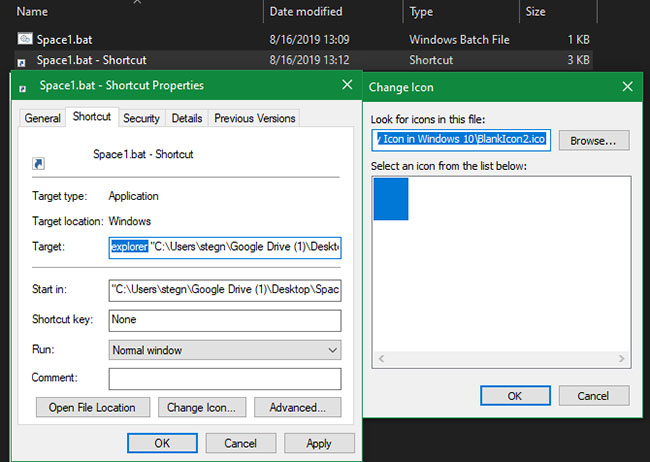
Bây giờ, nhấp chuột phải vào từng file Space và chọn&nbsp;<strong>Create shortcut</strong>, vì bạn sẽ cần một shortcut, không phải file BAT chính, để thay đổi biểu tượng. Bấm chuột phải vào từng file shortcut, chọn&nbsp;<strong>Properties</strong>&nbsp;và sử dụng nút&nbsp;<strong>Change Icon</strong>&nbsp;để chọn biểu tượng trống mới.</p>

<p style="text-align: justify;">Sau khi hoàn tất, bạn sẽ cần thêm một phần tử nữa để thêm các shortcut này vào thanh tác vụ của mình. Trong tab&nbsp;<strong>Shortcut</strong>&nbsp;của mỗi file BAT, nhập&nbsp;<strong>explorer</strong>&nbsp;trước mọi thứ trong hộp&nbsp;<strong>Target.</strong>&nbsp;Đảm bảo có một khoảng trống trước dấu ngoặc kép.</p>

<figure>
<div style="text-align: justify;"><img alt="Tạo shortcut" data-i="21" data-src="https://st.quantrimang.com/photos/image/2020/10/27/doi-bieu-tuong-mac-dinh-3.jpg" data-was-processed="true" height="462" src="https://st.quantrimang.com/photos/image/2020/10/27/doi-bieu-tuong-mac-dinh-3.jpg" width="650" /></div>

<figcaption>
<div style="text-align: justify;">Tạo shortcut</div>
</figcaption>
</figure>

<p style="text-align: justify;">Bây giờ, bạn có thể nhấp chuột phải vào tất cả các file Space của mình và chọn&nbsp;<strong>Pin to taskbar</strong>. Chúng sẽ xuất hiện dưới dạng biểu tượng trống, cho phép bạn kéo chúng đến bất cứ nơi nào bạn thích và nhóm với các biểu tượng khác.</p>

<figure>
<div style="text-align: justify;"><img alt="Ghim shortcut" data-i="22" data-src="https://st.quantrimang.com/photos/image/2020/10/27/doi-bieu-tuong-mac-dinh-4.jpg" data-was-processed="true" height="61" src="https://st.quantrimang.com/photos/image/2020/10/27/doi-bieu-tuong-mac-dinh-4.jpg" width="650" /></div>

<figcaption>
<div style="text-align: justify;">Ghim shortcut</div>
</figcaption>
</figure>

<p style="text-align: justify;">Ngoài ra, bạn có thể&nbsp;tạo biểu tượng tùy chỉnh cho ổ cứng di động trên Windows 10.</p>

<p style="text-align: justify;">Trên đây là bài tổng hợp thay biểu tượng mặc định trên Windows 10, với thay đổi icon thư mục, tập tin, biểu tượng trên giao diện Desktop hay thay đổi cả biểu tượng file định dạng. Cách thay đổi biểu tượng mặc định trên Windows 10 vô cùng đơn giản, và chúng ta có thể thực hiện các bước tương tự với các hệ điều hành khác.</p>
		</div>
				<div id="author">
						<p>
				<strong>Nguồn tin:</strong>
				Quantrimang.com
			</p>
		</div>
	</div>
	<div id="footer" class="clearfix">
		<div id="url">
			<strong>URL của bản tin này: </strong><a href="https://www.nguoicodonvn2008.info/vi/news/savefile/kien-thuc-may-tinh/cach-thay-doi-bieu-tuong-mac-dinh-tren-windows-10-2972.html" title="Cách thay đổi biểu tượng mặc định trên Windows 10">https://www.nguoicodonvn2008.info/vi/news/savefile/kien-thuc-may-tinh/cach-thay-doi-bieu-tuong-mac-dinh-tren-windows-10-2972.html</a>

		</div>
		<div class="clear"></div>
		<div class="copyright">
			&copy; .&#x3A; Nguoicodonvn2008.info - Cõi lòng người cô đơn &#x3A;.
		</div>
		<div id="contact">
			<a href="mailto:admin@nguoicodonvn2008.info">admin@nguoicodonvn2008.info</a>
		</div>
	</div>
</div>
        <div id="timeoutsess" class="chromeframe">
            Bạn đã không sử dụng Site, <a onclick="timeoutsesscancel();" href="https://www.nguoicodonvn2008.info/#">Bấm vào đây để duy trì trạng thái đăng nhập</a>. Thời gian chờ: <span id="secField"> 60 </span> giây
        </div>
        <div id="openidResult" class="nv-alert" style="display:none"></div>
        <div id="openidBt" data-result="" data-redirect=""></div>
		</script>
		<div class="car-top">
  <span><img src="https://www.nguoicodonvn2008.info/themes/default/images/car.png" alt=""></span>
</div>
<div id="run_cronjobs" style="visibility:hidden;display:none;"><img alt="cron" src="/index.php?second=cronjobs&amp;p=j1Wj9p4I" width="1" height="1" /></div>
<script src="https://www.nguoicodonvn2008.info/assets/js/jquery/jquery.min.js"></script>
<script>var nv_base_siteurl="/",nv_lang_data="vi",nv_lang_interface="vi",nv_name_variable="nv",nv_fc_variable="op",nv_lang_variable="language",nv_module_name="news",nv_func_name="savefile",nv_is_user=0, nv_my_ofs=-4,nv_my_abbr="EDT",nv_cookie_prefix="nv4c_e856T",nv_check_pass_mstime=1738000,nv_area_admin=0,nv_safemode=0,theme_responsive=0,nv_recaptcha_ver=2,nv_recaptcha_sitekey="",nv_recaptcha_type="image",XSSsanitize=1;</script>
<script src="https://www.nguoicodonvn2008.info/assets/js/language/vi.js"></script>
<script src="https://www.nguoicodonvn2008.info/assets/js/DOMPurify/purify3.js"></script>
<script src="https://www.nguoicodonvn2008.info/assets/js/global.js"></script>
<script src="https://www.nguoicodonvn2008.info/assets/js/site.js"></script>
<script src="https://www.nguoicodonvn2008.info/themes/default/js/news.js"></script>
<script src="https://www.nguoicodonvn2008.info/themes/default/js/main.js"></script>
<script src="https://www.nguoicodonvn2008.info/themes/default/js/custom.js"></script>
<script type="application/ld+json">
        {
            "@context": "https://schema.org",
            "@type": "Organization",
            "url": "https://www.nguoicodonvn2008.info",
            "logo": "https://www.nguoicodonvn2008.info/uploads/angel.gif"
        }
        </script>
<script src="https://www.nguoicodonvn2008.info/themes/default/js/bootstrap.min.js"></script>
<script type="text/javascript">
var $scrolltop = $('.car-top');
$scrolltop.on('click', function () {
    $('html,body').animate({
        scrollTop: 0
    }, 800);
    $(this).addClass("car-run");
    setTimeout(function(){ $scrolltop.removeClass('car-run');}, 1000);
    return false;
});
$(window).on('scroll', function ()
{ 
    if($(window).scrollTop() >= 200)
    {
        $scrolltop.addClass("show");
        $scrolltop.addClass("car-down");
    }
    else
    {
       $scrolltop.removeClass("show");
       setTimeout(function(){ $scrolltop.removeClass('car-down');}, 300);
    }
});
</script>
</body>
</html>