Cách sửa lỗi "Windows Cannot Access the Specified Device, Path or File"
- Thứ ba - 12/09/2023 10:40
- In ra
- Đóng cửa sổ này

Bạn có đang gặp phải thông báo lỗi "Windows Cannot Access the Specified Device, Path or File" trên Windows 10 hay 11? Sự cố này thường xuất hiện khi bạn cố chạy ứng dụng EXE hoặc mở tài liệu. Khi lỗi này xảy ra, bạn không thể chạy một số chương trình hoặc truy cập một số tài liệu, hạn chế tính hữu dụng của máy tính.
Vậy làm cách nào để giải quyết lỗi "Cannot access the specified device"? Hãy xem một số bước khắc phục sự cố mà bạn có thể thực hiện bên dưới.
1. Chạy ứng dụng với quyền admin
Một số chương trình, vì nhiều lý do, cần có đặc quyền admin để thực hiện các tác vụ cụ thể. Trên thực tế, trong một số trường hợp nhất định, bạn cũng có thể không mở được chúng.
Lỗi "Windows Cannot Access the Specified Device, Path or File” cũng có thể là kết quả của vấn đề này. Vì vậy, nếu bạn đang tìm cách khắc phục lỗi này, chạy ứng dụng với quyền admin sẽ là lựa chọn tốt nhất cho bạn. Nếu vấn đề là do thiếu đặc quyền admin thì ứng dụng của bạn sẽ chạy khi hoàn thành các bước này.
2. Vô hiệu hóa tính năng chặn ứng dụng không mong muốn
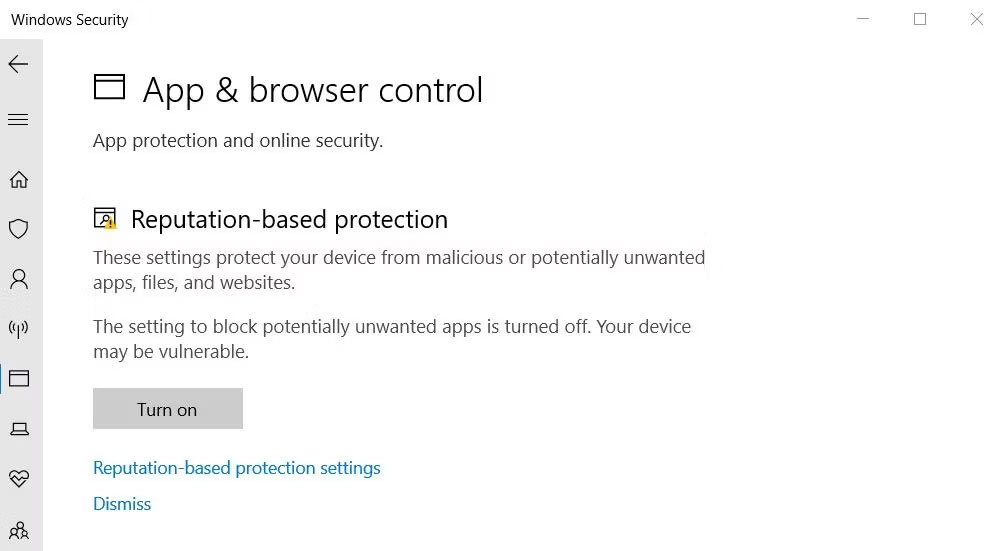
Chặn ứng dụng không mong muốn là một tính năng của Windows Security giúp ngăn các ứng dụng và phần mềm có uy tín thấp chạy. Tính năng đó có thể gây ra lỗi "Cannot access the specified device" khi được bật. Bạn có thể kiểm tra xem tính năng chặn ứng dụng không mong muốn có được bật hay không và tắt tính năng này như sau:
1. Nhấp đúp vào biểu tượng lá chắn (Windows Security) bên trong khu vực khay hệ thống bên phải thanh tác vụ. Bạn cũng có thể cần nhấp vào mũi tên lên nhỏ trên thanh tác vụ để xem các biểu tượng trên khay hệ thống.
2. Chọn tab App & browser control trong Windows Security.
3. Sau đó nhấp vào liên kết Reputation-based protection settings để xem thêm cài đặt.
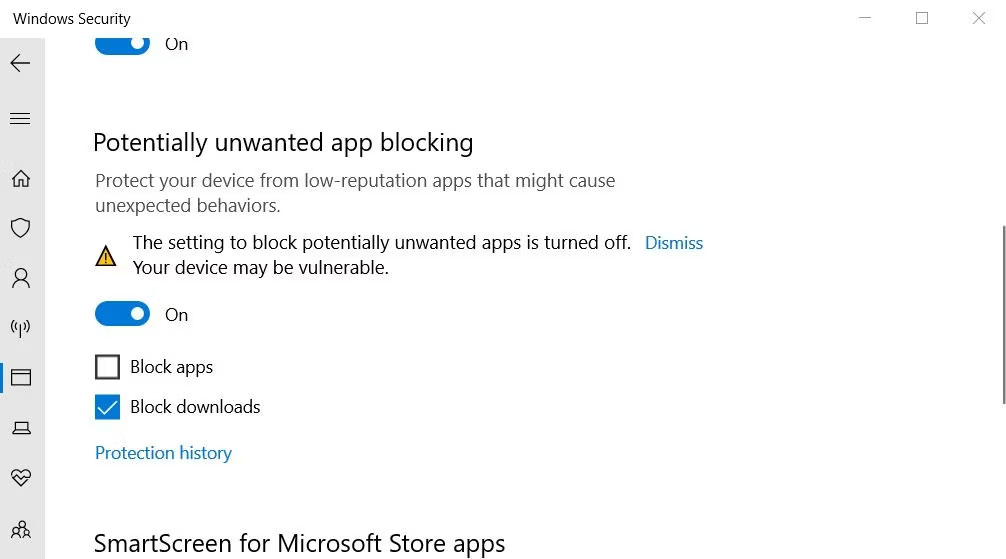
4. Bỏ chọn hộp kiểm Block apps nếu tính năng đó được bật.
3. Bỏ chọn cài đặt "Unblock File"
Đôi khi Windows chặn quyền truy cập vào các file hoặc thư mục được tải xuống từ các nguồn trực tuyến không đáng tin cậy, điều này có thể gây ra lỗi "Cannot access the specified device". Khi điều đó xảy ra, bạn sẽ thấy hộp kiểm Unblock trên cửa sổ thuộc tính file bị ảnh hưởng. Đây là cách bạn có thể bỏ chọn cài đặt "Unblock file":
Cảnh báo: Đảm bảo rằng bạn tin cậy nguồn của file trước khi thực hiện việc này. Nếu bạn bỏ chặn một file bị nhiễm, nó có thể làm hỏng máy tính của bạn và gây mất file.
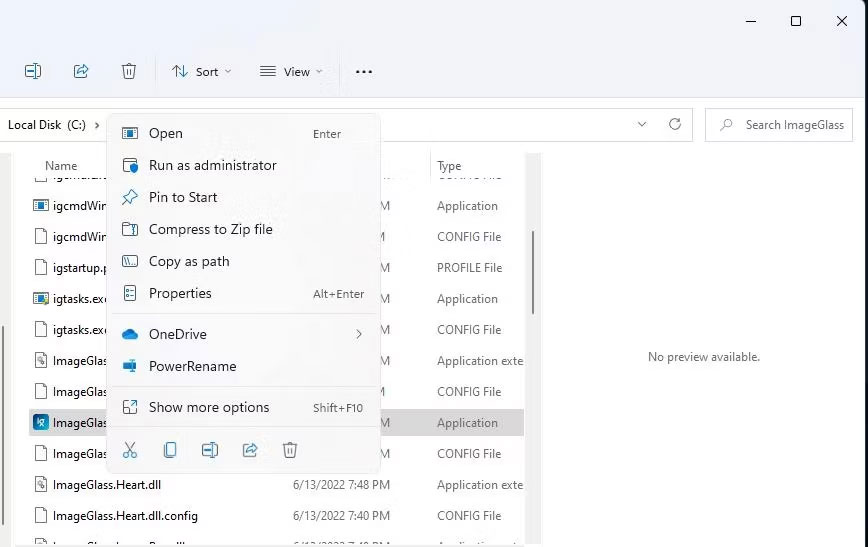
1. Nhấp chuột phải vào Start (nút taskbar) và chọn tùy chọn File Explorer từ menu.

2. Mở một thư mục chứa file xảy ra lỗi.
3. Nhấp chuột phải vào file bị ảnh hưởng và chọn Properties.
4. Nhấp vào General nếu cửa sổ thuộc tính không mở bằng tab đó theo mặc định.
5. Sau đó bỏ chọn hộp kiểm Unblock đã chọn nếu bạn có thể nhìn thấy.
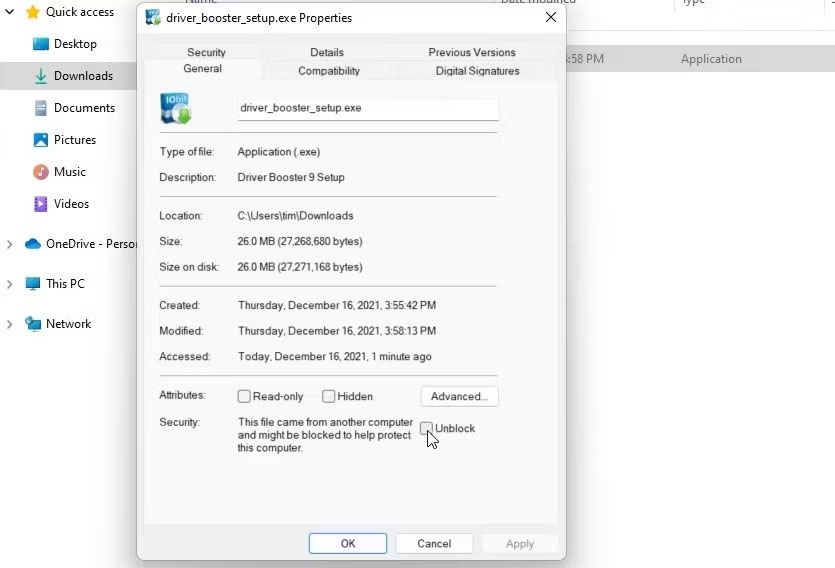
6. Chọn Apply để lưu cài đặt file mới.
7. Nhấn OK để đóng cửa sổ thuộc tính của file.
4. Chỉnh sửa quyền của file
Một nguyên nhân khác gây ra thông báo lỗi "Cannot access the specified device" là không đủ quyền truy cập file. Đó là điều bạn có thể khắc phục bằng cách chỉnh sửa quyền cho các file bị ảnh hưởng. Vì vậy, hãy thử chỉnh sửa quyền của file bị ảnh hưởng như sau:
1. Mở thư mục chứa file gây ra lỗi "Cannot access the specified device".
2. Nhấp chuột phải vào file bị ảnh hưởng và chọn tùy chọn Properties của nó.
3. Chọn Security trong cửa sổ thuộc tính.
4. Sau đó chọn tài khoản người dùng Windows mà bạn đã đăng nhập.
5. Nhấn nút Edit.
6. Chọn tài khoản người dùng Windows của bạn trên cửa sổ quyền mở ra.
7. Bỏ chọn tất cả các hộp kiểm quyền Deny đã chọn.
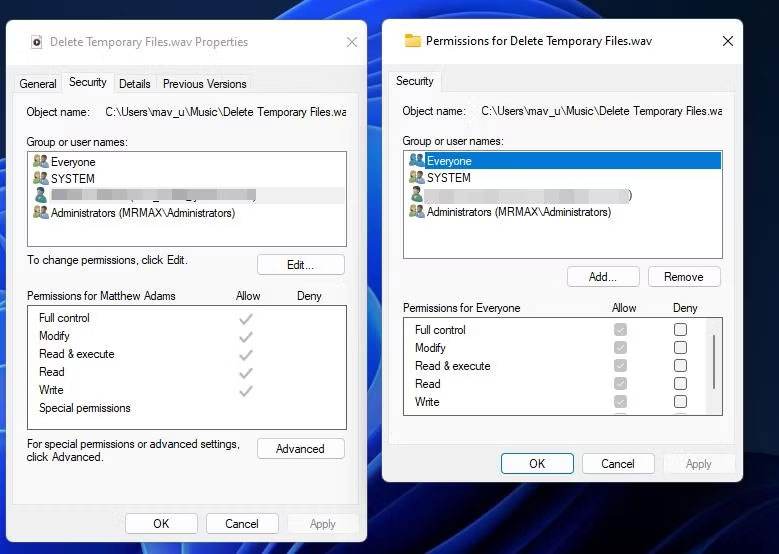
8. Chọn Apply để đặt cài đặt quyền mới.
9. Nhấn các nút OK trên tất cả các cửa sổ.
5. Tạo lại shortcut của chương trình
Nếu lỗi "Cannot access the specified device" xảy ra khi bạn cố chạy shortcut chương trình thì sự cố có thể nằm ở chính shortcut đó. Trong trường hợp này, việc thiết lập shortcut mới cho phần mềm bị ảnh hưởng có thể giải quyết được sự cố. Đây là cách thực hiện trên máy tính của bạn:
1. Nhấp chuột phải vào bất kỳ phần trống nào của desktop và chọn New.
2. Nhấp vào shortcut để hiển thị công cụ thêm desktop shortcut.
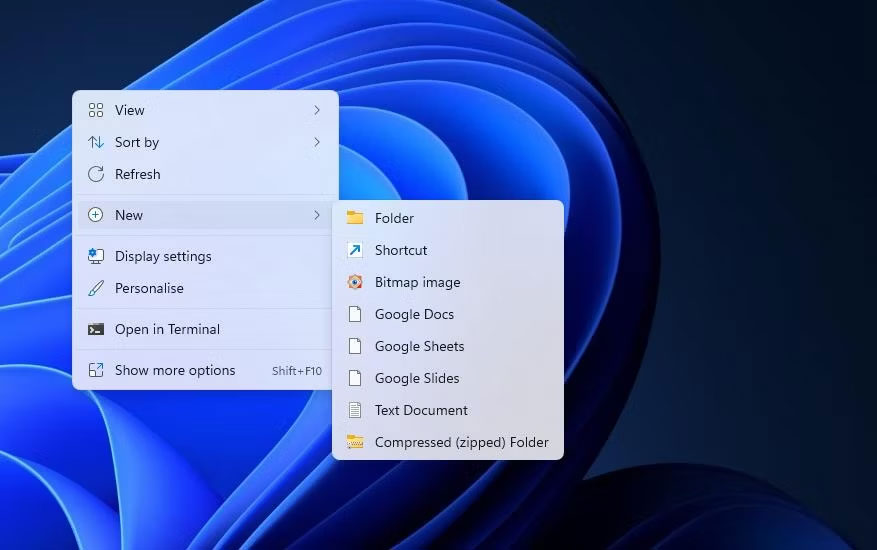
3. Sau đó, nhấp vào Browse để chọn file EXE xảy ra lỗi và nhấn nút OK.

4. Chọn Next và nhập tiêu đề shortcut vào hộp văn bản.
5. Nhấn Finish để thêm shortcut chương trình mới.
6. Nhấp chuột phải vào shortcut cũ của chương trình để chọn Delete (nút thùng rác trong Windows 11).
6. Kiểm tra kỹ vị trí của file
Bạn có cài đặt phần mềm và lưu một số file vào ổ cứng ngoài hoặc ổ cứng mạng không? Nếu vậy, có thể xảy ra lỗi truy cập do file nằm trên ổ hiện không thể truy cập được.
Kiểm tra kỹ vị trí của file bạn đang cố chạy hoặc mở bằng cách nhấp chuột phải vào desktop shortcut của chúng và chọn Properties. Sau đó, bạn có thể kiểm tra đường dẫn cho shortcut trong hộp Target được hiển thị ngay bên dưới.
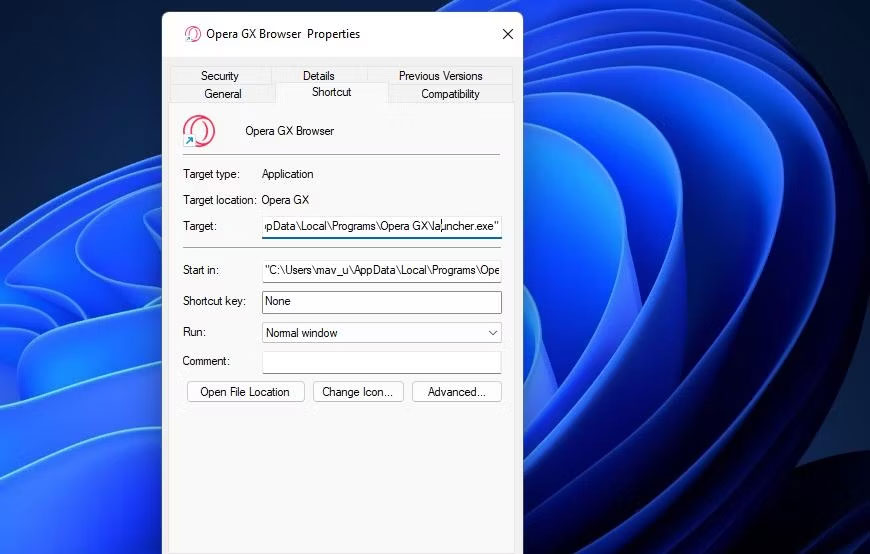
Hộp Target đó sẽ hiển thị xem file có nằm trên ổ khác hay không. Nếu đúng như vậy, hãy kết nối ổ cứng ngoài chứa file với PC của bạn để truy cập file đó. Kiểm tra kỹ xem file được chỉ định chưa bị xóa nếu hộp Target tham chiếu đến ổ C: cục bộ. Để làm điều đó, hãy mở đường dẫn thư mục được chỉ định trong File Explorer.
Nếu bạn phát hiện ra file của shortcut đã bị xóa, bạn có thể truy xuất file đó. Mở Recycle Bin để xem file có trong đó không. Nếu vậy, hãy nhấp chuột phải vào file và chọn Restore.
7. Kích hoạt quyền admin với Group Policy Editor
Người dùng đã xác nhận việc bật chế độ phê duyệt admin trong Group Policy Editor có thể giải quyết lỗi truy cập file này. Tuy nhiên, Group Policy Editor chỉ khả dụng trong phiên bản Windows 11, Windows 10 Pro và Enterprise. Nếu bạn có thể sử dụng Group Policy Editor, hãy thử bật chế độ phê duyệt của admin như sau:
1. Mở Group Policy Editor và chọn Computer Configuration trong tiện ích đó.
2. Nhấp đúp vào Windows Settings để mở rộng danh mục cấu hình đó.
3. Sau đó, nhấp đúp vào Security Settings > Local Policies > Security Options trong thanh bên của Group Policy Editor.
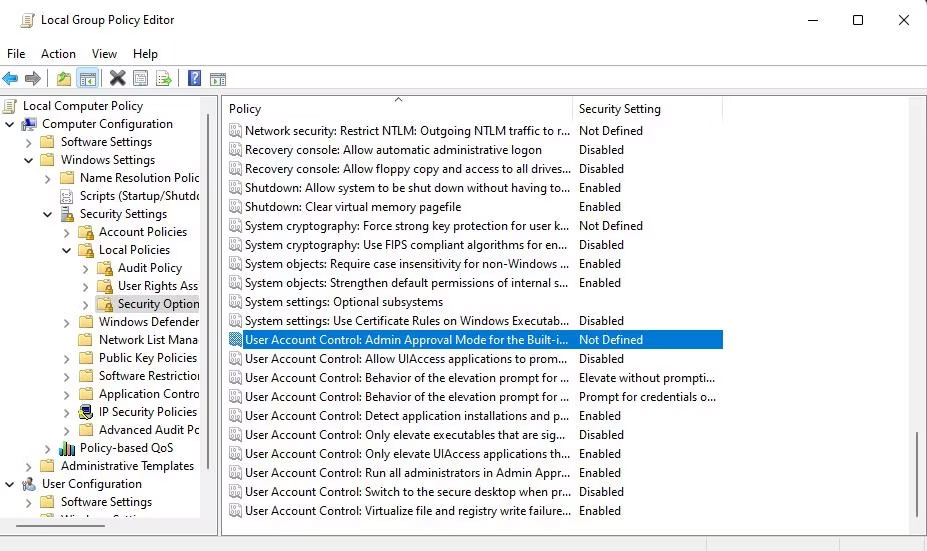
4. Nhấm đúp vào policy Admin Approval Mode for Built-in Administrator account.
5. Sau đó chọn nút Enabled.
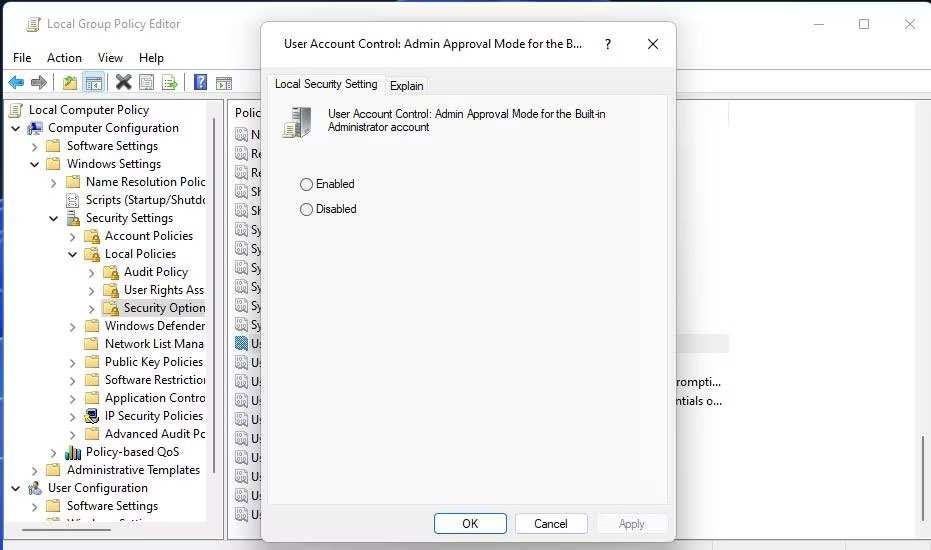
6. Nhấp vào Apply để thiết lập policy.
7. Chọn OK để thoát khỏi cửa sổ cài đặt policy và đóng tiện ích Group Policy Manager.
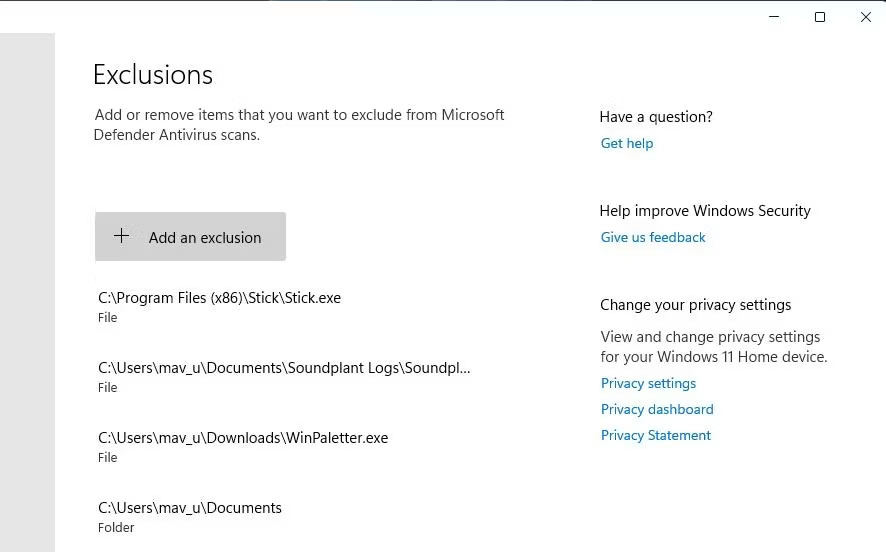
8. Thiết lập phần mềm hoặc file bị ảnh hưởng loại trừ Windows Security
Vì các biện pháp chặn Windows Security có thể gây ra lỗi này, vì vậy người dùng nên thêm các file bị ảnh hưởng vào danh sách loại trừ của ứng dụng diệt virus đó. Làm như vậy sẽ loại trừ file khỏi tính năng bảo vệ chống virus của Defender. Hãy xem hướng dẫn của Quantrimang.com về cách đưa các file vào whitelist trong Microsoft Defender (trước đây là Windows Defender) để biết chi tiết về cách áp dụng giải pháp tiềm năng này.
9. Tạm thời vô hiệu hóa mọi phần mềm bảo mật của bên thứ ba đang hoạt động
Một số ứng dụng diệt virus của bên thứ ba có chung tính năng chặn ứng dụng tương tự như Windows Security. Do đó, phần mềm bảo mật thay thế cũng có thể khiến vấn đề tương tự xảy ra. Vì vậy, hãy thử tắt mọi phần mềm diệt virus của bên thứ ba được cài đặt trên PC của bạn trước khi thử chạy phần mềm EXE bị ảnh hưởng.
Cách tắt chính xác các ứng dụng diệt virus của bên thứ ba khác nhau đôi chút. Tuy nhiên, hầu hết đều có menu ngữ cảnh mà bạn có thể chọn để vô hiệu hóa khả năng bảo vệ của chúng. Nhấp chuột phải vào biểu tượng khay hệ thống cho phần mềm diệt virus để xem menu ngữ cảnh của nó. Sau đó chọn một tùy chọn để vô hiệu hóa khả năng chống virus của nó từ đó.
Nếu giải pháp tiềm năng này có hiệu quả, bạn sẽ biết nguyên nhân gây ra nó. Tuy nhiên, đừng tắt phần mềm diệt virus của bạn mà hãy thêm các file bị ảnh hưởng vào danh sách ngoại lệ của phần mềm bảo mật.
10. Sửa chữa hoặc cài đặt lại file
Nếu bạn đang gặp phải sự cố này do file bị hỏng thì việc sửa chữa hoặc cài đặt lại nó là cách tốt nhất. Sử dụng Control Panel sẽ là lựa chọn tốt nhất của bạn trong trường hợp này. Đây là cách bạn có thể làm điều đó:
- Đi tới thanh tìm kiếm trong menu Start, nhập 'control panel' và chọn kết quả phù hợp nhất.
- Từ đó, đi đến Programs.
- Sau đó chọn Programs and Features.
- Nhấp chuột phải vào bất kỳ chương trình nào và chọn Uninstall/Change.
Tùy thuộc vào ứng dụng, bạn sẽ có tùy chọn gỡ hoặc thay đổi cài đặt của ứng dụng. Chỉ cần làm theo hướng dẫn trên màn hình và bạn sẽ hoàn tất ngay lập tức. Nếu bạn đã cài đặt ứng dụng, hãy đảm bảo bạn download ứng dụng đó từ một nguồn đáng tin cậy và sau đó xem liệu bạn có gặp lại lỗi tương tự hay không.
