Cách sử dụng Scrcpy để điều khiển Android trên Linux
- Thứ ba - 04/06/2024 23:59
- In ra
- Đóng cửa sổ này
Scrcpy (phát âm là Screen Copy) là một ứng dụng mã nguồn mở có thể sử dụng để điều khiển và chiếu liền mạch thiết bị Android của mình trên Linux. Bạn có thể kết nối với thiết bị Android của mình qua cáp USB hoặc không dây và điều khiển thiết bị bằng bàn phím và chuột. Đây là cách điều khiển thiết bị Android trên Linux bằng Scrcpy.
Cài đặt Scrcpy trong Linux
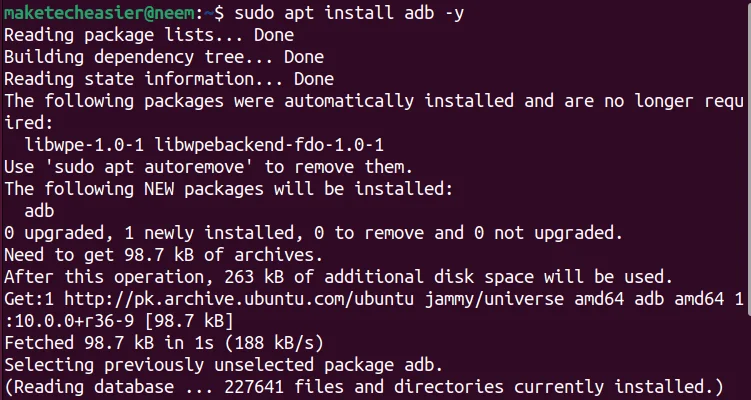
Trước khi cài đặt Scrcpy, nên cài đặt adb (Android Debug Bridge) trong hệ thống của mình. Với mục đích này, hãy thực thi một trong các lệnh sau, tùy thuộc vào bản phân phối của bạn:
# Hệ thống dựa trên Debian
sudo apt install adb
# Hệ thống dựa trên Fedora
sudo yum install adb
# Hệ thống dựa trên Arch
sudo pacman -S android-tools
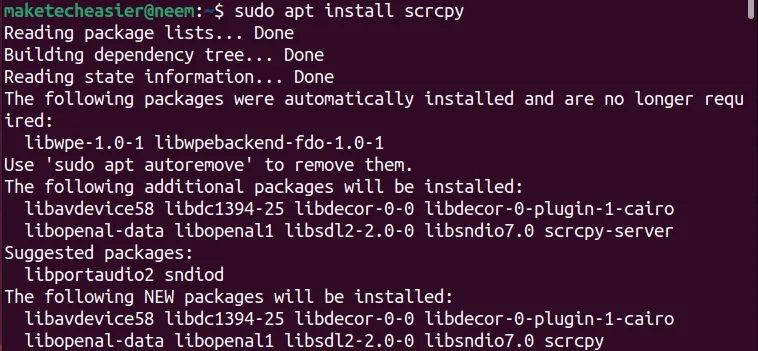
Sau khi cài đặt adb, hãy cài đặt phiên bản ổn định của Scrcpy:
# Hệ thống dựa trên Debian
sudo apt install scrcpy
# Hệ thống dựa trên Fedora
sudo dnf copr enable zeno/scrcpy && dnf install scrcpy
# Hệ thống dựa trên Arch
sudo pacman -S scrcpy
Cũng có thể cài đặt phiên bản ổn định của Scrcy bằng snap:
sudo snap install scrcpy

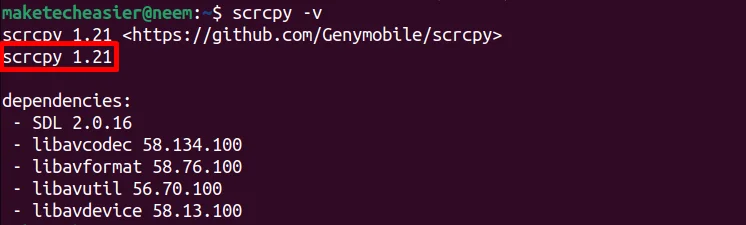
Sau khi cài đặt thành công, bạn có thể xác minh phiên bản của nó bằng lệnh scrcpy -v:
scrcpy -v
Cài đặt phiên bản Scrcpy mới nhất để có nhiều tính năng hơn
Nếu muốn có các tính năng như audio forwarding và camera mirroring, cần cài đặt phiên bản Scrcpy mới nhất (hiện tại là phiên bản 2.4).
Với mục đích này, cần cài đặt nó thông qua mã nguồn.
Trước tiên, hãy đảm bảo rằng hệ thống của bạn có tất cả các dependency cần thiết:
# Hệ thống dựa trên Debian
sudo apt install ffmpeg libsdl2-2.0-0 adb wget \
                 gcc git pkg-config meson ninja-build libsdl2-dev \
                 libavcodec-dev libavdevice-dev libavformat-dev libavutil-dev \
                 libswresample-dev libusb-1.0-0 libusb-1.0-0-dev

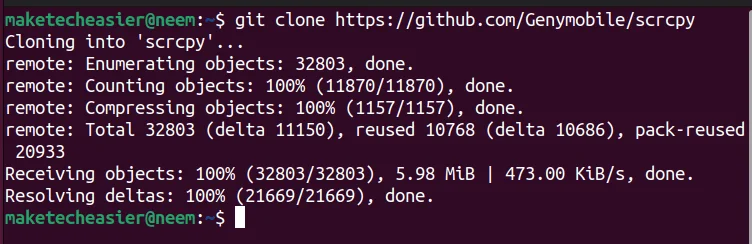
Sau đó, sao chép kho lưu trữ Scrcpy bằng lệnh git clone:
git clone https://github.com/Genymobile/scrcpy
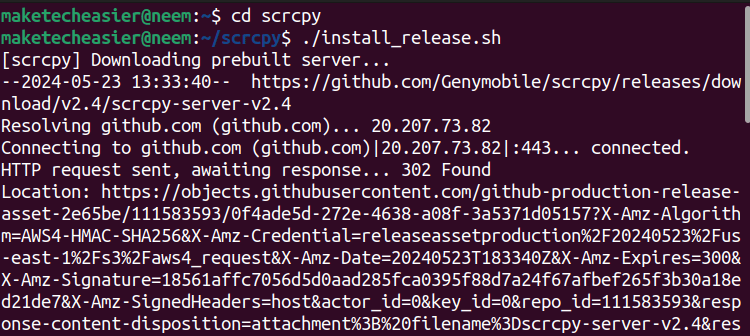
Tiếp theo, điều hướng đến thư mục của nó và chạy script cài đặt Scrcpy:
cd scrcpy
./install_release.sh
Bằng cách này, phiên bản Scrcpy mới nhất sẽ được cài đặt trong hệ thống Linux của bạn. Để xác minh nó, hãy thực thi lệnh sau:
scrcpy -v
Bây giờ, bạn đã sẵn sàng kết nối với thiết bị Android qua USB hoặc không dây.
Kết nối với Android qua cáp USB
Để kết nối với thiết bị Android, bạn cần bật Developer options và USB debugging.
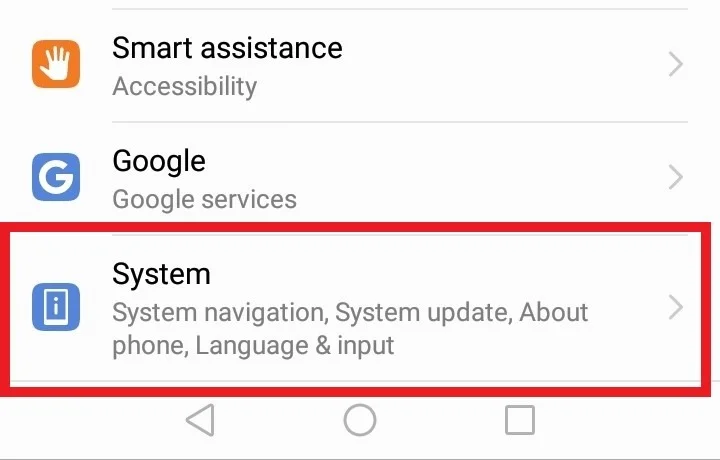
Để thực hiện việc này, hãy đi tới Settings -> System:
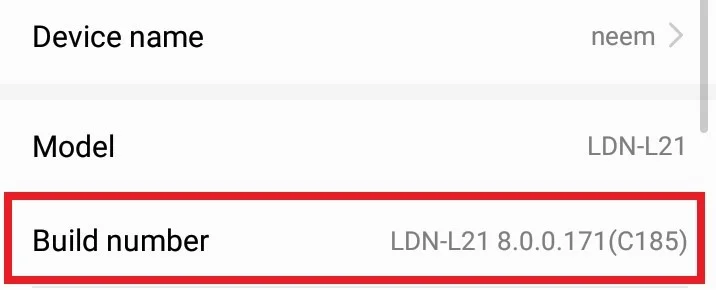
Mở tùy chọn About phone và nhấp vào Build number nhiều lần cho đến khi bạn nhận được thông báo có nội dung “You are a developer“:
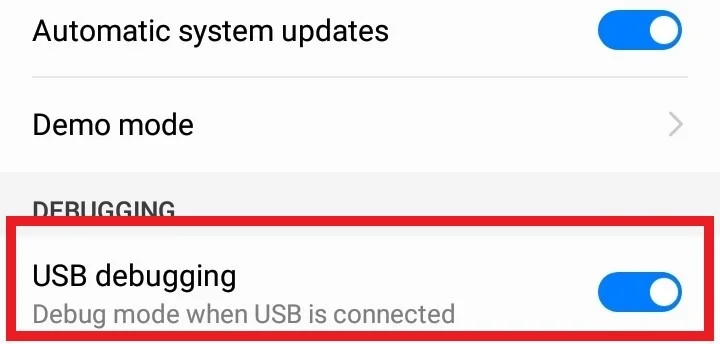
Tiếp theo, quay lại System settings và tại đây bạn sẽ thấy Developer options. Trong Developer options, bật tùy chọn USB debugging:
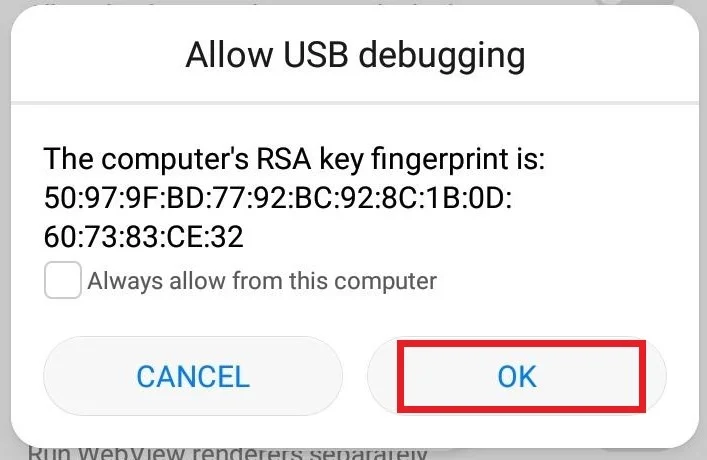
Sau khi bật tùy chọn USB debugging, bạn sẽ nhận được lời nhắc xác nhận lựa chọn của mình. Tại đây, nhấn nút OK:
Bây giờ, hãy kết nối điện thoại với hệ thống Linux bằng cáp USB. Sau khi thực hiện việc này, bạn sẽ thấy thông báo chế độ USB debugging trên Android.
Tiếp theo, mở Terminal trong hệ thống Linux và thực thi lệnh scrcpy để chiếu thiết bị:
scrcpy
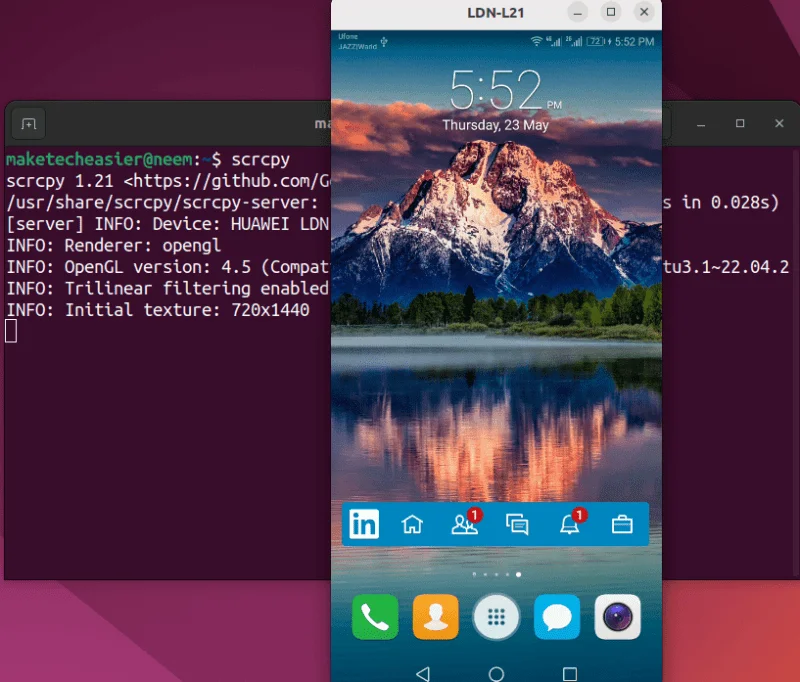
Bạn có thể thấy Android phản chiếu trên hệ thống của mình.
Để ngắt kết nối điện thoại, chỉ cần nhấn phím Ctrl + C.
Kết nối với Android thông qua kết nối không dây
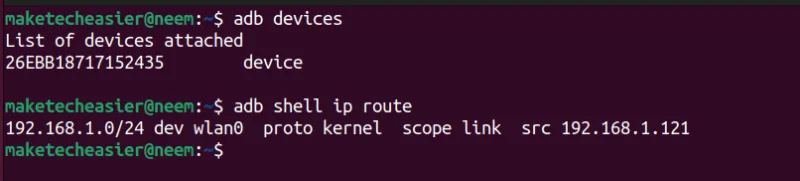
Bạn cũng có thể kết nối không dây thiết bị Android của mình. Trước tiên, hãy kết nối điện thoại với Linux qua cáp USB và thực hiện lệnh adb sau để Linux nhận dạng thiết bị Android:
adb devices
Tìm địa chỉ IP của thiết bị Android:
adb shell ip route
Hãy ghi nhớ: Linux và Android phải được kết nối với cùng một mạng Wi-Fi.
Bạn cũng có thể kiểm tra địa chỉ IP của điện thoại bằng cách đi tới Settings -> Wireless & network -> Wi-Fi và nhấn nút Configure:

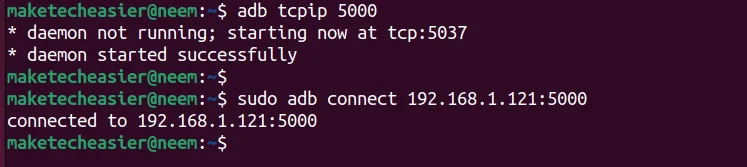
Sau khi biết địa chỉ IP của điện thoại, bạn phải cấu hình một cổng cho kết nối TCP/IP của mình. Chẳng hạn, ví dụ đặt nó thành 5000:
adb tcpip 5000
Lưu ý: Có thể cấu hình bất kỳ cổng nào chưa được chỉ định.
Bây giờ, hãy ngắt kết nối điện thoại khỏi cáp USB. Sau đó, kết nối điện thoại với hệ thống Linux bằng địa chỉ IP của điện thoại và cổng TCP/IP được chỉ định qua mạng:
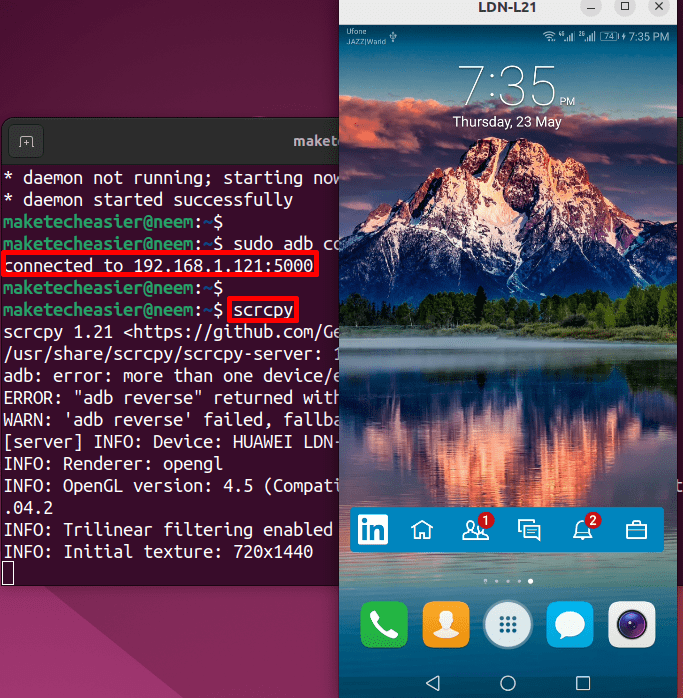
sudo adb connect 192.168.1.121:5000
Trong trường hợp có nhiều thiết bị, bạn có thể sử dụng số sê-ri của Android để kết nối với thiết bị qua mạng:
scrcpy -S <số-sê-ri>
Cuối cùng, thực thi lệnh scrcpy để điều khiển và chiếu màn hình Android:
scrcpy
Như đã đề cập trước đó, bạn có thể ngắt kết nối này bằng cách nhấn phím Ctrl + C.
