Cách sử dụng Rufus để bỏ qua yêu cầu TPM và Secure Boot trong Windows 11
- Thứ năm - 28/11/2024 23:17
- In ra
- Đóng cửa sổ này
Bạn có thể sử dụng các bản hack registry và những file ISO đã chỉnh sửa để bỏ qua các yêu cầu TPM 2.0 và Secure Boot của Windows 11. Tuy nhiên, bạn nên sử dụng Rufus thay thế. Đây là lý do!
Cách tạo USB boot bỏ qua các yêu cầu của Windows 11 bằng Rufus
Đầu tiên, bạn cần tải xuống phiên bản Rufus mới nhất từ Microsoft Store, GitHub hoặc trang web chính thức. Bạn nên tải xuống phiên bản Rufus portable để tránh hoàn toàn quá trình cài đặt.
quantrimang.com/download/rufus-179712
Ngoài ra, hãy tải xuống phiên bản mới nhất của file image ISO Windows 11 từ trang chính thức của Microsoft.
quantrimang.com/cong-nghe/tai-windows-11-download-iso-win-11-182407
Sau khi tải xuống phiên bản Rufus portable, hãy làm theo các bước sau:
- Vào thư mục tải xuống và nhấp đúp vào Rufus để chạy công cụ.
- UAC sẽ xuất hiện. Nhấp vào nút Yes để tiếp tục.
- Cắm USB vào hệ thống Windows 11. Đảm bảo rằng USB có dung lượng từ 8GB trở lên. Rufus sẽ tự động nhận dạng USB.
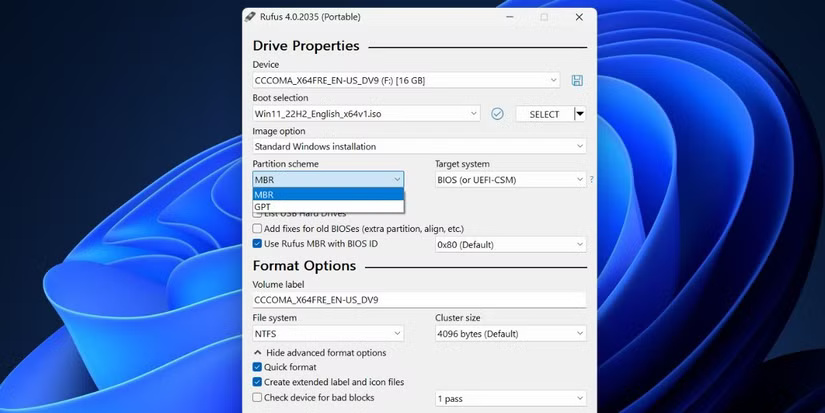
- Nhấp vào nút Select trong phần Boot selection. Duyệt máy tính của bạn để tìm file ISO và chọn file đó.
- Tiếp theo, nhấp vào tùy chọn Partition scheme. Chọn MBR nếu bạn muốn sử dụng USB này trên hệ thống có BIOS hoặc UEFI. Không thay đổi Target system và Partition scheme nếu bạn định sử dụng USB boot này trên hệ thống UEFI.
Tạo USB boot bằng Rufus
- Điều hướng đến cuối cửa sổ Rufus và nhấp vào nút Start.
- Hộp Windows User Experience sẽ mở ra. Tại đây, bạn có thể áp dụng mọi tùy chỉnh mình muốn cho USB boot Windows 11. Nhấp vào hộp kiểm trước tùy chọn Remove requirement for 4GB+ RAM, Secure Boot, and TPM 2.0.
- Tương tự, chọn hộp kiểm Remove requirement for an online Microsoft account và Disable data collection (Skip privacy questions).
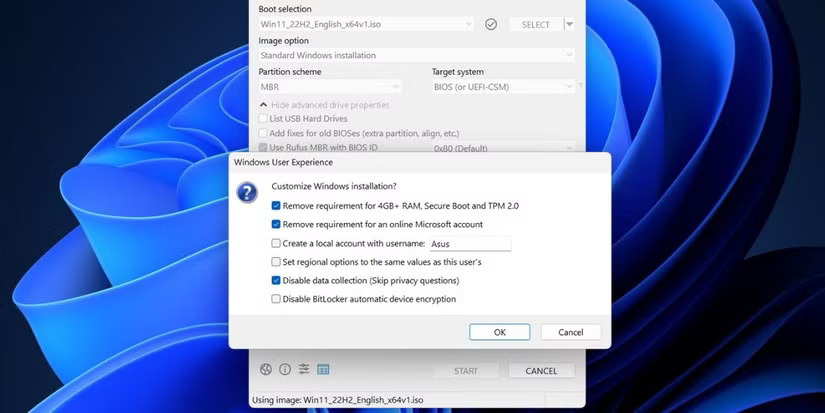
Tùy chỉnh cài đặt Windows của bạn bằng Rufus
- Nhấp vào nút OK. Rufus sẽ tạo cảnh báo về việc xóa mọi dữ liệu trên USB.

Xác nhận tùy chỉnh cài đặt Windows của bạn bằng Rufus
- Cuối cùng, nhấp vào nút OK và đợi Rufus tạo USB boot Windows 11. Tháo ổ sau khi bạn thấy thông báo “Ready”.
Cách cài đặt Windows 11 đã sửa đổi trên hệ thống
Lặp lại các bước sau để cài đặt Windows 11 trong khi bỏ qua các yêu cầu hệ thống của nó:
- Cắm USB boot mà bạn đã tạo bằng Rufus vào hệ thống đích. Nhấn phím F được chỉ định nhiều lần (F10, F12, F2 hoặc Esc) để vào menu thiết bị khởi động.
- Chọn USB từ danh sách bằng các phím mũi tên và nhấn phím Enter để khởi động.
- Chọn ngôn ngữ và khu vực rồi nhấp vào nút Next. Sau đó, nhấp vào Next một lần nữa.
- Chọn tùy chọn Install Windows 11 và nhấp vào hộp kiểm bên dưới. Nhấp vào Next.
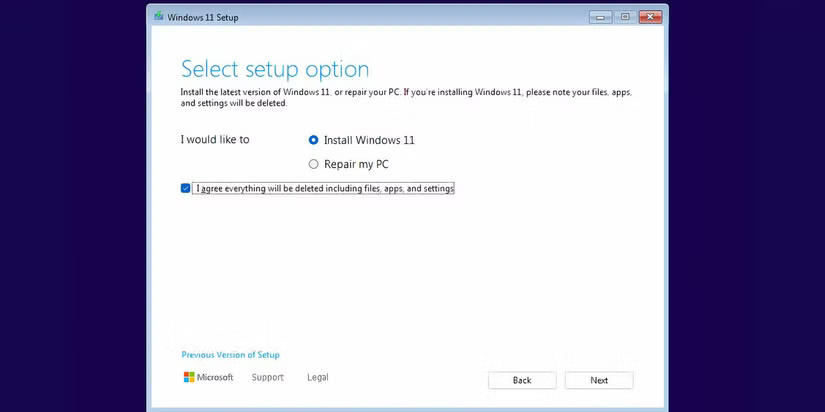
Trang lựa chọn thiết lập trong quá trình cài đặt Windows 11
- Nhấp vào tùy chọn I don’t have the product key.
- Chọn phiên bản Windows 11 bạn muốn cài đặt (Home, Pro, Enterprise hoặc Education) rồi nhấp vào Next.
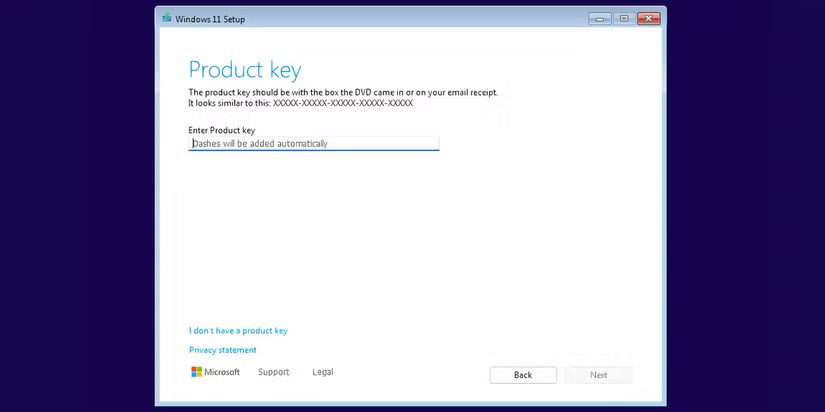
Trang product key trong quá trình cài đặt Windows 11
- Chấp nhận EULA và nhấp vào nút Next. Sau đó, nhấp vào tùy chọn Custom.
- Chọn ổ mà bạn muốn cài đặt Windows 11. Nhấp vào nút Format để định dạng ổ và nhấp vào Next.
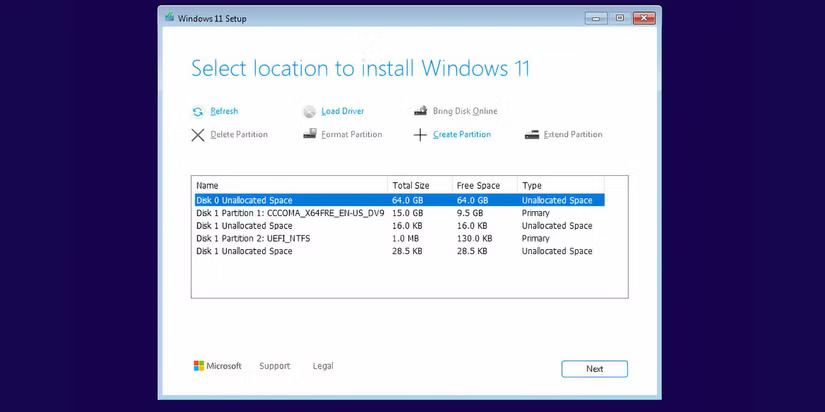
Trang lựa chọn ổ trong quá trình cài đặt Windows 11
- Xem lại các quyết định của bạn và nhấp vào Install.
- Quá trình thiết lập sẽ bắt đầu cài đặt Windows 11 tự động. Tuy nhiên, nếu TPM và Secure Boot bypass không được áp dụng, bạn sẽ không bao giờ vượt qua được trang Enter product key.
- Hệ thống của bạn sẽ khởi động lại một vài lần rồi khởi động đến trang thiết lập Windows 11. Ngắt kết nối hệ thống khỏi Internet. Nếu không, hệ thống sẽ cố gắng kiểm tra và tải xuống các bản cập nhật, có thể mất nhiều thời gian.
- Nhập Name và chọn 3 câu hỏi bảo mật cùng với câu trả lời của chúng. Nhấp vào Next.
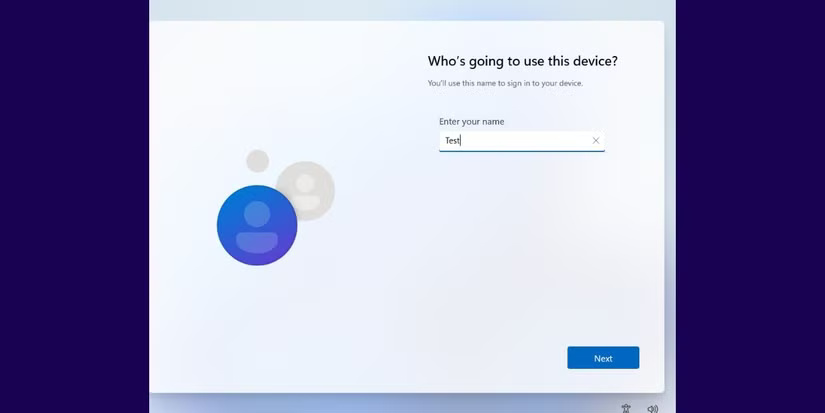
Trang thiết lập OOBE của Windows 11 với tùy chọn tạo tên người dùng
- Windows sẽ chuẩn bị hệ thống của bạn và khởi động vào desktop sau một thời gian.
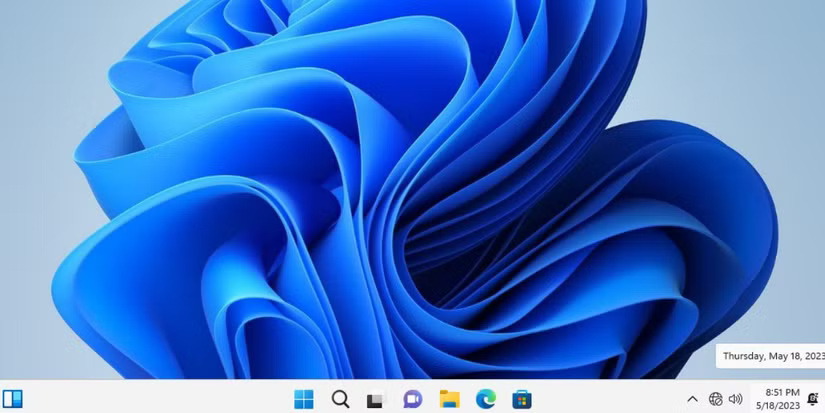
Desktop Windows 11 đang hoạt động trên hệ thống không được hỗ trợ
