<!DOCTYPE html>
    <html lang="vi" xmlns="http://www.w3.org/1999/xhtml" prefix="og: http://ogp.me/ns#">
    <head>
<title>Cách sử dụng Genymotion để chạy app Android trên Windows 10</title>
<meta name="description" content="Cách sử dụng Genymotion để chạy app Android trên Windows 10 - Savefile - Tin Tức -...">
<meta name="author" content=".: Nguoicodonvn2008.info - Cõi lòng người cô đơn :.">
<meta name="copyright" content=".: Nguoicodonvn2008.info - Cõi lòng người cô đơn :. [admin@nguoicodonvn2008.info]">
<meta name="robots" content="index, archive, follow, noodp">
<meta name="googlebot" content="index,archive,follow,noodp">
<meta name="msnbot" content="all,index,follow">
<meta name="generator" content="NukeViet v4.5">
<meta http-equiv="Content-Type" content="text/html; charset=utf-8">
<meta property="og:title" content="Cách sử dụng Genymotion để chạy app Android trên Windows 10">
<meta property="og:type" content="website">
<meta property="og:description" content="Savefile - Tin Tức - https&#x3A;&#x002F;&#x002F;www.nguoicodonvn2008.info&#x002F;vi&#x002F;news&#x002F;savefile&#x002F;kien-thuc-may-tinh&#x002F;cach-su-dung-genymotion-de-chay-app-android-tren-windows-10-2329.html">
<meta property="og:site_name" content=".&#x3A; Nguoicodonvn2008.info - Cõi lòng người cô đơn &#x3A;.">
<meta property="og:url" content="https://www.nguoicodonvn2008.info/vi/news/savefile/kien-thuc-may-tinh/cach-su-dung-genymotion-de-chay-app-android-tren-windows-10-2329.html">
<link rel="shortcut icon" href="https://www.nguoicodonvn2008.info/favicon.ico">
<link rel="canonical" href="https://www.nguoicodonvn2008.info/vi/news/savefile/kien-thuc-may-tinh/cach-su-dung-genymotion-de-chay-app-android-tren-windows-10-2329.html">
<link rel="alternate" href="https://www.nguoicodonvn2008.info/vi/news/rss/" title="Tin Tức" type="application/rss+xml">
<link rel="alternate" href="https://www.nguoicodonvn2008.info/vi/news/rss/karaoke-dual/" title="Tin Tức - Karaoke Dual" type="application/rss+xml">
<link rel="alternate" href="https://www.nguoicodonvn2008.info/vi/news/rss/nhac-tre/" title="Tin Tức - Nhạc trẻ" type="application/rss+xml">
<link rel="alternate" href="https://www.nguoicodonvn2008.info/vi/news/rss/tru-tinh/" title="Tin Tức - Trữ tình" type="application/rss+xml">
<link rel="alternate" href="https://www.nguoicodonvn2008.info/vi/news/rss/nuoc-ngoai/" title="Tin Tức - Nước ngoài" type="application/rss+xml">
<link rel="alternate" href="https://www.nguoicodonvn2008.info/vi/news/rss/remix/" title="Tin Tức - Remix" type="application/rss+xml">
<link rel="alternate" href="https://www.nguoicodonvn2008.info/vi/news/rss/tam-su-tinh-yeu/" title="Tin Tức - Tâm sự tình yêu" type="application/rss+xml">
<link rel="alternate" href="https://www.nguoicodonvn2008.info/vi/news/rss/tho-suu-tam/" title="Tin Tức - Thơ sưu tầm" type="application/rss+xml">
<link rel="alternate" href="https://www.nguoicodonvn2008.info/vi/news/rss/cuoc-song/" title="Tin Tức - Cuộc sống" type="application/rss+xml">
<link rel="alternate" href="https://www.nguoicodonvn2008.info/vi/news/rss/phan-mem/" title="Tin Tức - Phần mềm" type="application/rss+xml">
<link rel="alternate" href="https://www.nguoicodonvn2008.info/vi/news/rss/kien-thuc-may-tinh/" title="Tin Tức - Kiến thức máy tính" type="application/rss+xml">
<link rel="alternate" href="https://www.nguoicodonvn2008.info/vi/news/rss/hoc-tap/" title="Tin Tức - Học tập" type="application/rss+xml">
<link rel="alternate" href="https://www.nguoicodonvn2008.info/vi/news/rss/tai-lieu/" title="Tin Tức - Tài liệu" type="application/rss+xml">
<link rel="alternate" href="https://www.nguoicodonvn2008.info/vi/news/rss/de-thi/" title="Tin Tức - Đề thi" type="application/rss+xml">
<link rel="preload" as="style" href="https://www.nguoicodonvn2008.info/assets/css/font-awesome.min.css" type="text/css">
<link rel="preload" as="style" href="https://www.nguoicodonvn2008.info/themes/default/css/bootstrap.non-responsive.css" type="text/css">
<link rel="preload" as="style" href="https://www.nguoicodonvn2008.info/themes/default/css/style.css" type="text/css">
<link rel="preload" as="style" href="https://www.nguoicodonvn2008.info/themes/default/css/style.non-responsive.css" type="text/css">
<link rel="preload" as="style" href="https://www.nguoicodonvn2008.info/themes/default/css/news.css" type="text/css">
<link rel="preload" as="style" href="https://www.nguoicodonvn2008.info/themes/default/css/custom.css" type="text/css">
<link rel="preload" as="script" href="https://www.nguoicodonvn2008.info/assets/js/jquery/jquery.min.js" type="text/javascript">
<link rel="preload" as="script" href="https://www.nguoicodonvn2008.info/assets/js/language/vi.js" type="text/javascript">
<link rel="preload" as="script" href="https://www.nguoicodonvn2008.info/assets/js/DOMPurify/purify3.js" type="text/javascript">
<link rel="preload" as="script" href="https://www.nguoicodonvn2008.info/assets/js/global.js" type="text/javascript">
<link rel="preload" as="script" href="https://www.nguoicodonvn2008.info/assets/js/site.js" type="text/javascript">
<link rel="preload" as="script" href="https://www.nguoicodonvn2008.info/themes/default/js/news.js" type="text/javascript">
<link rel="preload" as="script" href="https://www.nguoicodonvn2008.info/themes/default/js/main.js" type="text/javascript">
<link rel="preload" as="script" href="https://www.nguoicodonvn2008.info/themes/default/js/custom.js" type="text/javascript">
<link rel="preload" as="script" href="https://www.nguoicodonvn2008.info/themes/default/js/bootstrap.min.js" type="text/javascript">
<link rel="stylesheet" href="https://www.nguoicodonvn2008.info/assets/css/font-awesome.min.css">
<link rel="stylesheet" href="https://www.nguoicodonvn2008.info/themes/default/css/bootstrap.non-responsive.css">
<link rel="stylesheet" href="https://www.nguoicodonvn2008.info/themes/default/css/style.css">
<link rel="stylesheet" href="https://www.nguoicodonvn2008.info/themes/default/css/style.non-responsive.css">
<link rel="StyleSheet" href="https://www.nguoicodonvn2008.info/themes/default/css/news.css">
<link rel="stylesheet" href="https://www.nguoicodonvn2008.info/themes/default/css/custom.css">
<style type="text/css">
	body{background: #fff;}
</style>
    </head>
    <body>
<div id="print">
	<div id="hd_print">
		<h2 class="pull-left">.&#x3A; Nguoicodonvn2008.info - Cõi lòng người cô đơn &#x3A;.</h2>
		<p class="pull-right"><a title=".&#x3A; Nguoicodonvn2008.info - Cõi lòng người cô đơn &#x3A;." href="https://www.nguoicodonvn2008.info/">https://www.nguoicodonvn2008.info</a></p>
	</div>
	<div class="clear"></div>
	<hr />
	<div id="content">
		<h1>Cách sử dụng Genymotion để chạy app Android trên Windows 10</h1>
		<ul class="list-inline">
			<li>Thứ năm - 09/07/2020 00:59</li>
			<li class="hidden-print txtrequired"><em class="fa fa-print">&nbsp;</em><a title="In ra" href="javascript:;" onclick="window.print()">In ra</a></li>
			<li class="hidden-print txtrequired"><em class="fa fa-power-off">&nbsp;</em><a title="Đóng cửa sổ này" href="javascript:;" onclick="window.close()">Đóng cửa sổ này</a></li>
		</ul>
		<div class="clear"></div>
		<div id="hometext">
		</div>
				<div class="imghome">
			<img alt="Cách sử dụng Genymotion để chạy app Android trên Windows 10" src="https://st.quantrimang.com/photos/image/2020/07/09/chay-android-tren-windows-voi-genymotion-1.jpg" width="460" class="img-thumbnail" />
		</div>
		<div class="clear"></div>
		<div id="bodytext" class="clearfix">
			<p style="text-align: justify;">Genymotion là&nbsp;trình giả lập Android phổ biến&nbsp;dựa trên VirtualBox. Nếu bạn chơi các game đồ họa 3D nặng, chẳng hạn như PUBG Mobile, cần dung lượng 2GB trở lên, Genymotion cho phép bạn trải nghiệm chúng trên laptop hoặc máy tính để bàn lớn hơn mà không gặp vấn đề về hiệu suất. Trong hướng dẫn này, bạn sẽ học cách chạy các ứng dụng Android trên Windows 10 với Genymotion và chơi các game Android yêu thích trên máy tính.</p>

<p style="text-align: justify;"><strong>Lưu ý</strong><strong>:&nbsp;</strong>Genymotion là một phần mềm độc quyền hướng đến các nhà phát triển Android nghiêm túc. Tuy nhiên, phiên bản cá nhân để chơi game hoàn toàn miễn phí và điều đó đủ để chạy tất cả những ứng dụng yêu thích của bạn.</p>

<h2 style="text-align: justify;">1. Tải và cài đặt Genymotion
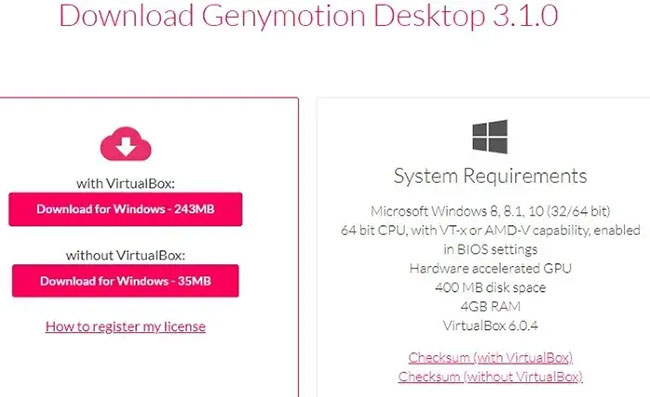
</h2>

<p style="text-align: justify;">Tải Genymotion Desktop cho Windows:&nbsp;<strong>https://download.com.vn/genymotion/download</strong>&nbsp;với VirtualBox. Các cấu hình hệ thống tối thiểu được hiển thị ở đây. Mặc dù ghi là 4GB RAM, nhưng ít nhất 8GB RAM sẽ giúp bạn không gặp phải bất kỳ sự chậm trễ nào về hiệu suất. Càng có nhiều RAM, trải nghiệm sẽ càng tốt hơn.</p>

<figure>
<div style="text-align: justify;"><img alt="Các cấu hình hệ thống tối thiểu" data-i="0" data-src="https://st.quantrimang.com/photos/image/2020/07/09/chay-android-tren-windows-voi-genymotion-1.jpg" data-was-processed="true" height="397" src="https://st.quantrimang.com/photos/image/2020/07/09/chay-android-tren-windows-voi-genymotion-1.jpg" width="650" /></div>

<figcaption>
<div style="text-align: justify;">Các cấu hình hệ thống tối thiểu</div>
</figcaption>
</figure>

<p style="text-align: justify;">Trong khi cài đặt, chọn ngôn ngữ thiết lập mong muốn là tiếng Anh hoặc bất kỳ ngôn ngữ nào khác. Để tạo đường dẫn thư mục trong Windows 10, cần ít nhất 315MB dung lượng. Bạn có một lựa chọn là không tạo thư mục menu Start để ứng dụng không can thiệp vào các chức năng PC còn lại.</p>

<p style="text-align: justify;">
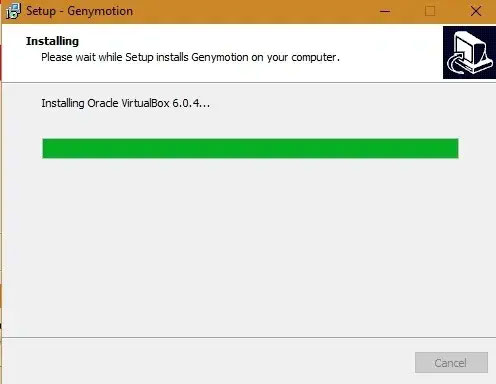
Đợi một lúc để Genymotion cài đặt trên Windows 10. Sau khi hoàn tất, VirtualBox sẽ tự động bắt đầu cài đặt trên Windows 10.</p>

<figure>
<div style="text-align: justify;"><img alt="VirtualBox sẽ tự động bắt đầu cài đặt trên Windows 10" data-i="1" data-src="https://st.quantrimang.com/photos/image/2020/07/09/chay-android-tren-windows-voi-genymotion-2.jpg" data-was-processed="true" height="384" src="https://st.quantrimang.com/photos/image/2020/07/09/chay-android-tren-windows-voi-genymotion-2.jpg" width="496" /></div>

<figcaption>
<div style="text-align: justify;">VirtualBox sẽ tự động bắt đầu cài đặt trên Windows 10</div>
</figcaption>
</figure>

<div style="text-align: justify;">&nbsp;</div>

<h2 style="text-align: justify;">2. Cài đặt VirtualBox</h2>

<p style="text-align: justify;">Nhấp vào&nbsp;<strong>Next</strong>&nbsp;để đồng ý với việc thiết lập Oracle VM VirtualBox Wizard.</p>

<p style="text-align: justify;">
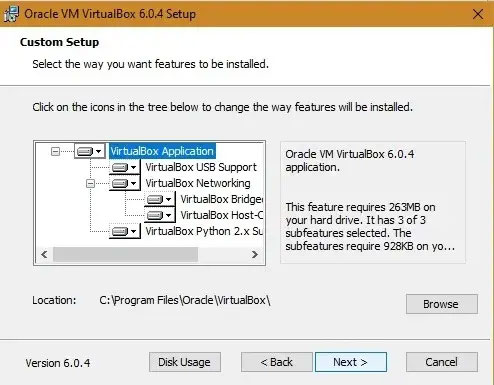
VirtualBox sẽ cài đặt một số thành phần nội bộ. Nhấp vào&nbsp;<strong>Next</strong>&nbsp;để tiếp tục. Bạn sẽ nhận được một tùy chọn để không tạo các mục menu, shortcut và thanh khởi động nhanh VirtualBox.</p>

<figure>
<div style="text-align: justify;"><img alt="Tùy chọn không tạo các mục menu, shortcut và thanh khởi động nhanh VirtualBox" data-i="2" data-src="https://st.quantrimang.com/photos/image/2020/07/09/chay-android-tren-windows-voi-genymotion-3.jpg" data-was-processed="true" height="385" src="https://st.quantrimang.com/photos/image/2020/07/09/chay-android-tren-windows-voi-genymotion-3.jpg" width="494" /></div>

<figcaption>
<div style="text-align: justify;">Tùy chọn không tạo các mục menu, shortcut và thanh khởi động nhanh VirtualBox</div>
</figcaption>
</figure>

<p style="text-align: justify;">Bạn có thể nhận được cảnh báo về các interface mạng tạm thời ngắt kết nối mạng. Bạn có thể yên tâm bỏ qua thông báo này. Nhấp vào&nbsp;<strong>Yes</strong>&nbsp;và tiếp tục.</p>

<p style="text-align: justify;">VirtualBox đã sẵn sàng để cài đặt. Nhấp vào&nbsp;<strong>Install</strong>&nbsp;để tiến hành.</p>

<p style="text-align: justify;">Chỉ mất một chút thời gian để ứng dụng VirtualBox cài đặt trên hệ thống.
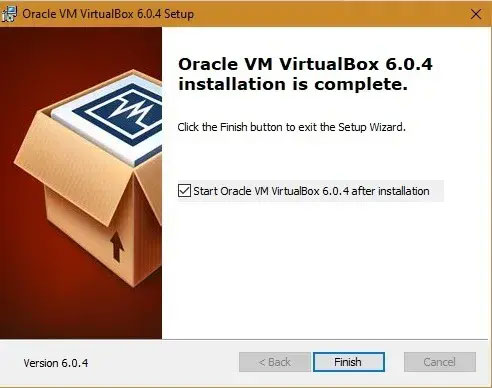
</p>

<p style="text-align: justify;">Nhấp vào&nbsp;<strong>Finish</strong>&nbsp;ngay khi cài đặt hoàn tất. Điều này sẽ tự động đưa bạn đến bước tiếp theo của việc khởi chạy Genymotion.</p>

<figure>
<div style="text-align: justify;"><img alt="Oracle VM VirtualBox được cài đặt thành công" data-i="3" data-src="https://st.quantrimang.com/photos/image/2020/07/09/chay-android-tren-windows-voi-genymotion-4.jpg" data-was-processed="true" height="388" src="https://st.quantrimang.com/photos/image/2020/07/09/chay-android-tren-windows-voi-genymotion-4.jpg" width="492" /></div>

<figcaption>
<div style="text-align: justify;">Oracle VM VirtualBox được cài đặt thành công</div>
</figcaption>
</figure>

<h2 style="text-align: justify;">3. Khởi chạy và kích hoạt Genymotion</h2>

<p style="text-align: justify;">Chọn tùy chọn&nbsp;<strong>Launch Genymotion</strong>&nbsp;và nhấp vào&nbsp;<strong>Finish</strong>&nbsp;để tiếp tục.</p>

<p style="text-align: justify;">Ứng dụng Genymotion sẽ khởi chạy trên màn hình Windows 10.</p>

<p style="text-align: justify;">Trong giai đoạn tiếp theo, bạn sẽ cần tạo tài khoản Genymotion để chạy các ứng dụng Android. Điều này sẽ tự động chuyển hướng bạn đến một cửa sổ trình duyệt với biểu mẫu Genymotion. Trong khi điền thông tin, hãy đảm bảo chọn&nbsp;<strong>Genymotion for personal use/Gaming</strong>.</p>

<figure>
<div style="text-align: justify;"><img alt="Tạo tài khoản Genymotion " data-i="4" data-src="https://st.quantrimang.com/photos/image/2020/07/09/chay-android-tren-windows-voi-genymotion-5.jpg" data-was-processed="true" height="459" src="https://st.quantrimang.com/photos/image/2020/07/09/chay-android-tren-windows-voi-genymotion-5.jpg" width="523" /></div>

<figcaption>
<div style="text-align: justify;">Tạo tài khoản Genymotion</div>
</figcaption>
</figure>

<p style="text-align: justify;">
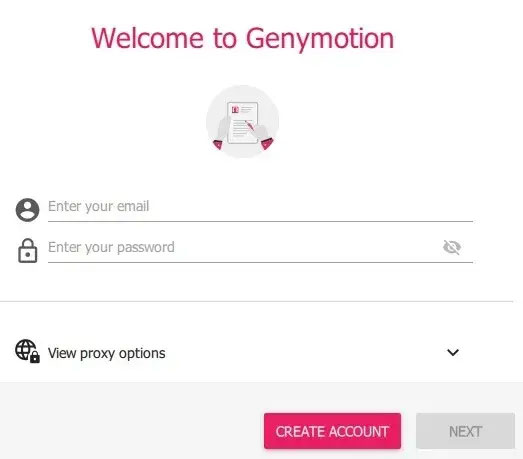
Khi cửa sổ giấy phép xuất hiện trên bảng điều khiển Genymotion, hãy chọn&nbsp;<strong>Personal use</strong>, nếu bạn không có giấy phép trả phí.</p>

<p style="text-align: justify;">Trong giai đoạn cuối, bạn phải đồng ý với thỏa thuận cấp phép người dùng cuối trước khi bảng điều khiển Genymotion mở trên màn hình.</p>

<div style="text-align: justify;">&nbsp;</div>

<h2 style="text-align: justify;">4. Cài đặt thiết bị ảo trong Genymotion</h2>

<p style="text-align: justify;">Làm việc với Genymotion khá dễ dàng. Nhấp vào&nbsp;<strong>+</strong>&nbsp;để cài đặt thiết bị di động ảo và chạy trình giả lập của bạn. Bạn có thể chạy nhiều thiết bị ảo trên Windows 10 (tùy thuộc vào dung lượng RAM bạn có).</p>

<p style="text-align: justify;">Chọn thiết bị ảo mục tiêu dựa trên cấu hình. Ban đầu, hãy dùng thử&nbsp;<strong>“custom phone”</strong>đơn giản nhất (bạn có thể xóa các thiết bị ảo này một cách dễ dàng).</p>

<figure>
<div style="text-align: justify;"><img alt="Hãy dùng thử “custom phone” đơn giản nhất" data-i="5" data-src="https://st.quantrimang.com/photos/image/2020/07/09/chay-android-tren-windows-voi-genymotion-6.jpg" data-was-processed="true" height="438" src="https://st.quantrimang.com/photos/image/2020/07/09/chay-android-tren-windows-voi-genymotion-6.jpg" width="650" /></div>

<figcaption>
<div style="text-align: justify;">Hãy dùng thử “custom phone” đơn giản nhất</div>
</figcaption>
</figure>

<p style="text-align: justify;">
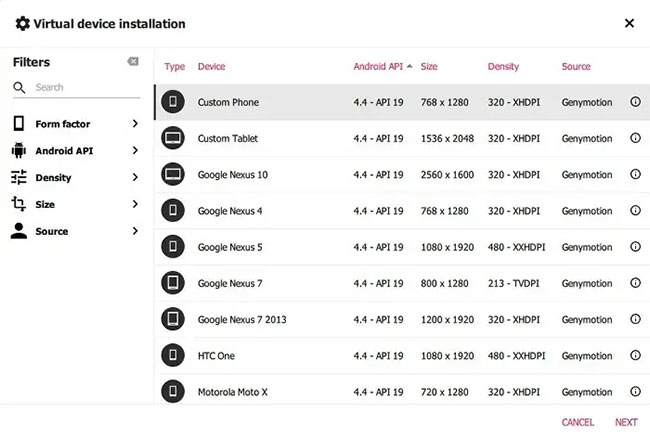
Bạn có thể thiết lập các thông số khác nhau liên quan đến thiết bị ảo của mình, bao gồm cả phiên bản Android 4.4 trở lên và RAM (khuyến nghị tối thiểu 2GB).</p>

<p style="text-align: justify;">Chỉ mất một chút thời gian để thiết bị ảo được cài đặt trên Windows 10. Một thiết bị ảo đang dần được cài đặt ở trên. Như được hiển thị dưới đây, nó đã được tạo thành công.</p>

<figure>
<div style="text-align: justify;"><img alt="Thiết bị ảo được cài đặt thành công" data-i="6" data-src="https://st.quantrimang.com/photos/image/2020/07/09/chay-android-tren-windows-voi-genymotion-7.jpg" data-was-processed="true" height="178" src="https://st.quantrimang.com/photos/image/2020/07/09/chay-android-tren-windows-voi-genymotion-7.jpg" width="650" /></div>

<figcaption>
<div style="text-align: justify;">Thiết bị ảo được cài đặt thành công</div>
</figcaption>
</figure>

<p style="text-align: justify;">
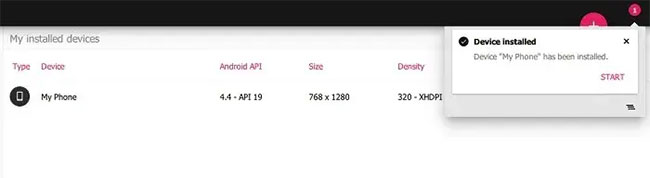
Bây giờ bạn có thể khởi động thiết bị ảo này một cách dễ dàng.</p>

<p style="text-align: justify;">Một lần nữa, không mất nhiều thời gian để thiết bị ảo bắt đầu với Genymotion trước khi bạn đến giai đoạn chạy ứng dụng.</p>

<h2 style="text-align: justify;">5. Khởi chạy thiết bị ảo và chạy ứng dụng Android trên Windows 10</h2>

<p style="text-align: justify;">Trình giả lập thiết bị ảo mở dưới dạng một tùy chọn riêng trên Windows 10.</p>

<figure>
<div style="text-align: justify;"><img alt="Trình giả lập thiết bị ảo mở dưới dạng một tùy chọn riêng trên Windows 10" data-i="7" data-src="https://st.quantrimang.com/photos/image/2020/07/09/chay-android-tren-windows-voi-genymotion-8.jpg" data-was-processed="true" height="500" src="https://st.quantrimang.com/photos/image/2020/07/09/chay-android-tren-windows-voi-genymotion-8.jpg" width="320" /></div>

<figcaption>
<div style="text-align: justify;">Trình giả lập thiết bị ảo mở dưới dạng một tùy chọn riêng trên Windows 10</div>
</figcaption>
</figure>

<p style="text-align: justify;">
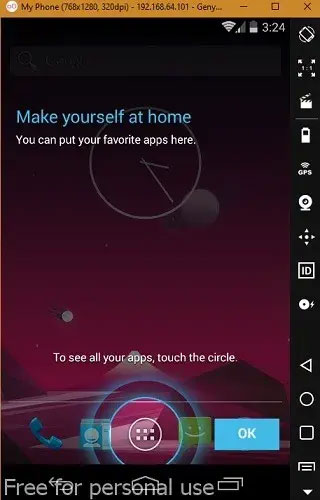
Bạn có thể thử nghiệm với các ứng dụng trong màn hình chính Windows 10 giống như trên điện thoại hoặc máy tính bảng thông thường.</p>

<p style="text-align: justify;">Chuyển đến cửa sổ trình duyệt để tải game, chẳng hạn như PUBG Mobile. Tuy nhiên, đối với công việc giả lập nghiêm túc, bạn cần Play Store được tải xuống từ GApps, có thể được truy cập từ khay hệ thống bên phải.</p>

<div style="text-align: justify;">&nbsp;</div>

<p style="text-align: justify;">Bạn phải xác minh lại tài khoản Google Play để tải xuống ứng dụng. GApps chỉ có dung lượng 70MB, vì vậy bạn có thể tải xuống để truy cập Play Store.</p>

<p style="text-align: justify;">Khi Play Store đã được cài đặt, bạn sẽ được yêu cầu khởi động lại thiết bị. Điều này sẽ không khởi động lại máy tính mà chỉ thiết bị ảo mà thôi. Nó sẽ tự động khởi động trong vài phút.</p>

<p style="text-align: justify;">Giờ đây, bạn có thể tải xuống bất kỳ game hoặc ứng dụng nào bạn muốn trực tiếp từ Play Store. Nếu một số ứng dụng như PUBG Mobile không được hỗ trợ, thì bạn cần một máy ảo với phiên bản Android cao hơn và nhiều RAM hơn. Tham khảo phần trước để tạo ra máy ảo phù hợp với nhu cầu của bạn.</p>

<p style="text-align: justify;">
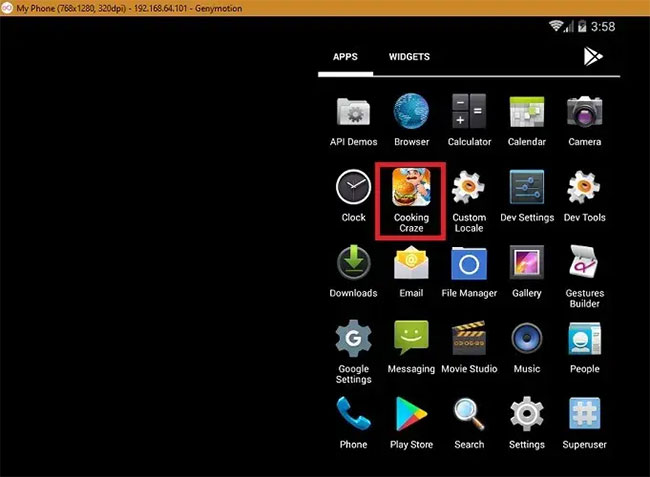
Ứng dụng đã tải xuống được cài đặt trên trình giả lập Genymotion như hiển thị ở đây.</p>

<figure>
<div style="text-align: justify;"><img alt="Ứng dụng đã tải xuống được cài đặt trên trình giả lập Genymotion" data-i="8" data-src="https://st.quantrimang.com/photos/image/2020/07/09/chay-android-tren-windows-voi-genymotion-9.jpg" data-was-processed="true" height="477" src="https://st.quantrimang.com/photos/image/2020/07/09/chay-android-tren-windows-voi-genymotion-9.jpg" width="650" /></div>

<figcaption>
<div style="text-align: justify;">Ứng dụng đã tải xuống được cài đặt trên trình giả lập Genymotion</div>
</figcaption>
</figure>

<p style="text-align: justify;">Genymotion là một ứng dụng rất hữu ích để&nbsp;chạy các game và ứng dụng Android yêu thích khác trên máy tính. Nó có nhiều tùy chọn nâng cao, như joystick, gia tốc kế và điều khiển từ xa để hỗ trợ các tính năng nâng cao.</p>
		</div>
				<div id="author">
						<p>
				<strong>Nguồn tin:</strong>
				Quantrimang.com
			</p>
		</div>
	</div>
	<div id="footer" class="clearfix">
		<div id="url">
			<strong>URL của bản tin này: </strong><a href="https://www.nguoicodonvn2008.info/vi/news/savefile/kien-thuc-may-tinh/cach-su-dung-genymotion-de-chay-app-android-tren-windows-10-2329.html" title="Cách sử dụng Genymotion để chạy app Android trên Windows 10">https://www.nguoicodonvn2008.info/vi/news/savefile/kien-thuc-may-tinh/cach-su-dung-genymotion-de-chay-app-android-tren-windows-10-2329.html</a>

		</div>
		<div class="clear"></div>
		<div class="copyright">
			&copy; .&#x3A; Nguoicodonvn2008.info - Cõi lòng người cô đơn &#x3A;.
		</div>
		<div id="contact">
			<a href="mailto:admin@nguoicodonvn2008.info">admin@nguoicodonvn2008.info</a>
		</div>
	</div>
</div>
        <div id="timeoutsess" class="chromeframe">
            Bạn đã không sử dụng Site, <a onclick="timeoutsesscancel();" href="https://www.nguoicodonvn2008.info/#">Bấm vào đây để duy trì trạng thái đăng nhập</a>. Thời gian chờ: <span id="secField"> 60 </span> giây
        </div>
        <div id="openidResult" class="nv-alert" style="display:none"></div>
        <div id="openidBt" data-result="" data-redirect=""></div>
		</script>
		<div class="car-top">
  <span><img src="https://www.nguoicodonvn2008.info/themes/default/images/car.png" alt=""></span>
</div>
<script src="https://www.nguoicodonvn2008.info/assets/js/jquery/jquery.min.js"></script>
<script>var nv_base_siteurl="/",nv_lang_data="vi",nv_lang_interface="vi",nv_name_variable="nv",nv_fc_variable="op",nv_lang_variable="language",nv_module_name="news",nv_func_name="savefile",nv_is_user=0, nv_my_ofs=-4,nv_my_abbr="EDT",nv_cookie_prefix="nv4c_e856T",nv_check_pass_mstime=1738000,nv_area_admin=0,nv_safemode=0,theme_responsive=0,nv_recaptcha_ver=2,nv_recaptcha_sitekey="",nv_recaptcha_type="image",XSSsanitize=1;</script>
<script src="https://www.nguoicodonvn2008.info/assets/js/language/vi.js"></script>
<script src="https://www.nguoicodonvn2008.info/assets/js/DOMPurify/purify3.js"></script>
<script src="https://www.nguoicodonvn2008.info/assets/js/global.js"></script>
<script src="https://www.nguoicodonvn2008.info/assets/js/site.js"></script>
<script src="https://www.nguoicodonvn2008.info/themes/default/js/news.js"></script>
<script src="https://www.nguoicodonvn2008.info/themes/default/js/main.js"></script>
<script src="https://www.nguoicodonvn2008.info/themes/default/js/custom.js"></script>
<script type="application/ld+json">
        {
            "@context": "https://schema.org",
            "@type": "Organization",
            "url": "https://www.nguoicodonvn2008.info",
            "logo": "https://www.nguoicodonvn2008.info/uploads/angel.gif"
        }
        </script>
<script src="https://www.nguoicodonvn2008.info/themes/default/js/bootstrap.min.js"></script>
<script type="text/javascript">
var $scrolltop = $('.car-top');
$scrolltop.on('click', function () {
    $('html,body').animate({
        scrollTop: 0
    }, 800);
    $(this).addClass("car-run");
    setTimeout(function(){ $scrolltop.removeClass('car-run');}, 1000);
    return false;
});
$(window).on('scroll', function ()
{ 
    if($(window).scrollTop() >= 200)
    {
        $scrolltop.addClass("show");
        $scrolltop.addClass("car-down");
    }
    else
    {
       $scrolltop.removeClass("show");
       setTimeout(function(){ $scrolltop.removeClass('car-down');}, 300);
    }
});
</script>
</body>
</html>