Cách mở ứng dụng Photos trên Windows 10
- Thứ hai - 07/10/2019 08:13
- In ra
- Đóng cửa sổ này
Windows 10 giới thiệu ứng dụng Photos để dễ dàng xem, duyệt và sắp xếp các ảnh kỹ thuật số trên thiết bị. Ngoài ra, ứng dụng còn cho phép người dùng thực hiện một số chỉnh sửa ảnh cơ bản và thậm chí tạo đoạn phim riêng. Bài viết này sẽ chỉ bạn một số cách để mở ứng dụng Photos trên Windows 10.
Lưu ý: Ảnh chụp màn hình và hướng dẫn trong bài này được thực hiện trên Windows 10 May Update trở lên.
1. Sử dụng tìm kiếm để mở ứng dụng Photos
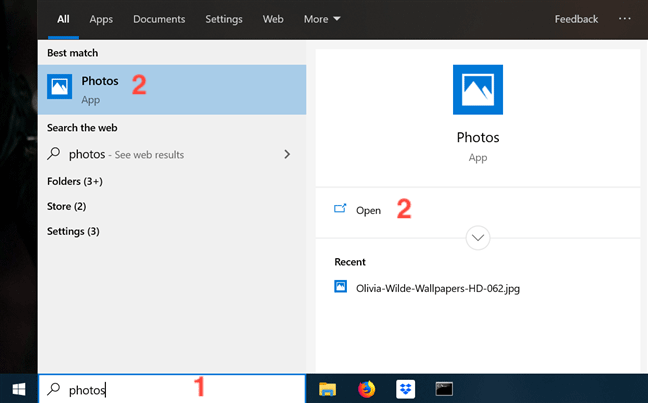
Tìm kiếm Windows 10 là cách nhanh và đáng tin cậy để truy cập vào ứng dụng bạn cần. Nhập photos vào trường tìm kiếm của Taskbar và sau đó click vào Photos hoặc Open ở bên phải cửa sổ.
2. Sử dụng shortcut menu Start để mở ứng dụng Photos
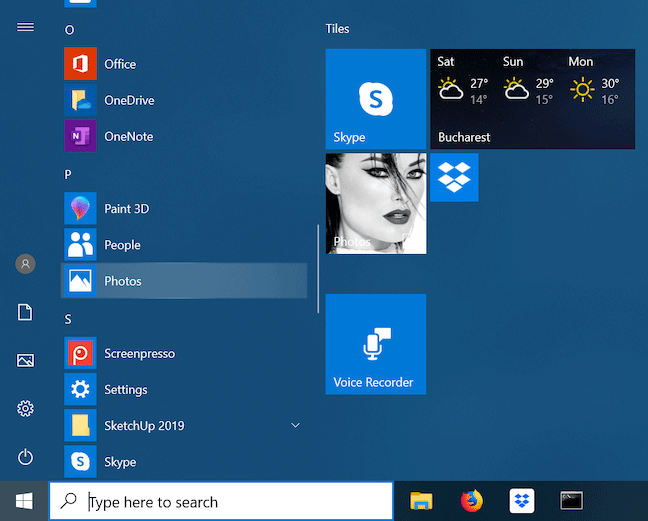
Theo mặc định, menu Start hiển thị shortcut theo bảng chữ cái tất cả ứng dụng của bạn trên máy tính hoặc thiết bị Windows 10. Click vào Start và cuộn xuống đến chữ cái P, sau đó click vào shortcut Photos để khởi chạy ứng dụng.
3. Mở ứng dụng Photos sử dụng shortcut trên taskbar hoặc desktop
Thật thuận tiện khi có thể truy cập ứng dụng Photos chỉ với một click hoặc một cú chạm. May thay bạn có thể tạo shortcut ứng dụng bằng cách kéo nó từ menu Start và thả vào vị trí bạn muốn trên desktop hoặc Taskbar.
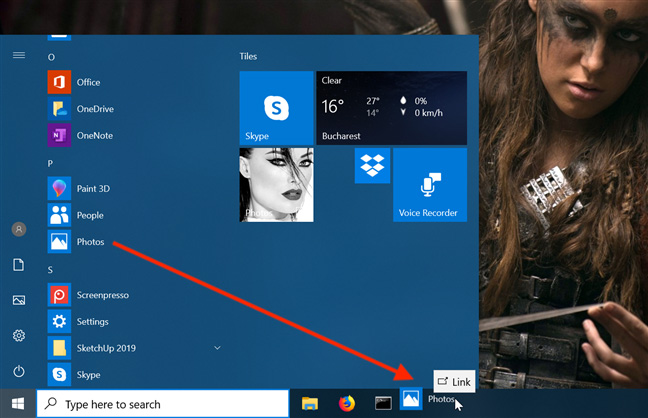
Bạn có thể sử dụng phương pháp tương tự để tạo shortcut trên desktop.
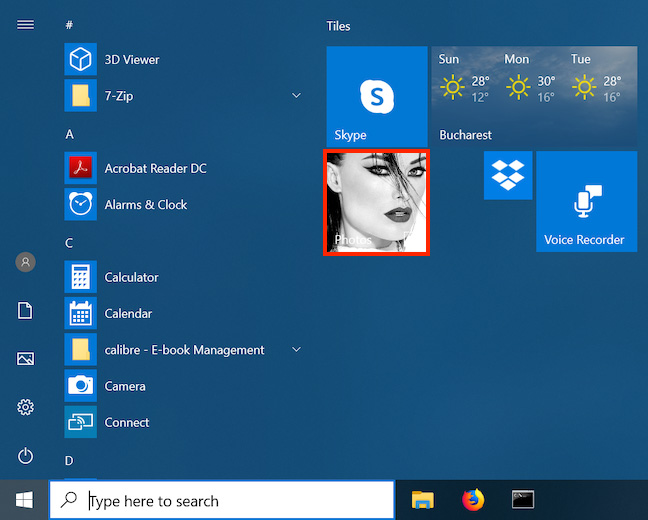
4. Mở ứng dụng Photos từ tile menu Start
Theo mặc định, ứng dụng Photos có tile riêng trên Windows 10 và bạn có thể click vào nó để mở ứng dụng.
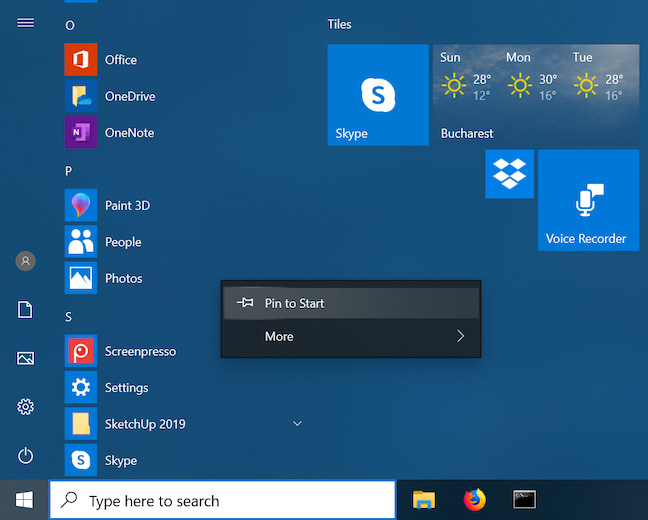
Tuy nhiên, nếu không thấy tile trên menu Start, bạn có thể dễ dàng tạo nó bằng cách cuộn đến shortcut ứng dụng trên menu Start, click chuột phải vào nó và chọn Pin to Start.
5. Yêu cầu Cortana mở ứng dụng Photos
Bạn cũng có thể yêu cầu Cortana mở ứng dụng Photos. Click vào icon Cortana ở bên phải hộp tìm kiếm của Taskbar để kích hoạt trợ lý ảo hoặc nói Hey Cortana, sau đó nói Open Photos.
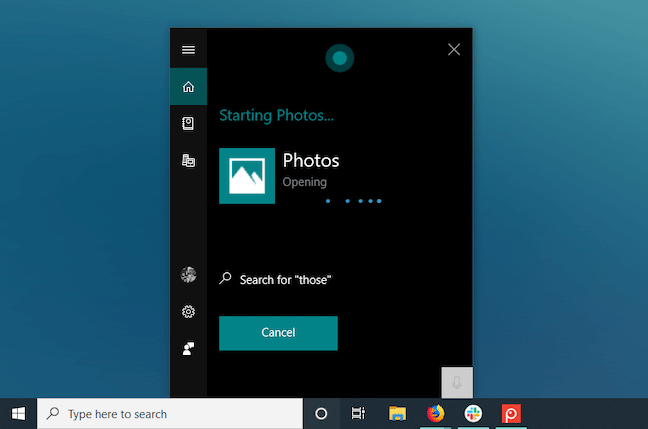
Bạn sẽ thấy Cortana khởi chạy ứng dụng Photos.
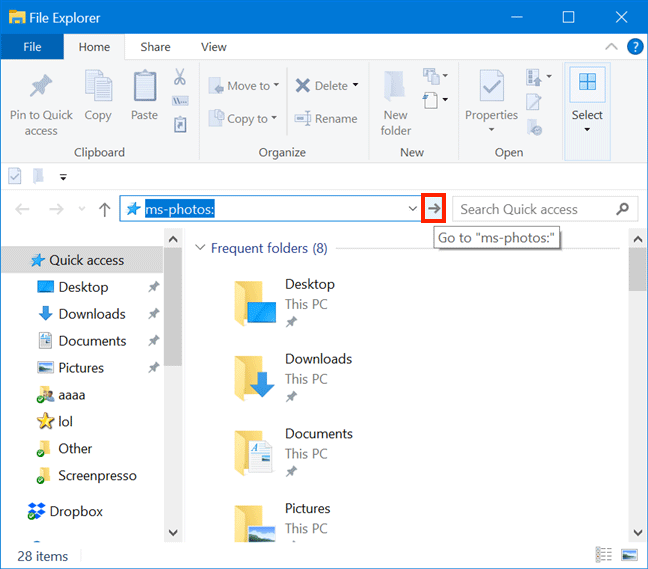
6. Sử dụng File Explorer để mở ứng dụng Photos
Bạn có thể sử dụng File Explorer để mở ứng dụng Photos. Mặc dù không thể truy cập vào file thực thi của nó bằng cách duyệt đến vị trí của ứng dụng Photos vì cài đặt bảo mật, nhưng bạn có thể click vào thanh địa chỉ và nhập lệnh ms-photos:. Sau đó nhấn Enterhoặc click vào mũi tên Go to cạnh thanh địa chỉ và ứng dụng Photos sẽ mở ra.
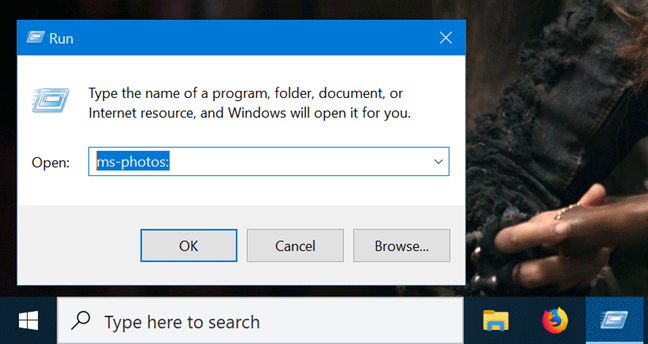
7. Sử dụng cửa sổ Run để mở ứng dụng Photos
Đối với một số người dùng, cửa sổ Run có thể là phương pháp nhanh nhất để mở ứng dụng trong Windows 10. Bạn cũng có thể sử dụng nó để mở ứng dụng Photos. Sử dụng phím tắt Win+R để mở Run, nhập lệnh ms-photos: và sau đó nhấn phím Enterhoặc click vào Ok.
8. Sử dụng Task Manager để mở ứng dụng Photos
Bạn cũng có thể mở ứng dụng Photos từ Task Manager. Để khởi chạy Task Manager, nhấn phím Ctrl+Shift+Esc trên bàn phím. Nếu mở ở chế độ xem nhỏ gọn, click vào More details. Trong chế độ xem đầy đủ của Task Manager, click vào File và sau đó chọn Run new task.

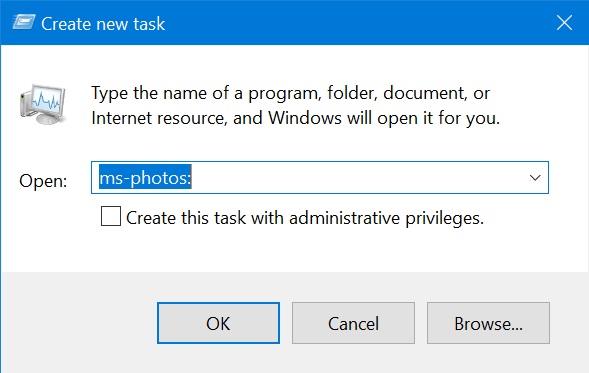
Một cửa sổ mới mở ra có tên là Create new task, gõ ms-photos: và sau đó nhấn Enterhoặc click vào Ok.
9. Sử dụng công cụ dòng lệnh Windows để mở ứng dụng Photos
Nếu sử dụng Command Prompt hoặc PowerShell, gõ lệnh start ms-photos: và nhấn Enter.
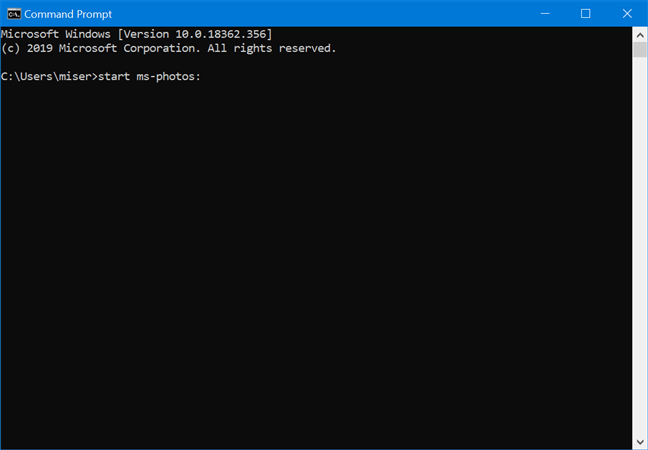
Lệnh trên sẽ khởi chạy ứng dụng Photos ngay lập tức.
Trên đây là những tùy chọn mở ứng dụng Photos trên Windows. Hãy thử chúng và tìm cho mình cách mở thuận tiện nhất nhé.
Chúc các bạn thực hiện thành công!
