Cách khắc phục sự cố Windows bằng cách tạo tài khoản người dùng mới
- Thứ tư - 04/06/2025 01:45
- In ra
- Đóng cửa sổ này

Nếu bạn đang khắc phục sự cố trên Windows và đã thử mọi cách khác, giải pháp cuối cùng có thể là tạo một tài khoản người dùng mới để khắc phục. Những sự cố như vậy có thể bao gồm các ứng dụng Windows không còn khởi chạy và hoạt động bình thường hoặc file tài khoản người dùng bị hỏng. Một số vấn đề khác nhau được giải quyết tốt nhất bằng cách tạo một tài khoản người dùng mới.
Vì phương pháp này hơi rắc rối, nên bạn cần chắc chắn rằng đây là cách duy nhất để khắc phục sự cố. Sau khi xác định được điều này, hãy đảm bảo làm theo các bước trong bài viết này để đảm bảo bạn có thể thực hiện đơn giản nhất có thể.
1. Luôn sao lưu dữ liệu
Bước cơ bản này là quan trọng nhất. Con người dễ mắc lỗi và máy tính cũng không hoàn hảo. Nếu có sự cố xảy ra, dữ liệu của bạn không nên bị đe dọa. Hãy sao lưu file và tạo điểm khôi phục hệ thống. Hai điều này giúp bạn tiết kiệm thời gian và loại bỏ sự bực bội.
2. Tạo tài khoản người dùng mới
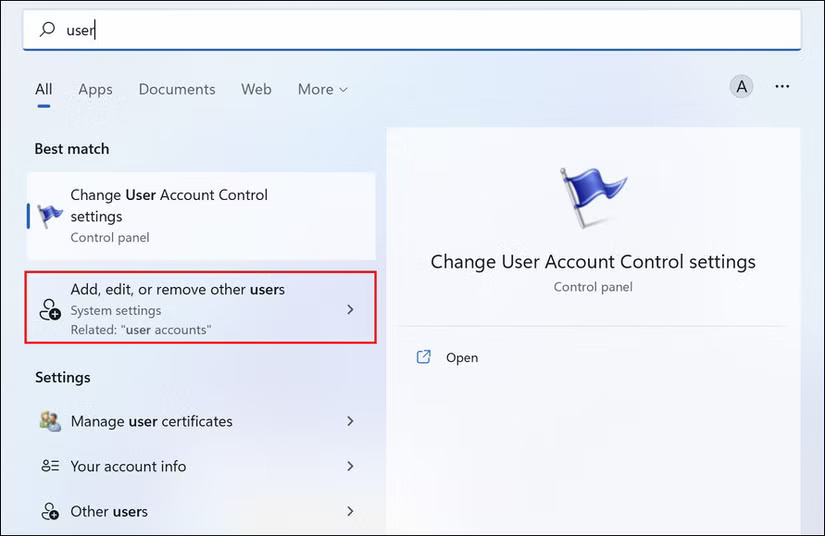
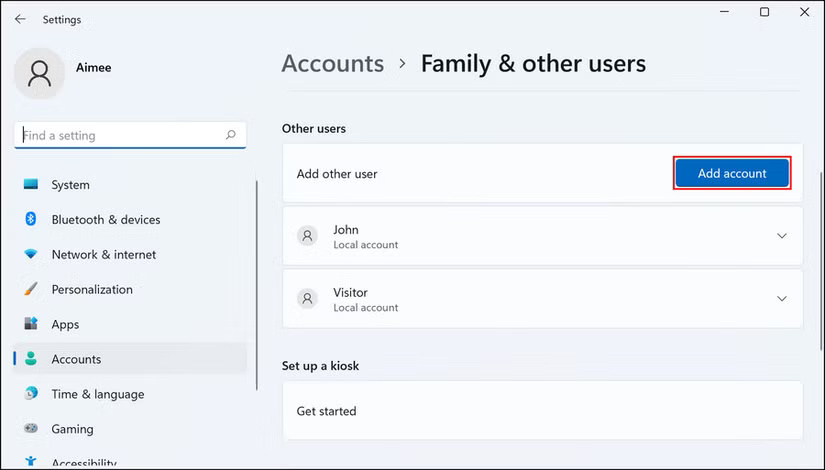
Để tạo tài khoản mới, hãy mở tìm kiếm (hoặc nhấn phím Windows) và nhập user. Bạn sẽ thấy Add, delete, and manage other user accounts. Thao tác này sẽ đưa bạn đến Other Accounts (hiển thị bên dưới). Bây giờ, hãy nhấp vào Add an account.
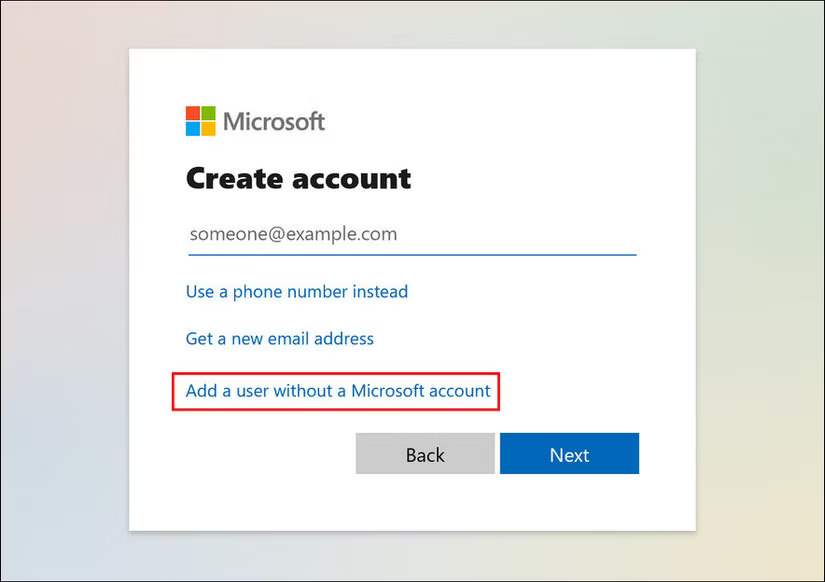
Các bước tiếp theo ở đây rất quan trọng để thực hiện – đừng chỉ lướt qua "các bước được khuyến nghị" của Microsoft.
Thay vì nhập địa chỉ email, hãy nhìn xuống cuối màn hình và nhấp vào nút màu xám Sign in without a Microsoft account, được gọi là Tài khoản cục bộ.
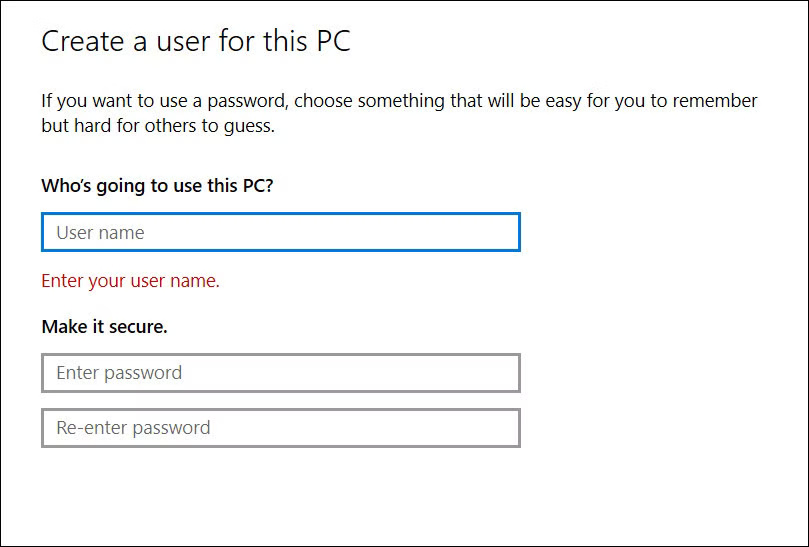
Trong cửa sổ tiếp theo, hãy điền thông tin chi tiết bắt buộc (tên người dùng và mật khẩu) rồi nhấp vào Next. Thao tác này sẽ tạo thành công một tài khoản người dùng mới đã sẵn sàng để sử dụng.
Tùy chọn
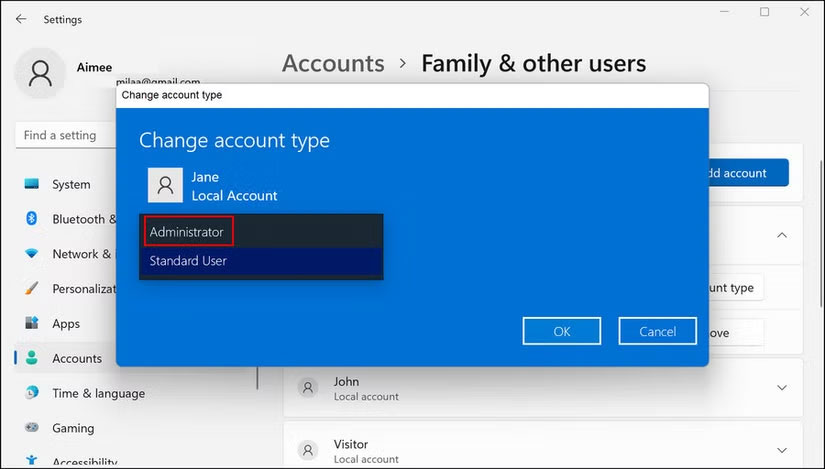
Tài khoản mới của bạn sẽ chỉ có quyền người dùng tiêu chuẩn. Nếu bạn muốn tài khoản đó là Administrator, hãy làm theo các bước bổ sung sau. Quay lại trang Family & other users, nhấp vào tài khoản người dùng mới, sau đó chọn tùy chọn Change account type.
Từ đây, bạn sẽ có một menu drop-down với tùy chọn thay đổi tài khoản từ Standard User thành Administrator.
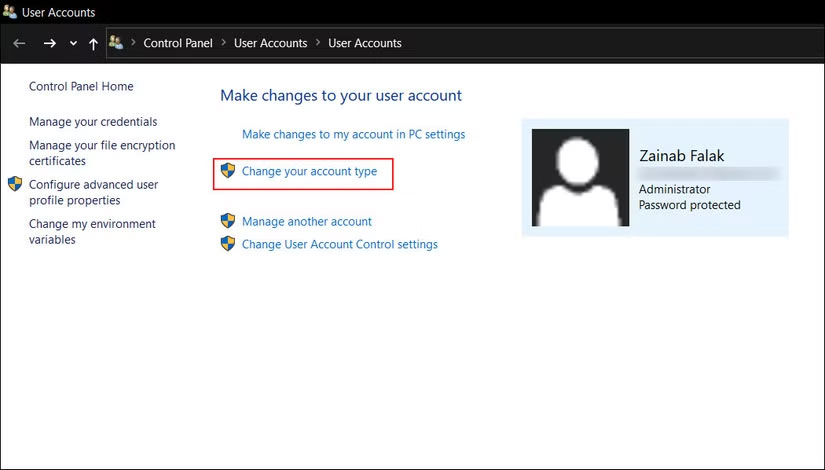
Trong trường hợp tùy chọn này bị mờ đối với bạn, bạn cũng có thể chuyển sang tài khoản admin thông qua Control Panel. Chỉ cần mở hộp thoại Run bằng cách nhấn đồng thời Win + R. Nhập control.exe userpasswords trong Run và nhấp vào Change your account type trong cửa sổ sau.
Bây giờ, bạn có thể nhấp vào tùy chọn Administrator, sau đó nhấn nút Change Account Type để hoàn tất quy trình.

3. Chuyển file tài khoản người dùng từ cũ sang mới
Bạn đã tạo tài khoản mới và sự cố bạn gặp phải đã được giải quyết. Bây giờ bạn cần làm cho nó giống như tài khoản trước đây của mình. Hình nền máy tính và theme là những phần dễ dàng có thể nhanh chóng điều chỉnh, nhưng còn cài đặt chương trình và tất cả các file cá nhân khác thì sao? Khi thực hiện việc này từ hai máy tính khác nhau, bạn có thể sử dụng công cụ Windows Easy Transfer, nhưng việc chuyển các file này trên cùng một máy có thể được thực hiện thông qua sao chép và dán thủ công.
Trước tiên, hãy đảm bảo các file và thư mục ẩn của bạn được hiển thị vì cài đặt chương trình nằm trong thư mục AppData, thường ẩn khỏi chế độ xem.
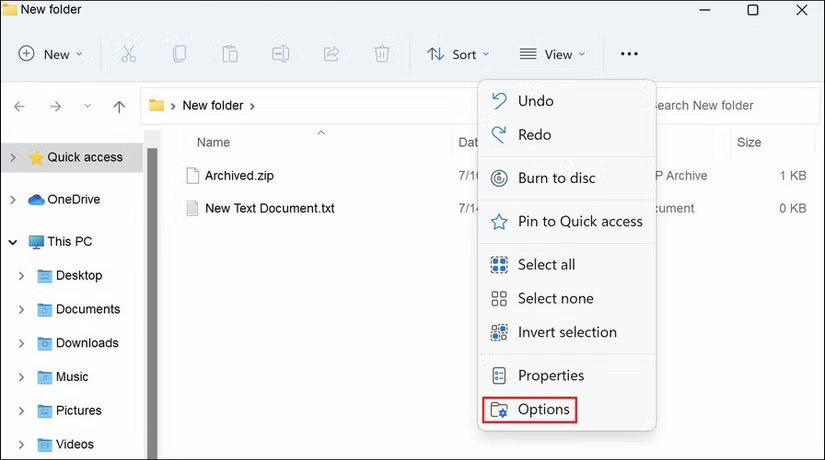
Khi đã vào thư mục User Account cũ, hãy nhấp vào View và xem có hộp kiểm Hidden Items (được gắn nhãn bằng số 1 ở hình ảnh trên cùng) không. Nếu vì lý do nào đó bạn không thấy hộp kiểm đó hoặc hộp kiểm không hiển thị tất cả các thư mục ẩn, hãy làm theo số 2 ở hình ảnh trên cùng bằng cách nhấp vào Options và Change folder and search options.
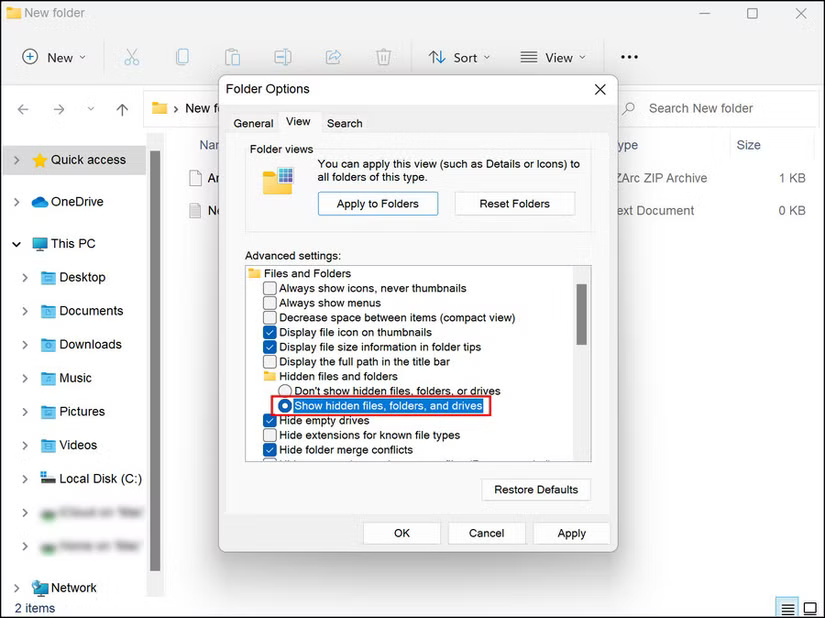
Nhấp vào tab View, tìm Hidden files and folders và chọn Show hidden files, folders, and drives.
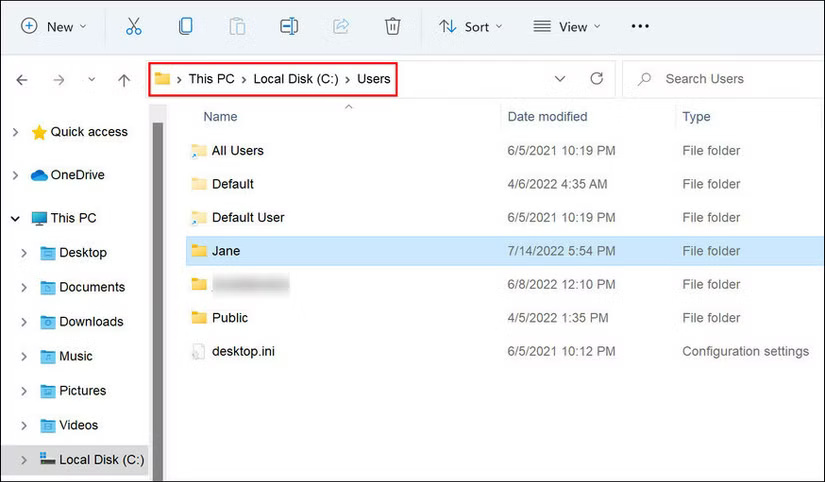
Giữ thư mục tài khoản người dùng cũ mở, mở một cửa sổ Windows Explorer mới và đi đến thư mục tài khoản người dùng mới. Bạn có thể dễ dàng tìm thấy nó bằng cách nhập C:\Users.
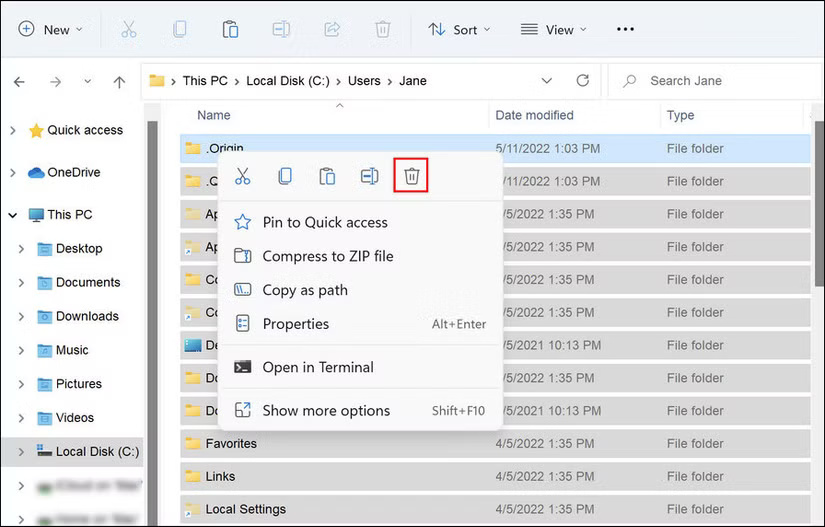
Chọn tất cả (Ctrl + A) nội dung của thư mục này và xóa nó (nhấn phím Delete).
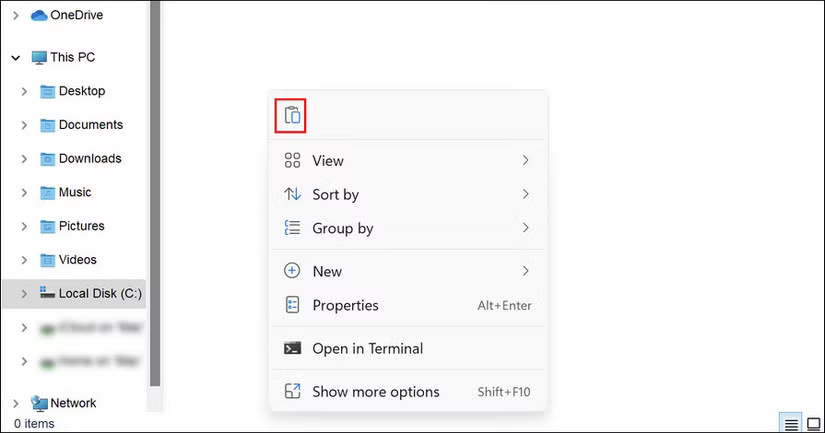
Quay lại thư mục tài khoản người dùng cũ, sao chép tất cả các file và thư mục (Ctrl + A, Ctrl + C), sau đó dán chúng vào thư mục tài khoản người dùng mới (Ctrl + V).
Việc này sẽ mất một chút thời gian - hãy đi làm một số công việc khác rồi quay lại.
4. Thay đổi tên người dùng
Chắc hẳn bạn muốn có cùng tên tài khoản mới như đã làm với tài khoản cũ, nhưng không thể làm như vậy vì tài khoản cũ đã có tên đó. Sau khi đã ổn định trong tài khoản mới và xóa tên cũ, bạn có thể thay đổi tên tài khoản khá dễ dàng. Tuy nhiên, hãy đảm bảo rằng bạn đã đăng nhập bằng tài khoản admin trước khi thực hiện các bước dưới đây.
Để thay đổi tên người dùng của tài khoản cục bộ, trước tiên, hãy khởi chạy Control Panel và thay đổi View type thành Large icons. Chọn User accounts rồi chuyển đến Manage another account. Chọn tài khoản mục tiêu và nhấp vào Change the account name.
Bây giờ, bạn có thể nhập tên mong muốn và lưu các thay đổi.
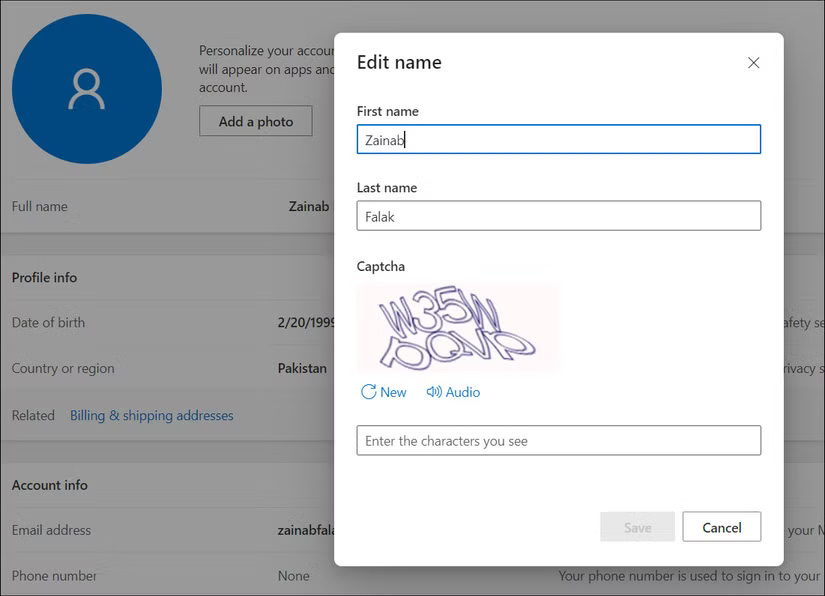
Trong trường hợp bạn muốn thay đổi tên người dùng của tài khoản Microsoft, hãy truy cập trang web Microsoft và đăng nhập vào tài khoản của bạn bằng ID email và mật khẩu. Trong cửa sổ tiếp theo, hãy nhấp vào Edit name rồi nhập tên và họ mong muốn của bạn. Sau khi tên tài khoản được thay đổi, các thay đổi sẽ tự động được phản ánh trong tài khoản máy tính của bạn.
Hy vọng là tài khoản mới đã giải quyết được vấn đề, giúp bạn không phải thiết lập lại hoặc thực hiện bất kỳ phương pháp khắc phục sự cố phức tạp nào khác. Trong trường hợp sự cố vẫn còn, bạn có thể thử khôi phục hệ thống về thời điểm trước đó và xem liệu điều đó có giúp ích không. Bạn cũng có thể liên hệ với nhóm hỗ trợ chính thức của Microsoft và báo cáo sự cố cho họ. Hy vọng là họ có thể xác định được sự cố cho bạn và đề xuất cách khắc phục phù hợp.
