Cách khắc phục mã lỗi Microsoft Store 0x80004003 trong Windows 10/11
- Thứ tư - 22/12/2021 23:54
- In ra
- Đóng cửa sổ này

Microsoft Store là một trong những ứng dụng quan trọng nhất trong Windows 10 và 11. Nếu không có nó, bạn không thể tải xuống và cài đặt các ứng dụng UWP từ cửa hàng của Microsoft.
Thật không may, bạn có thể gặp lỗi 0x80004003 khi sử dụng Microsoft Store. Lỗi này đôi khi xảy ra khi bạn cố gắng tải xuống ứng dụng từ MS Store hoặc khởi chạy ứng dụng storefront của Microsoft và kèm theo thông báo: “Page could not be loaded. Please try again later".
Do đó, người dùng không thể tải xuống và cài đặt ứng dụng qua MS Store khi lỗi này xuất hiện. Nếu bạn phát ngán khi nhìn thấy thông báo lỗi này, hãy thử áp dụng các giải pháp tiềm năng sau đây để khắc phục.
1. Chạy Windows Store App Troubleshooter
Windows Store App Troubleshooter có thể khắc phục được nhiều sự cố MS Store. Công cụ này không khắc phục được mọi sự cố của Microsoft Store, nhưng dù sao thì nó cũng là một giải pháp tiềm năng để bắt đầu khắc phục các lỗi liên quan đến ứng dụng. Bạn có thể chạy Windows Store App Troubleshooter như sau.
B1: Mở Settings bằng cách nhấp vào nút Start và chọn ứng dụng đó trên menu.
B2: Chọn tùy chọn Troubleshoot navigation trên tab System.
B3: Nhấp vào Other trouble-shooters để hiển thị một số tùy chọn.
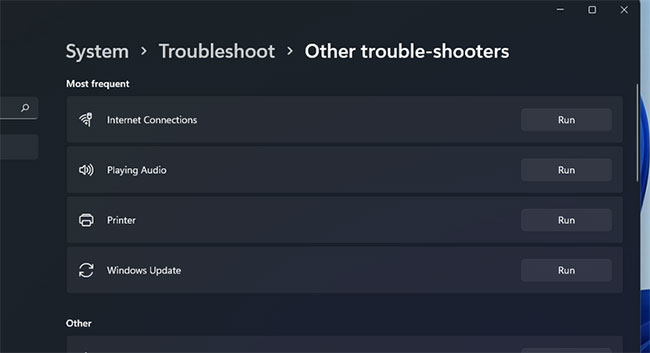
B4: Nhấn nút Run cho Windows Store Apps để khởi chạy trình khắc phục sự cố đó.
B5: Sau đó, hãy xem qua các hướng dẫn được cung cấp trong trình khắc phục sự cố để áp dụng những bản sửa lỗi tiềm năng.
2. Kiểm tra cài đặt thời gian & ngày và khu vực
Lỗi 0x80004003 có thể phát sinh do ngày và giờ không chính xác. Nó cũng có thể xuất hiện do cài đặt khu vực cho vị trí của bạn. Vì vậy, hãy kiểm tra các cài đặt đó để đảm bảo chúng được thiết lập chính xác.
Dưới đây là cách thay đổi cài đặt tải xuống theo khu vực và thời gian trong Windows 11:
B1: Mở Settings thông qua menu Start hoặc bằng phím nóng Win + I.
B2: Chọn tab Time & language.
B3: Sau đó, nhấp vào Date & time.
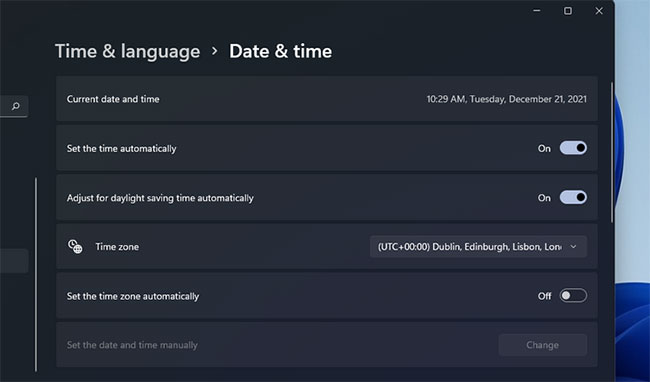
B4: Đặt tùy chọn Set the time automatically thành On nếu nó đang tắt.
B5: Nếu tùy chọn Set time zone automatically bị vô hiệu hóa, hãy nhấp vào cài đặt đó để kích hoạt nó.
B6: Để kiểm tra cài đặt khu vực, hãy nhấp vào Language and region trên tab Time and language.
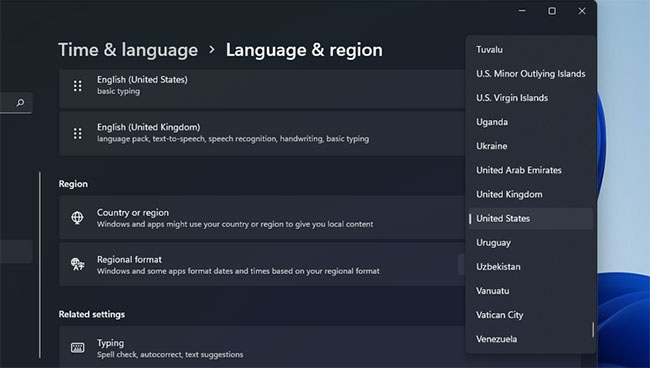
B7: Nhấp vào menu drop-down Country or region để chọn đúng khu vực bạn đang ở.
Nếu thời gian của đồng hồ trên khay hệ thống vẫn không đúng với cài đặt tự động được chọn, thì có thể có sự cố với pin CMOS của PC. Trong trường hợp đó, bạn sẽ cần phải thay pin CMOS để khôi phục lại thời gian hệ thống chính xác.
3. Thiết lập các service bắt buộc khởi chạy tự động
Microsoft Store sẽ không hoạt động bình thường nếu một số service Windows cần có bị vô hiệu hóa. Do đó, bạn có thể cần phải cấu hình các service nhất định để bắt đầu tự động và giải quyết lỗi 0x80004003.
Bạn có thể làm điều đó bằng cách nhập một vài lệnh trong Command Prompt như sau.
B1: Nhấp chuột phải vào nút Start của Windows 11 để chọn Windows Terminal (Admin).
B2: Chọn Yes trên lời nhắc UAC.
B3: Nhấp vào nút Open a new tab (mũi tên xuống) để chọn Command Prompt.

B4: Nhập các lệnh riêng biệt sau, nhấn Enter sau mỗi lệnh:
SC config wuauserv start=auto
SC config bits start=auto
SC config cryptsvc start=auto
SC config trustedinstaller start=auto
Bạn có thể sao chép từng lệnh đó vào clipboard của mình bằng cách chọn chúng với con trỏ và nhấn Ctrl + C. Sau đó, dán từng lệnh bằng phím tắt Ctrl + V. Nhấn phím nóng Win + V để chọn các mục được sao chép khác nhau bằng trình quản lý clipboard.
4. Sửa chữa và reset ứng dụng Microsoft Store
Windows 11 và 10 bao gồm các tùy chọn Reset và Repair cho ứng dụng Microsoft Store. Đó là những tùy chọn tích hợp tốt nhất mà bạn có thể chọn để giải quyết lỗi Microsoft Store. Vì vậy, chúng đáng để thử nếu bạn gặp lỗi 0x80004003.
Dưới đây là cách chạy các tùy chọn khắc phục sự cố của Microsoft Store:
Reset cache của Microsoft Store
B1: Mở công cụ tìm kiếm và nhập apps and feature vào hộp văn bản.
B2: Nhấp vào Apps & features trong kết quả tìm kiếm để mở tab Settings.
B3: Cuộn xuống vị trí của Microsoft Store và nhấp vào nút ba chấm ở phía bên phải của ứng dụng.
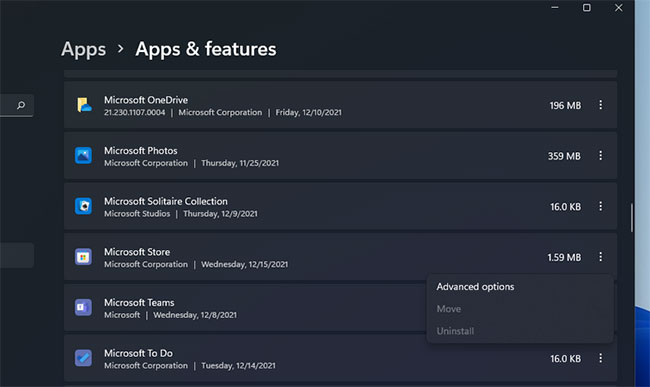
B4: Chọn Advanced options để mở các tùy chọn sửa chữa cho ứng dụng đó.
B5: Trước tiên, hãy nhấp vào nút Repair, nút này sẽ không xóa dữ liệu ứng dụng.
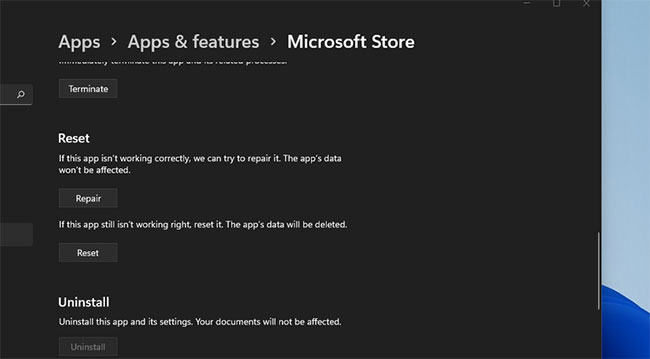
B6: Nếu điều đó không giải quyết được lỗi 0x80004003, hãy nhấp vào nút Reset.
B7: Sau đó chọn Reset một lần nữa để xác nhận tùy chọn đã chọn.
B8: Khởi động lại máy tính sau khi áp dụng giải pháp này.
Dữ liệu cache của Microsoft Store bị hỏng cũng có thể gây ra lỗi 0x80004003. Do đó, việc reset bằng công cụ dòng lệnh Wsreset.exe có thể giải quyết các vấn đề về dữ liệu cache. Dưới đây là cách sử dụng công cụ đó trong ba bước nhanh chóng:
B1: Nhấp chuột phải vào biểu tượng thanh tác vụ của menu Start để chọn Run.
B2: Nhập wsreset.exe trong hộp Open.
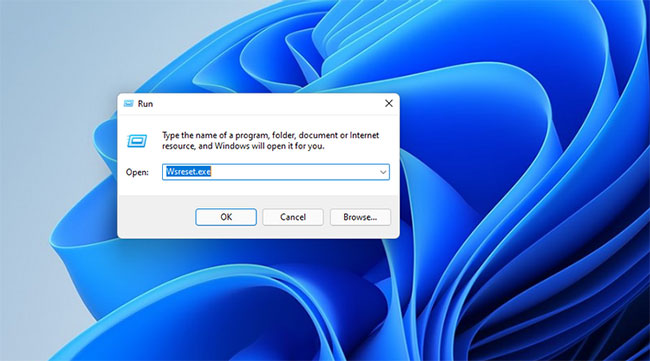
B3: Bấm OK để chạy lệnh.
B4: Sau đó, đợi cửa sổ wsreset trống đóng và ứng dụng MS Store mở.
Xóa thư mục DataStore
Nhiều người dùng cho biết họ có thể sửa lỗi 0x80004003 bằng cách xóa thư mục DataStore thông qua File Explorer. Thư mục con đó bao gồm file nhật ký Windows Update DataStore.edb.
Đó có lẽ là một bản sửa lỗi tiềm năng gây tò mò, nhưng dù sao thì cũng đã được xác nhận là có tác dụng. Làm theo các bước sau để xóa nội dung của thư mục DataStore.
B1: Để mở Run, hãy nhấn phím nóng Win + R.
B2: Nhập services.msc vào hộp Open và nhấp vào tùy chọn OK.
B3: Nhấp đúp vào service Windows Update.
B4: Nhấp vào Disabled trên menu drop-down Startup type.
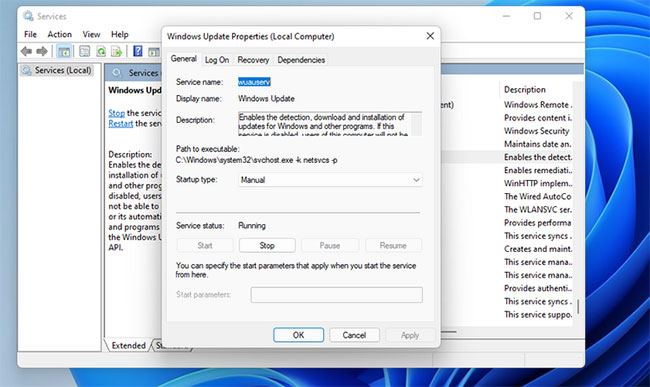
B5: Chọn tùy chọn Apply và nhấp vào OK để thoát khỏi cửa sổ.
B6: Nhấn Win + E để khởi chạy File Explorer.
B7: Sau đó, chuyển đến C: > Windows > SoftwareDistribution > DataStore trong File Explorer.
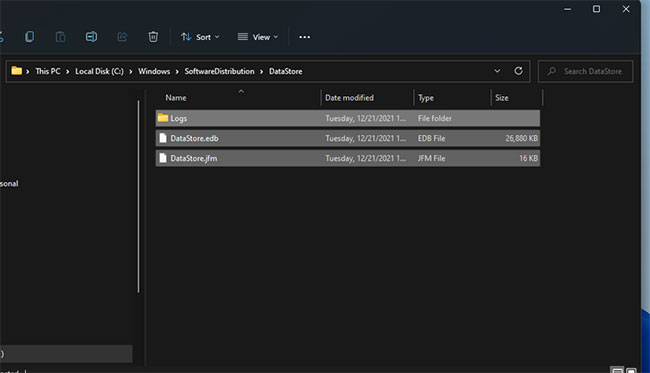
B8: Chọn tất cả nội dung trong thư mục DataStore (nhấn phím nóng Ctrl + A để làm như vậy).
B9: Nhấn nút Delete trên thanh lệnh của File Explorer.
B10: Mở lại cửa sổ Windows Update Properties. Sau đó, chọn các tùy chọn Automatic startup và Start ở đó, nhấp vào Apply để lưu.
Cài đặt lại ứng dụng Microsoft Store
Phương án cuối cùng, hãy thử cài đặt lại Microsoft Store, thao tác này sẽ đăng ký lại ứng dụng đó. Bạn có thể gỡ bỏ MS Store và sau đó cài đặt lại nó qua PowerShell bằng một vài lệnh. Để làm như vậy, hãy làm theo các bước dưới đây.
B1: Nhấp chuột phải vào Start để chọn tùy chọn Windows Terminal (Admin).
B2: Nhấp vào Yes trên bất kỳ lời nhắc UAC nào mở ra.
B3: Trong Windows PowerShell, nhập lệnh này và nhấn Return:
Get-AppxPackage *windowsstore* | Remove-AppxPackage&nbs
B4: Khởi động lại Windows 11 sau khi gỡ cài đặt MS Store.
B5: Để cài đặt lại Microsoft Store, hãy nhập lệnh PowerShell này và nhấn Enter:
Get-AppXPackage *WindowsStore* -AllUsers | Foreach {Add-AppxPackage -DisableDevelopmentMode -Register "$($_.InstallLocation)\AppXManifest.xml"}
Những giải pháp tiềm năng ở trên có lẽ sẽ giải quyết được lỗi 0x80004003 cho đa số người dùng. Phương án cuối cùng là reset Windows 11/10 cũng có thể giải quyết được sự cố này, nhưng đừng làm vậy cho đến khi bạn đã thử tất cả các bản sửa lỗi tiềm năng khác. Với lỗi 0x80004003 đã được khắc phục, bạn sẽ có thể sử dụng MS Store cũng như tải xuống và cài đặt các ứng dụng như bình thường.
