Cách giữ các biểu tượng desktop và con trỏ chuột mặc định khi thay đổi theme Windows 11
- Thứ hai - 20/03/2023 00:57
- In ra
- Đóng cửa sổ này

Thật thú vị khi nâng cao trải nghiệm Windows của bạn với giao diện mới. Bạn cũng đã có thể sử dụng các hình nền phong cảnh hoặc những theme thú vị để làm sinh động màn hình desktop và các khu vực hệ thống khác.
Tuy nhiên, một số theme thay đổi giao diện màn hình cũng có thể đổi luôn các biểu tượng desktop và thậm chí cả con trỏ chuột. Nhưng nếu bạn thích các biểu tượng gốc của Windows hoặc không thích các biểu tượng hoặc con trỏ chuột theo theme thì sao?
Bằng cách điều chỉnh chỉ một vài cài đặt, bạn có thể giữ nguyên các biểu tượng mặc định của Windows trong khi thưởng thức những theme mới. Cùng khám phá cách thực hiện qua bài viết sau đây nhé!
Cách giữ các biểu tượng desktop gốc khi thay đổi theme thông qua Settings
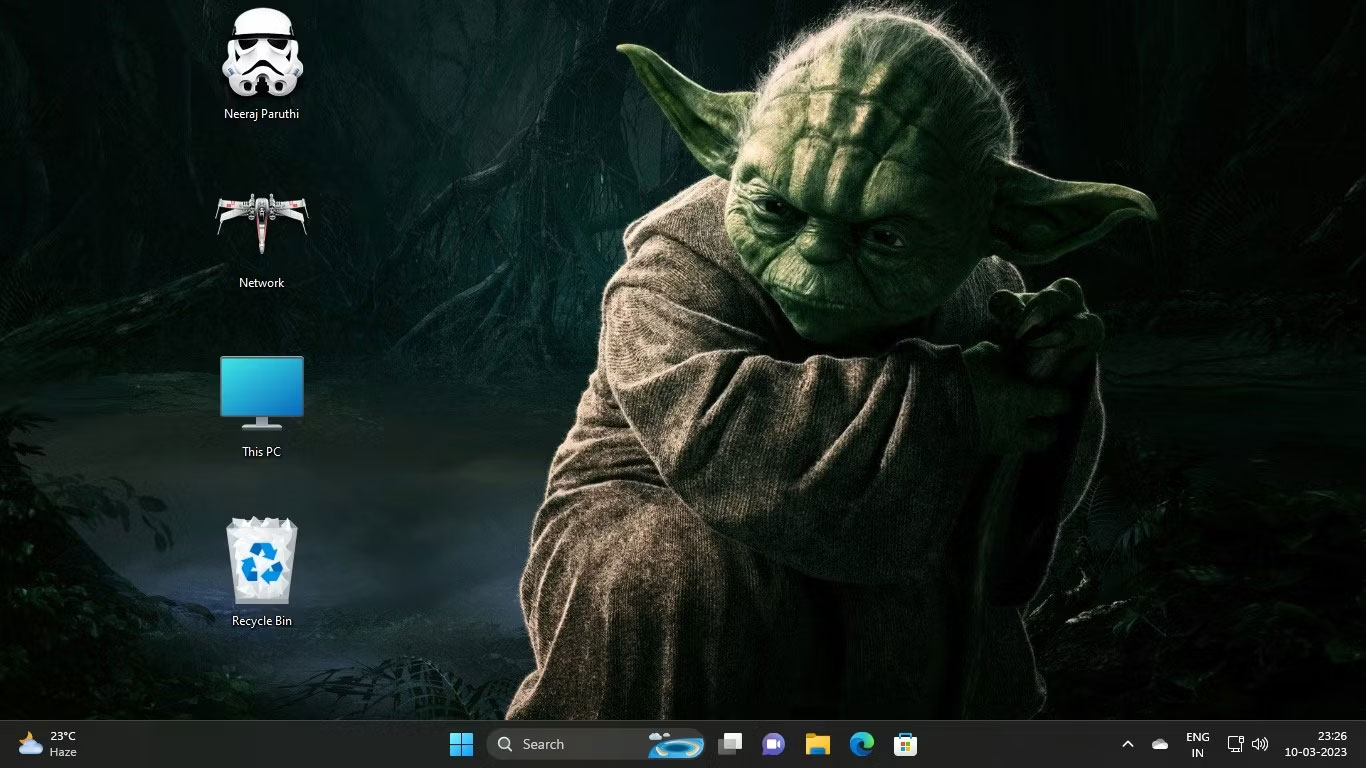
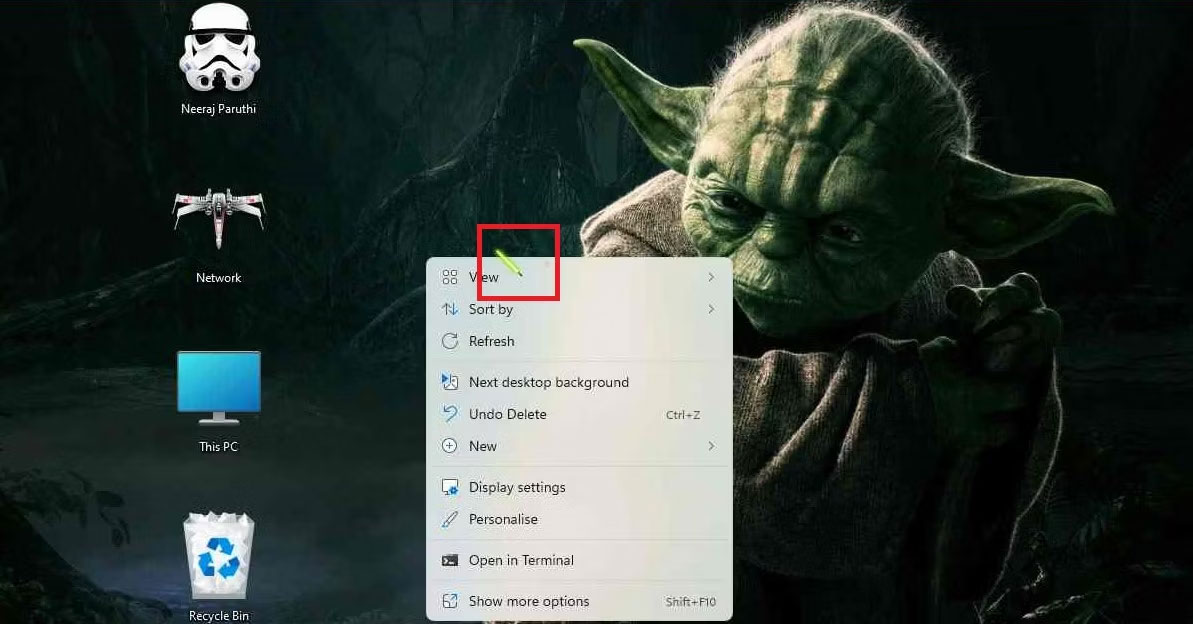
Ví dụ, bạn đã thêm theme Chiến tranh giữa các vì sao như hình bên dưới. Như bạn thấy, các biểu tượng mặc định cũng đã bị thay đổi theo theme.
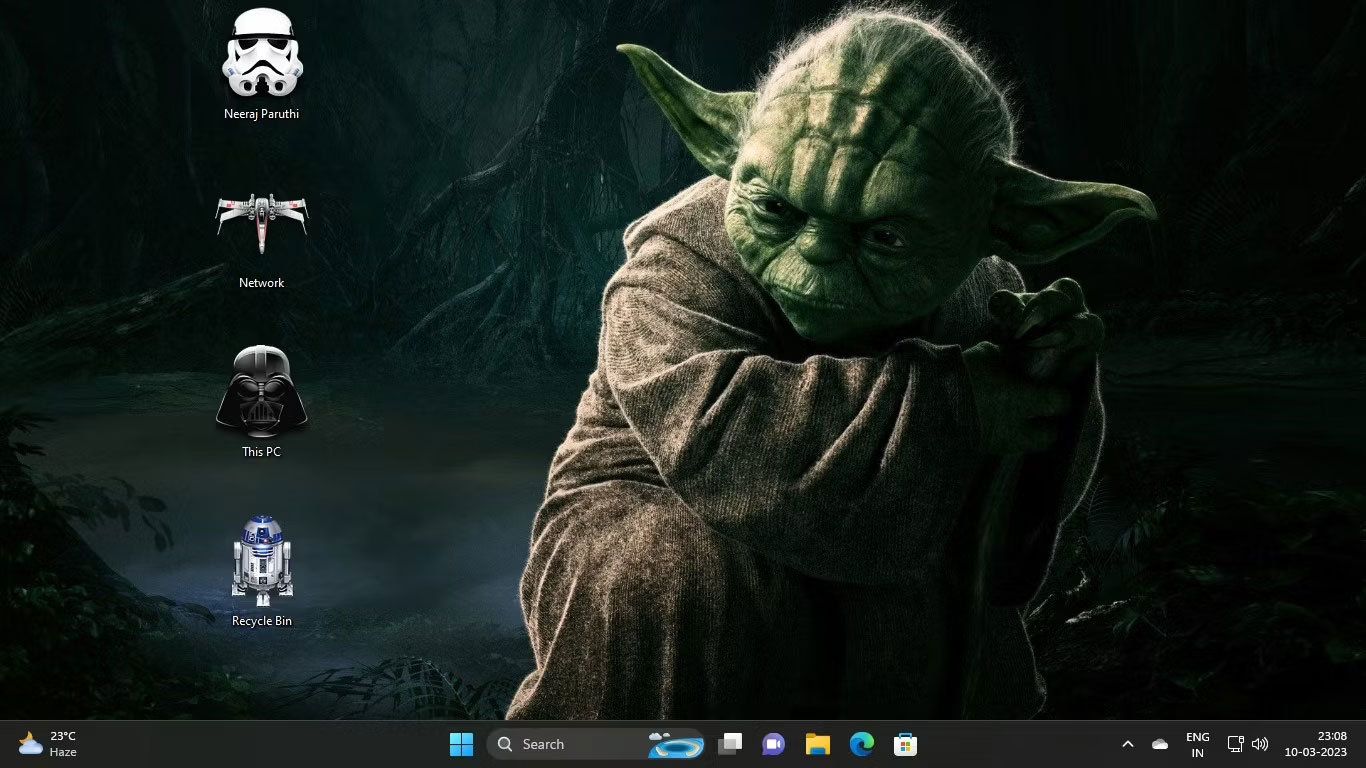
Bạn thích các biểu tượng mặc định của Windows hơn các biểu tượng mà theme mới của bạn cung cấp. Đừng lo lắng, bạn có thể dễ dàng ngăn theme Chiến tranh giữa các vì sao hoặc bất kỳ theme nào khác thay đổi những biểu tượng desktop của mình. Hãy thực hiện các bước sau trước khi áp dụng một theme mới:
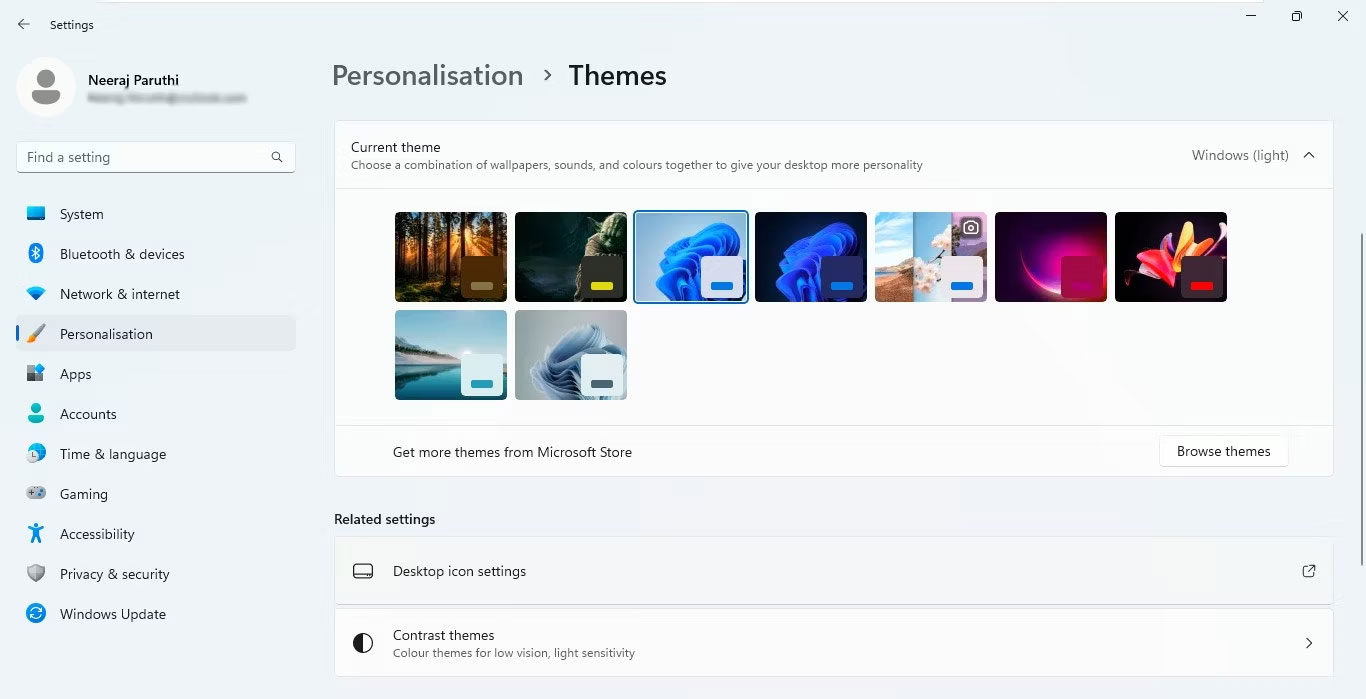
1. Nhấp chuột phải vào desktop, chọn Personalize, sau đó chọn theme từ ngăn bên phải trong cài đặt Personalization.
2. Trong cài đặt Themes, bên dưới Related settings, hãy nhấp vào Desktop icon settings.
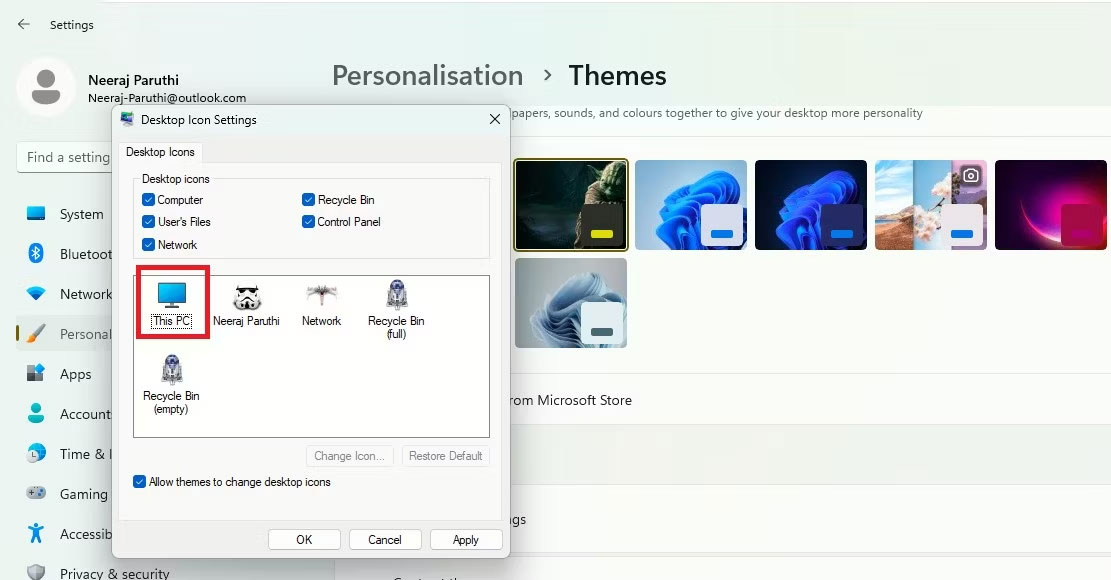
3. Sau đó, trong cửa sổ Desktop Icon Settings, bỏ chọn hộp bên cạnh Allow themes to change desktop icons.
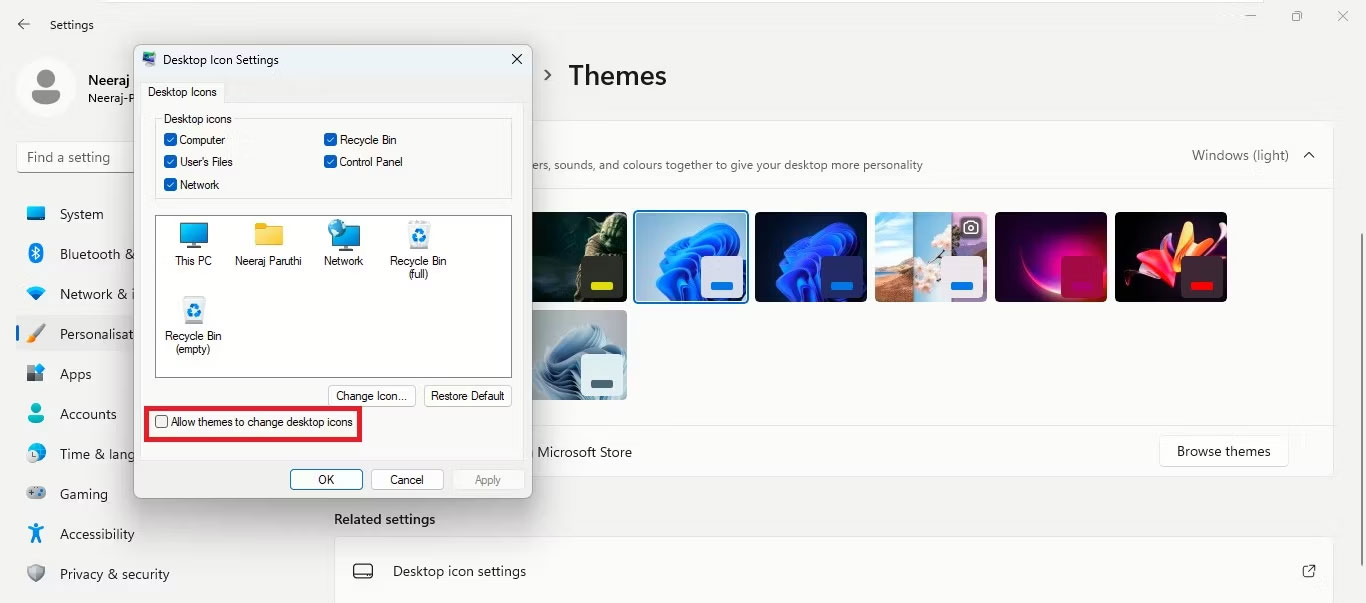
4. Cuối cùng, nhấp vào Apply > OK.
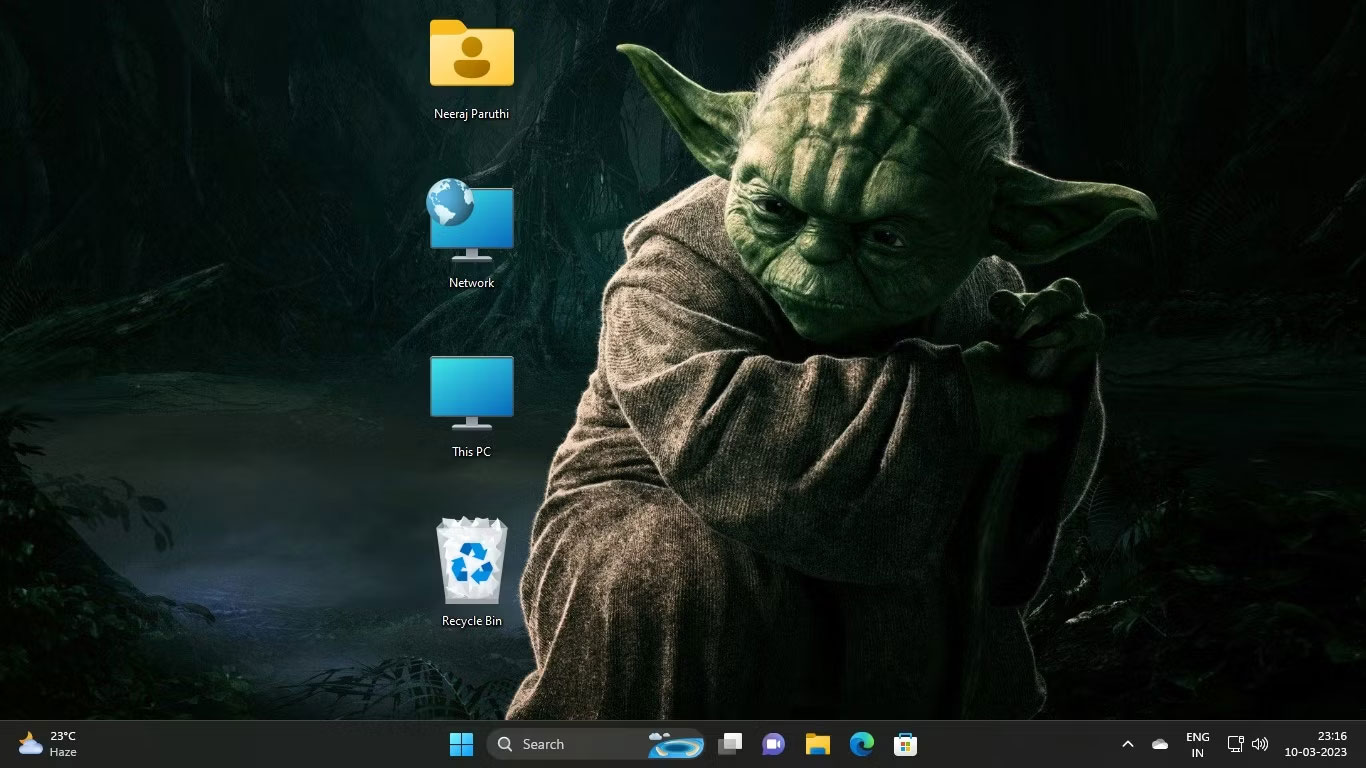
Giờ đây, bất cứ khi nào bạn thay đổi theme, các biểu tượng màn hình mặc định của bạn sẽ không thay đổi.
Cách sử dụng kết hợp cả biểu tượng theme và biểu tượng desktop mặc định
Giả sử bạn chỉ thích hai biểu tượng desktop của theme mới và muốn giữ nguyên các biểu tượng desktop mặc định khác, bạn cũng có thể làm điều đó.
Một lần nữa, hãy lấy các biểu tượng theme Chiến tranh giữa các vì sao làm ví dụ. Giả sử, bạn không thích dùng Darth Vader làm biểu tượng cho This PC và R2-D2 làm biểu tượng cho Recycle Bin, nhưng bạn muốn dùng Stormtrooper làm biểu tượng cho Files và X-Wing Starfighter cho Network .
Bạn có thể giữ các biểu tượng theme mà mình thích và thay thế những biểu tượng theme mà bạn không thích bằng các biểu tượng mặc định. Đây là cách thực hiện:
1. Nhấp chuột phải vào desktop và chọn Personalize > Themes > Desktop icon settings.
2. Trong Desktop Icon Settings, hãy chọn từng biểu tượng theme mà bạn muốn thay đổi. Vì vậy, trước tiên hãy chọn This PC hoặc Darth Vader, như trong ảnh chụp màn hình bên dưới. Sau đó bấm vào Restore Default.
Bạn sẽ thấy biểu tượng theme thay đổi trở lại biểu tượng mặc định trong cài đặt biểu tượng desktop.
3. Bây giờ, hãy thay đổi Recycle Bin hoặc R2-D2 trở lại biểu tượng mặc định.
4. Cuối cùng, nhấp vào Apply > OK.
Giờ đây, bạn có thể tận hưởng trải nghiệm Windows được cá nhân hóa với tất cả các biểu tượng desktop được tùy chỉnh theo ý thích của mình.
Cách giữ lại các biểu tượng desktop gốc khi thay đổi theme thông qua Registry Editor
Bạn cũng có thể sử dụng Registry Editor để đảm bảo rằng theme không thay đổi các biểu tượng desktop. Tuy nhiên, việc điều chỉnh cài đặt registry cần phải được thực hiện một cách thận trọng. Vì vậy, bài viết khuyên bạn nên tạo một điểm khôi phục đề phòng trường hợp xảy ra sự cố. Sau đó làm theo các bước bên dưới:
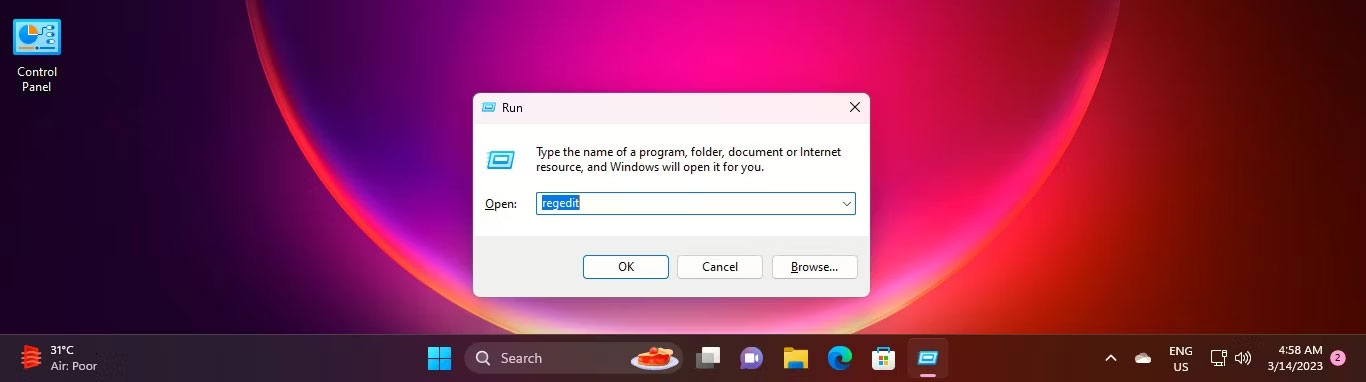
1. Nhấp vào các phím Win + R cùng lúc để mở Run. Nhập regedit vào thanh điều hướng và nhấn Enter hoặc sử dụng một trong nhiều cách để mở Registry Editor. Sau đó nhấp vào Yes trên UAC.
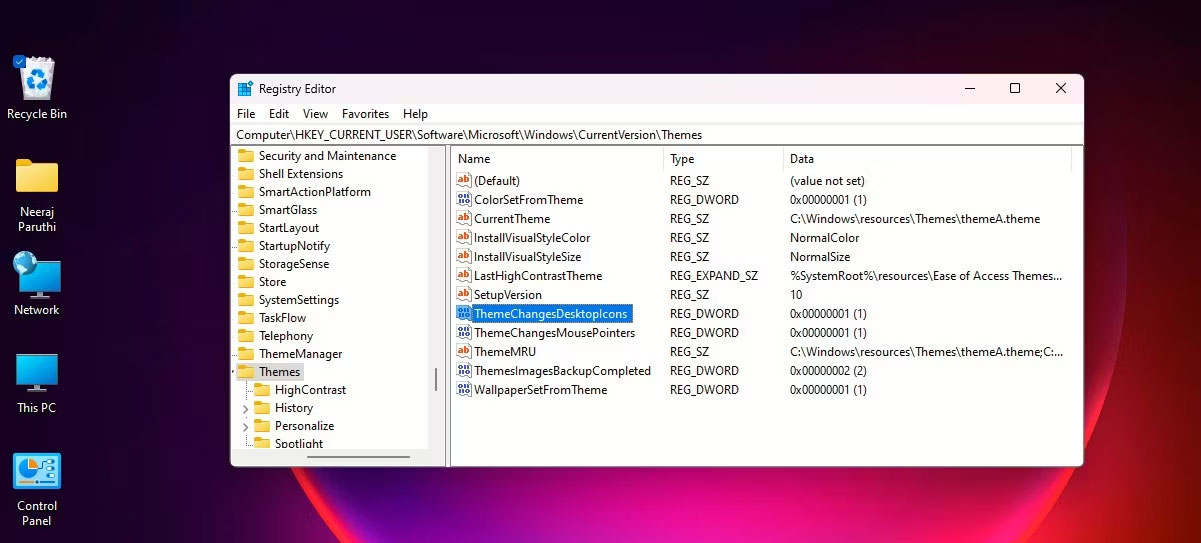
2. Bây giờ, điều hướng qua registry bằng đường dẫn sau để đến Themes:
HKEY_CURRENT_USER\Software\Microsoft\Windows\CurrentVersion\Themes
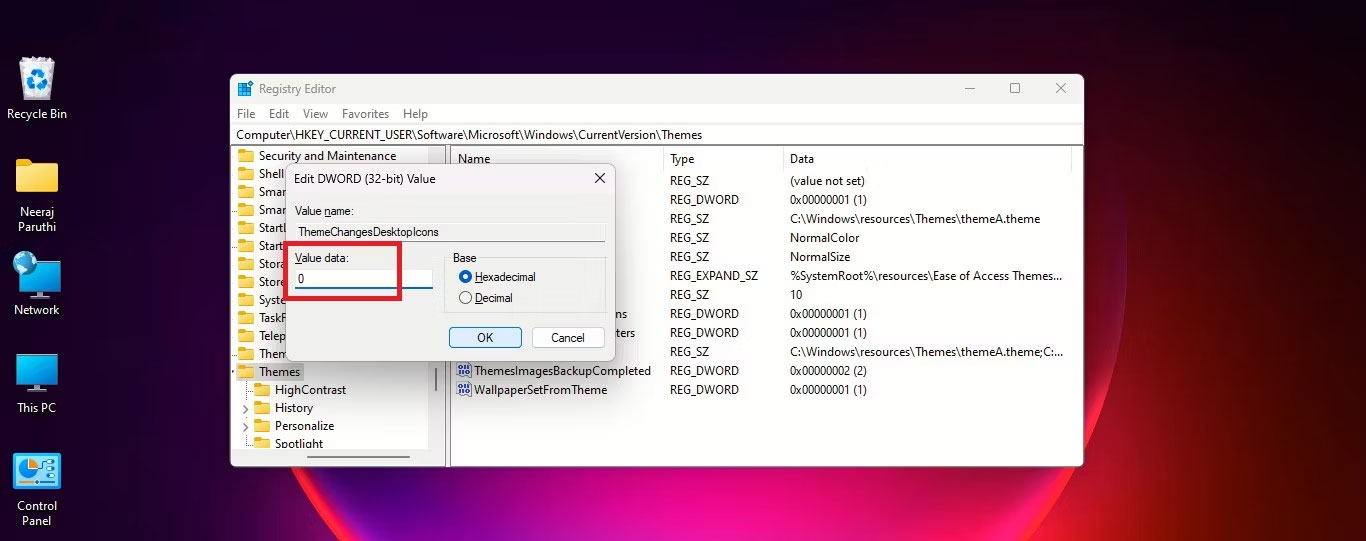
3. Trên ngăn bên phải của theme, nhấp đúp vào DWORD: ThemeChangesDesktopIcons
4. Trong cửa sổ EDIT DWord, thay đổi Value data từ 1 thành 0. Và nhấp vào OK.
5. Đóng Registry Editor.
Bây giờ, khi bạn đổi sang một theme mới, các biểu tượng desktop sẽ không thay đổi theo theme đó.
Bạn có thể dễ dàng đảo ngược điều này bằng cách điều hướng đến registry key:
HKEY_CURRENT_USER\Software\Microsoft\Windows\CurrentVersion\Themes
Sau đó nhấp đúp vào DWORD: ThemeChangesDesktopIcons và thay đổi Value Data thành 1. Từ bây giờ, các theme mới mà bạn áp dụng sẽ có thể cài đặt các biểu tượng mới thay vì những biểu tượng desktop mặc định.
Cách giữ lại con trỏ chuột ban đầu khi thay đổi theme
Một số theme cũng thay đổi con trỏ chuột để mở rộng hiệu ứng theme hơn nữa trong Windows.
Theme Chiến tranh giữa các vì sao được sử dụng cho hướng dẫn này sẽ thay đổi con trỏ chuột thành một thanh kiếm ánh sáng đầy màu sắc. Nó trông bắt mắt, nhưng không tiện dụng, đặc biệt là khi làm việc trên tài liệu văn bản.
Nhưng bạn có thể dễ dàng khôi phục con trỏ chuột mũi tên mặc định để hoạt động trơn tru và hiệu quả như trước. Tuy nhiên, để lấy lại con trỏ chuột mặc định, bạn sẽ phải chỉnh sửa registry vì không có tùy chọn nào khác trong Settings.
Nhưng yên tâm, mọi thao tác rất dễ dàng. Điều hướng đến cùng một key Themes như bạn đã làm trước đây để tinh chỉnh key biểu tượng desktop:
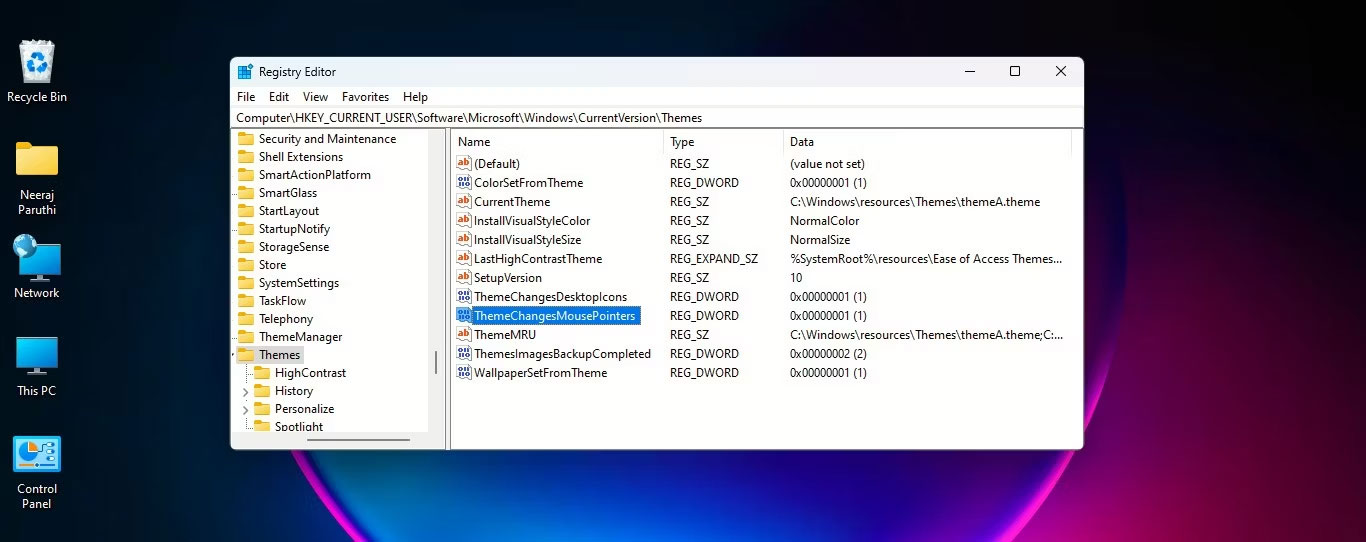
HKEY_CURRENT_USER\Software\Microsoft\Windows\CurrentVersion\Themes
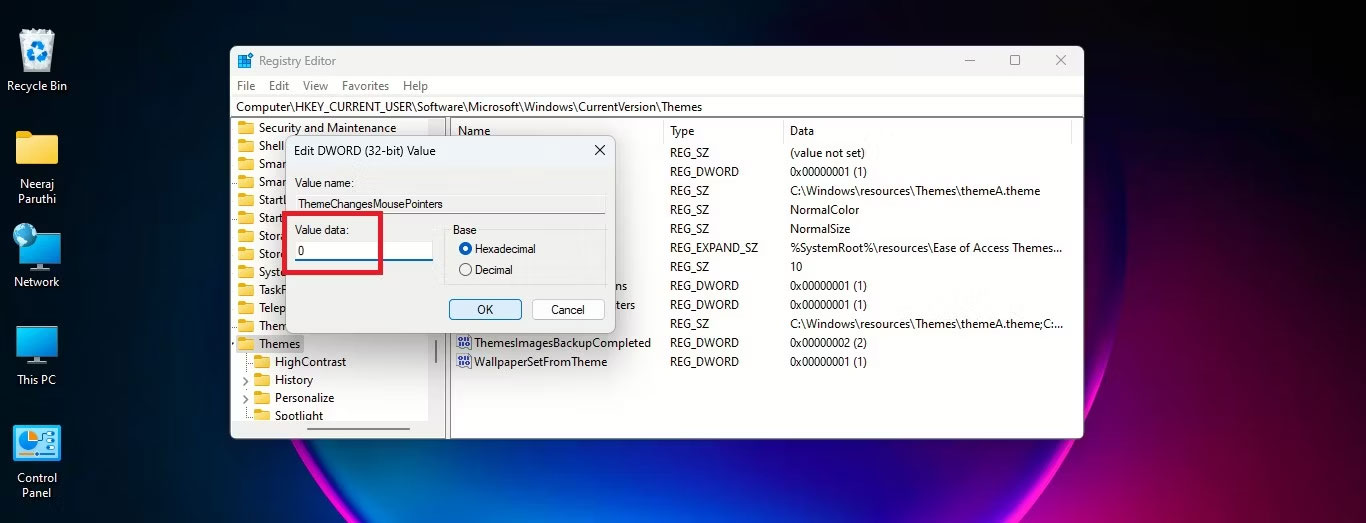
Trên ngăn bên phải, ngay bên dưới DWORD: ThemeChangesDesktopIcons, bạn sẽ tìm thấy DWORD: ThemeChangesMousePointers.
Nhấp đúp vào nó và thay đổi Value data thành 0. Sau đó nhấn OK.
Con trỏ mũi tên mặc định của Windows sẽ xuất hiện trong các theme mới mà bạn áp dụng trên PC của mình.
