Cách cài đặt Windows trên Chromebook
- Thứ tư - 07/02/2024 09:17
- In ra
- Đóng cửa sổ này
Windows 10 là đối thủ cạnh tranh linh hoạt và mạnh mẽ của ChromeOS. Mặc dù Chromebook của bạn có thể không đi kèm Windows nhưng bạn vẫn có thể cài đặt hệ điều hành này bằng cách làm theo một quy trình đơn giản.
Tải Windows và chuẩn bị USB boot
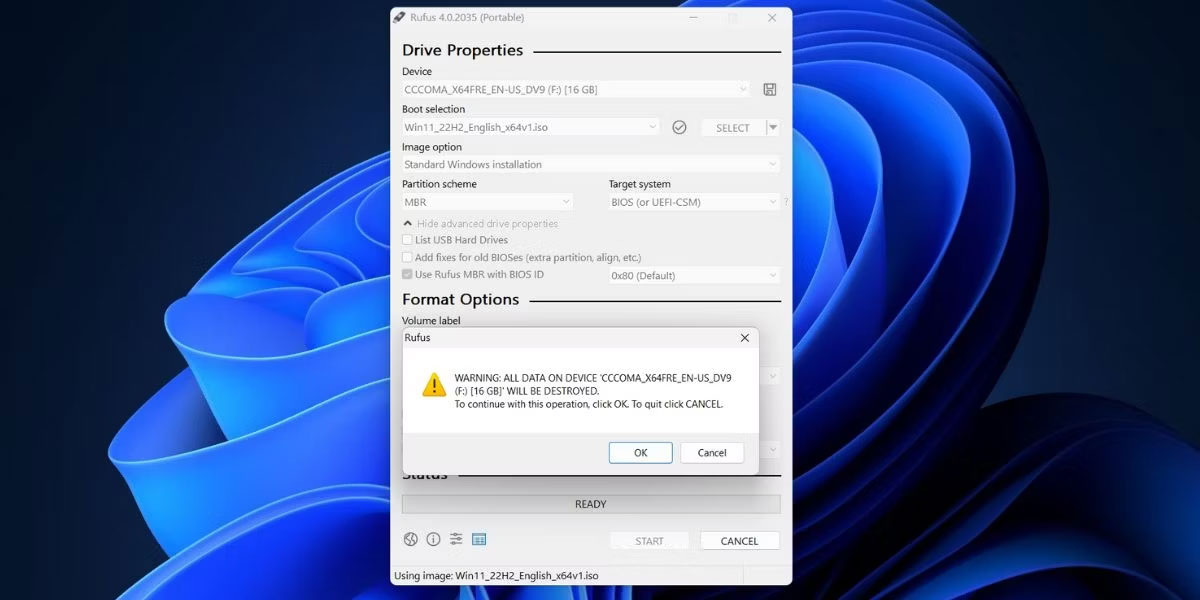
Để cài đặt Windows trên Chromebook, bạn cần tải xuống file ISO Windows 10 chính thức và chuẩn bị USB boot để chạy file đó. Bạn nên tạo trình cài đặt này bằng một thiết bị Windows hoặc Linux khác.
Mặc dù bạn có thể tạo ổ boot bằng Chromebook Recovery Tool nhưng phương pháp này có vẻ hoạt động tốt nhất đối với các bản phân phối Linux. Nó thường không hoạt động với ISO của Windows và tệ hơn nữa là Chromebook Recovery Utility đặt các ổ USB ở trạng thái chỉ đọc khiến việc đảo ngược trở nên khó chịu. Thay vào đó, bạn nên tạo trình cài đặt Windows 10 bằng Rufus hoặc một chương trình tương tự.
Truy cập Developer Mode và cài đặt firmware UEFI
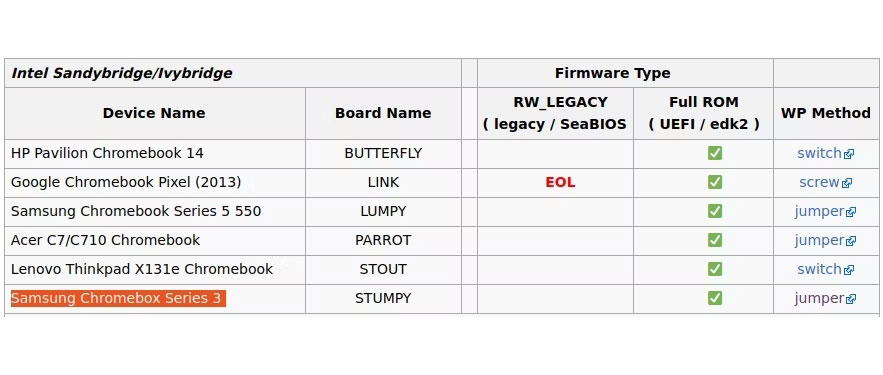
Sau khi chuẩn bị USB boot, bạn sẽ cần tắt tính năng Write Protection trên Chromebook của mình. Phương pháp bạn nên sử dụng để thực hiện việc này tùy thuộc vào model Chromebook của bạn nhưng bạn có thể xác định phương pháp đó bằng cách kiểm tra wiki MrChromebox.tech: https://mrchromebox.tech/#devices. Làm theo lời khuyên được cung cấp trong liên kết bên cạnh model Chromebook cụ thể của bạn.
Tiến hành cài đặt Firmware UEFI như sau:
1. Bắt đầu bằng cách bật Developer Mode.
2. Sau khi đăng nhập vào tài khoản của bạn, hãy mở Developer Console (Ctrl + Alt + Refresh).
3. Nhập chronos làm tên localhost của bạn, sau đó nhập lệnh này:
cd; curl -LO mrchromebox.tech/firmware-util.sh && sudo bash firmware-util.sh
4. Khi cửa sổ UEFI Flash xuất hiện, hãy nhập 2 để chọn tùy chọn Install/Update UEFI (Full ROM) Firmware.
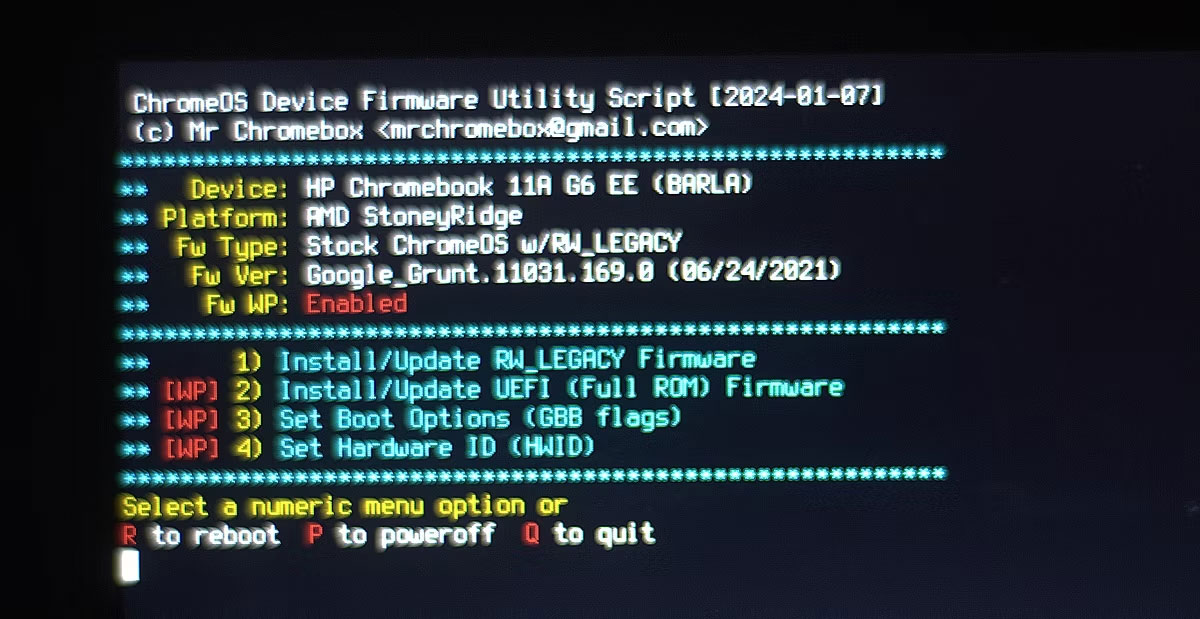
5. Nhập Y để xác nhận lựa chọn của bạn, sau đó nhập U để xác nhận rằng bạn muốn cài đặt firmware tương thích với UEFI.
Cuối cùng, một lời nhắc sẽ xuất hiện hỏi bạn có muốn tạo bản sao lưu cho firmware gốc của mình hay không. Điều này rất quan trọng vì nó cho phép bạn quay lại ChromeOS nếu bạn quyết định rằng thiết lập Chultrabook không dành cho mình.
- Đảm bảo rằng bạn đã lắp ổ USB dự phòng, riêng biệt.
- Xác nhận rằng bạn muốn flash firmware .rom vào ổ USB của mình bằng cách nhập số bên cạnh nó vào danh sách thiết bị.
Sau khi cài đặt xong firmware UEFI mới và sao lưu firmware ChromeOS cũ, bạn đã sẵn sàng bắt đầu cài đặt Windows trên Chromebook của mình. Bạn cũng có thể đảo ngược những thay đổi bạn đã thực hiện để tắt tính năng Write Protection.
Chạy trình cài đặt Windows trên Chromebook
Cuối cùng, bạn đã sẵn sàng cài đặt Windows.
- Tắt Chromebook.
- Cắm USB boot cài đặt Windows.
- Nhấn nút Nguồn để khởi động lại Chromebook.
- Nhấn phím ESC ngay khi Chromebook khởi động để truy cập BIOS.
- Điều hướng đến cài đặt Boot Order và điều chỉnh thứ tự boot để USB của bạn là thiết bị khởi động đầu tiên.
- Khởi động lại Chromebook của bạn và đợi nó vào menu cài đặt Windows. Bạn sẽ cần kết nối bàn phím hoặc chuột USB để điều hướng qua trình cài đặt.
Tiếp tục thông qua trình cài đặt Windows:
1. Đặt tùy chọn cơ bản của bạn và nhấp vào Install now.
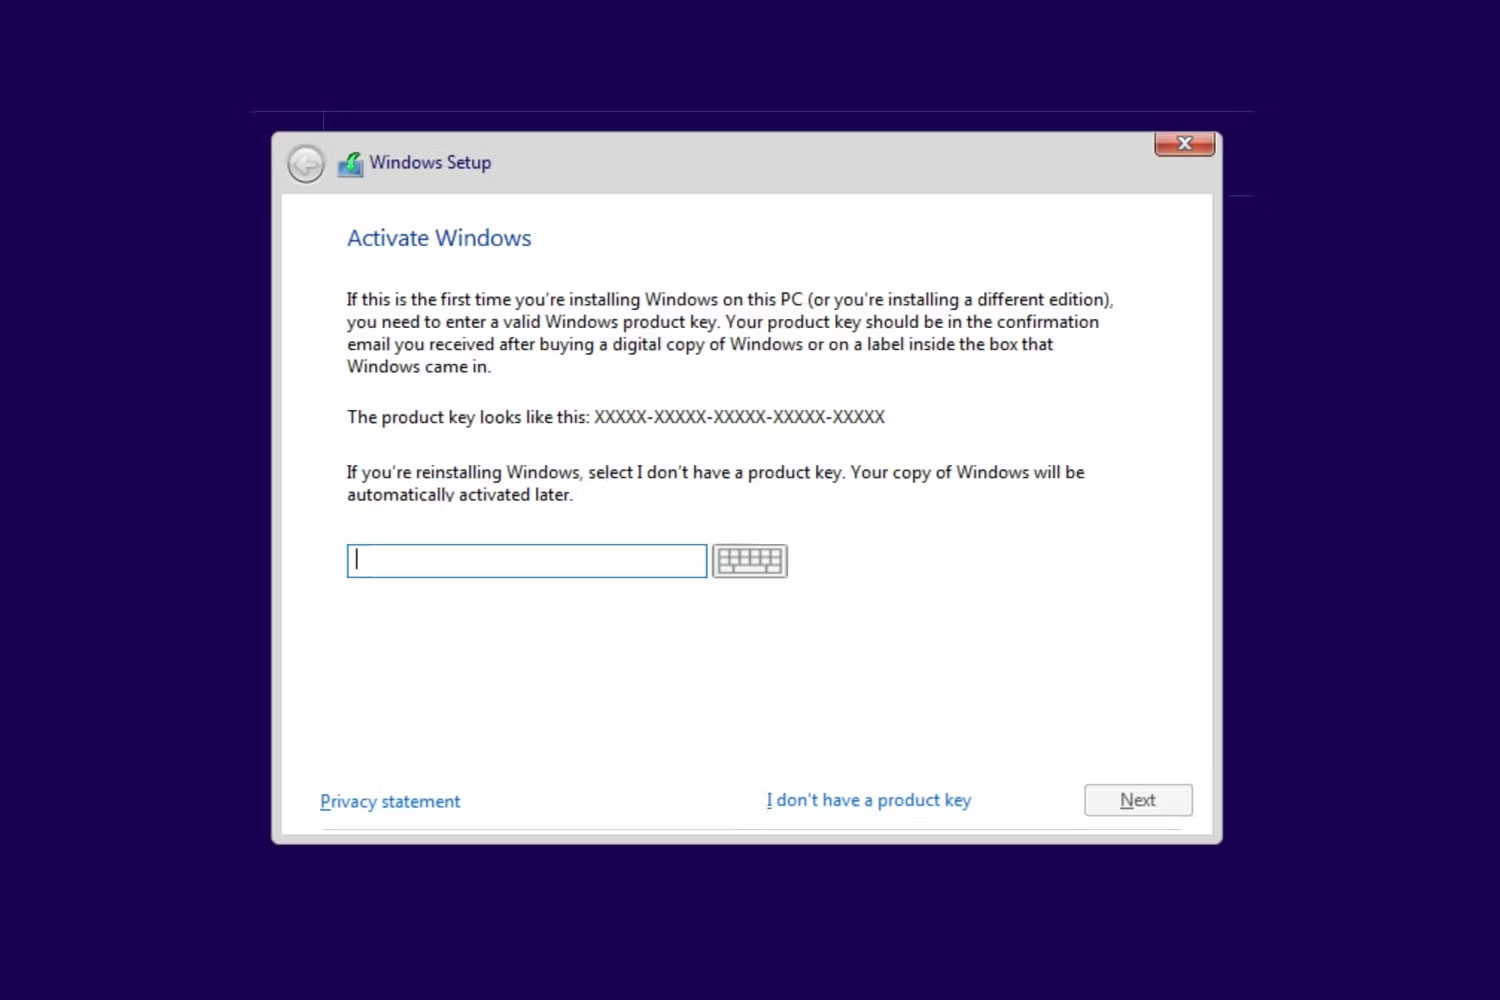
2. Bạn sẽ được nhắc nhập product key. Chọn I don't have a product key, sau đó chọn phiên bản Windows bạn muốn từ danh sách drop-down.
3. Chọn Custom: Install Windows only (advanced) khi được nhắc chọn quy trình cài đặt. Bạn có thể sắp xếp lại các phân vùng của mình theo ý muốn, nhưng bạn nên cài đặt Windows trong phân vùng lớn nhất.
Khi Chromebook của bạn khởi động lại hoặc quay lại phần đầu của trình cài đặt, hãy tháo trình cài đặt USB và khởi động lại thiết bị. Nếu quá trình cài đặt thành công, Chromebook của bạn sẽ khởi động theo lời nhắc thiết lập Windows cuối cùng.
Tải driver Windows và tùy chỉnh thiết lập của bạn
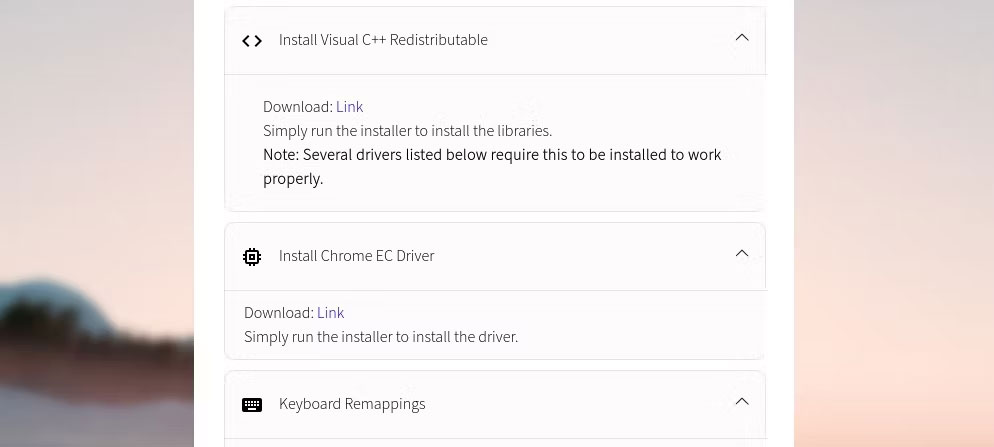
Mặc dù có thể bạn đã vượt qua giai đoạn cài đặt Windows trên Chromebook khó khăn nhất nhưng bạn vẫn cần cài đặt một số driver trước khi hệ điều hành mới của mình sẵn sàng sử dụng. Phương pháp đơn giản nhất để tìm driver phù hợp cho Chromebook của bạn là sử dụng trình trợ giúp Chromebook Windows Installation của Coolstar.
Các driver bạn cần tải xuống đều dành riêng cho từng thiết bị, vì vậy bạn nên tin tưởng vào các hướng dẫn mà Coolstar cung cấp. Ngoài ra, bạn có thể thực hiện các bước cơ bản để tùy chỉnh Windows 10 và cài đặt thêm một số ứng dụng tùy chỉnh Windows nếu không hài lòng với các tùy chọn cơ bản được cung cấp.
