Cách cài đặt và thiết lập Windows 11 không cần kết nối Internet
- Thứ năm - 04/12/2025 01:05
- In ra
- Đóng cửa sổ này
Windows 11 yêu cầu bạn phải đăng nhập bằng tài khoản Microsoft để hoàn tất quá trình thiết lập máy tính mới. Tuy nhiên, nếu bạn không có kết nối Internet đang hoạt động hoặc muốn sử dụng tài khoản người dùng cục bộ, bạn có thể làm theo các phương pháp sau để thiết lập Windows 11.
1. Bỏ qua yêu cầu Internet Out-of-Box Experience (OOBE)
Bạn có thể bỏ qua màn hình Let's connect you to a network bằng lệnh OOBE \BYPASSNRO trong Command Prompt. Khi được thực thi, lệnh này sẽ chạy một script CMD hiện có, bypassnro.cmd, được lưu trữ trong thư mục System32 để sửa đổi Windows registry. Việc sửa đổi này cho phép bạn hoàn tất quá trình thiết lập Windows 11 mà không cần kết nối Internet. Để thực hiện việc này:
1. Khởi động máy tính bằng phương tiện cài đặt Windows. Bỏ qua Bước 6 bên dưới nếu bạn đã ở màn hình Let's connect you to a network.
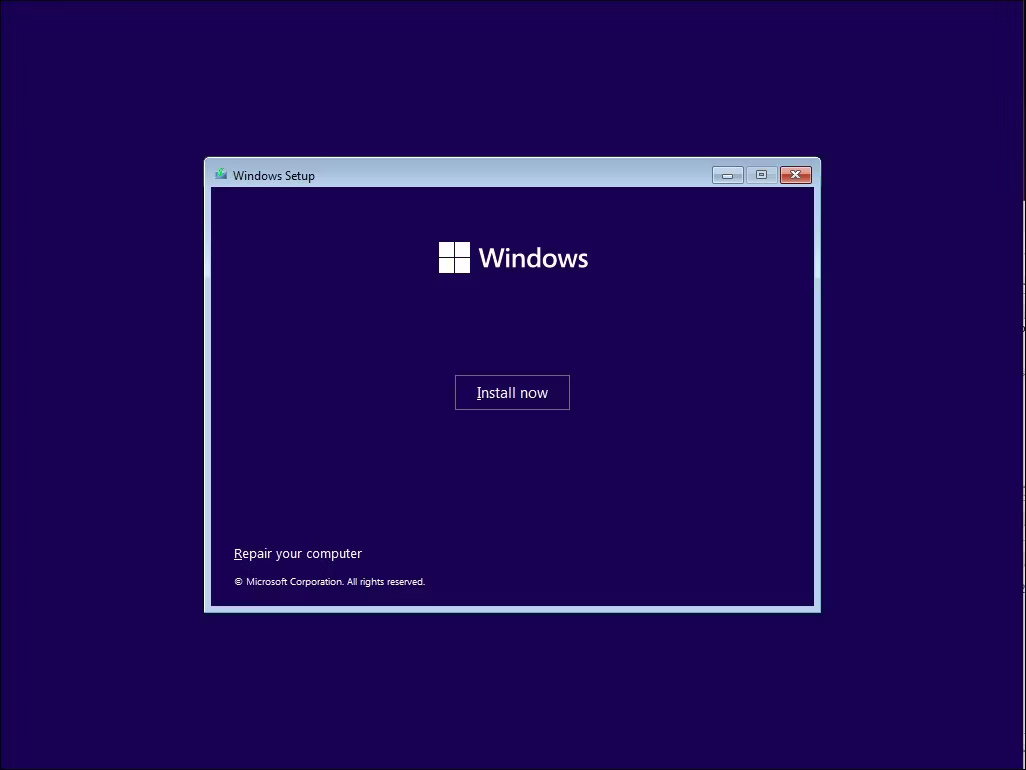
2. Khi hộp thoại Windows Setup xuất hiện, hãy chọn ngôn ngữ, thời gian và bố cục đầu vào bàn phím ưa thích rồi nhấp vào Next. Sau đó, nhấp vào Install Now.
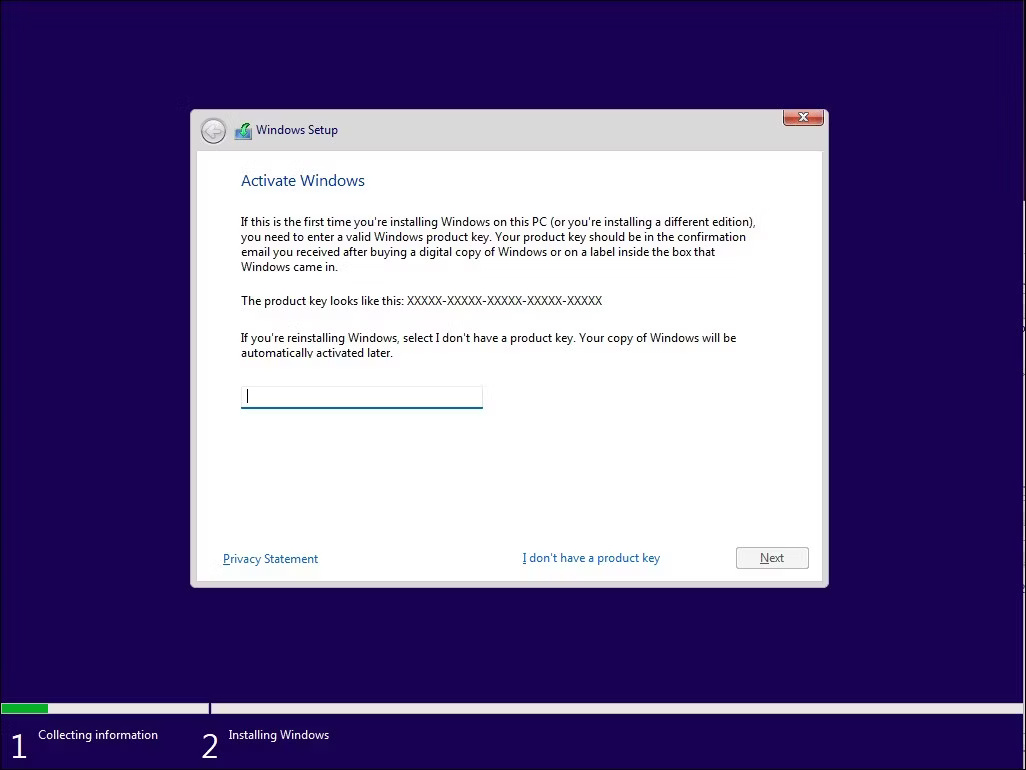
3. Nhập product key để kích hoạt Windows 11. Nếu bạn không có product key, hãy nhấp vào liên kết I don't have a product key ở góc dưới bên phải. Nếu bạn đang nâng cấp từ Windows 10 hoặc phiên bản Windows 11 cũ hơn, hệ điều hành sẽ tự động nhận dạng và xác thực product key Windows được liên kết với phần cứng máy tính của bạn.
4. Tiếp theo, nếu được nhắc, hãy chọn phiên bản Windows 11 mà bạn muốn cài đặt. Đánh dấu vào ô để chấp nhận các điều khoản và nhấp vào Next. Sau đó, chọn Custom: Install Windows Only (Advanced).
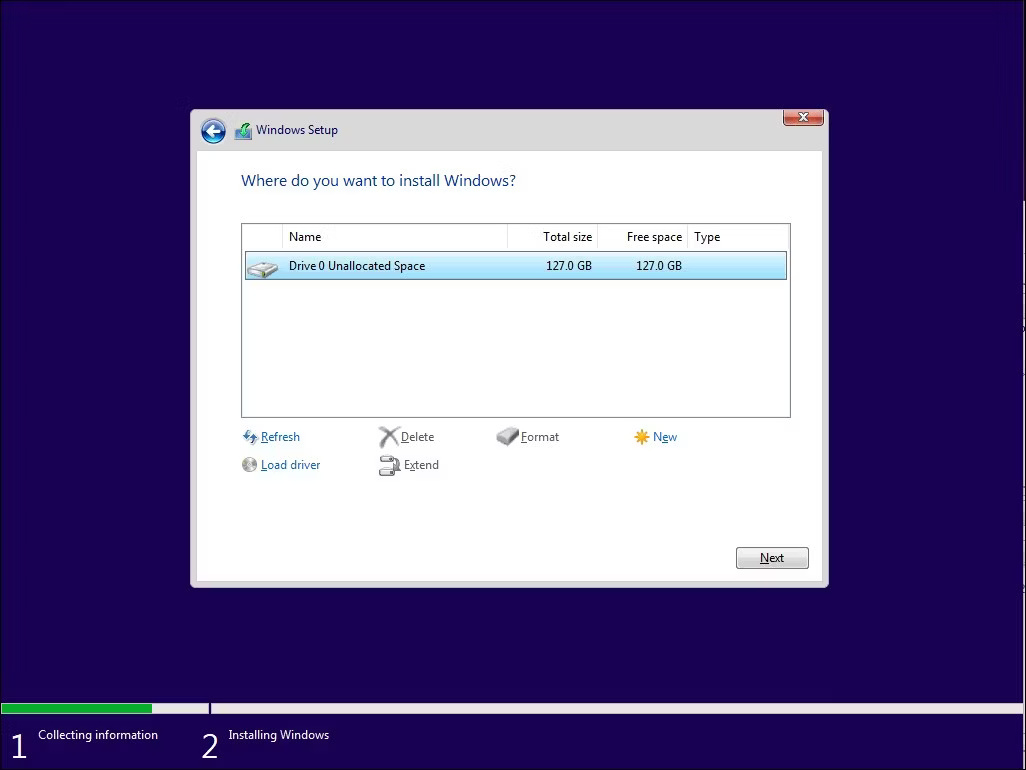
5. Chọn ổ cài đặt và nhấp vào Next. Đợi Windows hoàn tất cài đặt và khởi động lại máy tính. Trong màn hình thiết lập, hãy chọn vùng và bố cục bàn phím của bạn.
6. Khi ở màn hình Let's connect you to a network, hãy nhấn Shift + F10 để khởi chạy Command Prompt.
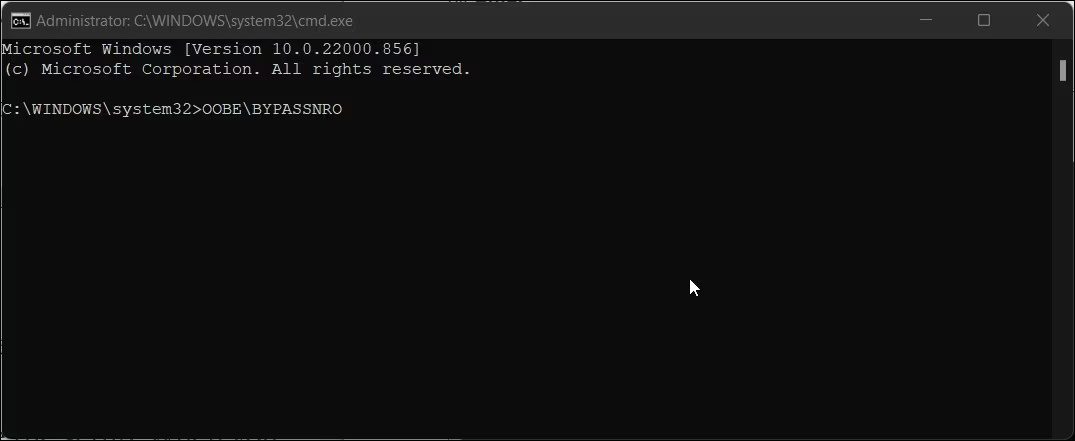
7. Trong cửa sổ Command Prompt, nhập lệnh sau và nhấn Enter:
OOBE\BYPASSNRO
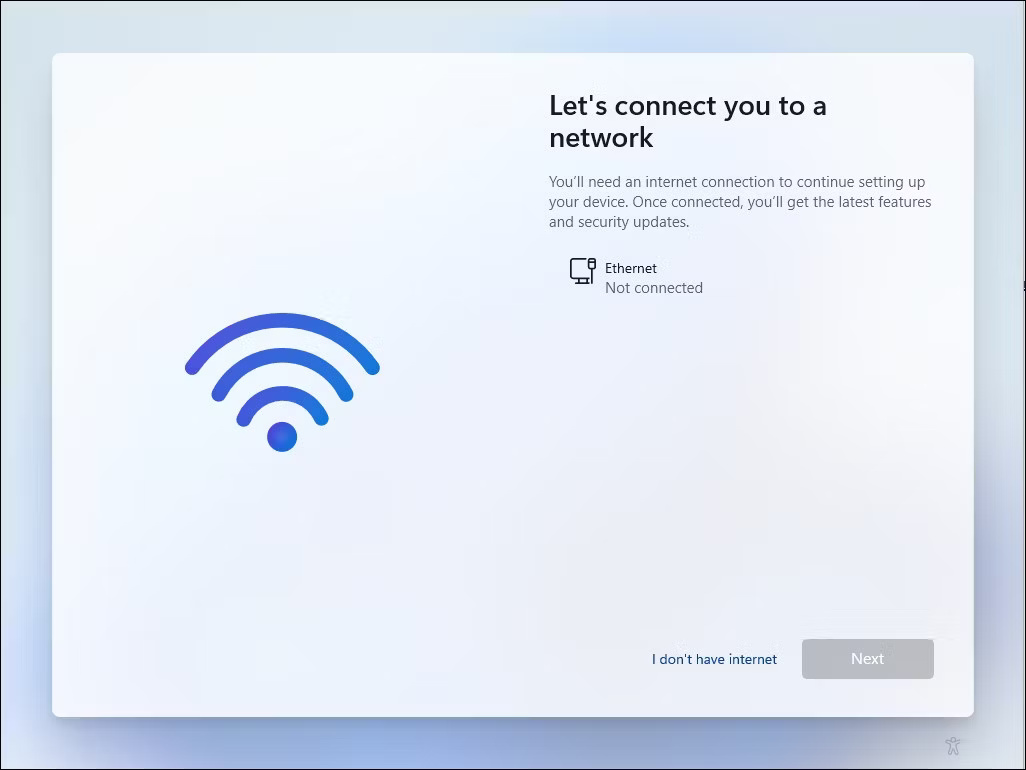
8. Bây giờ, hệ thống sẽ khởi động lại và khởi chạy lại hộp thoại OOBE. Làm theo hướng dẫn trên màn hình để hoàn tất thiết lập. Khi bạn đến màn hình Let's connect you to a network, hãy nhấp vào I don't have Internet.
9. Tiếp theo, nhấp vào Continue with limited setup. Sau đó, chấp nhận thỏa thuận cấp phép và tiến hành tạo tài khoản người dùng cục bộ của bạn.
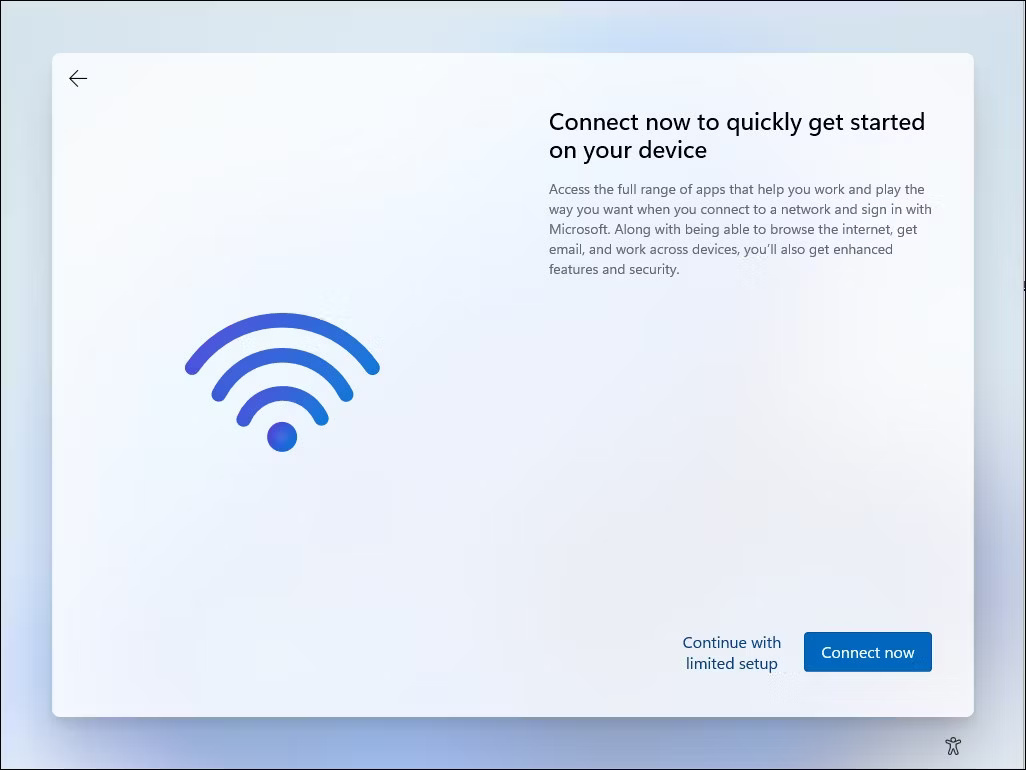
Ngoài ra, hãy đảm bảo thêm các câu hỏi bảo mật. Điều này sẽ giúp bạn khôi phục tài khoản người dùng cục bộ của mình trong trường hợp bạn quên mật khẩu. Sau khi hoàn tất, hãy làm theo hướng dẫn trên màn hình để hoàn tất thiết lập.
2. Kết thúc tiến trình Network Connection Flow bằng Task Manager
Bạn có thể bỏ qua màn hình "Let's connect you to a network" bằng cách kết thúc tiến trình oobenetworkconnectionflow.exe. Vì đã cài đặt Windows 11 ở giai đoạn này, bạn có thể khởi chạy Task Manager trên đầu trình hướng dẫn thiết lập của mình bằng Command Prompt và kết thúc tiến trình.
Lưu ý: Phương pháp này có thể không phải lúc nào cũng hiệu quả vì các bản cập nhật Windows mới thường vá những giải pháp thay thế như vậy.
Để bỏ qua thiết lập mạng Windows 11 bằng Task Manager:
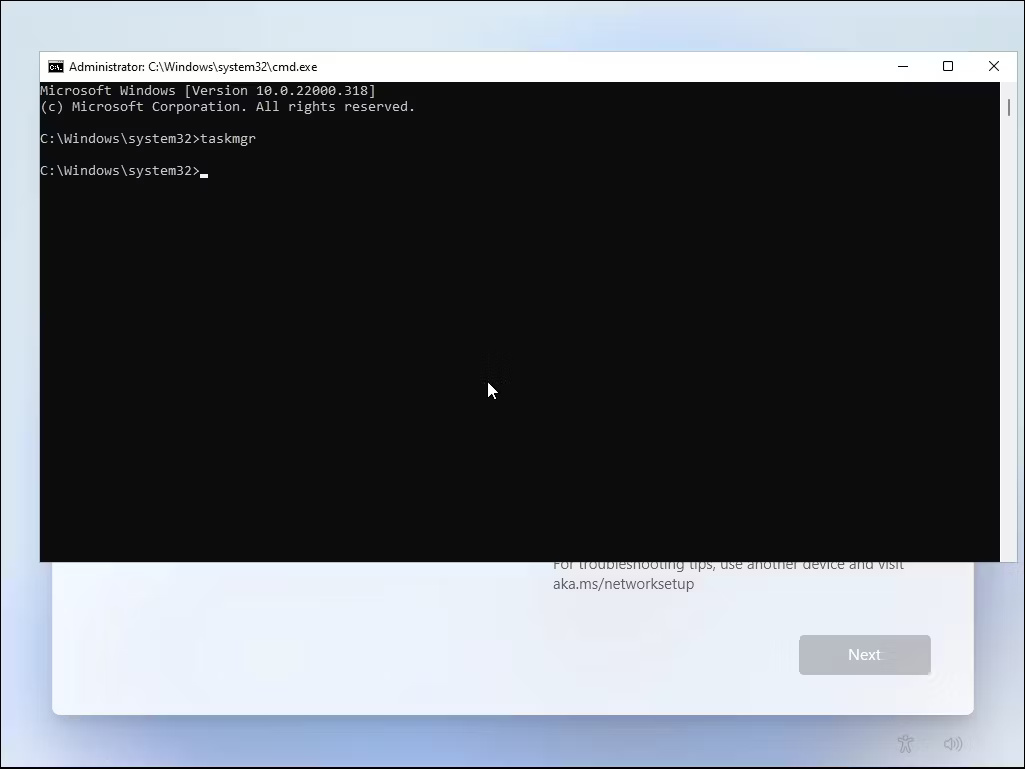
1. Giả sử bạn đang ở màn hình Let's connect you to a network screen, hãy nhấn Shift + F10 để khởi chạy Command Prompt.
2. Trong cửa sổ Command Prompt, nhập taskmgr và nhấn Enter để khởi chạy Task Manager. Ngoài ra, bạn có thể nhấn Ctrl + Shift + Esc để khởi chạy.
3. Nhấp vào More Details để mở Task Manager ở chế độ xem đầy đủ.
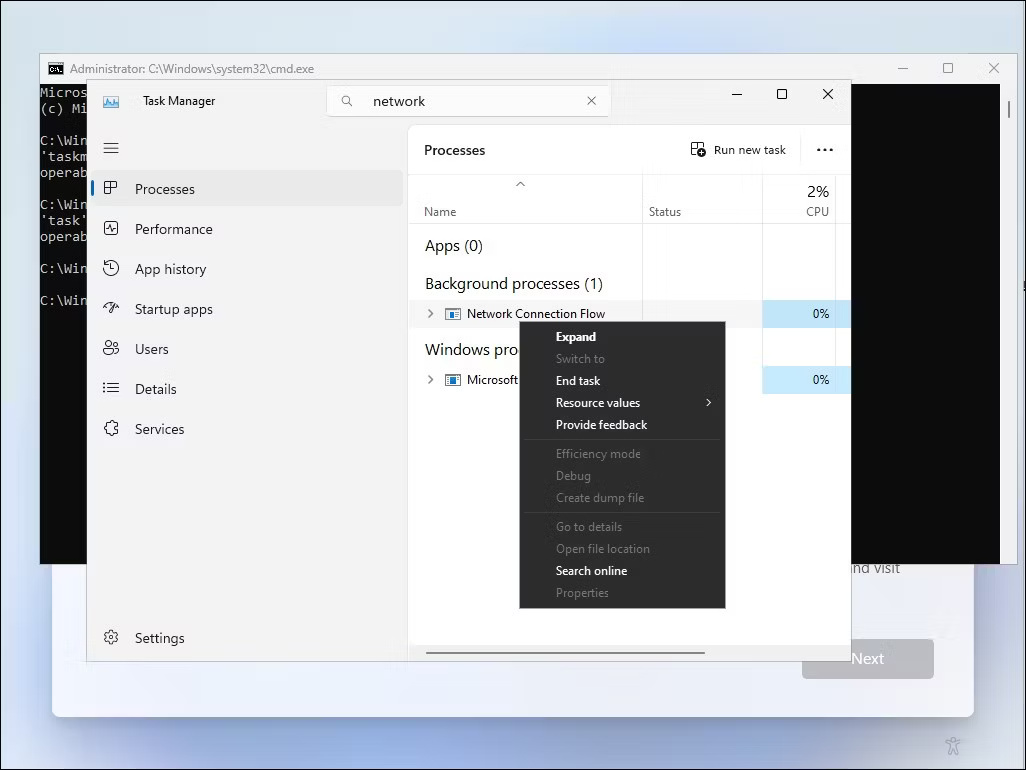
4. Đi tới tab Processes và sử dụng thanh tìm kiếm trong Task Manager để tìm tiến trình Network Connection Flow.
5. Chọn tiến trình Network Connection Flow rồi nhấp vào nút End task. Đợi tiến trình kết thúc, sau đó đóng Task Manager.
6. Nhập exit vào Command Prompt và nhấn phím Enter.
Quá trình cài đặt sẽ refresh và bạn sẽ được chuyển hướng đến trình hướng dẫn thiết lập. Nó sẽ hiển thị một số hình ảnh động đang load và sau đó tiến hành bước tiếp theo. Tại đây, nhập tên và mật khẩu để tạo tài khoản người dùng cục bộ trong Windows 11 và hoàn tất thiết lập.
Sau khi hoàn tất thiết lập, hãy kết nối với Internet. Sau đó, hãy vào Settings > Windows Update và tải xuống tất cả các bản cập nhật bảo mật và tính năng quan trọng. Bạn cũng có thể nhận thấy một số biểu tượng bị thiếu sau khi thiết lập ban đầu. Windows sẽ tải xuống các biểu tượng này khi bạn kết nối PC của mình với Internet.
