Cách cài đặt/gỡ cài đặt Wireless Display trên Windows 11
- Thứ sáu - 18/11/2022 00:01
- In ra
- Đóng cửa sổ này
Tính năng Wireless Display trong Windows 11 cho phép bạn kết nối và chiếu màn hình điện thoại thông minh tới PC. Đây là một tiện ích hữu ích để xem nội dung từ điện thoại hoặc máy tính bảng của bạn trên màn hình lớn hơn.
Trong Windows 11, Wireless Display là một tính năng tùy chọn và yêu cầu PC tương thích với Miracast để hoạt động. Vì đây là một tính năng tùy chọn nên bạn sẽ phải cài đặt nó để bắt đầu với Miracast. Bài viết hôm nay sẽ chỉ cho bạn hai cách cài đặt Wireless Display trong Windows 11 để giúp chiếu màn hình điện thoại Android lên PC.
Cách bật Wireless Display bằng Settings
Bạn có thể cài đặt tính năng Wireless Display dưới dạng tính năng tùy chọn từ bảng điều khiển Settings. Trước đó, hãy đảm bảo kiểm tra xem PC của bạn có tương thích với Miracast không. Nếu có, hãy làm theo các bước bên dưới để cài đặt Wireless Display.
Để cài đặt Wireless Display:
1. Nhấn Win + I để mở Settings.
2. Mở tab Apps ở ngăn bên trái.
3. Tiếp theo, cuộn xuống và nhấp vào tùy chọn Optional features.

4. Nhấp vào View features cho Add an optional feature.
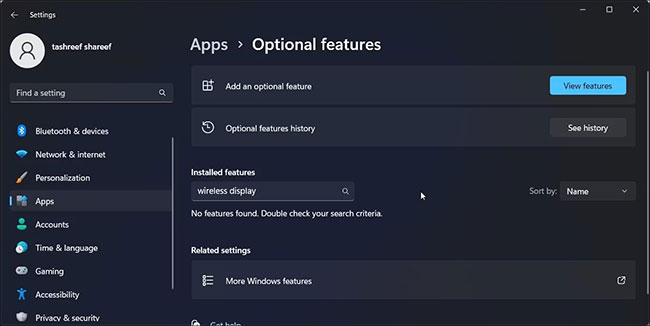
5. Trong hộp thoại Add an optional feature, nhập wireless display.
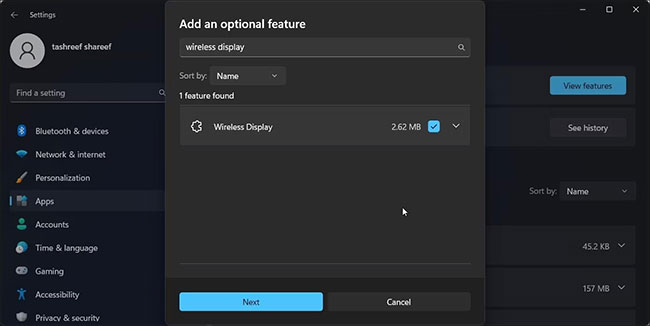
6. Chọn Wireless Display từ kết quả tìm kiếm và nhấp vào Next.
7. Nhấp vào Install, rồi đợi Windows tải xuống và cài đặt ứng dụng.
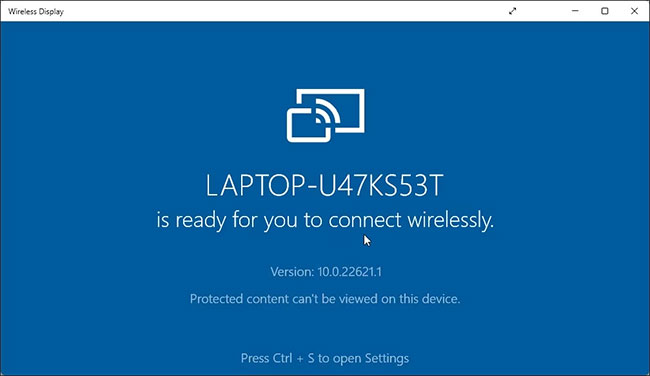
Sau khi cài đặt, hãy khởi động lại PC. Sau khi khởi động lại, hãy mở Windows Search (Win + S) và nhập Wireless Display. Giờ đây, bạn có thể kết nối điện thoại thông minh hoặc máy tính bảng với PC và chiếu màn hình không dây.
Cách cài đặt Wireless Display bằng Command Prompt
Bạn cũng có thể cài đặt Wireless Display bằng Command Prompt. Để cài đặt ứng dụng, bạn có thể sử dụng lệnh Features on Demand(FODs) trong tiện ích dòng lệnh.
Để cài đặt Wireless Display bằng Command Prompt:
1. Nhấn phím Win và gõ cmd.
2. Từ kết quả tìm kiếm, nhấp chuột phải vào Command Prompt và chọn Run as administrator.
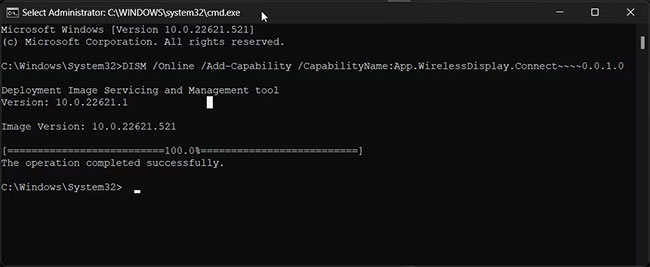
3. Trong cửa sổ Command Prompt, gõ lệnh sau và nhấn Enter:
DISM /Online /Add-Capability /CapabilityName:App.WirelessDisplay.Connect~~~~0.0.1.0
4. Windows sẽ tải xuống và cài đặt ứng dụng Wireless Display. Quá trình này có thể mất một chút thời gian, vì vậy hãy đợi cho đến khi thanh tiến trình đạt 100%.
5. Khi bạn thấy thông báo thành công, hãy đóng cửa sổ Command Prompt và khởi động lại PC.
Cách chiếu màn hình bằng Wireless Display
Bây giờ, bạn đã cài đặt thành công Wireless Display. Bạn có thể bắt đầu chiếu điện thoại thông minh hoặc các thiết bị tương thích khác tới màn hình của mình.
Để sử dụng Wireless Display:
1. Kết nối điện thoại Android của bạn và PC Windows với cùng một mạng WiFi.
2. Tiếp theo, nhấn phím Win và gõ wireless display.
3. Từ kết quả tìm kiếm, nhấp vào Wireless Display để mở ứng dụng.
4. Trên điện thoại Android, hãy quét tìm màn hình không dây. Ví dụ, trên thiết bị Samsung Galaxy, hãy mở Smart View và chọn PC của bạn từ danh sách các thiết bị khả dụng.
Bạn có thể cấu hình thêm cài đặt trình chiếu trên PC của mình để Wireless Display luôn khả dụng. Bằng cách này, bạn có thể chiếu từ điện thoại Android của mình ngay cả khi ứng dụng Wireless Display không mở trên PC.
Để Wireless Display luôn khả dụng:
1. Nhấn Win + I để mở Settings.
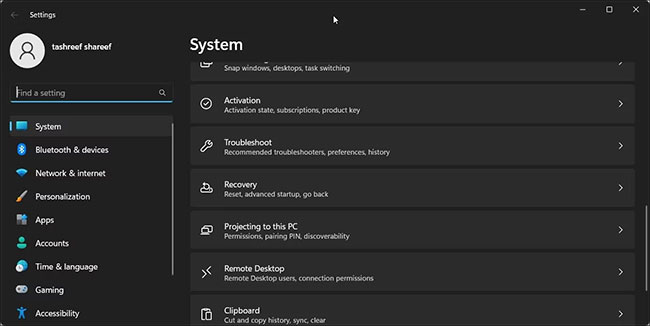
2. Với tab System được chọn, cuộn xuống và nhấp vào Projecting to this PC.
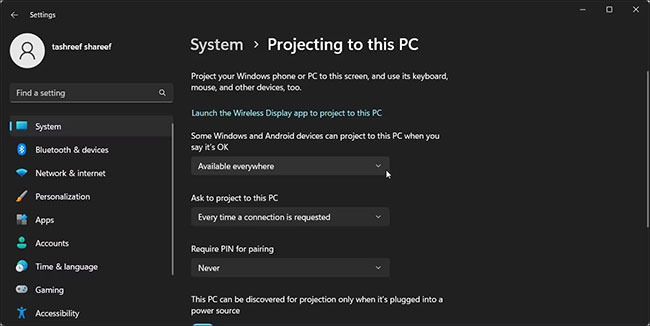
3. Tiếp theo, nhấp vào Some Windows and Android devices can project to this PC when you say it’s OK và chọn Available everywhere.
Giờ đây, nếu bạn cố gắng chiếu màn hình điện thoại Android của mình tới PC, Windows sẽ tự động khởi chạy ứng dụng Wireless Display và bắt đầu chiếu màn hình.
Cách gỡ cài đặt Wireless Display trong Windows 11
Bạn có thể gỡ cài đặt Wireless Display khỏi Settings. Tương tự, Command Prompt là một tùy chọn đáng tin cậy khác để gỡ cài đặt ứng dụng trong nháy mắt.
Hãy xem xét hai cách để gỡ cài đặt Wireless Display trong Windows 11.
Sử dụng Settings:
1. Nhấn Win + I để mở Settings.
2. Chuyển đến Apps > Optional features.
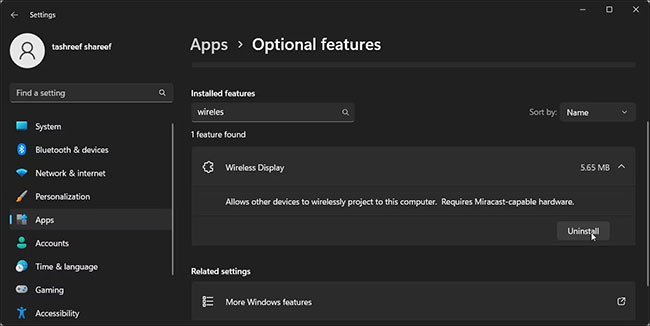
3. Nhập Wireless Display vào thanh tìm kiếm Installed features.
4. Nhấp vào Wireless Display và sau đó chọn Uninstall.
Sử dụng Command Prompt:
1. Mở Command Prompt với quyền admin.

2. Trong cửa sổ Command Prompt, gõ lệnh sau và nhấn Enter:
DISM /Online /Remove-Capability /CapabilityName:App.WirelessDisplay.Connect~~~~0.0.1.0
3. Đợi ứng dụng gỡ cài đặt. Sau đó khởi động lại PC để áp dụng các thay đổi.
Ứng dụng Wireless Display giúp dễ dàng xem màn hình Android của bạn trên máy tính Windows. Nó cũng giúp bạn tránh khỏi rắc rối khi cài đặt các ứng dụng chiếu màn hình của bên thứ ba thường yêu cầu đăng ký.
Thật không may, bạn không thể sử dụng Wireless Display để chiếu màn hình iPhone lên PC. Do hệ sinh thái của Apple, bạn sẽ phải dựa vào các ứng dụng của bên thứ ba để truyền màn hình iPhone sang máy tính Windows của mình.
