<!DOCTYPE html>
    <html lang="vi" xmlns="http://www.w3.org/1999/xhtml" prefix="og: http://ogp.me/ns#">
    <head>
<title>Cách cài đặt Apache Guacamole qua Docker trên Ubuntu 22.04</title>
<meta name="description" content="Cách cài đặt Apache Guacamole qua Docker trên Ubuntu 22.04 - Savefile - Tin Tức -...">
<meta name="author" content=".: Nguoicodonvn2008.info - Cõi lòng người cô đơn :.">
<meta name="copyright" content=".: Nguoicodonvn2008.info - Cõi lòng người cô đơn :. [admin@nguoicodonvn2008.info]">
<meta name="robots" content="index, archive, follow, noodp">
<meta name="googlebot" content="index,archive,follow,noodp">
<meta name="msnbot" content="all,index,follow">
<meta name="generator" content="NukeViet v4.5">
<meta http-equiv="Content-Type" content="text/html; charset=utf-8">
<meta property="og:title" content="Cách cài đặt Apache Guacamole qua Docker trên Ubuntu 22.04">
<meta property="og:type" content="website">
<meta property="og:description" content="Savefile - Tin Tức - https&#x3A;&#x002F;&#x002F;www.nguoicodonvn2008.info&#x002F;vi&#x002F;news&#x002F;savefile&#x002F;kien-thuc-may-tinh&#x002F;cach-cai-dat-apache-guacamole-qua-docker-tren-ubuntu-22-04-7555.html">
<meta property="og:site_name" content=".&#x3A; Nguoicodonvn2008.info - Cõi lòng người cô đơn &#x3A;.">
<meta property="og:url" content="https://www.nguoicodonvn2008.info/vi/news/savefile/kien-thuc-may-tinh/cach-cai-dat-apache-guacamole-qua-docker-tren-ubuntu-22-04-7555.html">
<link rel="shortcut icon" href="https://www.nguoicodonvn2008.info/favicon.ico">
<link rel="canonical" href="https://www.nguoicodonvn2008.info/vi/news/savefile/kien-thuc-may-tinh/cach-cai-dat-apache-guacamole-qua-docker-tren-ubuntu-22-04-7555.html">
<link rel="alternate" href="https://www.nguoicodonvn2008.info/vi/news/rss/" title="Tin Tức" type="application/rss+xml">
<link rel="alternate" href="https://www.nguoicodonvn2008.info/vi/news/rss/karaoke-dual/" title="Tin Tức - Karaoke Dual" type="application/rss+xml">
<link rel="alternate" href="https://www.nguoicodonvn2008.info/vi/news/rss/nhac-tre/" title="Tin Tức - Nhạc trẻ" type="application/rss+xml">
<link rel="alternate" href="https://www.nguoicodonvn2008.info/vi/news/rss/tru-tinh/" title="Tin Tức - Trữ tình" type="application/rss+xml">
<link rel="alternate" href="https://www.nguoicodonvn2008.info/vi/news/rss/nuoc-ngoai/" title="Tin Tức - Nước ngoài" type="application/rss+xml">
<link rel="alternate" href="https://www.nguoicodonvn2008.info/vi/news/rss/remix/" title="Tin Tức - Remix" type="application/rss+xml">
<link rel="alternate" href="https://www.nguoicodonvn2008.info/vi/news/rss/tam-su-tinh-yeu/" title="Tin Tức - Tâm sự tình yêu" type="application/rss+xml">
<link rel="alternate" href="https://www.nguoicodonvn2008.info/vi/news/rss/tho-suu-tam/" title="Tin Tức - Thơ sưu tầm" type="application/rss+xml">
<link rel="alternate" href="https://www.nguoicodonvn2008.info/vi/news/rss/cuoc-song/" title="Tin Tức - Cuộc sống" type="application/rss+xml">
<link rel="alternate" href="https://www.nguoicodonvn2008.info/vi/news/rss/phan-mem/" title="Tin Tức - Phần mềm" type="application/rss+xml">
<link rel="alternate" href="https://www.nguoicodonvn2008.info/vi/news/rss/kien-thuc-may-tinh/" title="Tin Tức - Kiến thức máy tính" type="application/rss+xml">
<link rel="alternate" href="https://www.nguoicodonvn2008.info/vi/news/rss/hoc-tap/" title="Tin Tức - Học tập" type="application/rss+xml">
<link rel="alternate" href="https://www.nguoicodonvn2008.info/vi/news/rss/tai-lieu/" title="Tin Tức - Tài liệu" type="application/rss+xml">
<link rel="alternate" href="https://www.nguoicodonvn2008.info/vi/news/rss/de-thi/" title="Tin Tức - Đề thi" type="application/rss+xml">
<link rel="preload" as="style" href="https://www.nguoicodonvn2008.info/assets/css/font-awesome.min.css" type="text/css">
<link rel="preload" as="style" href="https://www.nguoicodonvn2008.info/themes/default/css/bootstrap.non-responsive.css" type="text/css">
<link rel="preload" as="style" href="https://www.nguoicodonvn2008.info/themes/default/css/style.css" type="text/css">
<link rel="preload" as="style" href="https://www.nguoicodonvn2008.info/themes/default/css/style.non-responsive.css" type="text/css">
<link rel="preload" as="style" href="https://www.nguoicodonvn2008.info/themes/default/css/news.css" type="text/css">
<link rel="preload" as="style" href="https://www.nguoicodonvn2008.info/themes/default/css/custom.css" type="text/css">
<link rel="preload" as="script" href="https://www.nguoicodonvn2008.info/assets/js/jquery/jquery.min.js" type="text/javascript">
<link rel="preload" as="script" href="https://www.nguoicodonvn2008.info/assets/js/language/vi.js" type="text/javascript">
<link rel="preload" as="script" href="https://www.nguoicodonvn2008.info/assets/js/DOMPurify/purify3.js" type="text/javascript">
<link rel="preload" as="script" href="https://www.nguoicodonvn2008.info/assets/js/global.js" type="text/javascript">
<link rel="preload" as="script" href="https://www.nguoicodonvn2008.info/assets/js/site.js" type="text/javascript">
<link rel="preload" as="script" href="https://www.nguoicodonvn2008.info/themes/default/js/news.js" type="text/javascript">
<link rel="preload" as="script" href="https://www.nguoicodonvn2008.info/themes/default/js/main.js" type="text/javascript">
<link rel="preload" as="script" href="https://www.nguoicodonvn2008.info/themes/default/js/custom.js" type="text/javascript">
<link rel="preload" as="script" href="https://www.nguoicodonvn2008.info/themes/default/js/bootstrap.min.js" type="text/javascript">
<link rel="stylesheet" href="https://www.nguoicodonvn2008.info/assets/css/font-awesome.min.css">
<link rel="stylesheet" href="https://www.nguoicodonvn2008.info/themes/default/css/bootstrap.non-responsive.css">
<link rel="stylesheet" href="https://www.nguoicodonvn2008.info/themes/default/css/style.css">
<link rel="stylesheet" href="https://www.nguoicodonvn2008.info/themes/default/css/style.non-responsive.css">
<link rel="StyleSheet" href="https://www.nguoicodonvn2008.info/themes/default/css/news.css">
<link rel="stylesheet" href="https://www.nguoicodonvn2008.info/themes/default/css/custom.css">
<style type="text/css">
	body{background: #fff;}
</style>
    </head>
    <body>
<div id="print">
	<div id="hd_print">
		<h2 class="pull-left">.&#x3A; Nguoicodonvn2008.info - Cõi lòng người cô đơn &#x3A;.</h2>
		<p class="pull-right"><a title=".&#x3A; Nguoicodonvn2008.info - Cõi lòng người cô đơn &#x3A;." href="https://www.nguoicodonvn2008.info/">https://www.nguoicodonvn2008.info</a></p>
	</div>
	<div class="clear"></div>
	<hr />
	<div id="content">
		<h1>Cách cài đặt Apache Guacamole qua Docker trên Ubuntu 22.04</h1>
		<ul class="list-inline">
			<li>Chủ nhật - 24/09/2023 09:58</li>
			<li class="hidden-print txtrequired"><em class="fa fa-print">&nbsp;</em><a title="In ra" href="javascript:;" onclick="window.print()">In ra</a></li>
			<li class="hidden-print txtrequired"><em class="fa fa-power-off">&nbsp;</em><a title="Đóng cửa sổ này" href="javascript:;" onclick="window.close()">Đóng cửa sổ này</a></li>
		</ul>
		<div class="clear"></div>
		<div id="hometext">
		</div>
				<div class="imghome">
			<img alt="Cách cài đặt Apache Guacamole qua Docker trên Ubuntu 22.04" src="https://st.quantrimang.com/photos/image/2023/09/20/cai-apache-guacamole-qua-docker-tren-ubuntu-19.jpg" width="460" class="img-thumbnail" />
		</div>
		<div class="clear"></div>
		<div id="bodytext" class="clearfix">
			<p style="text-align: justify;">Apache Guacamole là một remote desktop gateway mã nguồn mở và miễn phí cho phép bạn kết nối từ xa với máy tính/máy chủ của mình bằng các giao thức khác nhau như&nbsp;SSH, RDP và VNC. Apache Guacamole được Apache Software Foundation duy trì và được cấp Giấy phép Apache 2.0.</p>

<p style="text-align: justify;">Apache Guacamole là một remote desktop gateway không có client. Bạn có thể truy cập Apache Guacamole chỉ bằng trình duyệt web từ mọi nơi vào bất kỳ lúc nào. Bạn nên sử dụng Apache Guacamole nếu bạn có nhiều hệ điều hành từ xa với các giao thức khác nhau, chẳng hạn như Windows với RDP và hệ thống Linux với VNC và SSH.</p>

<p style="text-align: justify;">Trong hướng dẫn này, bạn sẽ cài đặt Apache Guacamole – Remote Desktop/Server Gateway – thông qua Docker trên máy chủ Ubuntu 22.04. Điều này bao gồm cài đặt và cấu hình Nginx làm reverse proxy cho Apache Guacamole. Cuối cùng, bạn sẽ có Apache Guacamole chạy dưới dạng&nbsp;Docker container&nbsp;và bảo mật quá trình cài đặt thông qua chứng chỉ SSL/TLS trên reverse proxy Nginx.</p>

<h2 style="text-align: justify;">Điều kiện tiên quyết</h2>

<p style="text-align: justify;">Để bắt đầu với hướng dẫn này, bạn phải có các yêu cầu sau:</p>

<ul>
	<li style="text-align: justify;">Một máy chủ Linux chạy Ubuntu 22.04 Server.</li>
	<li style="text-align: justify;">Người dùng không phải root có đặc quyền admin sudo/root.</li>
	<li style="text-align: justify;">Một tên miền trỏ đến địa chỉ IP của máy chủ.</li>
</ul>

<p style="text-align: justify;">Khi các yêu cầu đã sẵn sàng, bây giờ, bạn có thể bắt đầu cài đặt Apache Guacamole.</p>

<h2 style="text-align: justify;">Cài đặt Docker Engine và Docker Compose</h2>

<p style="text-align: justify;">Trong hướng dẫn này, bạn sẽ chạy và cài đặt Apache Guacamole dưới dạng dịch vụ container thông qua Docker và Docker Compose. Ví dụ này sử dụng máy chủ Ubuntu 22.04 mới, do đó, bao gồm cài đặt Docker và Docker Compose.</p>

<p style="text-align: justify;">
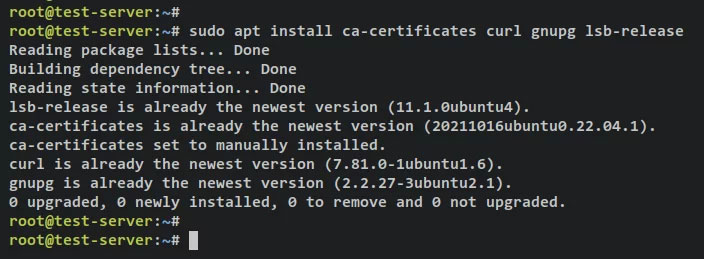
Để bắt đầu, hãy chạy lệnh apt bên dưới để cài đặt các dependency cơ bản. Nhập&nbsp;<strong>y</strong>&nbsp;khi được nhắc và nhấn&nbsp;<strong>ENTER</strong>&nbsp;để tiếp tục.</p>

<pre id="pre0">
<code>sudo apt install ca-certificates curl gnupg lsb-release</code></pre>

<p style="text-align: justify;">Đầu ra:</p>

<figure>
<div style="text-align: justify;"><img alt="Cài đặt các dependency cơ bản" data-i="0" data-src="https://st.quantrimang.com/photos/image/2023/09/20/cai-apache-guacamole-qua-docker-tren-ubuntu-1.jpg" data-was-processed="true" height="259" src="https://st.quantrimang.com/photos/image/2023/09/20/cai-apache-guacamole-qua-docker-tren-ubuntu-1.jpg" width="704" /></div>

<figcaption>
<div style="text-align: justify;">Cài đặt các dependency cơ bản</div>
</figcaption>
</figure>

<p style="text-align: justify;">Tiếp theo, chạy lệnh bên dưới để thêm key GPG và kho lưu trữ cho các gói Docker.</p>

<pre id="pre1">
<code>sudo mkdir -p /etc/apt/keyrings
curl -fsSL https://download.docker.com/linux/ubuntu/gpg | sudo gpg --dearmor -o /etc/apt/keyrings/docker.gpg</code></pre>

<pre id="pre2">
<code>echo \
  &quot;deb &#91;arch=$(dpkg --print-architecture) signed-by=/etc/apt/keyrings/docker.gpg&#93; https://download.docker.com/linux/ubuntu \
  $(lsb_release -cs) stable&quot; | sudo tee /etc/apt/sources.list.d/docker.list &gt; /dev/null</code></pre>

<p style="text-align: justify;">Đầu ra:</p>

<figure>
<div style="text-align: justify;"><img alt="Kho lưu trữ" data-i="1" data-src="https://st.quantrimang.com/photos/image/2023/09/20/cai-apache-guacamole-qua-docker-tren-ubuntu-2.jpg" data-was-processed="true" height="203" src="https://st.quantrimang.com/photos/image/2023/09/20/cai-apache-guacamole-qua-docker-tren-ubuntu-2.jpg" width="1186" /></div>

<figcaption>
<div style="text-align: justify;">Kho lưu trữ</div>
</figcaption>
</figure>

<p style="text-align: justify;">
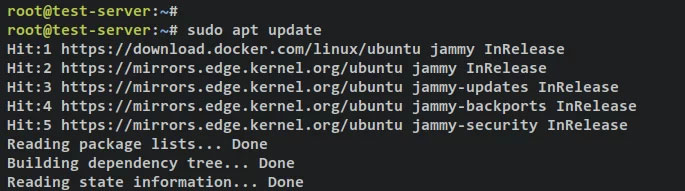
Sau đó, cập nhật và làm mới chỉ mục gói Ubuntu của bạn thông qua lệnh apt bên dưới.</p>

<pre id="pre3">
<code>sudo apt update</code></pre>

<p style="text-align: justify;">Đầu ra:</p>

<figure>
<div style="text-align: justify;"><img alt="Cập nhật kho lưu trữ" data-i="2" data-src="https://st.quantrimang.com/photos/image/2023/09/20/cai-apache-guacamole-qua-docker-tren-ubuntu-3.jpg" data-was-processed="true" height="191" src="https://st.quantrimang.com/photos/image/2023/09/20/cai-apache-guacamole-qua-docker-tren-ubuntu-3.jpg" width="685" /></div>

<figcaption>
<div style="text-align: justify;">Cập nhật kho lưu trữ</div>
</figcaption>
</figure>

<p style="text-align: justify;">Với kho lưu trữ Docker được thêm vào, giờ đây bạn có thể cài đặt công cụ Docker và plugin Docker Compose bằng lệnh apt bên dưới. Khi được nhắc, hãy nhập&nbsp;<strong>y</strong>, sau đó nhấn&nbsp;<strong>ENTER</strong>&nbsp;để tiếp tục.</p>

<pre id="pre4">
<code>sudo apt install docker-ce docker-ce-cli containerd.io docker-compose-plugin</code></pre>

<p style="text-align: justify;">Đầu ra:</p>

<figure>
<div style="text-align: justify;"><img alt="Cài đặt Docker và Docker Compose" data-i="3" data-src="https://st.quantrimang.com/photos/image/2023/09/20/cai-apache-guacamole-qua-docker-tren-ubuntu-4.jpg" data-was-processed="true" height="300" src="https://st.quantrimang.com/photos/image/2023/09/20/cai-apache-guacamole-qua-docker-tren-ubuntu-4.jpg" width="986" /></div>

<figcaption>
<div style="text-align: justify;">Cài đặt Docker và Docker Compose</div>
</figcaption>
</figure>

<p style="text-align: justify;">Service Docker sẽ khởi động và kích hoạt tự động. Bạn có thể xác minh service Docker thông qua tiện ích lệnh systemctl sau.</p>

<pre id="pre5">
<code>sudo systemctl is-enabled docker
sudo systemctl status docker</code></pre>

<p style="text-align: justify;">Bạn sẽ nhận được kết quả cho biết service Docker đã được bật và sẽ tự động chạy khi khởi động. Và trạng thái của service Docker là đang chạy.</p>

<p style="text-align: justify;">Cuối cùng, để cho phép người dùng không phải root chạy Docker container, bạn phải thêm người dùng của mình vào nhóm &#039;docker&#039;. Chạy lệnh usermod bên dưới để thêm người dùng của bạn vào nhóm &#039;docker&#039;. Ngoài ra, hãy nhớ thay đổi username thành người dùng của bạn.</p>

<pre id="pre6">
<code>sudo usermod -aG docker alice</code></pre>

<p style="text-align: justify;">
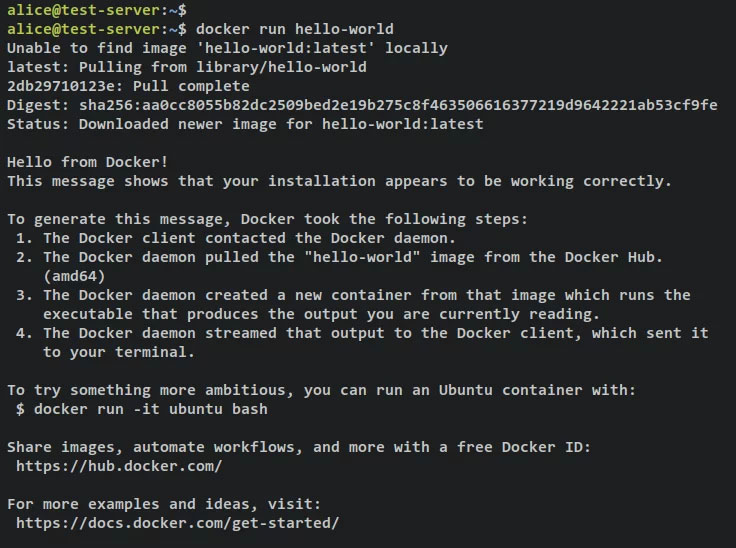
Bây giờ, bạn có thể đăng nhập với tư cách người dùng của mình và chạy Docker container thông qua lệnh bên dưới.</p>

<pre id="pre7">
<code>su - alice
docker run hello-world</code></pre>

<p style="text-align: justify;">Khi thành công, bạn sẽ nhận được thông báo&nbsp;<strong>hello-world</strong>&nbsp;từ Docker container như ảnh chụp màn hình sau.</p>

<figure>
<div style="text-align: justify;"><img alt="Xác minh Docker chạy hello-world" data-i="4" data-src="https://st.quantrimang.com/photos/image/2023/09/20/cai-apache-guacamole-qua-docker-tren-ubuntu-5.jpg" data-was-processed="true" height="548" src="https://st.quantrimang.com/photos/image/2023/09/20/cai-apache-guacamole-qua-docker-tren-ubuntu-5.jpg" width="736" /></div>

<figcaption>
<div style="text-align: justify;">Xác minh Docker chạy hello-world</div>
</figcaption>
</figure>

<p style="text-align: justify;">Sau khi cài đặt Docker và Docker Compose, tiếp theo bạn sẽ bắt đầu tạo thư mục dự án để triển khai Apache Guacamole.</p>

<h2 style="text-align: justify;">Thiết lập thư mục dự án</h2>

<p style="text-align: justify;">Trước tiên, hãy đảm bảo rằng bạn đã đăng nhập với tư cách người dùng không phải root bằng cách chạy lệnh sau.</p>

<pre id="pre8">
<code>su - alice</code></pre>

<p style="text-align: justify;">Tạo một thư mục dự án mới&nbsp;<strong>‘~/guacamole-server’</strong>&nbsp;và di chuyển thư mục làm việc của bạn vào đó.</p>

<pre id="pre9">
<code>mkdir -p guacamole-server; cd guacamole-server/</code></pre>

<p style="text-align: justify;">Sau đó, trong thư mục&nbsp;<strong>‘~/guacamole-server‘</strong>, tạo thư mục mới&nbsp;<strong>‘init‘</strong>&nbsp;và file&nbsp;<strong>‘docker-compose.yml‘.</strong></p>

<pre id="pre10">
<code>mkdir -p init
touch docker-compose.yml
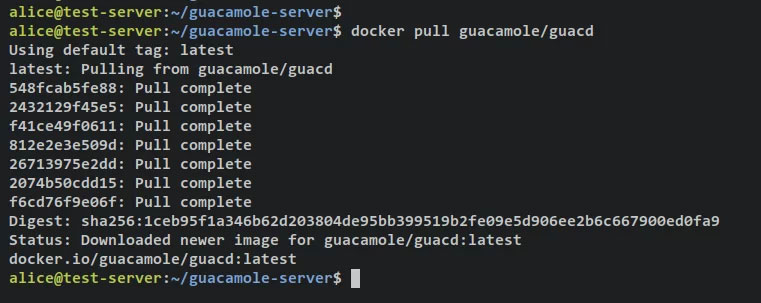
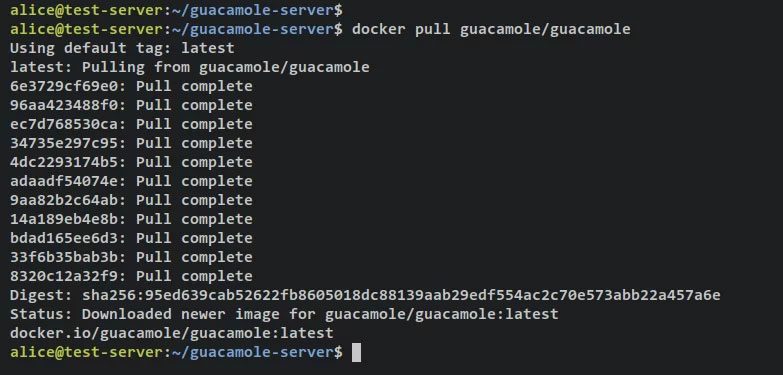
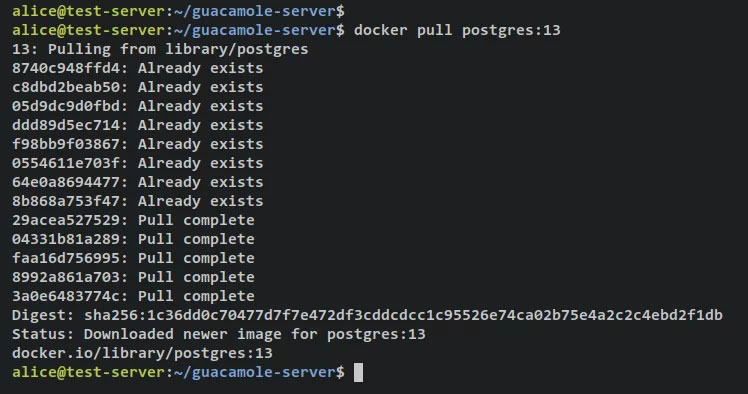
</code></pre>

<p style="text-align: justify;">Tiếp theo, chạy lệnh&nbsp;<strong>&#039;docker pull&#039;</strong>&nbsp;sau để tải xuống các image Docker cần thiết cho quá trình cài đặt Apache Guacamole. Bạn sẽ tải xuống 3 image khác nhau,&nbsp;<strong>guacd</strong>&nbsp;làm trình quản lý proxy,&nbsp;<strong>guacamole</strong>&nbsp;làm giao diện người dùng của Apache Guacamole và&nbsp;<strong>postgres:13</strong>&nbsp;sẽ được sử dụng làm database backend cho container Apache Guacamole.</p>

<pre id="pre11">
<code>docker pull guacamole/guacd
docker pull guacamole/guacamole
docker pull postgres:13</code></pre>

<p style="text-align: justify;">Tải xuống image guacd.</p>

<figure>
<div style="text-align: justify;"><img alt="Tải xuống image guacd" data-i="5" data-src="https://st.quantrimang.com/photos/image/2023/09/20/cai-apache-guacamole-qua-docker-tren-ubuntu-6.jpg" data-was-processed="true" height="303" src="https://st.quantrimang.com/photos/image/2023/09/20/cai-apache-guacamole-qua-docker-tren-ubuntu-6.jpg" width="761" /></div>

<figcaption>
<div style="text-align: justify;">Tải xuống image guacd</div>
</figcaption>
</figure>

<p style="text-align: justify;">Tải xuống image guacamole.</p>

<figure>
<div style="text-align: justify;"><img alt="Tải xuống image guacamole" data-i="6" data-src="https://st.quantrimang.com/photos/image/2023/09/20/cai-apache-guacamole-qua-docker-tren-ubuntu-7.jpg" data-was-processed="true" height="375" src="https://st.quantrimang.com/photos/image/2023/09/20/cai-apache-guacamole-qua-docker-tren-ubuntu-7.jpg" width="783" /></div>

<figcaption>
<div style="text-align: justify;">Tải xuống image guacamole</div>
</figcaption>
</figure>

<p style="text-align: justify;">Tải xuống image PostgreSQL 13.</p>

<figure>
<div style="text-align: justify;"><img alt="Tải xuống image postgresql" data-i="7" data-src="https://st.quantrimang.com/photos/image/2023/09/20/cai-apache-guacamole-qua-docker-tren-ubuntu-8.jpg" data-was-processed="true" height="394" src="https://st.quantrimang.com/photos/image/2023/09/20/cai-apache-guacamole-qua-docker-tren-ubuntu-8.jpg" width="748" /></div>

<figcaption>
<div style="text-align: justify;">Tải xuống image postgresql</div>
</figcaption>
</figure>

<p style="text-align: justify;">
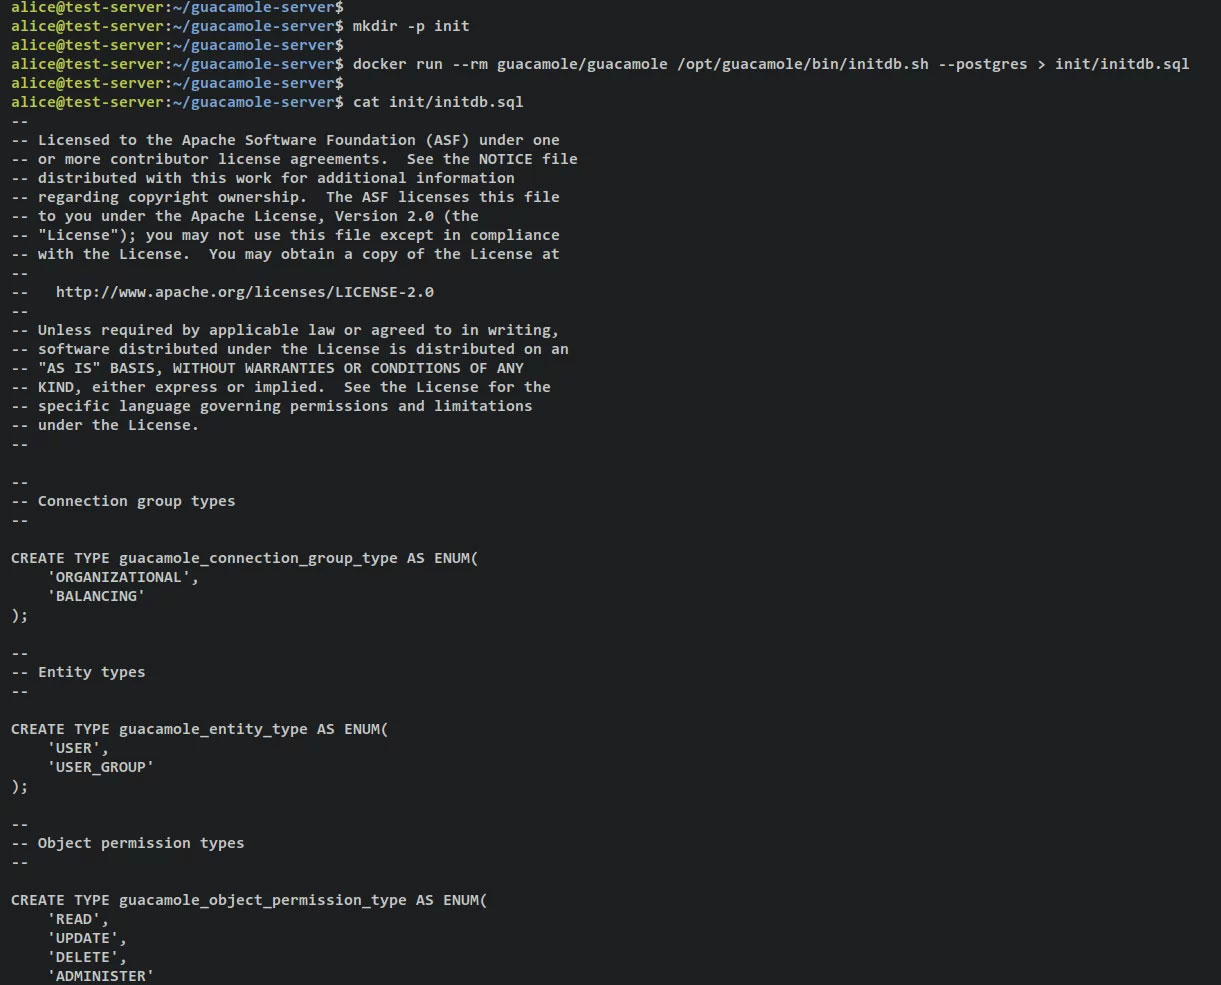
Khi các image Docker cần thiết được tải xuống, hãy thực thi lệnh sau để chạy container guacamole mới và chạy script&nbsp;<strong>&#039;initdb.sh&#039;</strong>&nbsp;để tạo database schema cho quá trình triển khai của bạn. Bạn sẽ tạo database schema guacamole thành&nbsp;<strong>‘init/initdb.sql’.</strong></p>

<pre id="pre12">
<code>docker run --rm guacamole/guacamole /opt/guacamole/bin/initdb.sh --postgres &gt; init/initdb.sql</code></pre>

<p style="text-align: justify;">Xác minh nội dung của database schema guacamole thông qua lệnh cat bên dưới.</p>

<pre id="pre13">
<code>cat init/initdb.sql</code></pre>

<p style="text-align: justify;">Đầu ra:</p>

<figure>
<div style="text-align: justify;"><img alt="Tạo database schema" data-i="8" data-src="https://st.quantrimang.com/photos/image/2023/09/20/cai-apache-guacamole-qua-docker-tren-ubuntu-9.jpg" data-was-processed="true" height="985" src="https://st.quantrimang.com/photos/image/2023/09/20/cai-apache-guacamole-qua-docker-tren-ubuntu-9.jpg" width="1221" /></div>

<figcaption>
<div style="text-align: justify;">Tạo database schema</div>
</figcaption>
</figure>

<h2 style="text-align: justify;">Thiết lập docker-compose.yml</h2>

<p style="text-align: justify;">Bây giờ, các image Docker cần thiết đã được tải xuống, bạn có thể bắt đầu cấu hình script&nbsp;<strong>&#039;docker-compose.yml&#039;</strong>&nbsp;và thiết lập cài đặt Apache Guacamole.</p>

<p style="text-align: justify;">Bắt đầu bằng cách mở file cấu hình&nbsp;<strong>‘docker-compose.yml‘</strong>&nbsp;bằng lệnh trình soạn thảo nano sau.</p>

<pre id="pre14">
<code>nano docker-compose.yml</code></pre>

<p style="text-align: justify;">Thêm các dòng sau vào file.</p>

<pre id="pre15">
<code>version: &#039;3.7&#039;
# networks
networks:
guacnet:
driver: bridge

# services
services:
guacd:
container_name: guac_guacd
image: guacamole/guacd
networks:
guacnet:
restart: always

postgres:
container_name: guac_postgres
environment:
PGDATA: /var/lib/postgresql/data/guacamole
POSTGRES_DB: guacamole_db
POSTGRES_PASSWORD: &#039;ChangeThisPassword&#039;
POSTGRES_USER: guacamole_user
image: postgres:13
networks:
guacnet:
restart: always
volumes:
- ./init:/docker-entrypoint-initdb.d:ro
- ./data:/var/lib/postgresql/data:rw

guacamole:
container_name: guac_guacamole
depends_on:
- guacd
- postgres
environment:
GUACD_HOSTNAME: guacd
POSTGRES_DATABASE: guacamole_db
POSTGRES_HOSTNAME: postgres
POSTGRES_PASSWORD: &#039;ChangeThisPassword&#039;
POSTGRES_USER: guacamole_user
image: guacamole/guacamole
links:
- guacd
networks:
guacnet:
ports:
- 8080:8080/tcp
restart: always</code></pre>

<p style="text-align: justify;">Lưu và đóng file&nbsp;<strong>&#039;docker-compose.yml&#039;</strong>&nbsp;khi hoàn tất.</p>

<p style="text-align: justify;">Với script&nbsp;<strong>‘docker-compose.yml’</strong>&nbsp;này, bạn sẽ tạo 3 container/service như sau:</p>

<ul>
	<li style="text-align: justify;"><strong>guacd</strong>&nbsp;– thành phần chính của Apache Guacamole sẽ được sử dụng để ủy quyền cho nhiều giao thức như SSH, RDP, VNC, v.v...</li>
	<li style="text-align: justify;"><strong>postgres</strong>&nbsp;– database backend cho quá trình cài đặt Apache Guacamole của bạn. Dữ liệu của bạn sẽ được lưu trữ trong container này.</li>
	<li style="text-align: justify;"><strong>guacamole</strong>&nbsp;– ứng dụng web Apache Guacamole được kết nối với các service PostgreSQL và guacd. Container này sẽ hiển thị cổng 8080 trên máy chủ của bạn.</li>
</ul>

<h2 style="text-align: justify;">Khởi động Apache Guacamole</h2>

<p style="text-align: justify;">Trước khi bắt đầu, hãy đảm bảo rằng bạn đang ở trong thư mục dự án&nbsp;<strong>‘guacamole-server’.</strong>&nbsp;Sau đó, chạy lệnh&nbsp;<strong>&#039;docker compose&#039;</strong>&nbsp;sau để tạo và bắt đầu triển khai Apache Guacamole.</p>

<pre id="pre16">
<code>
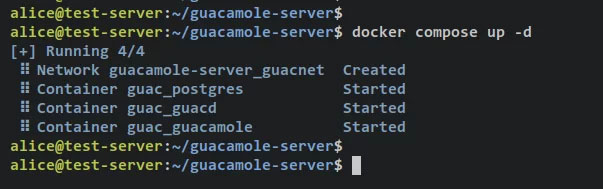
docker compose up -d</code></pre>

<p style="text-align: justify;">Bạn sẽ nhận được kết quả đầu ra như thế này – Có 3 container khác nhau&nbsp;<strong>guac_postgres, guac_guacd</strong>&nbsp;và&nbsp;<strong>guac_guacamole</strong>&nbsp;được tạo và bắt đầu.</p>

<figure>
<div style="text-align: justify;"><img alt="3 container khác nhau guac_postgres, guac_guacd và guac_guacamole" data-i="9" data-src="https://st.quantrimang.com/photos/image/2023/09/20/cai-apache-guacamole-qua-docker-tren-ubuntu-10.jpg" data-was-processed="true" height="189" src="https://st.quantrimang.com/photos/image/2023/09/20/cai-apache-guacamole-qua-docker-tren-ubuntu-10.jpg" width="603" /></div>

<figcaption>
<div style="text-align: justify;">3 container khác nhau guac_postgres, guac_guacd và guac_guacamole</div>
</figcaption>
</figure>

<p style="text-align: justify;">Xác minh danh sách các service/container đang chạy trên dự án Apache Guacamole của bạn thông qua lệnh sau.</p>

<pre id="pre17">
<code>docker compose ps</code></pre>

<p style="text-align: justify;">Nếu bạn thấy&nbsp;<strong>&#039;STATUS&#039;</strong>&nbsp;là&nbsp;<strong>&#039;Up&#039;</strong>&nbsp;thì nghĩa là container/service đang chạy. Trên phần&nbsp;<strong>&#039;PORTS&#039;</strong>, bạn sẽ thấy các cổng được hiển thị theo container cho máy chủ.</p>

<p style="text-align: justify;">Container&nbsp;<strong>&#039;guac_guacamole&#039;</strong>&nbsp;hiển thị cổng TCP 8080 trên cả container và máy chủ Docker. Với điều này, bạn có thể truy cập cài đặt Apache Guacamole của mình.</p>

<figure>
<div style="text-align: justify;"><img alt="Truy cập cài đặt Apache Guacamole" data-i="10" data-src="https://st.quantrimang.com/photos/image/2023/09/20/cai-apache-guacamole-qua-docker-tren-ubuntu-11.jpg" data-was-processed="true" height="159" src="https://st.quantrimang.com/photos/image/2023/09/20/cai-apache-guacamole-qua-docker-tren-ubuntu-11.jpg" width="1433" /></div>

<figcaption>
<div style="text-align: justify;">Truy cập cài đặt Apache Guacamole</div>
</figcaption>
</figure>

<p style="text-align: justify;">
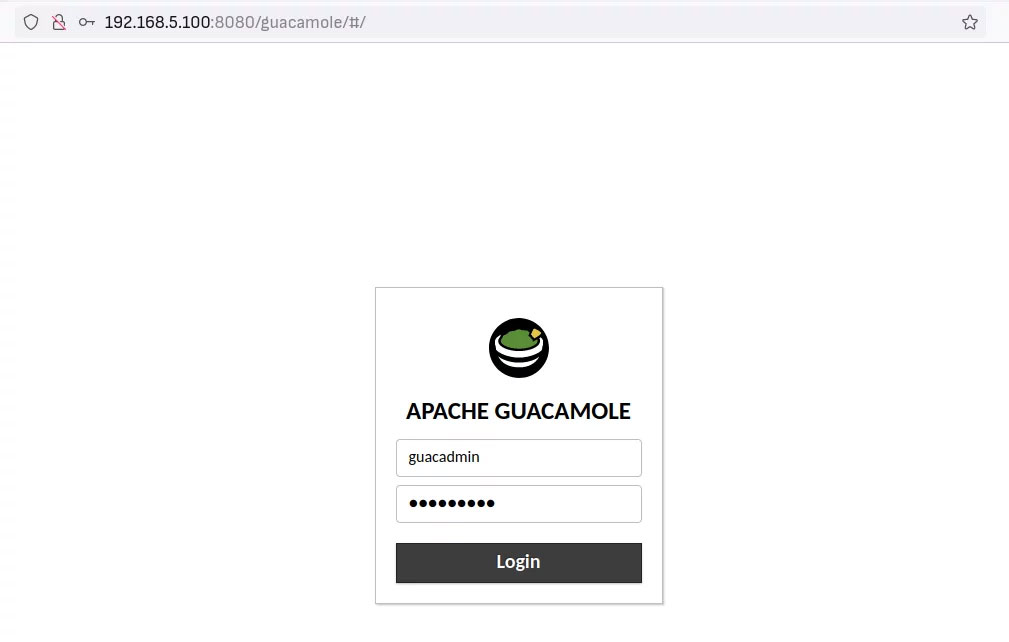
Mở trình duyệt web và truy cập địa chỉ IP máy chủ, sau đó là cổng 8080 (tức là:&nbsp;<strong>http://192.168.5.100:8080/</strong>). Bạn sẽ thấy trang đăng nhập Apache Guacamole.</p>

<p style="text-align: justify;">Đăng nhập thông qua người dùng mặc định&nbsp;<strong>‘guacadmin‘</strong>&nbsp;và mật khẩu&nbsp;<strong>‘guacadmin‘.</strong>&nbsp;Sau đó nhấn&nbsp;<strong>Login</strong>&nbsp;để xác nhận.</p>

<figure>
<div style="text-align: justify;"><img alt="Đăng nhập vào Apache Guacamole" data-i="11" data-src="https://st.quantrimang.com/photos/image/2023/09/20/cai-apache-guacamole-qua-docker-tren-ubuntu-12.jpg" data-was-processed="true" height="642" src="https://st.quantrimang.com/photos/image/2023/09/20/cai-apache-guacamole-qua-docker-tren-ubuntu-12.jpg" width="1009" /></div>

<figcaption>
<div style="text-align: justify;">Đăng nhập vào Apache Guacamole</div>
</figcaption>
</figure>

<p style="text-align: justify;">Khi thành công, bạn sẽ nhận được bảng điều khiển người dùng Apache Guacamole.</p>

<figure>
<div style="text-align: justify;"><img alt="Bảng điều khiển Guacamole" data-i="12" data-src="https://st.quantrimang.com/photos/image/2023/09/20/cai-apache-guacamole-qua-docker-tren-ubuntu-13.jpg" data-was-processed="true" height="273" src="https://st.quantrimang.com/photos/image/2023/09/20/cai-apache-guacamole-qua-docker-tren-ubuntu-13.jpg" width="1469" /></div>

<figcaption>
<div style="text-align: justify;">Bảng điều khiển Guacamole</div>
</figcaption>
</figure>

<p style="text-align: justify;">Cùng với đó, xác nhận rằng quá trình cài đặt Apache Guacamole thông qua Docker và Docker Compose đã hoàn tất và thành công. Tuy nhiên, đối với hướng dẫn này, vẫn còn một số hành động cần được thực hiện để bảo đảm việc triển khai Apache Guacamole của bạn.</p>

<p style="text-align: justify;">Ngoài ra, khi khắc phục lỗi khi triển khai Apache Guacamole, bạn có thể kiểm tra nhật ký cho từng container thông qua lệnh<em>&nbsp;&#039;docker compose&#039;</em>&nbsp;bên dưới.</p>

<p style="text-align: justify;">Cách sử dụng cơ bản&nbsp;<em>&#039;docker compose&#039;&nbsp;</em>để kiểm tra nhật ký.</p>

<pre id="pre18">
<code>docker compose logs
docker compose logs SERVICE</code></pre>

<p style="text-align: justify;">Kiểm tra nhật ký cho các container/service cụ thể thông qua lệnh&nbsp;<em>&#039;docker compose&#039;</em>.</p>

<pre id="pre19">
<code>docker compose logs guacamole
docker compose logs guacd
docker compose logs postgres</code></pre>

<h2 style="text-align: justify;">Cài đặt web server Nginx</h2>

<p style="text-align: justify;">Đối với hướng dẫn này, bạn sẽ chạy Apache Guacamole với reverse proxy Nginx. Trong phần này, bạn sẽ cài đặt web server Nginx và công cụ Certbot để tạo chứng chỉ SSL/TLS. Sau đó, bạn sẽ xác minh service Nginx để đảm bảo rằng service này đã được bật và đang chạy.</p>

<p style="text-align: justify;">
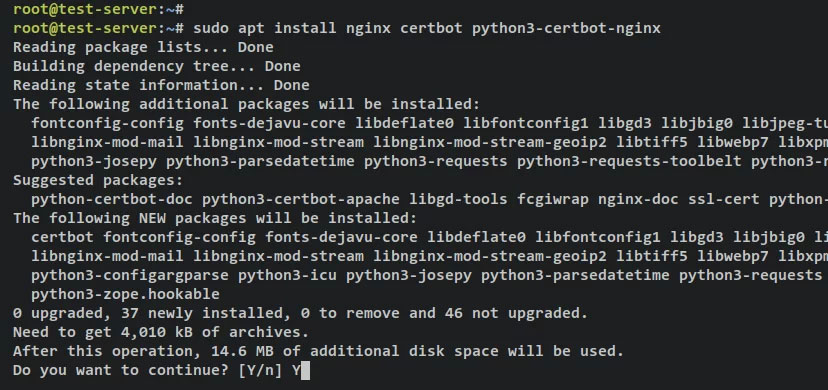
Chạy lệnh apt sau để cài đặt plugin Nginx, Certbot và Certbot Nginx. Nhập&nbsp;<strong>y</strong>&nbsp;khi được nhắc xác nhận và nhấn&nbsp;<strong>ENTER</strong>&nbsp;để tiếp tục.</p>

<pre id="pre20">
<code>sudo apt install nginx certbot python3-certbot-nginx</code></pre>

<figure>
<div style="text-align: justify;"><img alt="Cài đặt Certbot Nginx" data-i="13" data-src="https://st.quantrimang.com/photos/image/2023/09/20/cai-apache-guacamole-qua-docker-tren-ubuntu-14.jpg" data-was-processed="true" height="390" src="https://st.quantrimang.com/photos/image/2023/09/20/cai-apache-guacamole-qua-docker-tren-ubuntu-14.jpg" width="828" /></div>

<figcaption>
<div style="text-align: justify;">Cài đặt Certbot Nginx</div>
</figcaption>
</figure>

<p style="text-align: justify;">
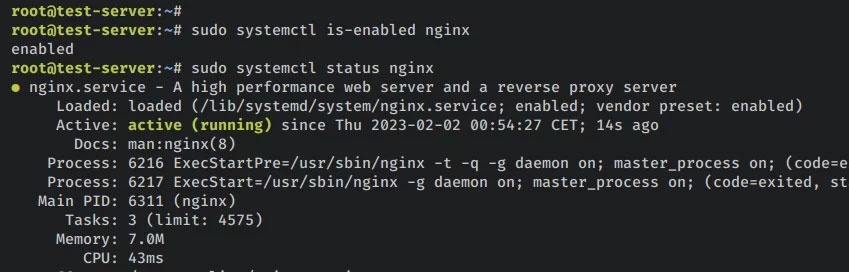
Sau khi Nginx và Certbot được cài đặt, hãy chạy lệnh sau để xác minh trạng thái service Nginx. Điều này sẽ đảm bảo rằng service Nginx được kích hoạt và chạy trên hệ thống của bạn.</p>

<pre id="pre21">
<code>sudo systemctl is-enabled nginx
sudo systemctl status nginx</code></pre>

<p style="text-align: justify;">Đầu ra&nbsp;<strong>&#039;enabled&#039;</strong>&nbsp;xác nhận rằng service Nginx đã được bật và sẽ tự động chạy khi khởi động hệ thống. Đầu ra&nbsp;<strong>&#039;active (running)&#039;</strong>&nbsp;xác nhận rằng service Nginx đang chạy.</p>

<figure>
<div style="text-align: justify;"><img alt="Xác minh Nginx" data-i="14" data-src="https://st.quantrimang.com/photos/image/2023/09/20/cai-apache-guacamole-qua-docker-tren-ubuntu-15.jpg" data-was-processed="true" height="272" src="https://st.quantrimang.com/photos/image/2023/09/20/cai-apache-guacamole-qua-docker-tren-ubuntu-15.jpg" width="849" /></div>

<figcaption>
<div style="text-align: justify;">Xác minh Nginx</div>
</figcaption>
</figure>

<h2 style="text-align: justify;">Thiết lập tường lửa UFW</h2>

<p style="text-align: justify;">Sau khi cài đặt Nginx, tiếp theo bạn sẽ thiết lập tường lửa UFW được cài đặt mặc định trên hệ thống Ubuntu của mình. Trong phần này, bạn sẽ thêm service OpenSSH để mở cổng 22 và thêm service ‘Nginx Full’ để mở cả cổng HTTP và HTTPS trên ufw. Sau đó, bạn sẽ bắt đầu và kích hoạt ufw. Cuối cùng, bạn sẽ xác minh trạng thái của tường lửa ufw.</p>

<p style="text-align: justify;">
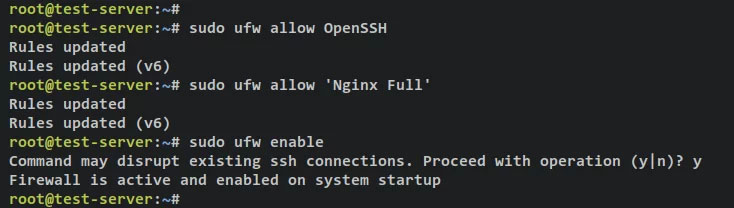
Nhập lệnh sau để thêm service OpenSSH và ‘Nginx Full‘ vào tường lửa ufw. Đầu ra&nbsp;<strong>&#039;Rules updated&#039;</strong>&nbsp;xác nhận rằng quy tắc mới đã được thêm vào ufw.</p>

<pre id="pre22">
<code>sudo ufw allow OpenSSH
sudo ufw allow &#039;Nginx Full&#039;</code></pre>

<p style="text-align: justify;">Tiếp theo, nhập lệnh sau để khởi động và kích hoạt tường lửa ufw. Nhập&nbsp;<strong>y</strong>&nbsp;khi được nhắc và nhấn&nbsp;<strong>ENTER</strong>&nbsp;để tiếp tục.</p>

<pre id="pre23">
<code>sudo ufw enable</code></pre>

<p style="text-align: justify;">Bây giờ, bạn sẽ nhận được kết quả đầu ra như &#039;<strong>Firewall is active and enabled on system startup</strong>&#039;, có nghĩa là tường lửa ufw đang chạy và được bật và sẽ tự động khởi động khi khởi động hệ thống.</p>

<figure>
<div style="text-align: justify;"><img alt="Thiết lập ufw" data-i="15" data-src="https://st.quantrimang.com/photos/image/2023/09/20/cai-apache-guacamole-qua-docker-tren-ubuntu-16.jpg" data-was-processed="true" height="208" src="https://st.quantrimang.com/photos/image/2023/09/20/cai-apache-guacamole-qua-docker-tren-ubuntu-16.jpg" width="734" /></div>

<figcaption>
<div style="text-align: justify;">Thiết lập ufw</div>
</figcaption>
</figure>

<p style="text-align: justify;">
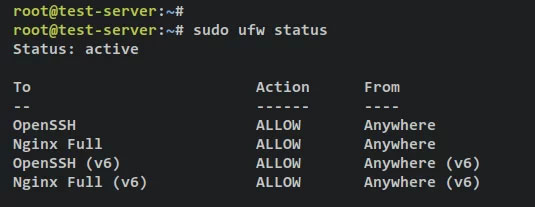
Xác minh trạng thái của tường lửa ufw bằng cách nhập lệnh sau.</p>

<pre id="pre24">
<code>sudo ufw status</code></pre>

<p style="text-align: justify;">Bạn sẽ nhận được trạng thái của tường lửa ufw là &#039;<strong>active</strong>&#039; và các service được kích hoạt&nbsp;<strong>&#039;OpenSSH&#039;</strong>&nbsp;sẽ mở cổng SSH 22 và service&nbsp;<strong>&#039;Nginx Full&#039;</strong>&nbsp;sẽ mở cả hai cổng HTTP và HTTPS.</p>

<figure>
<div style="text-align: justify;"><img alt="Xác minh ufw" data-i="16" data-src="https://st.quantrimang.com/photos/image/2023/09/20/cai-apache-guacamole-qua-docker-tren-ubuntu-17.jpg" data-was-processed="true" height="207" src="https://st.quantrimang.com/photos/image/2023/09/20/cai-apache-guacamole-qua-docker-tren-ubuntu-17.jpg" width="535" /></div>

<figcaption>
<div style="text-align: justify;">Xác minh ufw</div>
</figcaption>
</figure>

<h2 style="text-align: justify;">Thiết lập Nginx làm reverse proxy</h2>

<p style="text-align: justify;">Để bảo đảm việc triển khai Apache Guacamole của bạn, bạn sẽ sử dụng Nginx làm reverse proxy và bật các kết nối bảo mật HTTPS trên đó.</p>

<p style="text-align: justify;">Trong phần này, bạn sẽ tạo cấu hình block máy chủ Nginx mới sẽ được sử dụng làm reverse proxy cho Apache Guacamole, sau đó tạo chứng chỉ SSL/TLS thông qua Certbot và Letsencrypt để bảo mật việc triển khai Apache Guacamole.
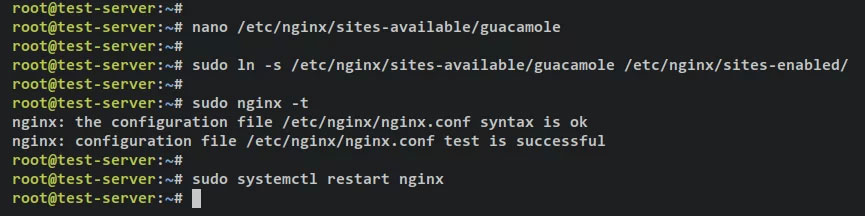
</p>

<p style="text-align: justify;">Tạo cấu hình block máy chủ Nginx mới&nbsp;<strong>‘/etc/nginx/sites-available/guacamole.conf’</strong>&nbsp;bằng cách sử dụng lệnh soạn thảo nano sau.</p>

<pre id="pre25">
<code>sudo nano /etc/nginx/sites-available/guacamole.conf</code></pre>

<p style="text-align: justify;">Thêm các dòng sau vào file và đảm bảo thay đổi tên miền trong cấu hình bên dưới. Với điều này, bạn sẽ thiết lập Nginx làm reverse proxy cho container Apache Guacamole đã hiển thị cổng 8080 trên máy chủ Docker.</p>

<pre id="pre26">
<code>server {
  listen 80;
server_name guacamole.hwdomain.io;
root /var/www/html;

index index.html index.htm index.nginx-debian.html;

access_log  /var/log/nginx/guac_access.log;
error_log  /var/log/nginx/guac_error.log;

location / {
proxy_pass http://127.0.0.1:8080/guacamole/;
proxy_buffering off;
proxy_http_version 1.1;
proxy_set_header X-Forwarded-For $proxy_add_x_forwarded_for;
proxy_set_header Upgrade $http_upgrade;
proxy_set_header Connection $http_connection;
proxy_cookie_path /guacamole/ /;
}
}</code></pre>

<p style="text-align: justify;">Lưu và đóng file khi hoàn tất.</p>

<p style="text-align: justify;">Tiếp theo, chạy lệnh bên dưới để kích hoạt file block máy chủ Nginx&nbsp;<strong>‘/etc/nginx/sites-available/guacamole.conf‘.</strong>&nbsp;Sau đó, xác minh cấu hình Nginx để đảm bảo rằng bạn có cài đặt phù hợp.</p>

<pre id="pre27">
<code>sudo ln -s /etc/nginx/sites-available/guacamole.conf /etc/nginx/sites-enabled/
sudo nginx -t</code></pre>

<p style="text-align: justify;">Nếu thành công, bạn sẽ nhận được kết quả như ‘<strong>test successful – syntax ok</strong>‘.</p>

<p style="text-align: justify;">Bây giờ, hãy chạy tiện ích lệnh systemctl sau để khởi động lại service Nginx và áp dụng các thay đổi.</p>

<pre id="pre28">
<code>sudo systemctl restart nginx</code></pre>

<p style="text-align: justify;">Đầu ra:</p>

<figure>
<div style="text-align: justify;"><img alt="Thiết lập reverse proxy Nginx" data-i="17" data-src="https://st.quantrimang.com/photos/image/2023/09/20/cai-apache-guacamole-qua-docker-tren-ubuntu-18.jpg" data-was-processed="true" height="216" src="https://st.quantrimang.com/photos/image/2023/09/20/cai-apache-guacamole-qua-docker-tren-ubuntu-18.jpg" width="865" /></div>

<figcaption>
<div style="text-align: justify;">Thiết lập reverse proxy Nginx</div>
</figcaption>
</figure>

<p style="text-align: justify;">Tại thời điểm này, Apache Guacamole đang chạy với Nginx làm reverse proxy với tên miền của bạn – ví dụ này sử dụng tên miền&nbsp;<strong>‘guacamole.hwdomain.io’.</strong>&nbsp;Bây giờ để bảo mật việc triển khai Apache Guacamole của bạn, bạn sẽ cần tạo chứng chỉ SSL/TLS thông qua Certbot và Letsencrypt.</p>

<p style="text-align: justify;">Nhập lệnh certbot sau để tạo chứng chỉ SSL mới cho máy chủ ảo Nginx của bạn. Đảm bảo thay đổi chi tiết tên miền và địa chỉ email trong lệnh sau.</p>

<pre id="pre29">
<code>sudo certbot --nginx --agree-tos --redirect --hsts --staple-ocsp --email alice@hwdomain.io -d guacamole.hwdomain.io</code></pre>

<p style="text-align: justify;">Sau khi được tạo, chứng chỉ SSL của bạn sẽ có sẵn trong thư mục&nbsp;<strong>‘/etc/letsencrypt/live/guacamole.hwdomain.io/‘.</strong>&nbsp;Ngoài ra, block máy chủ Nginx của bạn sẽ tự động được thay đổi khi bật SSL và tự động chuyển hướng từ HTTP sang HTTPS.</p>

<h2 style="text-align: justify;">Truy cập Apache Guacamole</h2>

<p style="text-align: justify;">
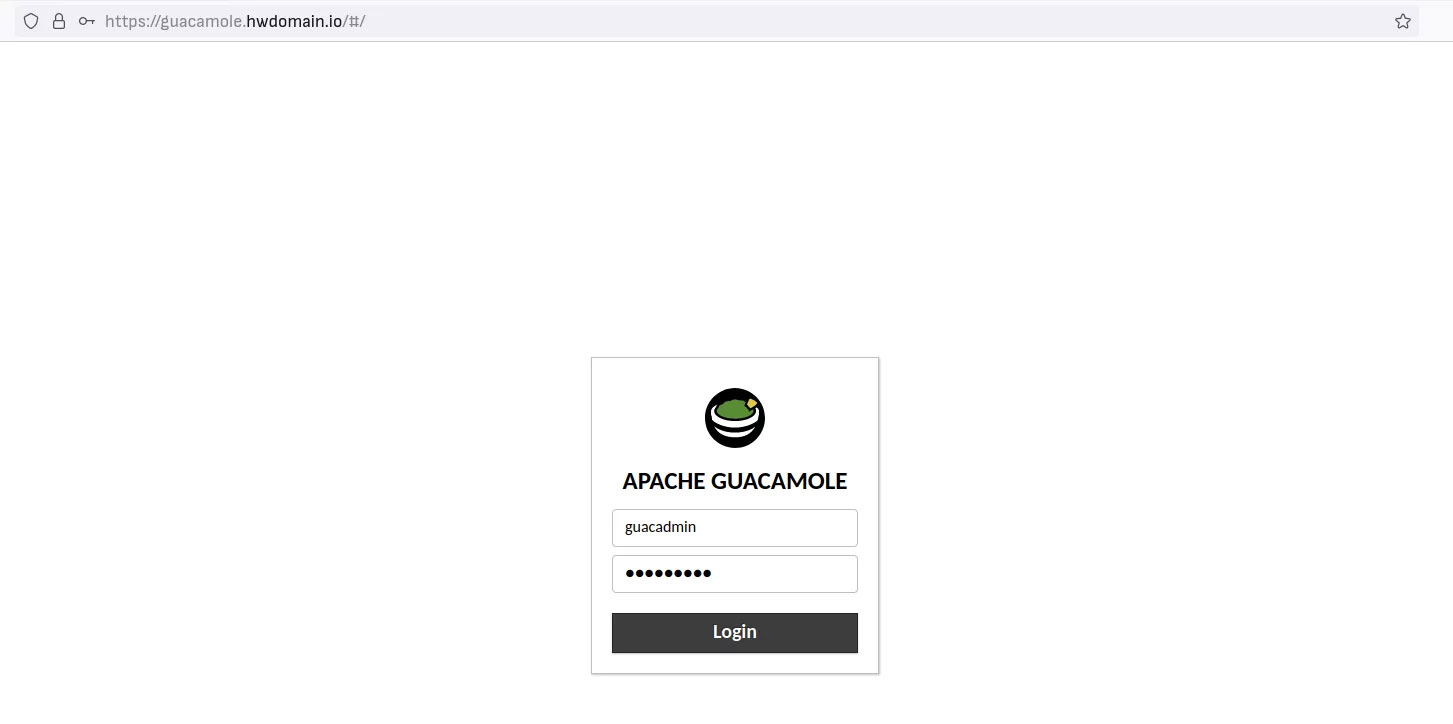
Mở trình duyệt web của bạn và truy cập tên miền của cài đặt Apache Guacamole (ví dụ,&nbsp;<em>https://guacamole.hwdomain.io/</em>).</p>

<p style="text-align: justify;">Đăng nhập bằng người dùng và mật khẩu mặc định&nbsp;<strong>‘guacadmin‘.</strong></p>

<figure>
<div style="text-align: justify;"><img alt="Đăng nhập guacamole" data-i="18" data-src="https://st.quantrimang.com/photos/image/2023/09/20/cai-apache-guacamole-qua-docker-tren-ubuntu-19.jpg" data-was-processed="true" height="724" src="https://st.quantrimang.com/photos/image/2023/09/20/cai-apache-guacamole-qua-docker-tren-ubuntu-19.jpg" width="1453" /></div>

<figcaption>
<div style="text-align: justify;">Đăng nhập guacamole</div>
</figcaption>
</figure>

<p style="text-align: justify;">Khi thành công, bạn sẽ nhận được bảng điều khiển người dùng Apache Guacamole.</p>

<figure>
<div style="text-align: justify;"><img alt="Reverse proxy Guacamole Nginx" data-i="19" data-src="https://st.quantrimang.com/photos/image/2023/09/20/cai-apache-guacamole-qua-docker-tren-ubuntu-20.jpg" data-was-processed="true" height="257" src="https://st.quantrimang.com/photos/image/2023/09/20/cai-apache-guacamole-qua-docker-tren-ubuntu-20.jpg" width="1468" /></div>

<figcaption>
<div style="text-align: justify;">Reverse proxy Guacamole Nginx</div>
</figcaption>
</figure>

<p style="text-align: justify;">Tại thời điểm này, bạn đã hoàn tất quá trình cài đặt Apache Guacamole thông qua Docker và Docker Compose. Ngoài ra, bạn đã cấu hình Nginx làm reverse proxy cho Apache Guacamole và bảo mật nó thông qua chứng chỉ SSL/TLS từ Letsencrypt.</p>

<div style="text-align: justify;">&nbsp;</div>
		</div>
				<div id="author">
						<p>
				<strong>Nguồn tin:</strong>
				Quantrimang.com:
			</p>
		</div>
	</div>
	<div id="footer" class="clearfix">
		<div id="url">
			<strong>URL của bản tin này: </strong><a href="https://www.nguoicodonvn2008.info/vi/news/savefile/kien-thuc-may-tinh/cach-cai-dat-apache-guacamole-qua-docker-tren-ubuntu-22-04-7555.html" title="Cách cài đặt Apache Guacamole qua Docker trên Ubuntu 22.04">https://www.nguoicodonvn2008.info/vi/news/savefile/kien-thuc-may-tinh/cach-cai-dat-apache-guacamole-qua-docker-tren-ubuntu-22-04-7555.html</a>

		</div>
		<div class="clear"></div>
		<div class="copyright">
			&copy; .&#x3A; Nguoicodonvn2008.info - Cõi lòng người cô đơn &#x3A;.
		</div>
		<div id="contact">
			<a href="mailto:admin@nguoicodonvn2008.info">admin@nguoicodonvn2008.info</a>
		</div>
	</div>
</div>
        <div id="timeoutsess" class="chromeframe">
            Bạn đã không sử dụng Site, <a onclick="timeoutsesscancel();" href="https://www.nguoicodonvn2008.info/#">Bấm vào đây để duy trì trạng thái đăng nhập</a>. Thời gian chờ: <span id="secField"> 60 </span> giây
        </div>
        <div id="openidResult" class="nv-alert" style="display:none"></div>
        <div id="openidBt" data-result="" data-redirect=""></div>
		</script>
		<div class="car-top">
  <span><img src="https://www.nguoicodonvn2008.info/themes/default/images/car.png" alt=""></span>
</div>
<script src="https://www.nguoicodonvn2008.info/assets/js/jquery/jquery.min.js"></script>
<script>var nv_base_siteurl="/",nv_lang_data="vi",nv_lang_interface="vi",nv_name_variable="nv",nv_fc_variable="op",nv_lang_variable="language",nv_module_name="news",nv_func_name="savefile",nv_is_user=0, nv_my_ofs=-4,nv_my_abbr="EDT",nv_cookie_prefix="nv4c_e856T",nv_check_pass_mstime=1738000,nv_area_admin=0,nv_safemode=0,theme_responsive=0,nv_recaptcha_ver=2,nv_recaptcha_sitekey="",nv_recaptcha_type="image",XSSsanitize=1;</script>
<script src="https://www.nguoicodonvn2008.info/assets/js/language/vi.js"></script>
<script src="https://www.nguoicodonvn2008.info/assets/js/DOMPurify/purify3.js"></script>
<script src="https://www.nguoicodonvn2008.info/assets/js/global.js"></script>
<script src="https://www.nguoicodonvn2008.info/assets/js/site.js"></script>
<script src="https://www.nguoicodonvn2008.info/themes/default/js/news.js"></script>
<script src="https://www.nguoicodonvn2008.info/themes/default/js/main.js"></script>
<script src="https://www.nguoicodonvn2008.info/themes/default/js/custom.js"></script>
<script type="application/ld+json">
        {
            "@context": "https://schema.org",
            "@type": "Organization",
            "url": "https://www.nguoicodonvn2008.info",
            "logo": "https://www.nguoicodonvn2008.info/uploads/angel.gif"
        }
        </script>
<script src="https://www.nguoicodonvn2008.info/themes/default/js/bootstrap.min.js"></script>
<script type="text/javascript">
var $scrolltop = $('.car-top');
$scrolltop.on('click', function () {
    $('html,body').animate({
        scrollTop: 0
    }, 800);
    $(this).addClass("car-run");
    setTimeout(function(){ $scrolltop.removeClass('car-run');}, 1000);
    return false;
});
$(window).on('scroll', function ()
{ 
    if($(window).scrollTop() >= 200)
    {
        $scrolltop.addClass("show");
        $scrolltop.addClass("car-down");
    }
    else
    {
       $scrolltop.removeClass("show");
       setTimeout(function(){ $scrolltop.removeClass('car-down');}, 300);
    }
});
</script>
</body>
</html>