Cách bật tính năng chống ransomware Controlled Folder Access trên Windows 10/11
- Thứ hai - 06/02/2023 23:46
- In ra
- Đóng cửa sổ này
Controlled Folder Access là một tính năng của ứng dụng diệt virus Windows Security trên nền tảng desktop của Microsoft. Tính năng này ngăn chặn ransomware bằng cách ngăn sửa đổi các file trong các thư mục được bảo vệ. Việc bật Controlled Folder Access sẽ ngăn các ứng dụng không đáng tin cậy, phần mềm độc hại hoặc cách khác thay đổi file trong những thư mục được bảo vệ.
Controlled Folder Access là một tính năng bảo mật bổ sung trong Windows 10 và 11 mà một số người dùng đánh giá cao. Ransomware không phải là thứ gì đó có thể xem nhẹ và việc kích hoạt tính năng này sẽ giữ cho các file của hệ thống và người dùng thêm an toàn. Đây là 4 cách bạn có thể kích hoạt Controlled Folder Access trong Windows.
Cách bật Controlled Folder Access trong Windows Security
Cài đặt Controlled Folder Access nằm trong Ransomware Protection thuộc ứng dụng Windows Security. Thật dễ dàng để tìm và bật/tắt tùy chọn đó khi bạn biết nó ở đâu. Đây là cách bật tùy chọn Controlled Folder Access trong ứng dụng Windows Security.
1. Để mở ứng dụng Windows Security, nhấp đúp vào biểu tượng khay hệ thống của nó.
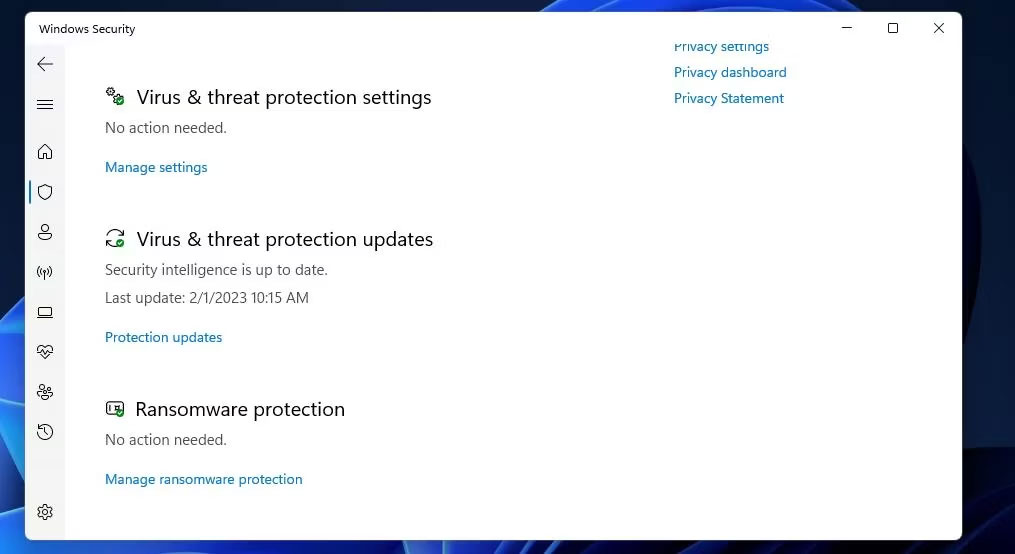
2. Chọn tab Virus & threat protection của Windows Security.
3. Nhấp vào Manage ransomware protection để đến cài đặt Controlled Folder Access.
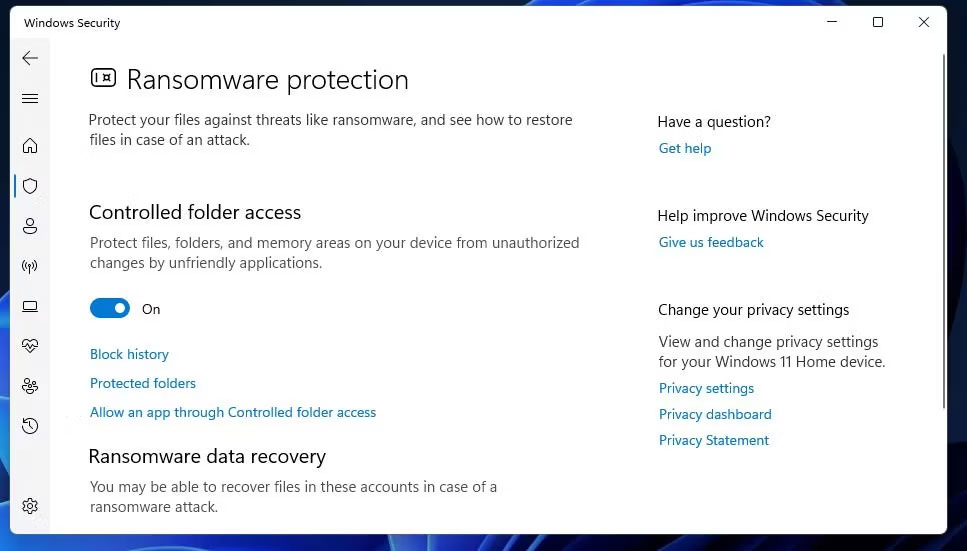
4. Bây giờ, hãy bật tùy chọn Controlled Folder Access để kích hoạt tính năng đó.
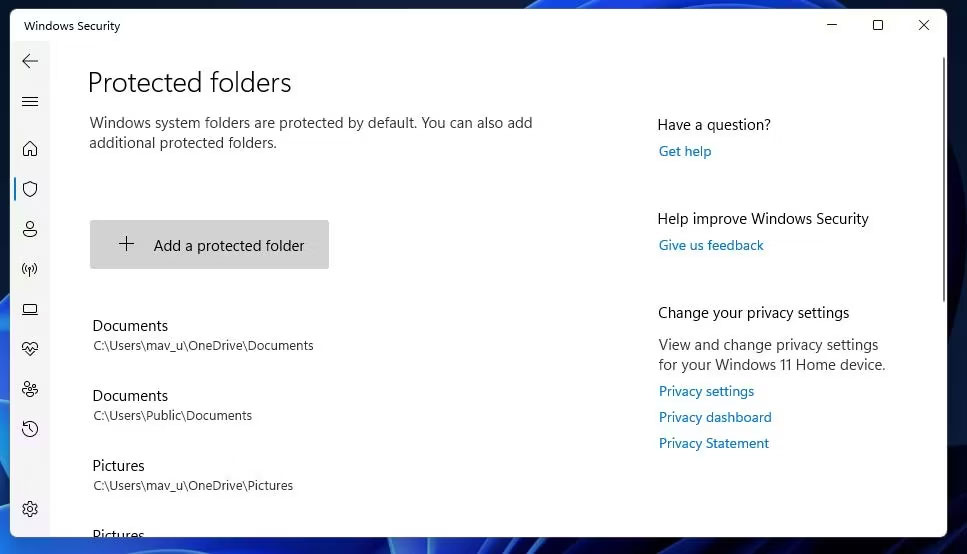
Controlled Folder Access bảo vệ các thư mục người dùng Documents, Videos, Pictures và Music khi được bật. Để xem danh sách các thư mục người dùng được bảo vệ, hãy nhấp vào Protected folder. Bạn có thể thêm nhiều hơn nữa vào danh sách bằng cách nhấp vào nút Add protected folder, chọn một thư mục và nhấp vào Select Folder.
Cách bật quyền Controlled Folder Access bằng PowerShell
Windows PowerShell cung cấp cho bạn một phương pháp thay thế để bật và tắt Controlled Folder Access bằng cách thực thi các lệnh. Bạn có thể bật Controlled Folder Access bằng PowerShell như sau:
1. Để kích hoạt công cụ tìm kiếm file, nhấn Win + S.
2. Nhập PowerShell trong tiện ích tìm kiếm đã kích hoạt.
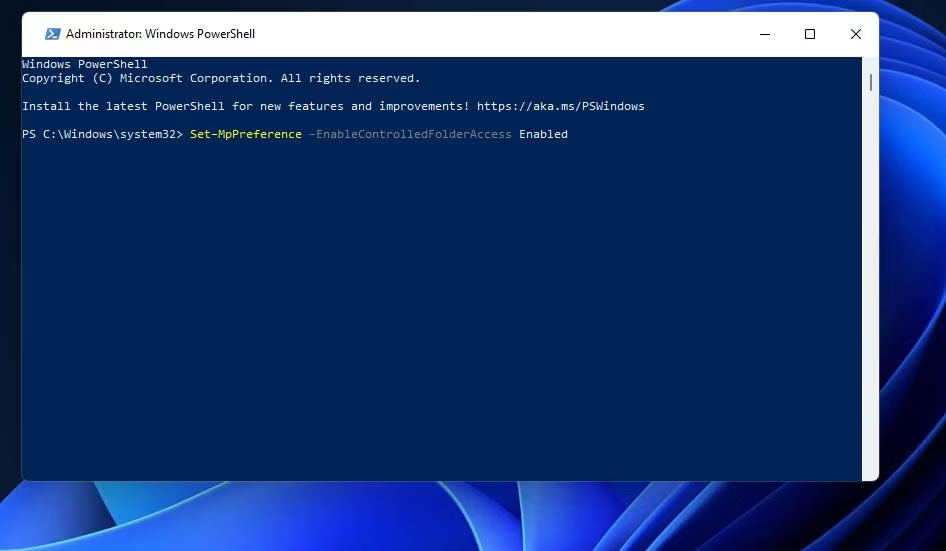
3. Mở PowerShell với quyền admin bằng cách chọn Run as administrator.
4. Để bật Controlled Folder Access, hãy nhập văn bản lệnh này và nhấn Enter:
Set-MpPreference -EnableControlledFolderAccess Enabled
5. Bạn có thể tắt Controlled Folder Access bằng cách thực hiện lệnh này:
Set-MpPreference -EnableControlledFolderAccess Disabled
Cách bật Controlled Folder Access với Group Policy Editor
Nếu có phiên bản Windows 11 Pro hoặc Enterprise, bạn có thể bật Controlled Folder Access bằng Group Policy Editor. Group Policy Editor cũng bao gồm một số cài đặt cấu hình bổ sung để truy cập Controlled Folder Access. Đây là cách bật Controlled Folder Access qua GPE.
Lưu ý: Nếu bạn đang sử dụng Windows Home, Group Policy Editor sẽ không xuất hiện theo mặc định.
1. Mở công cụ tìm kiếm trong Windows và nhập gpedit.msc vào đó.
2. Chọn gpedit.msc để hiển thị Group Policy Editor.
3. Nhấp vào Computer Configuration > Administrative Templates trong ngăn bên trái của Group Policy Editor.
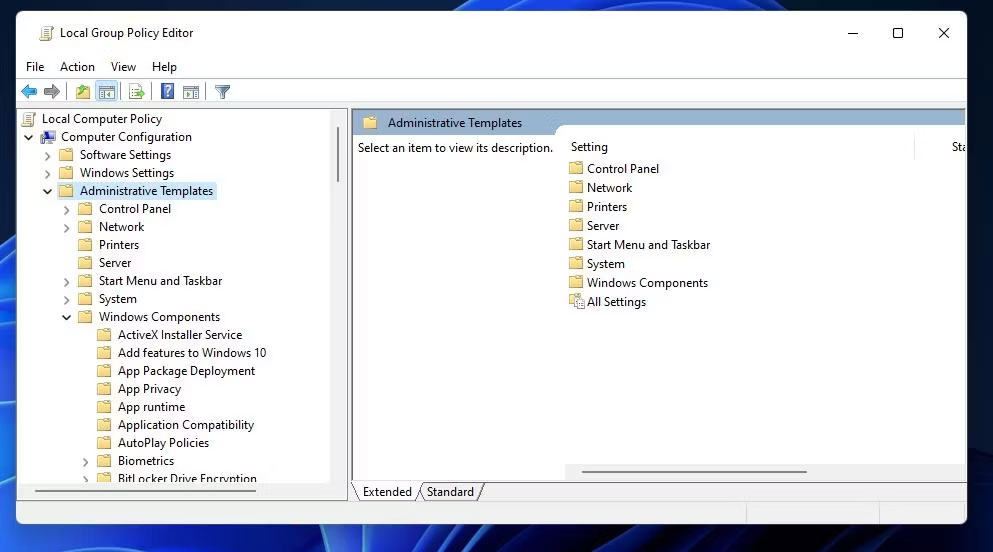
4. Nhấp đúp vào Windows Components để mở rộng nó.
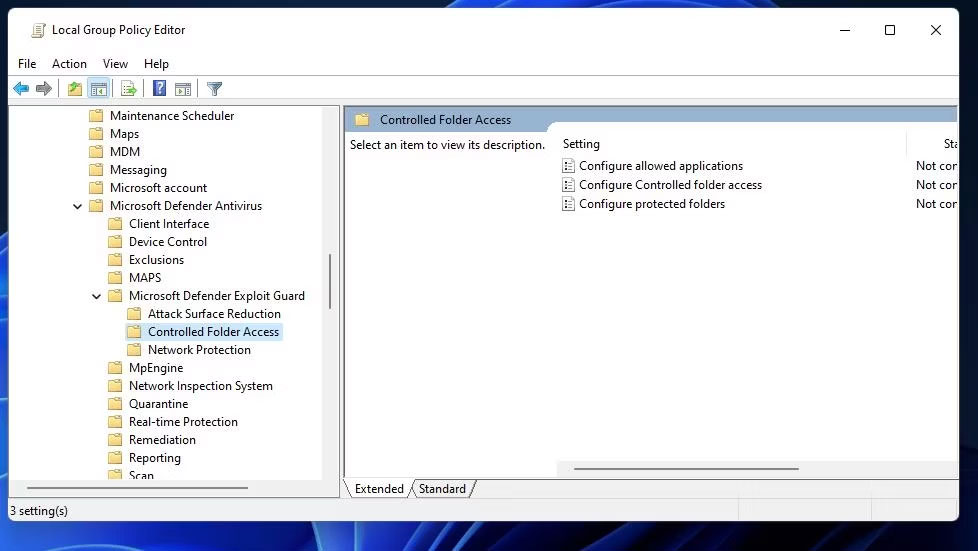
5. Bấm vào các mũi tên để mở rộng Microsoft Defender Antivirus và Microsoft Defender Exploit Guard.
6. Chọn Controlled Folder Access để xem cài đặt policy cho tính năng đó.
7. Sau đó nhấp đúp vào Configure Controlled folder access để xem cửa sổ của cài đặt đó.
8. Chọn Enabled cho cửa sổ Configure Controlled folder access.
9. Nhấp vào Block trên menu drop-down để chọn chế độ CFA nghiêm ngặt nhất. Tuy nhiên, bạn cũng có thể chọn các tùy chọn Audit Mode, Block disk notification only và Audit disk notification only để cho phép truy cập Controlled Folder Access.
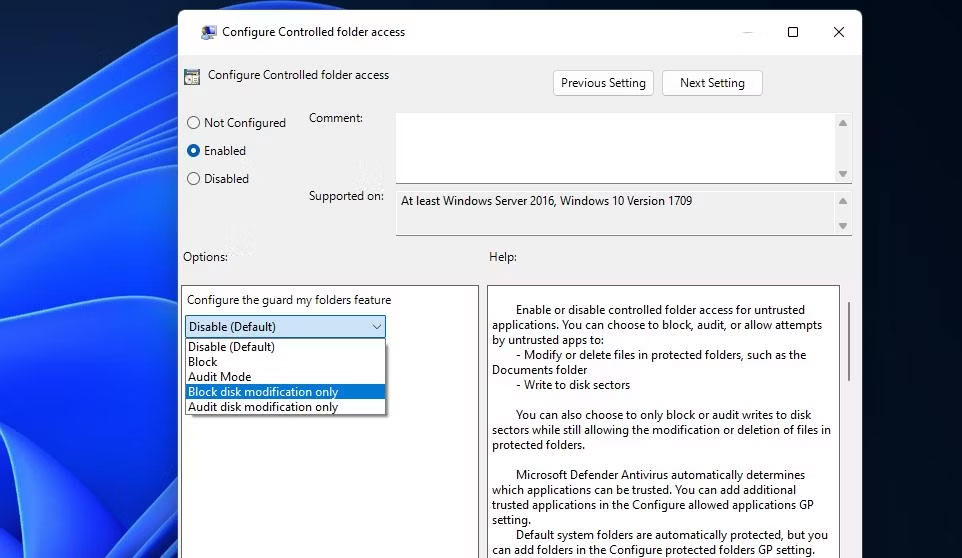
10. Chọn Apply trong cửa sổ Configure Controlled folder access.
11. Nhấp vào nút OK của cửa sổ Configure Controlled folder access.
Cách bật Controlled Folder Access từ menu ngữ cảnh Windows
Ngoài ra, bạn có thể tạo shortcut menu ngữ cảnh để bật/tắt Controlled Folder Access. Sau đó, bạn sẽ có thể truy cập cài đặt Turn on Control folder access từ khu vực desktop của Windows. Bạn có thể thêm tùy chọn CFA như vậy vào menu chuột phải bằng cách thiết lập và chạy registry script như sau:
1. Mở Notepad.
2. Sau đó chọn văn bản script này và nhấn tổ hợp phím Ctrl + C:
Windows Registry Editor Version 5.00
 ; Created by: Shawn Brink

 ; Created on: July 19th 2018

 ; Tutorial: https://www.tenforums.com/tutorials/114389-add-turn-off-controlled-folder-access-context-menu-windows-10-a.html
 [HKEY_CLASSES_ROOT\DesktopBackground\Shell\ControlledFolderAccess]

 "HasLUAShield"=""

 "Icon"="%ProgramFiles%\\Windows Defender\\EppManifest.dll,-101"

 "MUIVerb"="Turn On or Off Control folder access"

 "Position"="Bottom"

 "SubCommands"=""
 [HKEY_CLASSES_ROOT\DesktopBackground\Shell\ControlledFolderAccess\shell\001flyout]

 "MUIVerb"="Turn on Control folder access"

 "HasLUAShield"=""

 "Icon"="%ProgramFiles%\\Windows Defender\\EppManifest.dll,-101"
 [HKEY_CLASSES_ROOT\DesktopBackground\Shell\ControlledFolderAccess\shell\001flyout\command]

 @="PowerShell -windowstyle hidden -Command \"Start-Process cmd -ArgumentList '/s,/c,start PowerShell.exe Set-MpPreference -EnableControlledFolderAccess Enabled' -Verb RunAs\""
 [HKEY_CLASSES_ROOT\DesktopBackground\Shell\ControlledFolderAccess\shell\002flyout]

 "MUIVerb"="Turn off Control folder access"

 "HasLUAShield"=""

 "Icon"="%ProgramFiles%\\Windows Defender\\EppManifest.dll,-101"
 [HKEY_CLASSES_ROOT\DesktopBackground\Shell\ControlledFolderAccess\shell\002flyout\command]

 @="PowerShell -windowstyle hidden -Command \"Start-Process cmd -ArgumentList '/s,/c,start PowerShell.exe Set-MpPreference -EnableControlledFolderAccess Disabled' -Verb RunAs\""
3. Dán script đó vào Notepad bằng cách nhấp vào cửa sổ của ứng dụng và nhấn Ctrl + V.

4. Tiếp theo, nhấn Ctrl + Shift + S để xem cửa sổ Save as của Notepad.
5. Đặt tùy chọn Save as type thành All files.
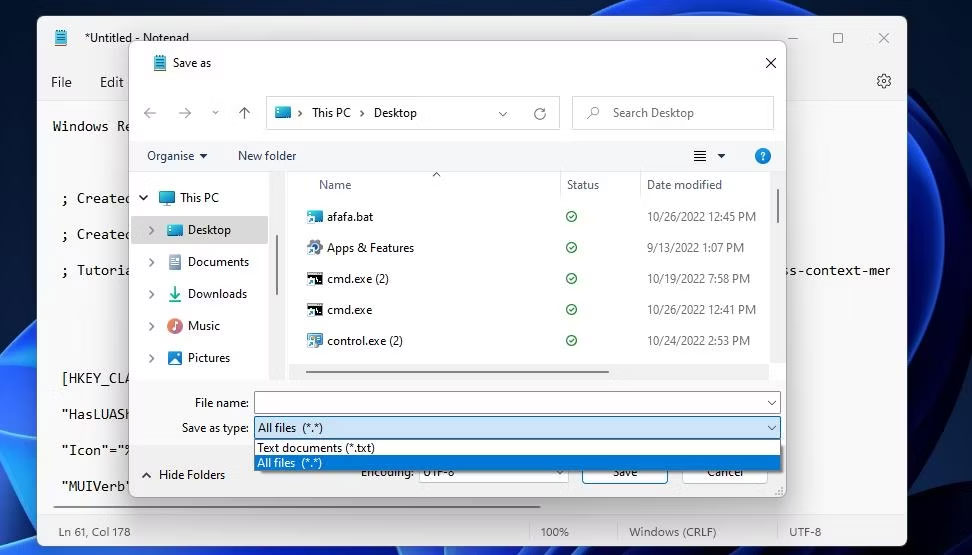
6. Nhập Turn on Control folder access.reg bên trong hộp tên file.
7. Chọn để lưu script vào vị trí desktop.
8. Nhấp vào Save để thêm file registry Turn on Control folder access vào desktop.
9. Đóng trình chỉnh sửa Notepad và nhấp đúp vào file Turn on Control folder access.reg trên desktop.
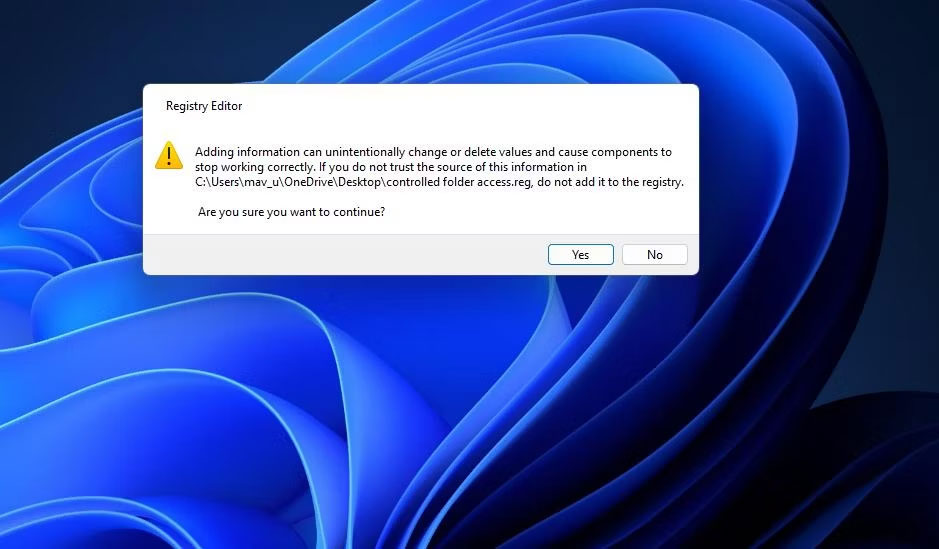
10. Chọn Yes để xác nhận rằng bạn tin tưởng script.
Giờ đây, bạn có thể kích hoạt quyền truy cập Controlled Folder Access từ menu ngữ cảnh của Windows.
