Cách bật tính năng bảo vệ Core isolation trên Windows 10
- Thứ sáu - 28/08/2020 05:58
- In ra
- Đóng cửa sổ này
Trong bài viết Windows Defender trên Windows 10, Quản trị mạng đã nhấn mạnh tới người dùng tính năng bảo vệ mới Core isolation, tăng khả năng an toàn cho hệ thống trước sự tấn công của virus hay malware.
Tính năng này sử dụng công nghệ hóa ảo để tạo nên bức tường bảo mật chắc chắn, tránh được những cuộc tấn công từ những phần mềm hay chương trình độc hại. Vậy làm sao để sử dụng tính năng bảo mật Core isolation trên Windows 10?
Đôi điều về tính năng Core isolation
Bản cập nhật Windows 10 Creators Update đã giới thiệu một trải nghiệm mới có tên là Windows Security để giúp bạn xem và kiểm soát các biện pháp bảo mật đã chọn dễ dàng hơn, cũng như hiểu rõ hơn về các tính năng bảo mật đã bảo vệ bạn trên thiết bị Windows 10.
Bắt đầu với Windows 10 build 17093, trang Device security đã được thêm vào Windows Security để cung cấp cho bạn báo cáo trạng thái và quản lý các tính năng bảo mật được tích hợp trong thiết bị - bao gồm cả việc bật các tính năng để cung cấp những biện pháp bảo vệ nâng cao.
Một tùy chọn bảo mật thiết bị là Core isolation, cung cấp các tính năng bảo mật dựa trên ảo hóa để tăng cường bảo vệ chống lại phần mềm độc hại và những cuộc tấn công khác, bằng cách cô lập các tiến trình máy tính khỏi hệ điều hành và thiết bị.
Memory integrity là một tính năng của Core isolation. Bằng cách bật cài đặt Memory integrity, bạn có thể giúp ngăn mã độc hại truy cập vào các tiến trình bảo mật cao trong trường hợp bị tấn công.
Memory integrity là một tính năng của Windows đảm bảo code chạy trong Windows kernel được thiết kế bảo mật và đáng tin cậy. Nó sử dụng ảo hóa phần cứng và Hyper-V để bảo vệ các tiến trình chế độ Windows kernel khỏi việc nhiễm và thực thi mã độc hại hoặc chưa được xác minh.
Tính toàn vẹn của code chạy trên Windows được xác nhận bởi Memory integrity, giúp Windows có khả năng chống lại các cuộc tấn công từ phần mềm độc hại. Memory integrity là một ranh giới bảo mật mạnh mẽ giúp chặn nhiều loại phần mềm độc hại chạy trong môi trường Windows 10 và Windows Server 2016.

Cách kích hoạt Core isolation Windows 10
Bước 1:
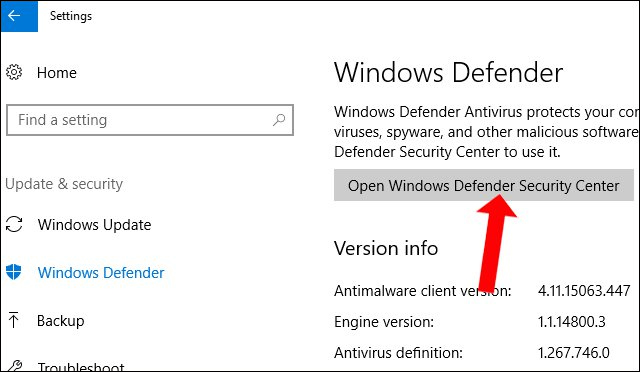
Trước hết, chúng ta cần truy cập vào Windows Defender Security Center bằng cách vào Settings > Update & Security, sau đó click vào Windows Security > Open Windows Defender Security Center.
Bước 2:
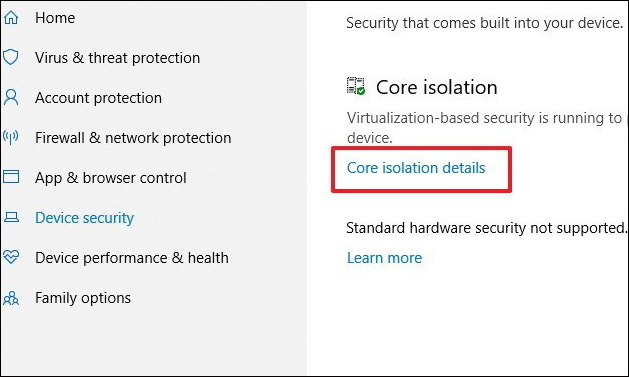
Trong giao diện Windows Defender Secutiry Center nhấn chọn vào mục Device security.
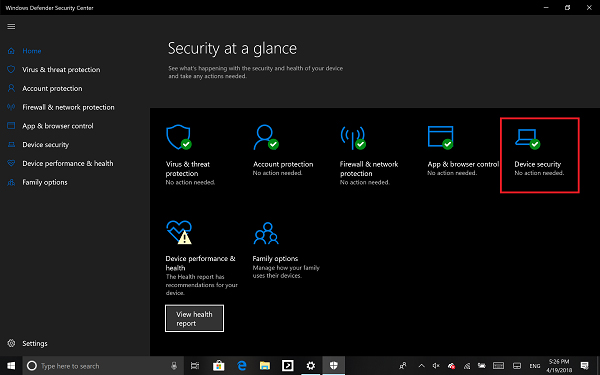
Sau đó trong giao diện mới nhấn vào tùy chọn Core isolation details.
Bước 3:
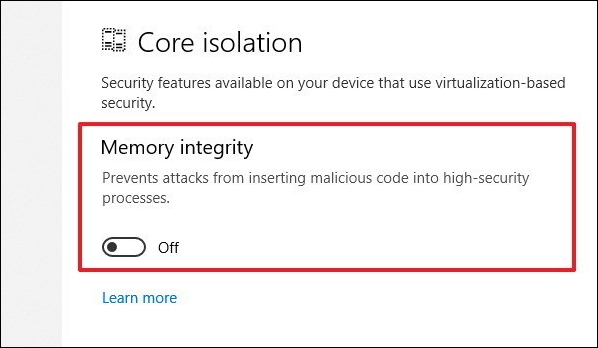
Sau đó tại tính năng Memory integrity, hãy chuyển sang chế độ On bằng cách gạt thanh ở bên dưới.
Bước 4:
Sau khi bật xong tính năng này, hệ thống sẽ yêu cầu người dùng khởi động lại máy tính. Nếu bật tính năng này thành công thì máy tính sẽ không xuất hiện bất cứ thông báo nào. Như vậy, tính năng Core isolation đã được bật trên máy tính của bạn.
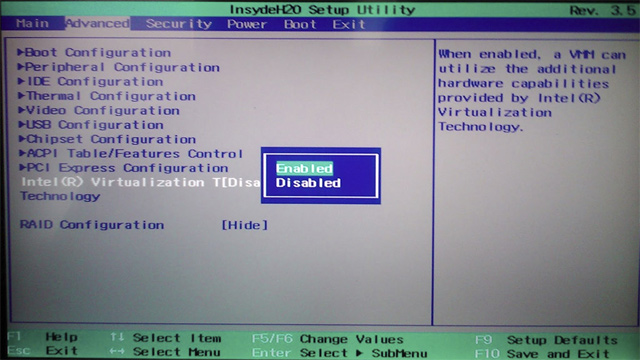
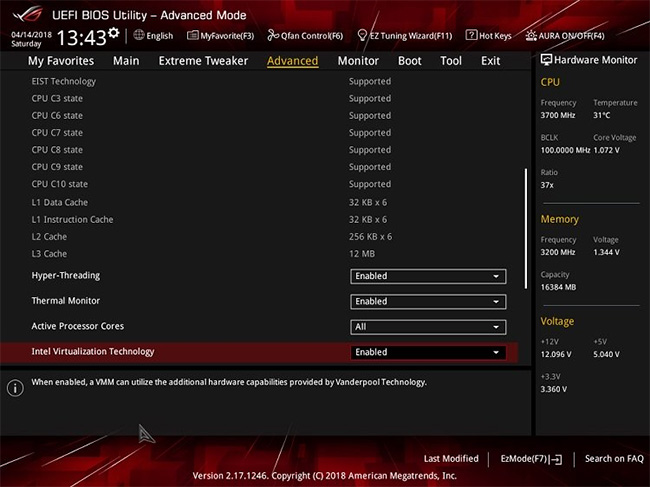
Lưu ý với bạn đọc, Core isolation sẽ được vận hành dựa trên công nghệ hóa ảo nên yêu cầu bộ vi xử lý máy tính cũng phải hỗ trợ ảo hóa. Chế độ ảo hóa trong BIOS hoặc UEFI cũng phải được bật. Truy cập vào BIOS trên máy tính rồi nhấn vào mục Advanced rồi tìm tới tùy chọn Virtualization hoặc Intel virtualization để chuyển sang chế độ Enable.
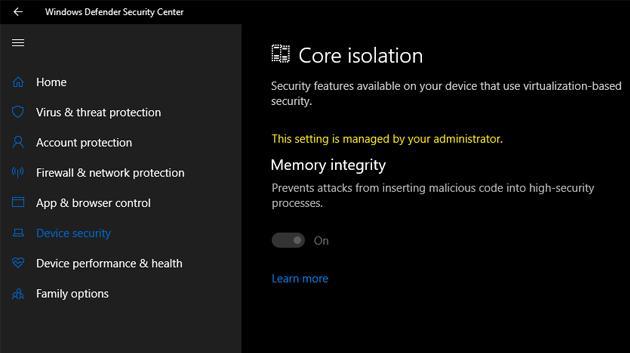
Lưu ý với bạn đọc, trong quá trình bật tính năng Core isolation và khởi động lại gặp sự cố như hình dưới đây thì hãy sửa theo những bước dưới.
Nhấn tổ hợp phím Winfows + R để mở hộp thoại Run rồi nhập từ khóa regedit để truy cập Registry. Tiếp đó người dùng cần truy cập theo đường dẫn thư mục như dưới đây.
HKEY_LOCAL_MACHINE\SYSTEM\CurrentControlSet\Control\DeviceGuard\Scenarios\HypervisorEnforcedCodeIntegrity
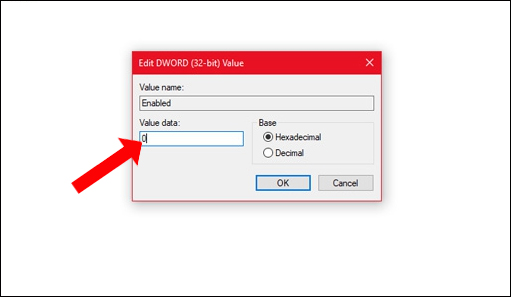
Sau đó, click đúp chuột vào Enabled để xuất hiện giao diện chỉnh sửa giá trị, nhập giá trị là 0.
Như vậy, bạn đã kích hoạt tính năng Core isolation trong Windows Defender trên Windows 10. Trong trường hợp cài đặt và khởi động lại gặp lỗi, người dùng chỉ cần tùy chỉnh giá trị trong Registry Editor là xong.
