9 cách thay đổi theme trên Windows 11
- Thứ tư - 01/03/2023 23:55
- In ra
- Đóng cửa sổ này
Windows có sẵn hỗ trợ cho các theme trong cài đặt tùy chỉnh. Mặc dù Microsoft không chính thức tạo bất kỳ theme mới nào như trước đây, nhưng có rất nhiều tùy chọn có sẵn trên Microsoft Store. Nếu không hài lòng với chúng, bạn cũng có thể thử các theme của bên thứ ba.
Microsoft đã chuyển nhiều tùy chọn Control Panel sang ứng dụng Settings. Vì vậy, bạn cần chuyển đến tùy chọn Personalization trong ứng dụng Settings để áp dụng theme mới. Tuy nhiên, bạn có biết rằng mình có thể làm điều đó bằng nhiều phương pháp khác không? Cùng tìm hiểu chi tiết qua bài viết sau đây nhé!
1. Sử dụng menu ngữ cảnh desktop
Menu ngữ cảnh desktop là phương pháp ưa thích nhất để thay đổi hình nền và theme trong hệ điều hành Windows. Windows 11 vẫn giữ lại tùy chọn đó trong menu ngữ cảnh. Đây là cách thay đổi theme bằng menu ngữ cảnh desktop:
1. Khởi động PC Windows và nhấp chuột phải vào desktop.
2. Bây giờ, hãy nhấp vào tùy chọn Personalization từ menu ngữ cảnh.
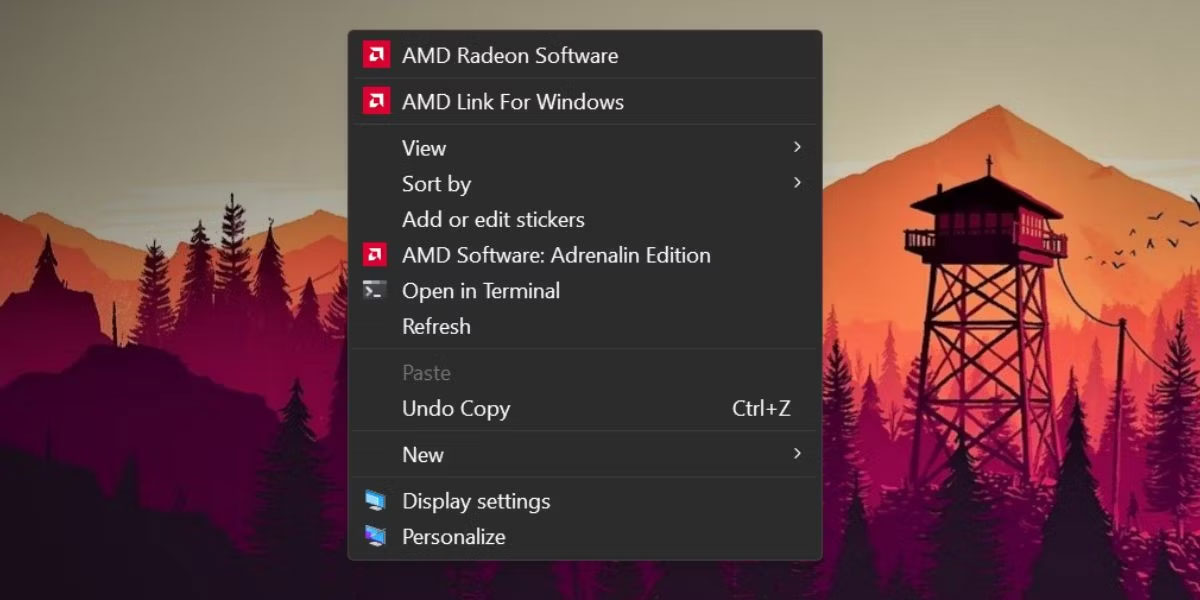
3. Cuộn xuống và nhấp vào tùy chọn Themes.
4. Trong phần Current theme, nhấp vào bất kỳ theme nào có sẵn để áp dụng chúng cho hệ thống của bạn.
5. Đóng ứng dụng Settings.
2. Sử dụng ứng dụng Settings
Vì menu ngữ cảnh desktop chuyển hướng bạn đến ứng dụng Settings, nên bạn có thể trực tiếp mở nó và thay đổi theme hệ thống. Đây là cách thực hiện:
1. Nhấn Win + I để khởi chạy ứng dụng Settings.
2. Nhấp vào tùy chọn Personalization trong menu bên trái.
3. Cuộn xuống và chọn tùy chọn Themes.
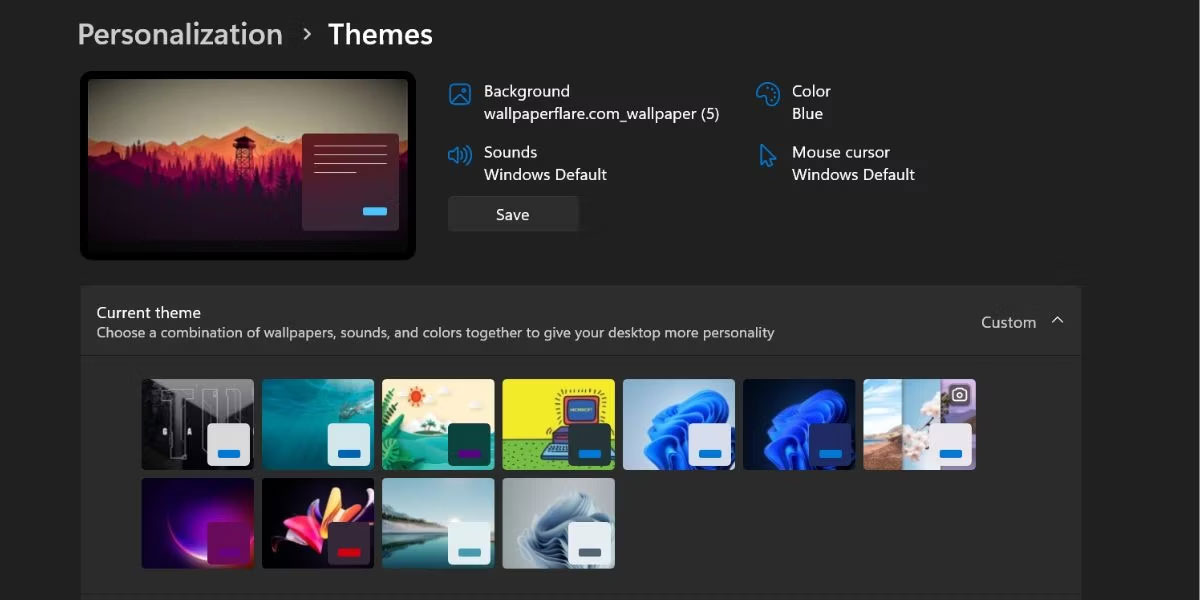
4. Bây giờ, nhấp vào bất kỳ theme nào từ phần các theme có sẵn. Bạn cũng có thể áp dụng theme có độ tương phản cao bằng cách chọn tùy chọn Contrast Theme bên dưới.
3. Sử dụng tiện ích Control Panel Personalization cũ
Phiên bản cũ của hệ điều hành Windows có tiện ích Control Panel Personalization. Sử dụng tiện ích này bạn có thể thay đổi theme, cách phối màu và hình nền. Microsoft đã ẩn tùy chọn này trong Windows 11, nhưng bạn vẫn có thể truy cập nó bằng hộp Run. Đây là cách thực hiện:
1. Nhấn Win + R để khởi chạy hộp lệnh Run. Nhập lệnh sau và nhấn phím Enter.
shell:::{ED834ED6-4B5A-4bfe-8F11-A626DCB6A921}-Microsoft.Personalization
2. Tiện ích Personalization cũ sẽ khởi chạy. Điều hướng đến cửa sổ Themes và nhấp vào bất kỳ theme nào để áp dụng nó. Tiện ích sẽ không chuyển hướng bạn đến ứng dụng Settings.
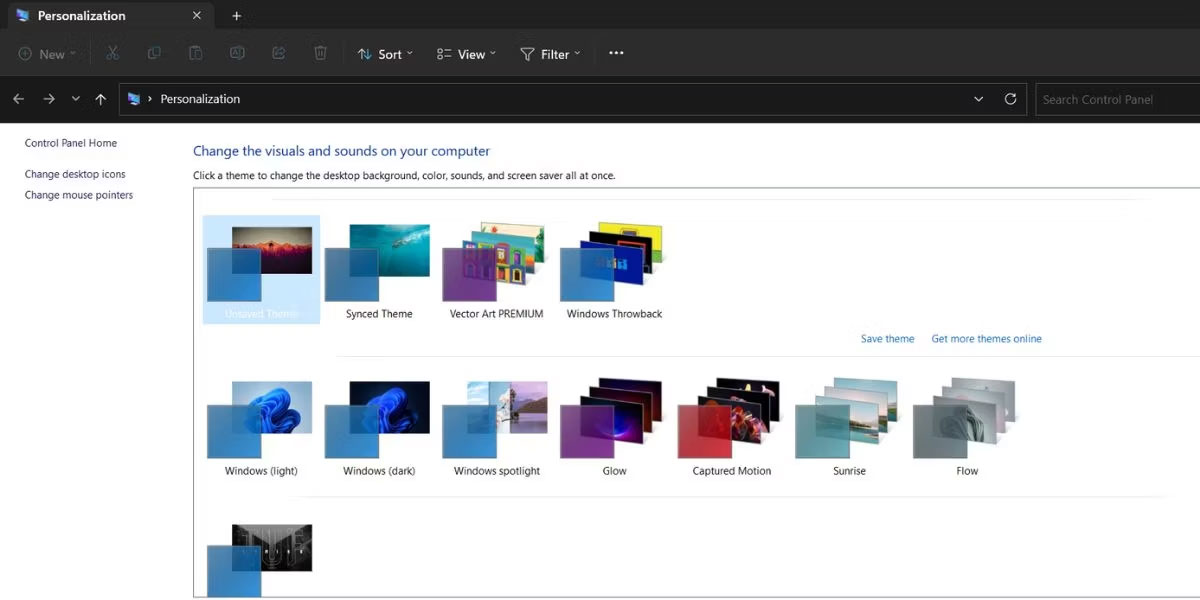
3. Đóng cửa sổ tiện ích Personalization.
4. Sử dụng hộp lệnh Run
Bạn thậm chí có thể bỏ qua những rắc rối khi phải đi qua các lớp của ứng dụng Settings và có thể trực tiếp khởi chạy cài đặt theme bằng hộp lệnh Run. Đây là cách thực hiện:
1. Nhấn Win + R để khởi chạy hộp lệnh Run. Nhập ms-settings:themes và nhấn phím Enter.
2. Ứng dụng Settings Windows 11 sẽ khởi chạy và trực tiếp đưa bạn đến phần Themes.
3. Nhấp vào bất kỳ theme có sẵn nào để áp dụng và thay đổi theme hiện tại.
5. Sử dụng File Explorer
Tất cả các theme đã cài đặt trên hệ thống Windows 11 của bạn nằm trong thư mục Windows AppData. Bạn có thể truy cập thư mục bằng File Explorer và sau đó áp dụng bất kỳ theme nào trên hệ thống của mình. Đây là cách thực hiện:
1. Nhấn Win + E để khởi chạy ứng dụng File Explorer.
2. Chuyển đến thanh địa chỉ, dán đường dẫn sau và nhấn phím Enter:
%LocalAppData%\Microsoft\Windows\Themes
3. Bạn sẽ thấy một loạt các theme được liệt kê ở đây. Nhấp đúp vào bất kỳ file ".theme" nào để áp dụng file đó cho hệ thống.
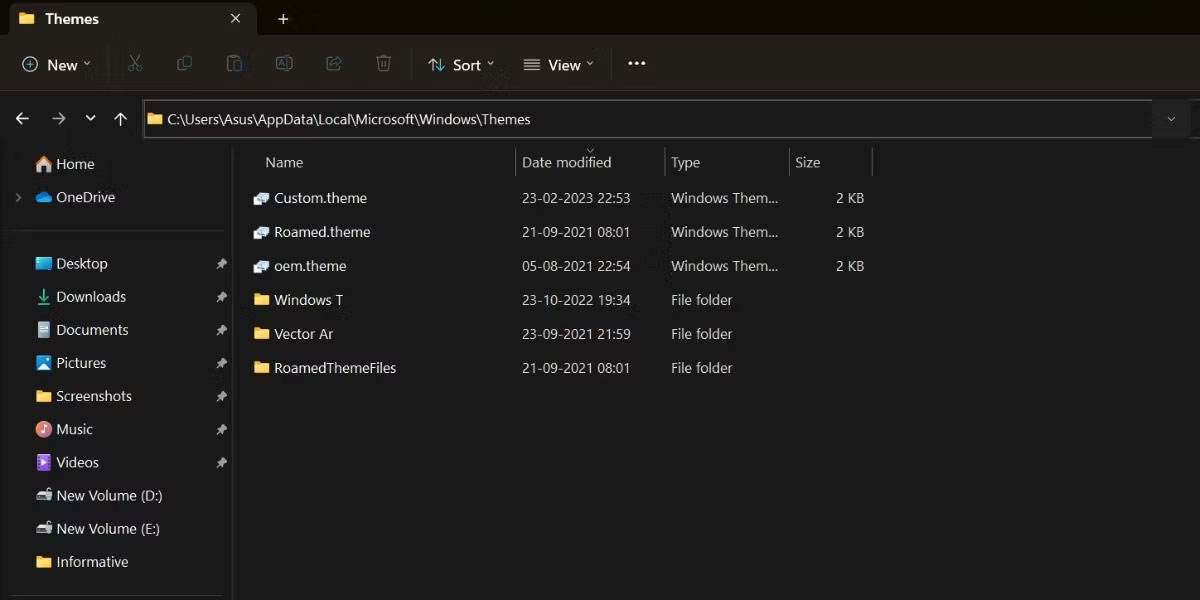
4. Sẽ có một loạt các thư mục. Chúng thường thuộc về các theme đã tải xuống. Mở thư mục và định vị file theme để áp dụng theme đã tải xuống.
6. Sử dụng CMD
Bạn có thể thay đổi theme trong Windows 11 bằng Command Prompt. Tất cả những gì bạn cần làm là nhập vị trí của theme và chạy nó. Lặp lại các bước sau:
1. Nhấn Win + X để khởi chạy menu Power user. Cuộn xuống và chọn tùy chọn Terminal (admin) từ menu.
2. Ứng dụng Terminal sẽ khởi chạy. Nhấp vào biểu tượng + để mở cửa sổ CMD với quyền admin.
3. Bây giờ, gõ lệnh C:\Windows\resources\Themes\aero.theme và nhấn phím Enter.
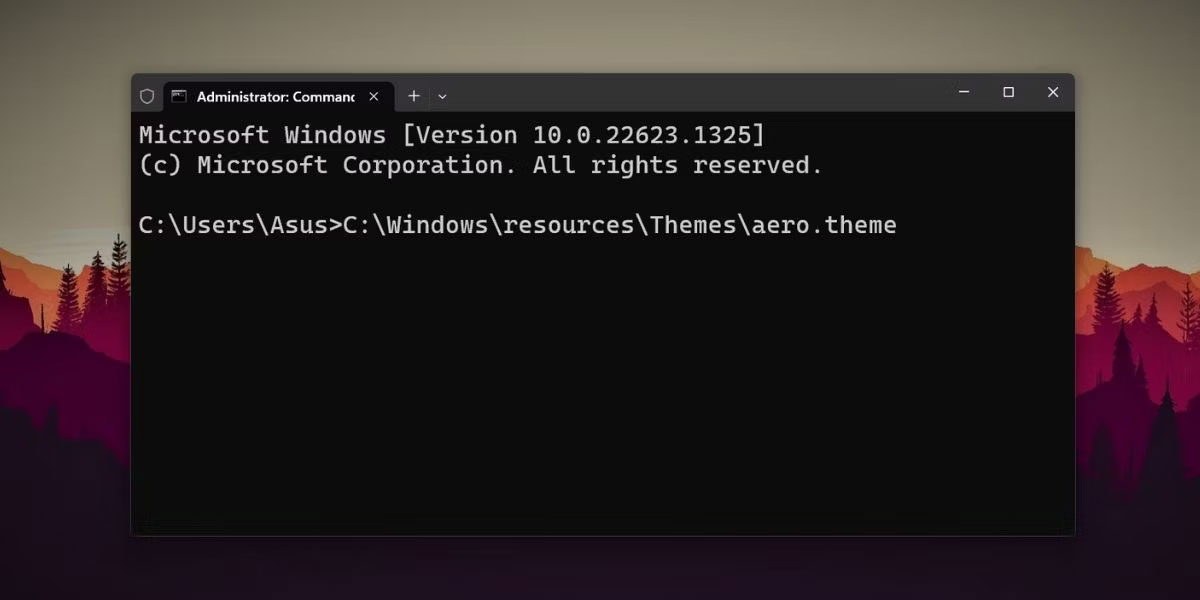
4. Hệ thống Windows 11 của bạn sẽ thay đổi thành theme aero có sẵn. Tương tự, bạn có thể thay thế tên của bất kỳ theme sẵn có nào khác và áp dụng nó.
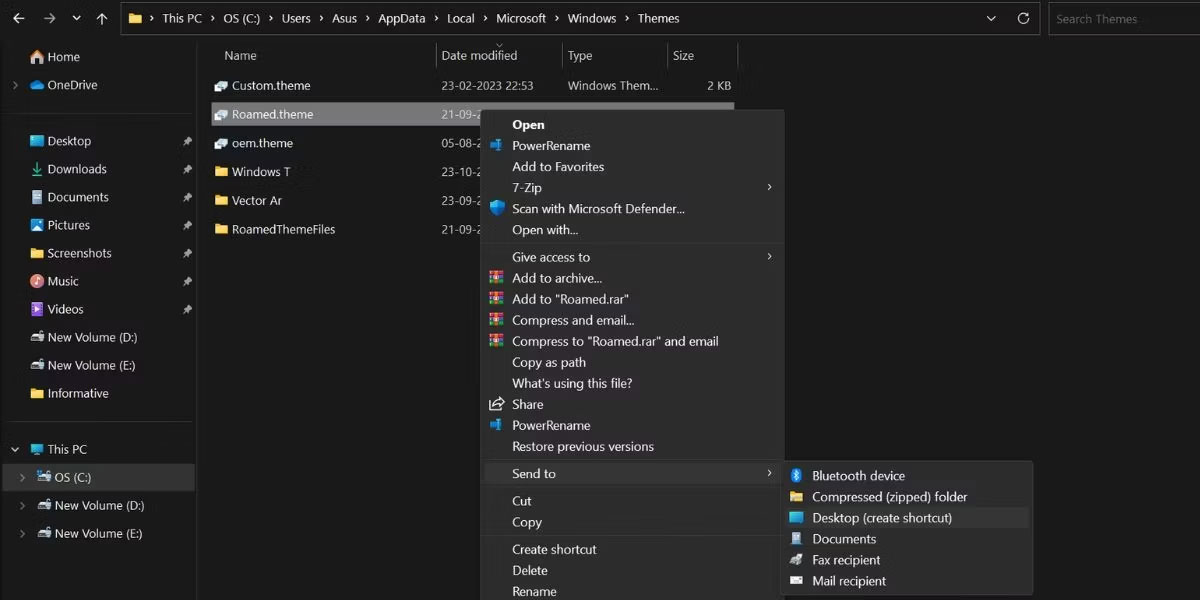
7. Sử dụng shortcut
Bạn có thể áp dụng theme yêu thích của mình bằng cách tạo desktop shortcut. Bằng cách đó, bạn sẽ không phải khởi chạy ứng dụng File Explorer hoặc Settings để thay đổi theme. Đây là cách thực hiện:
1. Nhấn Win + E để khởi chạy ứng dụng File Explorer.
2. Điều hướng đến thanh địa chỉ và nhập đường dẫn sau: C:\Windows\resources\Themes\
3. Nhấn phím Enter để mở thư mục Themes.
4. Bây giờ, nhấp chuột phải vào một theme và chọn Show More options.
5. Sau đó nhấp vào tùy chọn Send to và chọn tùy chọn Desktop (create shortcut).
6. Nhấn Win + D để chuyển sang desktop. Đảm bảo đóng ứng dụng Settings trước khi chạy shortcut.
7. Nhấp đúp vào shortcut theme vừa tạo để áp dụng theme cho máy tính của bạn
8. Sử dụng PowerShell
Giống như CMD, bạn có thể truy cập các file theme từ PowerShell và thay đổi theme. Làm theo các bước sau:
1. Nhấn Win + R để khởi chạy hộp lệnh Run. Nhập PowerShell vào vùng nhập văn bản và nhấn Ctrl + Shift + Enter để khởi chạy PowerShell với quyền admin.
2. Bây giờ hãy nhập lệnh sau và nhấn phím Enter:
start-process -filepath "C:\Windows\Resources\Themes\aero.theme"
3. Bạn có thể thay thế phần “aero.theme” của lệnh bằng bất kỳ tên theme nào khác. Một số ví dụ bao gồm: “dark.theme” và “spotlight.theme”.
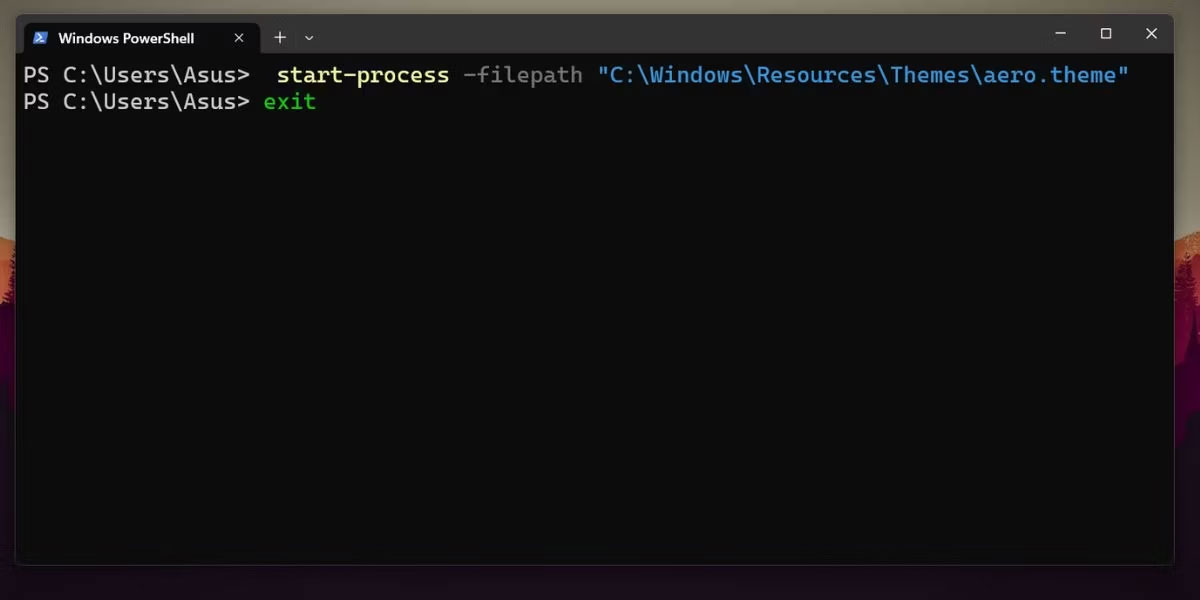
4. Nhập exit và nhấn Enter để đóng Command Prompt.
9. Sử dụng file batch
Bạn có thể tạo một file batch và chạy nó mỗi khi ai đó thay đổi theme ưa thích của bạn. Hơn nữa, bạn còn có thể đặt nó trên desktop để nhanh chóng chuyển đổi theme. Đây là cách thực hiện:
1. Nhấn Win + S và gõ Notepad. Nhấp vào kết quả tìm kiếm đầu tiên để mở ứng dụng Notepad.
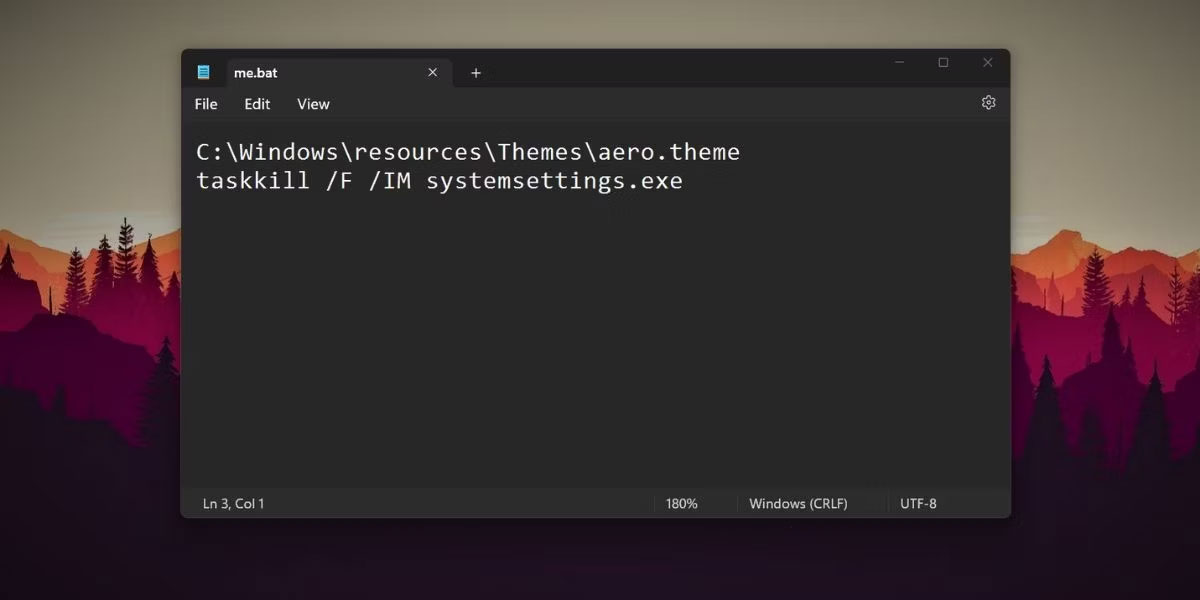
2. Bây giờ, dán đoạn code sau vào file Notepad:
C:\Windows\resources\Themes\aero.theme
 taskkill /F /IM systemsettings.exe
3. Chuyển đến thanh menu trên cùng và nhấp vào File > Save as. Giữ tên file là changetheme.bat, chọn tùy chọn All files và lưu file trên desktop.
4. Đóng ứng dụng Notepad và nhấn Win + D để chuyển sang desktop.
5. Bây giờ, nhấp chuột phải vào file changetheme.bat và chọn tùy chọn Run as administrator.
6. File sẽ mở cửa sổ Command Prompt, thay đổi theme và tự động đóng cửa sổ CMD và System Settings .
