5 cách biến giao diện Windows thành giao diện macOS
- Thứ năm - 16/02/2023 23:59
- In ra
- Đóng cửa sổ này
Chúng ta đều biết giao diện macOS trông hấp dẫn như thế nào. Không có gì đáng ngạc nhiên khi nhiều người dùng Windows ghen tị và muốn bắt chước yếu tố thẩm mỹ của macOS từ Apple. Và tin tốt là bạn không cần phải mua một chiếc máy Mac hoàn toàn mới để có được giao diện tương tự.
May mắn thay, có thể tạo trải nghiệm hình ảnh tương tự trên Windows bằng cách sử dụng một số chương trình của bên thứ ba và vài chỉnh sửa dễ dàng.
1. Sử dụng hình nền desktop theo chủ đề macOS
Trước khi chuyển sang các bước thực tế để tùy chỉnh giao diện Windows, trước tiên, bạn phải thay đổi hình nền hiện tại của PC Windows.
Nhiều trang web cung cấp nhiều hình nền macOS, chẳng hạn như WallpapersHome, WallpaperAccess và WallpaperCave. Chỉ cần tìm kiếm "macOS wallpaper" và bạn sẽ tìm thấy nhiều lựa chọn hình ảnh.
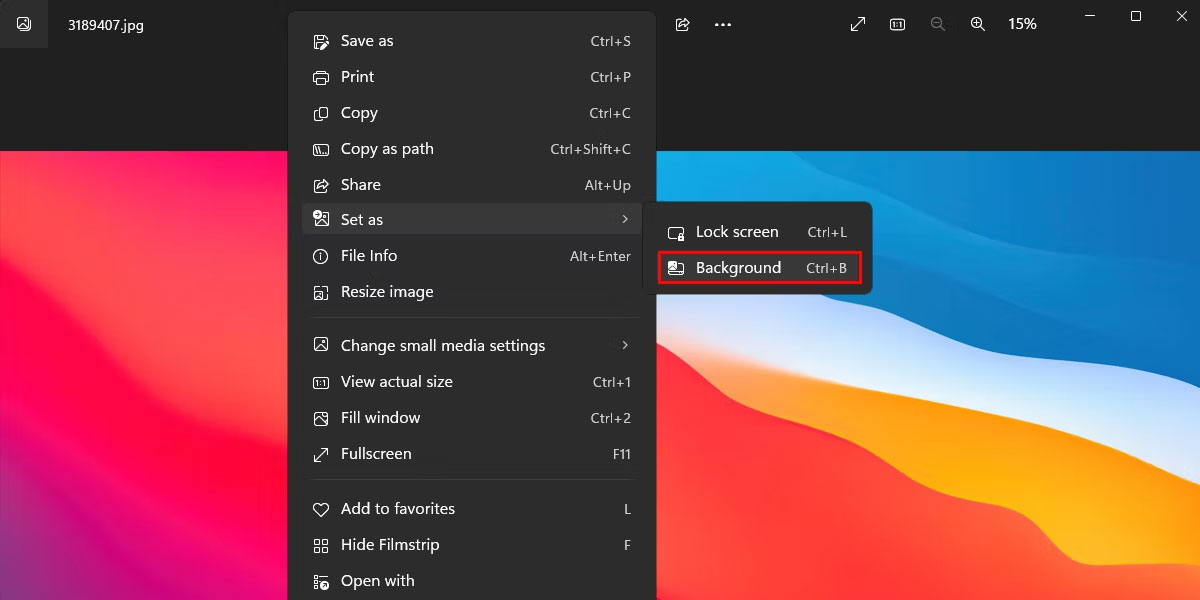
Khi bạn đã tìm thấy hình ảnh ưng ý, hãy tải xuống và mở hình ảnh đó. Nhấp chuột phải vào bất kỳ đâu trên hình ảnh và chọn Set as > Background để áp dụng nó cho màn hình desktop của bạn.
Cài đặt WinDynamicDesktop
Nếu cảm thấy khó tải xuống hình nền macOS trên web, bạn có thể cài đặt WinDynamicDesktop để có quyền truy cập vào nhiều loại hình nền macOS.
Làm theo các bước dưới đây để bắt đầu với WinDynamicDesktop:
1. Tải WinDynamicDesktop từ Microsoft Store.
https://apps.microsoft.com/store/detail/windynamicdesktop/9NM8N7DQ3Z5F
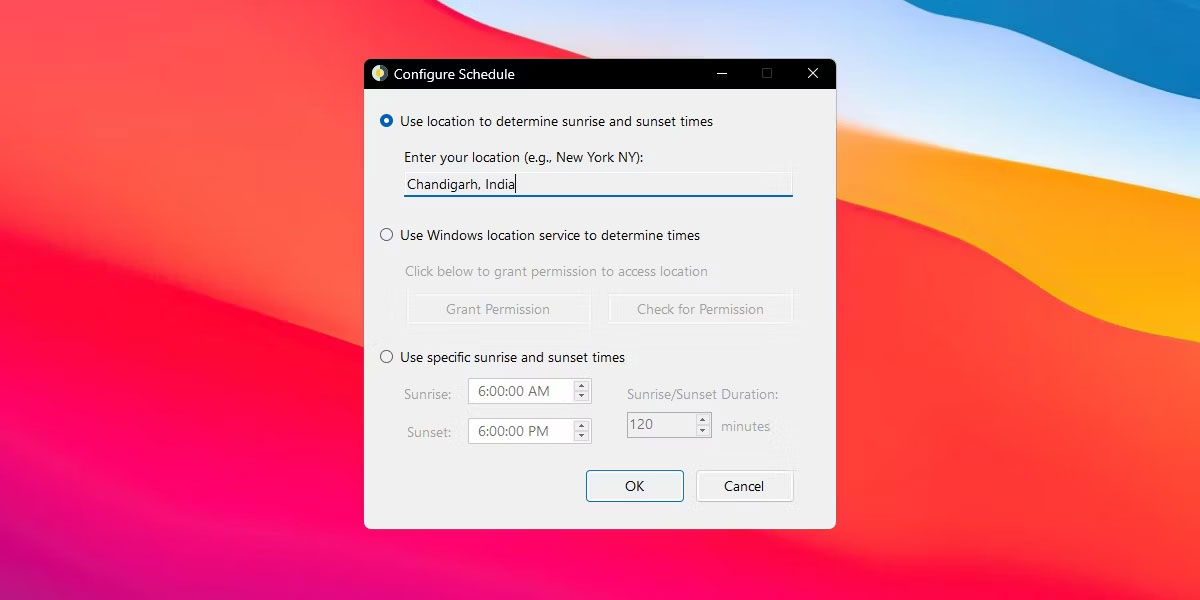
2. Mở ứng dụng, nhập vị trí của bạn trong thiết lập ban đầu và nhấp vào OK.
3. WinDynamicDesktop sẽ cung cấp cho bạn rất nhiều hình nền để lựa chọn. Chọn hình nền phù hợp nhất với sở thích của bạn và nhấp vào nút Apply.
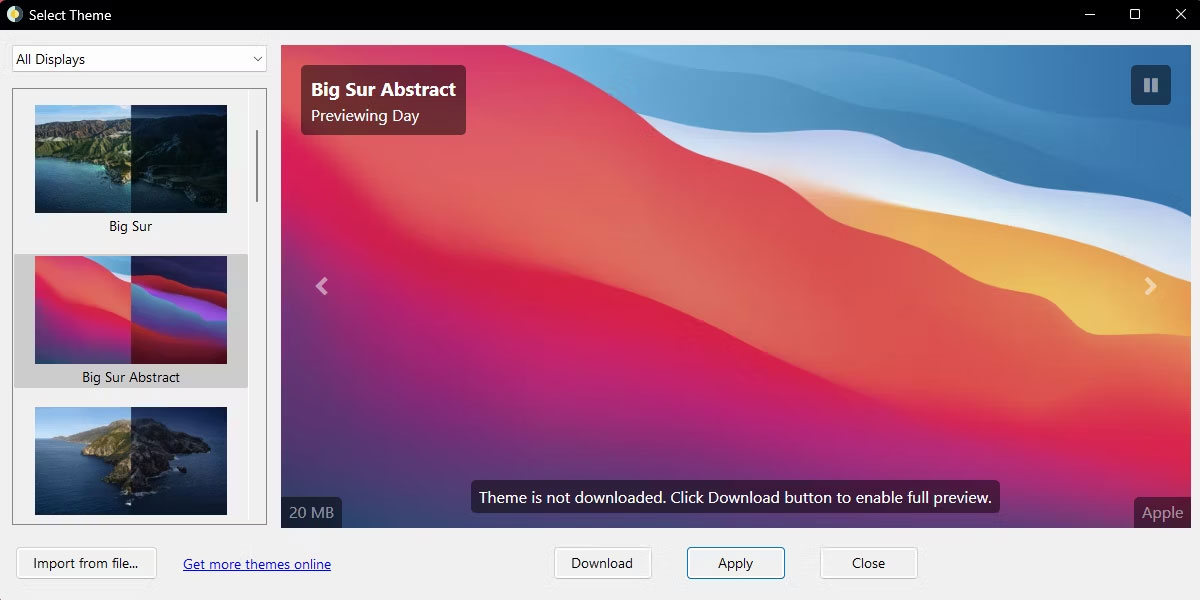
WinDynamicDesktop sẽ tự động tải xuống hình nền đã chọn và áp dụng nó cho màn hình của bạn.
Ưu điểm lớn nhất của WinDynamicDesktop là nó tải xuống hai phiên bản hình nền khác nhau. Một phiên bản của hình nền được tối ưu hóa cho chế độ sáng và phiên bản còn lại được tối ưu hóa cho chế độ tối. Điều tốt là nó sẽ tự động chuyển đổi hình nền tùy thuộc vào thời gian trong ngày.
2. Cài đặt con trỏ kiểu macOS
Con trỏ Windows mặc định khá cơ bản và không mang lại mức độ thẩm mỹ như macOS. Rất may, có một cách để tùy chỉnh con trỏ Windows và làm cho nó trông giống con trỏ macOS.
Để làm cho con trỏ của bạn trông giống con trỏ macOS, bạn có thể sử dụng theme con trỏ macOS, có sẵn miễn phí trên DeviantArt.
Đây là cách cài đặt theme con trỏ kiểu macOS trên Windows:
1. Tải xuống theme con trỏ macOS từ DeviantArt : https://www.deviantart.com/antiden/art/macOS-cursors-for-Windows-701736062 và giải nén file đã tải xuống.
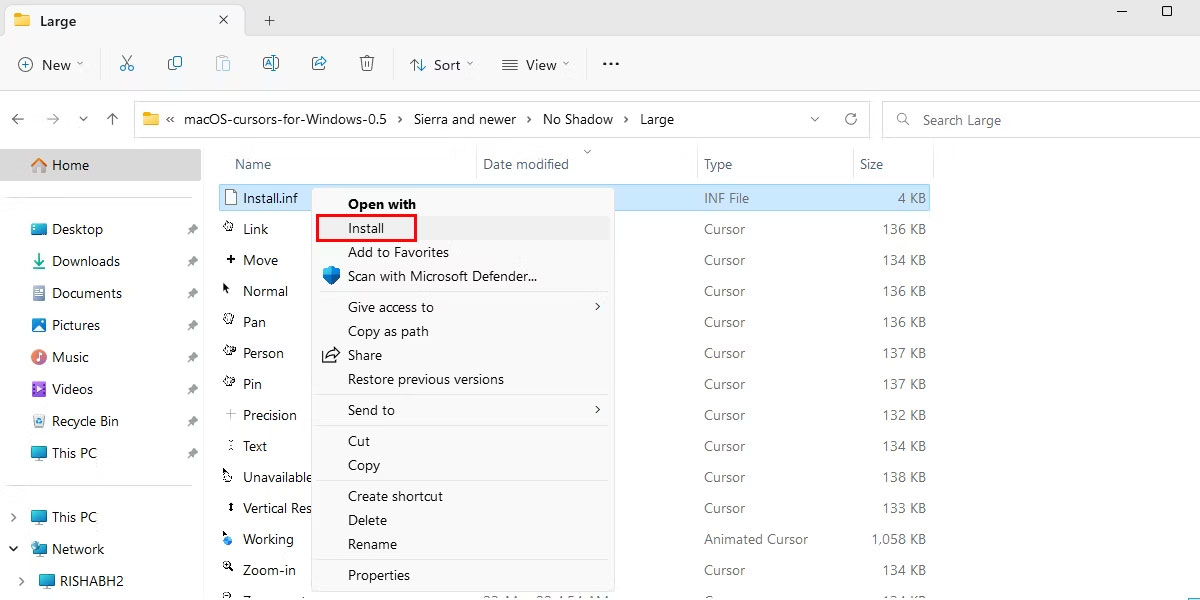
2. Điều hướng đến thư mục đã giải nén và nhập thư mục có tên Sierra and newer > No Shadow > Large. Đối với hướng dẫn này, bài viết sẽ cài đặt theme con trỏ large và no-shadow. Bạn có thể chọn biến thể nào bạn muốn cài đặt bằng cách điều hướng đến thư mục mong muốn.

3. Nhấp chuột phải vào file Install.inf và chọn Install từ menu ngữ cảnh.
4. Chọn thiết kế con trỏ macOS và nhấp vào nút Apply trong cửa sổ Mouse Properties.
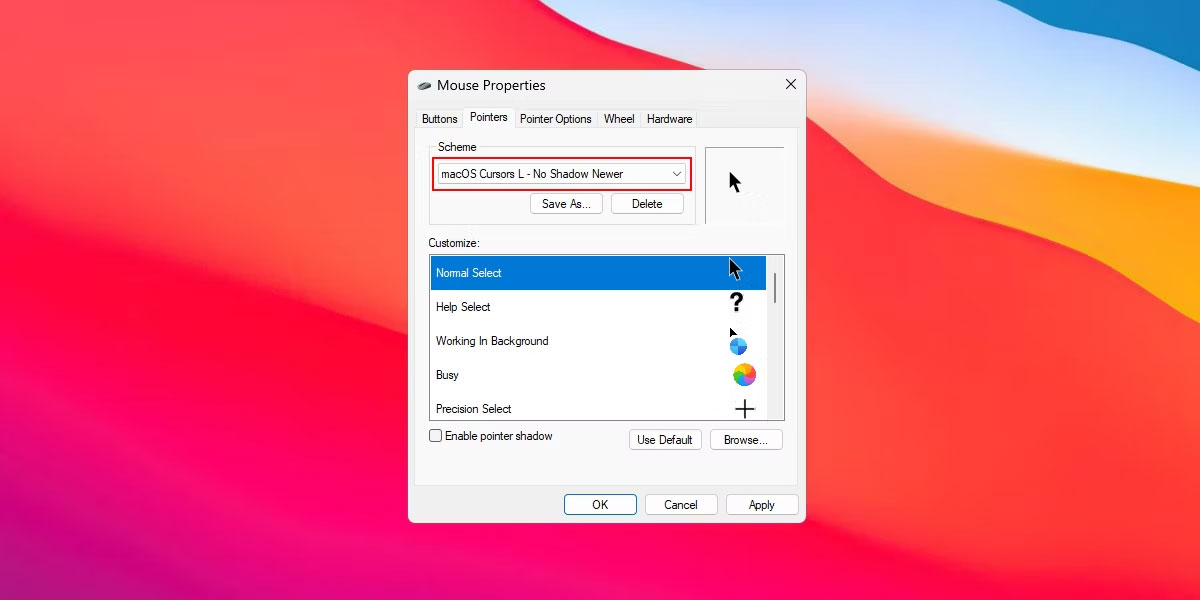
5. Nhấp vào Yes để thay thế theme con trỏ Windows mặc định bằng theme con trỏ macOS.
Mọi thứ đã hoàn tất và bây giờ bạn có thể tận hưởng theme con trỏ macOS trên desktop Windows của mình.
Nếu chưa từng sử dụng macOS trước đây, bạn có thể không thích thiết kế bình thường của con trỏ macOS. Vì vậy, nếu bạn muốn thay đổi nó, hãy vào bên trong thư mục No Shadow > XtraLarge và thực hiện các bước tương tự đã đề cập ở trên.
3. Tạo mockup macOS Dock bằng MyDockFinder
Một trong những điểm khác biệt rõ ràng nhất giữa Windows và macOS là thanh dock. Trên macOS, Dock tương tự như thanh tác vụ trên Windows, thanh này luôn hiển thị ở cuối màn hình.
Nếu muốn sao chép Dock macOS trên Windows, bạn có thể sử dụng chương trình của bên thứ ba như MyDockFinder. MyDockFinder là ứng dụng trả phí cho phép bạn thêm thanh công cụ kiểu macOS vào đesktop Windows của mình.
Nó cung cấp nhiều tùy chọn tùy chỉnh, bao gồm khả năng thay đổi màu sắc, kích thước và vị trí của dock. Nó là một lựa chọn thay thế tốt cho những ai muốn có một dock mạnh mẽ và có thể tùy chỉnh nhiều hơn so với các lựa chọn thay thế miễn phí.
Ưu điểm lớn nhất là nó cung cấp giao diện người dùng đơn giản, giúp bạn dễ dàng tùy chỉnh thanh công cụ chỉ bằng một vài cú nhấp chuột. Ngoài ra, nó còn cung cấp tính năng kéo và thả trực quan cho phép bạn nhanh chóng sắp xếp lại các ứng dụng trên thanh công cụ của mình.
Nếu bạn đang tìm kiếm một giải pháp thay thế miễn phí cho MyDockFinder, hãy xem bài viết về cách thêm dock kiểu Mac bằng các công cụ miễn phí trên Windows.
Để bắt đầu, bạn phải mua nó từ Steam với giá $4,99. Sau khi bạn tải xuống, nó sẽ tự động hiển thị một thanh công cụ trên màn hình. Nếu bạn muốn tùy chỉnh thêm, hãy nhấp chuột phải vào bất kỳ đâu trên thanh công cụ và chọn Preferences.
- Tải MyDock Downloader ($4,99): https://store.steampowered.com/app/1787090/MyDockFinder/
4. Sao chép thanh menu macOS bằng Droptop 4
Droptop 4 là giao diện Rainmeter miễn phí có thêm thanh menu kiểu macOS vào desktop Windows. Thanh menu là một thanh ngang ở đầu màn hình hiển thị danh sách các menu và tùy chọn, chẳng hạn như menu ứng dụng, danh sách thông báo, điều khiển độ sáng và điều khiển âm lượng, v.v...
Phần thú vị là bạn hoàn toàn kiểm soát thanh menu bằng Droptop 4. Nó cho phép bạn thêm các thư mục khác nhau theo ý thích của mình, ghim các shortcut khác nhau vào ứng dụng, cài đặt ứng dụng cộng đồng Droptop, v.v...
Thực hiện theo các bước dưới đây để tùy chỉnh thanh menu với Droptop 4:
1. Tải xuống và cài đặt Rainmeter từ Rainmeter.net: https://www.rainmeter.net/
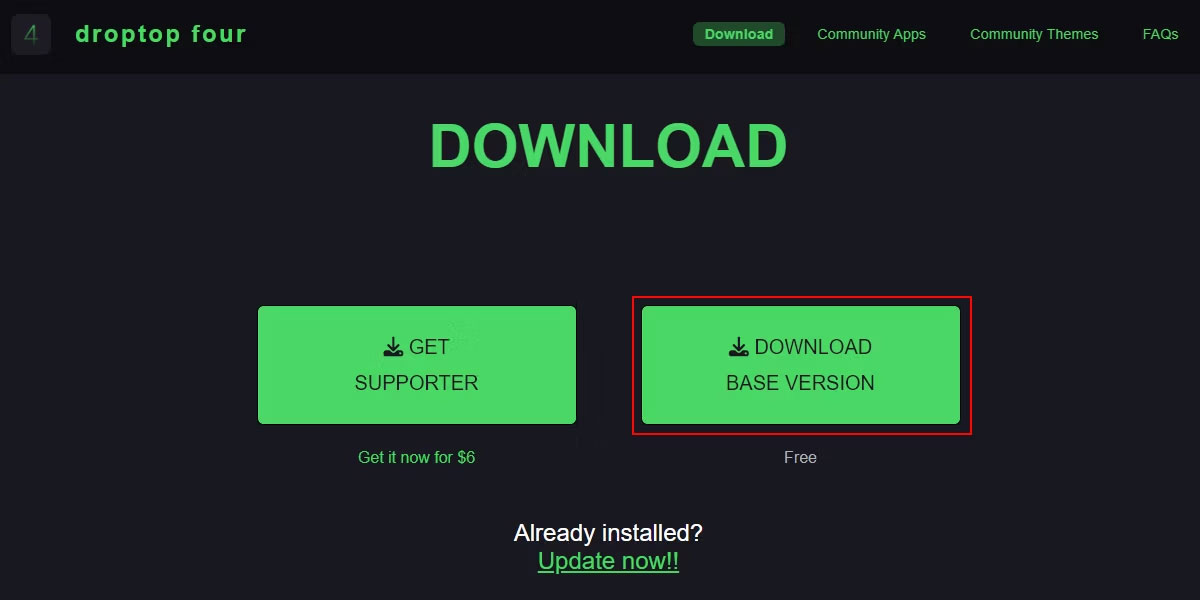
2. Thực hiện theo các hướng dẫn trên màn hình trong quá trình cài đặt để thiết lập Rainmeter. Sau khi hoàn tất, hãy tải xuống phiên bản Droptop 4 Base từ Droptopfour.com.: https://www.droptopfour.com/download/
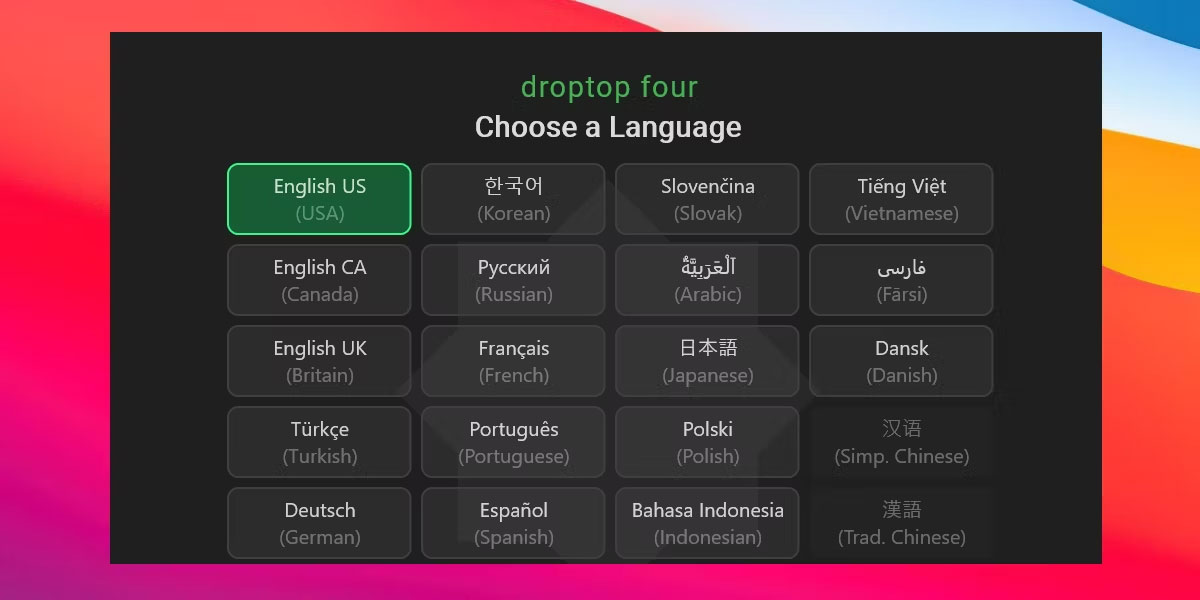
3. Mở thư mục tải xuống và nhấp đúp vào file .rmskin. Rainmeter Skin Installer sẽ mở. Nhấp vào Install để Rainmeter áp dụng giao diện Droptop 4 và kích hoạt thanh menu.

4. Nhấp vào Continue để bắt đầu thiết lập Droptop 4. Chọn ngôn ngữ của bạn và làm theo hướng dẫn trên màn hình.
Sau khi bạn hoàn tất quá trình thiết lập, Rainmeter sẽ tự động áp dụng giao diện Droptop 4 cho desktop của bạn và thanh menu sẽ hiển thị ở đầu màn hình.
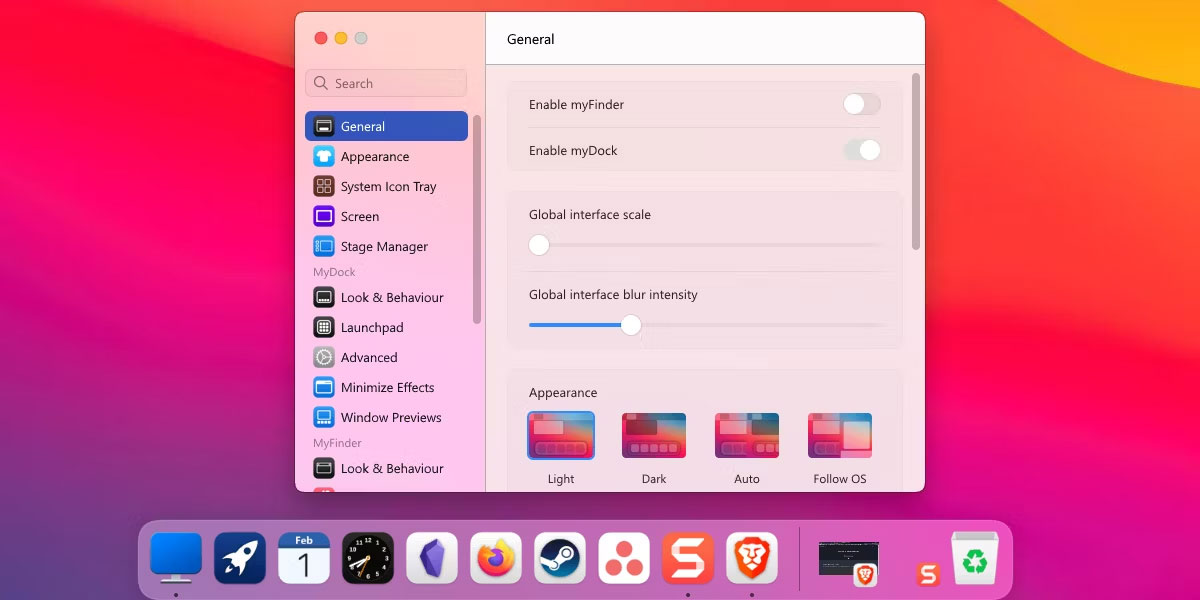
Lưu ý: Nếu đã cài đặt MyDockFinder trước đó, trước tiên bạn cần tắt thanh menu của nó. Để làm điều đó, hãy chuyển đến tùy chọn MyDockFinder và tắt tùy chọn Enable myFinder.
Bạn thậm chí có thể kéo và thả các ứng dụng yêu thích của mình vào thanh menu để nhanh chóng truy cập chúng bất cứ lúc nào. Ngoài ra, Droptop 4 cho phép người dùng dễ dàng truy cập các thư mục và file, với khả năng ẩn các mục cụ thể khỏi chế độ xem.
5. Cài đặt widget macOS bằng Rainmeter
Mặc dù các tinh chỉnh trước đó sẽ cung cấp cho hệ điều hành Windows của bạn giao diện giống như macOS, nhưng bạn có thể tiến thêm một bước bằng cách thêm những widget kiểu macOS vào Windows. Với mục đích này, DeviantArt.com là một trang web tuyệt vời vì nó cho phép bạn truy cập bộ sưu tập các widget macOS được tạo sẵn cho desktop của bạn.
Lưu ý rằng các widget sẽ thêm đều dựa trên Rainmeter. Rainmeter là phần mềm miễn phí cho phép bạn tùy chỉnh và cá nhân hóa giao diện desktop của mình. Nó giúp bạn áp dụng các widget và giao diện (theme) tùy chỉnh cho Windows.
Lưu ý: Bạn nên tạo một điểm khôi phục trước khi tiến xa hơn. Nó sẽ giúp bạn khôi phục PC về trạng thái trước đó trong trường hợp cài đặt theme không thành công.
Đây là cách cài đặt các widget macOS trên Windows:
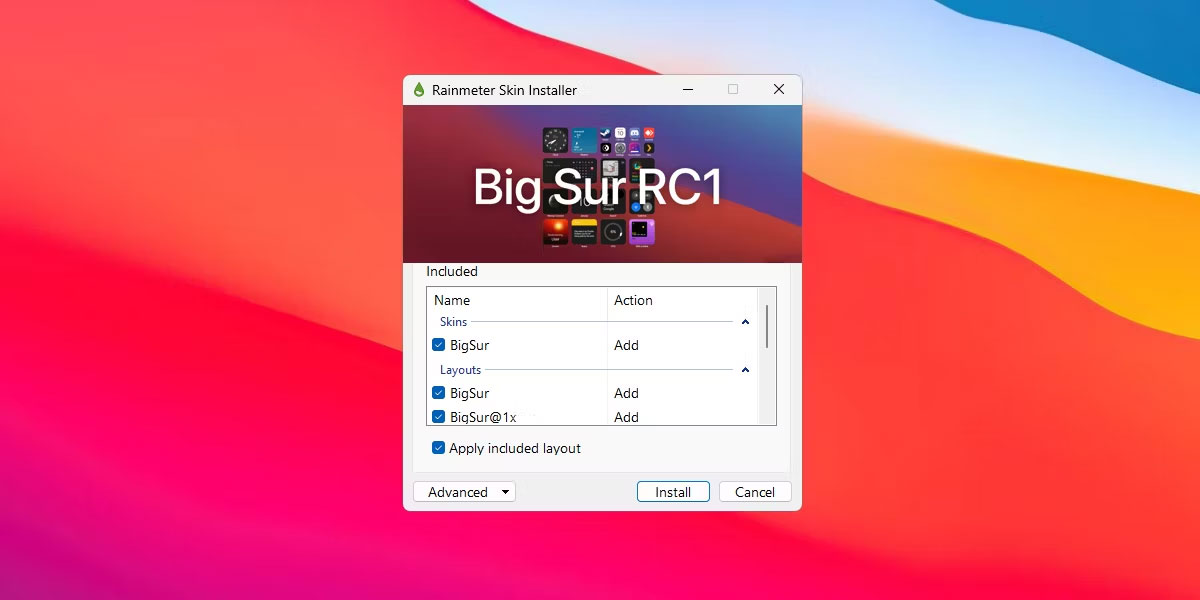
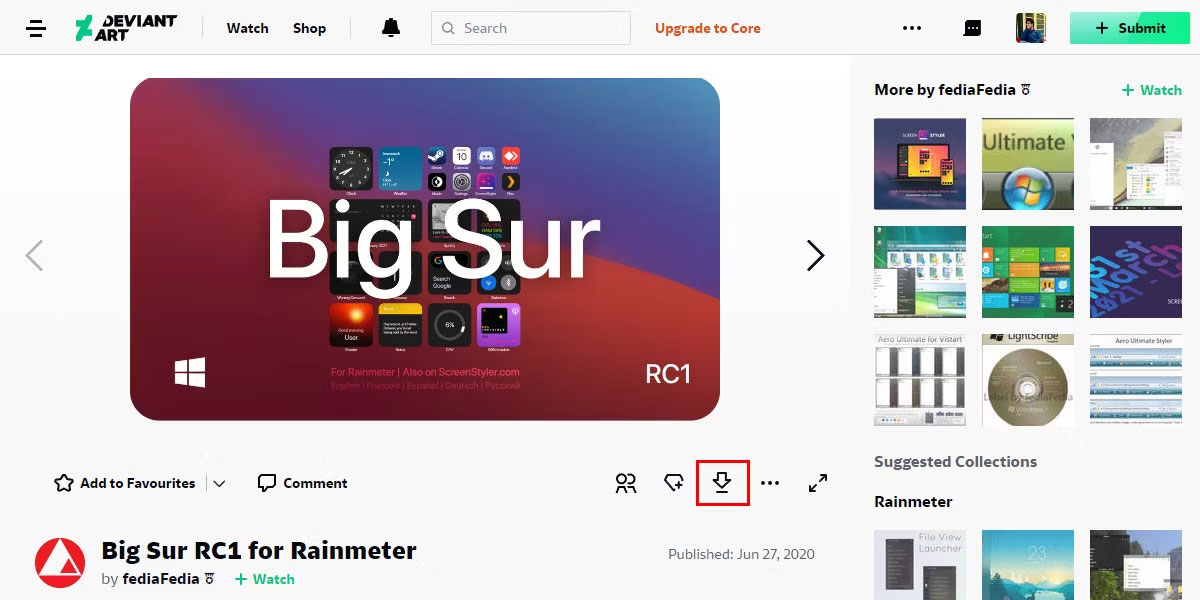
1. Tải xuống giao diện widget Big Sur for Rainmeter từ DeviantArt: https://www.deviantart.com/fediafedia/art/Big-Sur-RC1-for-Rainmeter-846882462 bằng cách nhấp vào biểu tượng tải xuống.
2. Giải nén file zip đã tải xuống và trong thư mục đã giải nén, nhấp đúp vào file BigSur.rmskin để mở.
3. Rainmeter sẽ tự động phát hiện file và khởi chạy Rainmeter Skin Installer. Nhấp vào Install để áp dụng giao diện widget macOS.
Sau đó, bạn có thể tùy chỉnh theme bằng cài đặt và tùy chọn của Rainmeter. Nếu bạn muốn tùy chỉnh một widget, hãy nhấp chuột phải vào widget đó và chọn Settings.
Tương tự, bạn có thể tìm kiếm trên DeviantArt để biết thêm các widget hoặc thậm chí những gói biểu tượng trên màn hình để cá nhân hóa thêm desktop cho giống với macOS.
