4 cách xóa lịch sử bảo vệ của Microsoft Defender trên Windows 10/11
- Thứ ba - 16/05/2023 00:59
- In ra
- Đóng cửa sổ này
Windows Defender là phần mềm diệt virus của Microsoft được tích hợp trong PC Windows để bảo vệ bạn khỏi virus, các mối đe dọa phần mềm độc hại và những cuộc tấn công. Nó duy trì một bản ghi các lần quét và hành động của nó trong thư mục Protection History.
Mặc dù Protection History sẽ bị xóa sau một thời gian, nhưng bạn có thể muốn có nhiều quyền kiểm soát hơn bằng cách tự mình xóa nó. Vì vậy, hãy xem cách bạn có thể xóa Protection History.
Lịch sử bảo vệ của Microsoft Defender là gì? Tại sao nên xóa nó?
Một trong những phần mềm diệt virus tốt nhất cho PC của bạn, Windows Defender ngày càng tốt hơn với một số nâng cấp mạnh mẽ. Các phát hiện do Windows Defender thực hiện sẽ xuất hiện trên trang Protection History - nghĩa là bạn có thể xem các hành động mà Microsoft Defender Antivirus đã thực hiện thay cho bạn. Đây sẽ là những lần quét được thực hiện để xác định và chặn phần mềm độc hại cũng như các mối đe dọa khác và cả những đề xuất (được đánh dấu bằng màu đỏ hoặc vàng) cho các hành động bạn nên thực hiện.
Bạn cũng có quyền truy cập vào tất cả thông tin này ở dạng rõ ràng và dễ hiểu, bao gồm cả Potentially Unwanted Apps đã bị xóa hoặc các service chính đã bị vô hiệu hóa. Protection History cũng sẽ hiển thị các phát hiện xuất hiện trong khi thực hiện quét ngoại tuyến của Windows Defender.

Mặc dù Windows Defender lưu giữ lịch sử phát hiện của nó trong 30 ngày, nhưng bạn có thể xóa nó trước thời điểm đó nếu cần - ví dụ, khi có nhiều nhật ký quét đã tích lũy. Xóa Protection History sẽ giúp bạn giải phóng dung lượng trên PC và giữ cho Defender chạy trơn tru. Hãy nhớ rằng bạn phải đăng nhập với quyền admin để xóa Protection History, vì vậy hãy kiểm tra xem bạn có quyền admin hay không.
Bây giờ, hãy xem 4 cách dễ dàng để xóa Protection History trong Windows 10 và 11.
4 cách xóa lịch sử bảo vệ của Microsoft Defender trên Windows 10/11
1. Cách xóa thư mục Protection History của Microsoft Defender
Bạn có thể xóa Protection History theo cách thủ công bằng cách xóa nội dung của thư mục Service trong thư mục Windows Defender bằng File Explorer. Đây là cách thực hiện:
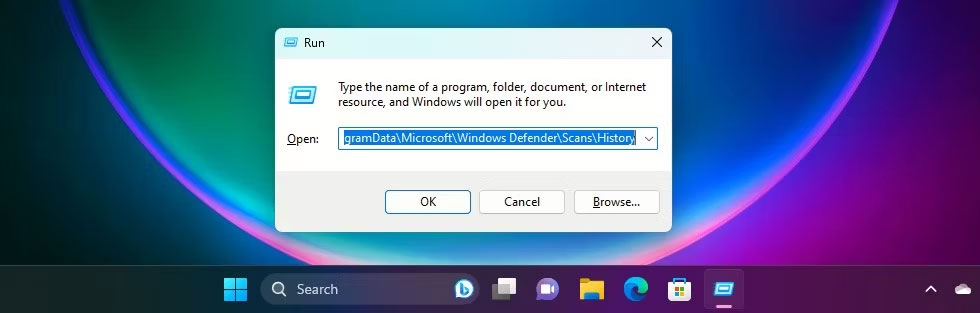
1. Nhấn các phím Windows + R để hiển thị hộp Run.
2. Sao chép và dán đường dẫn bên dưới và nhấp vào OK hoặc nhấn Enter:
C:\ProgramData\Microsoft\Windows Defender\Scans\History
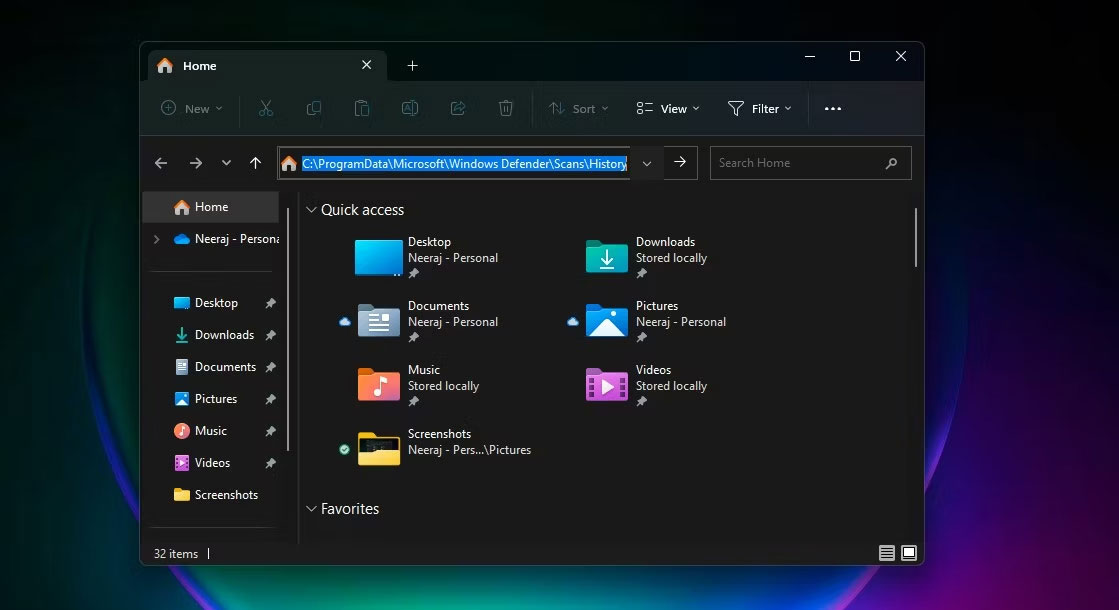
3. Bạn cũng có thể dán đường dẫn C:\ProgramData\Microsoft\Windows Defender\Scans\History vào thanh điều hướng File Explorer rồi nhấn Enter.
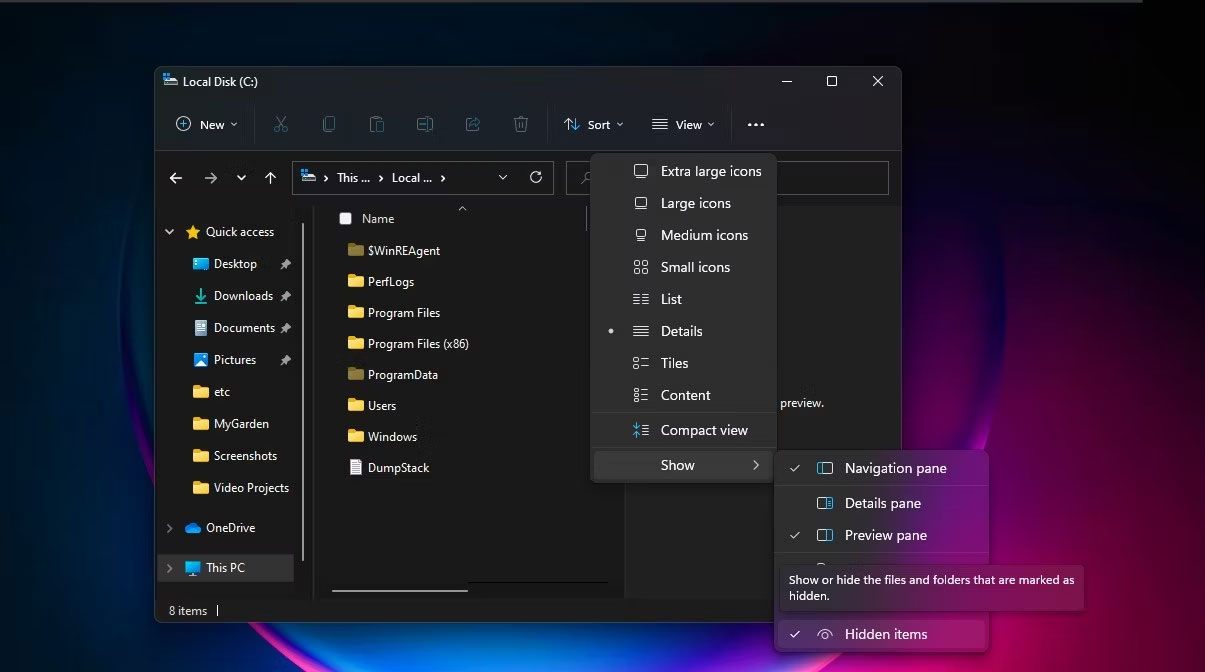
4. Ngoài ra, bạn có thể điều hướng đến thư mục Defender Protection History bằng đường dẫn trên trong File Explorer. Nếu bạn không thấy thư mục ProgramData khi mở Local Drive, hãy chọn View rồi đánh dấu vào ô bên cạnh Hidden items.
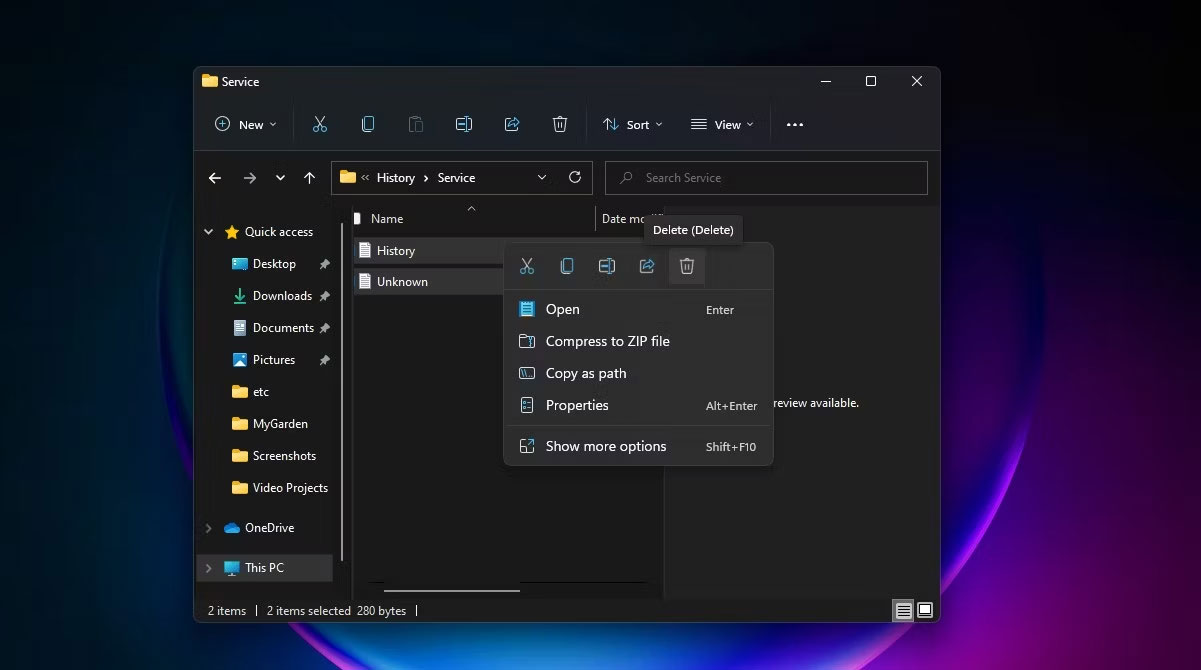
5. Mở thư mục Service và chọn tất cả các file bên trong nó. Nhấp chuột phải và chọn Delete để xóa tất cả các file. Sau đó thoát khỏi File Explorer.
6. Tiếp theo, tìm kiếm Windows Security và mở nó.
7. Trong Virus & threat protection, nhấp vào Manage settings.
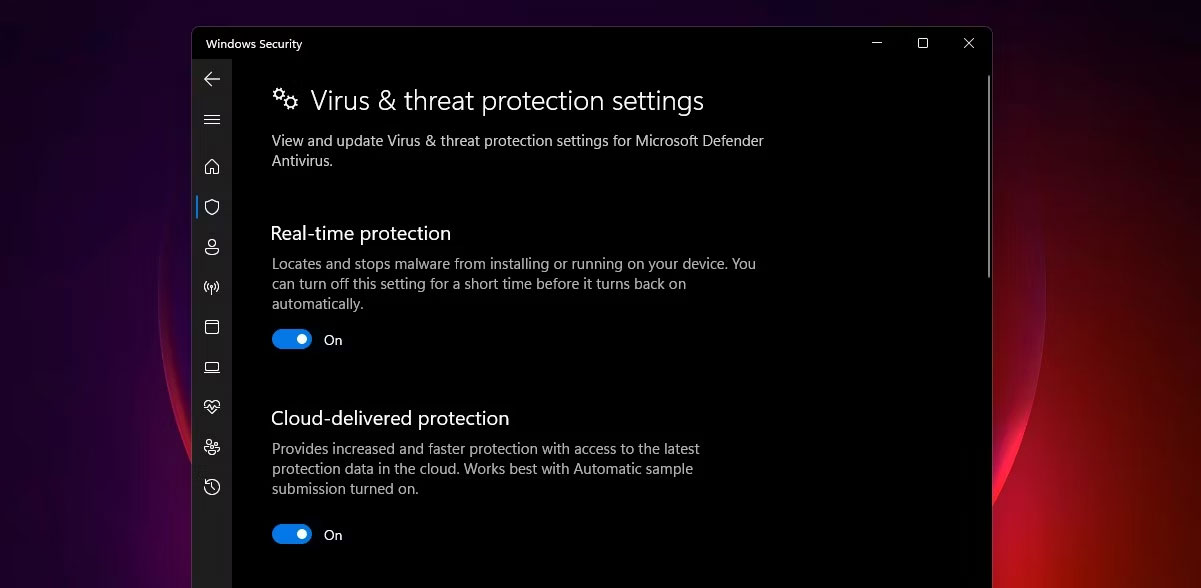
8. Cuối cùng, chuyển nút chuyển đổi cho Real-Time protection và Cloud-delivered protection sang Off rồi lại On.
2. Cách xóa Protection History của Microsoft Defender bằng Event Viewer
Bạn cũng có thể xóa Protection History của Defender theo cách thủ công qua Event Viewer -một ứng dụng hữu ích để phân tích nhật ký sự kiện trên thiết bị của bạn. Đây là cách thực hiện:
1. Đầu tiên, thực hiện tìm kiếm trên Windows cho Event Viewer và nhấp vào kết quả phù hợp nhất để mở Event Viewer.
2. Trong Event Viewer (Local) ở bên trái, hãy mở rộng Applications and Services Logs.
3. Trong Applications and Services Logs, nhấp vào mũi tên xổ xuống bên cạnh thư mục Microsoft.
4. Nhấp vào Windows ở bên trái để mở danh sách các file Windows ở giữa.
5. Cuộn xuống danh sách các file ở giữa để tìm Windows Defender.
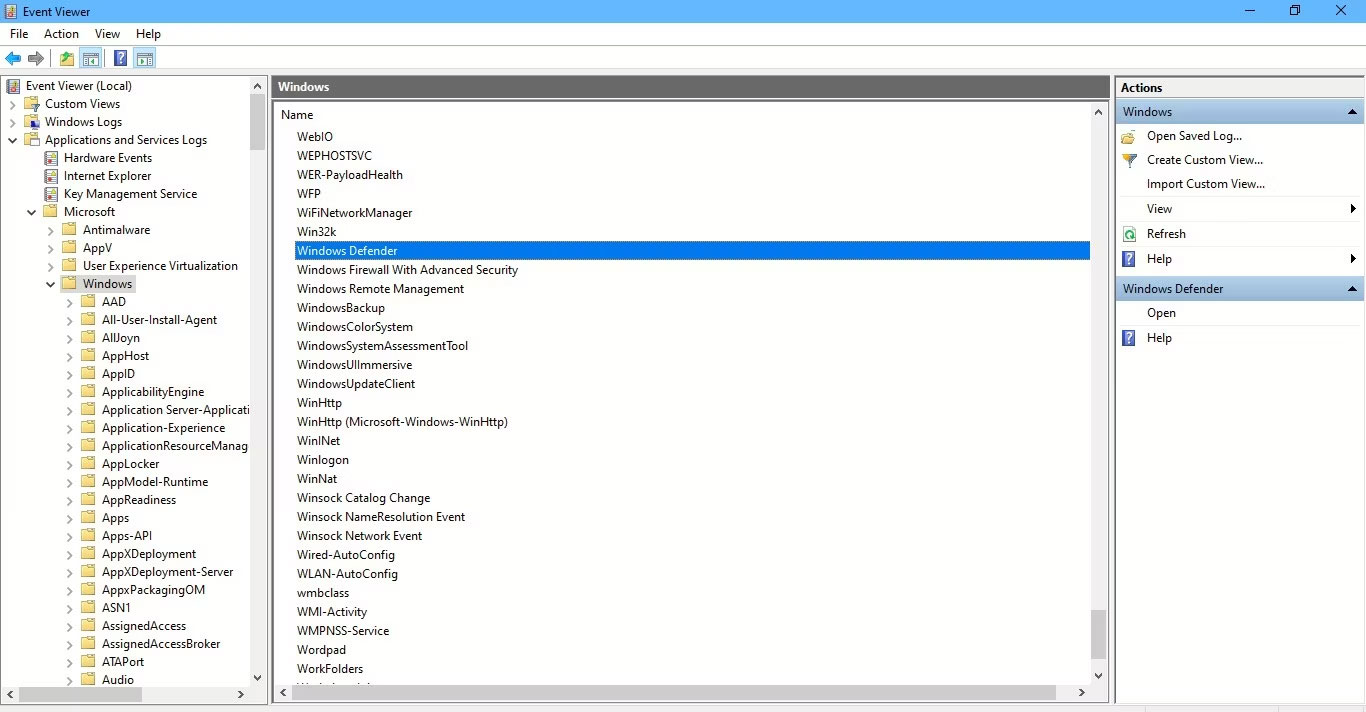
6. Nhấp đúp vào Windows Defender.
7. Sau đó nhấp chuột phải vào Operational và chọn Open để xem tất cả các nhật ký trước đây.
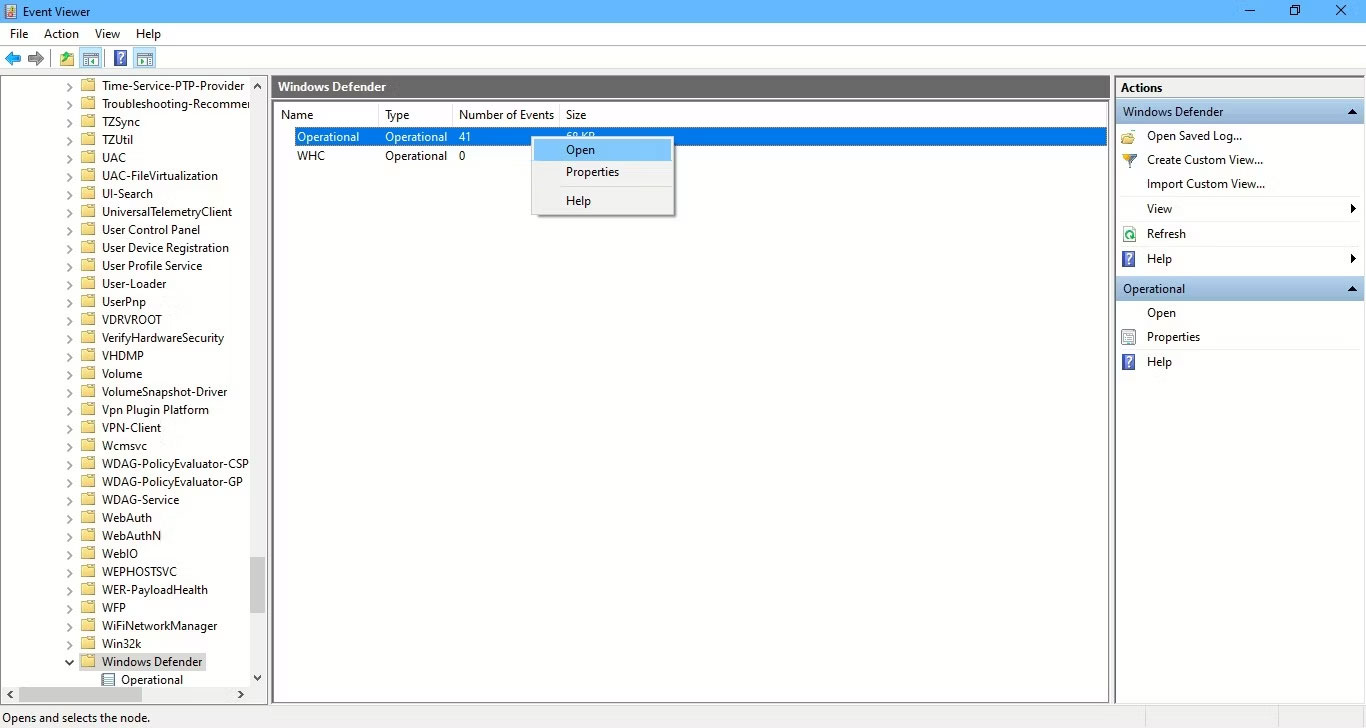
8. Bây giờ, bạn có thể nhấp chuột phải vào Operational ở bên trái và chọn Clear Log. Hoặc nhấp vào Clear Log ở bên phải dưới Actions.
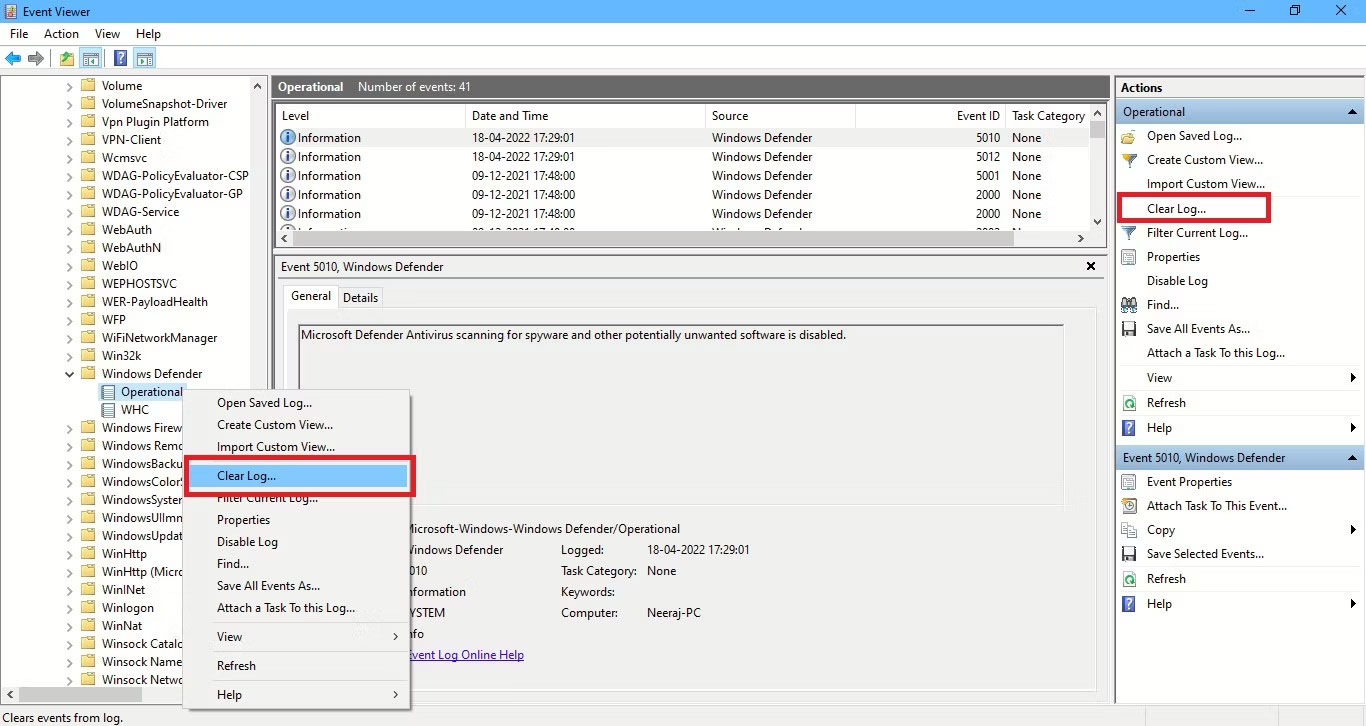
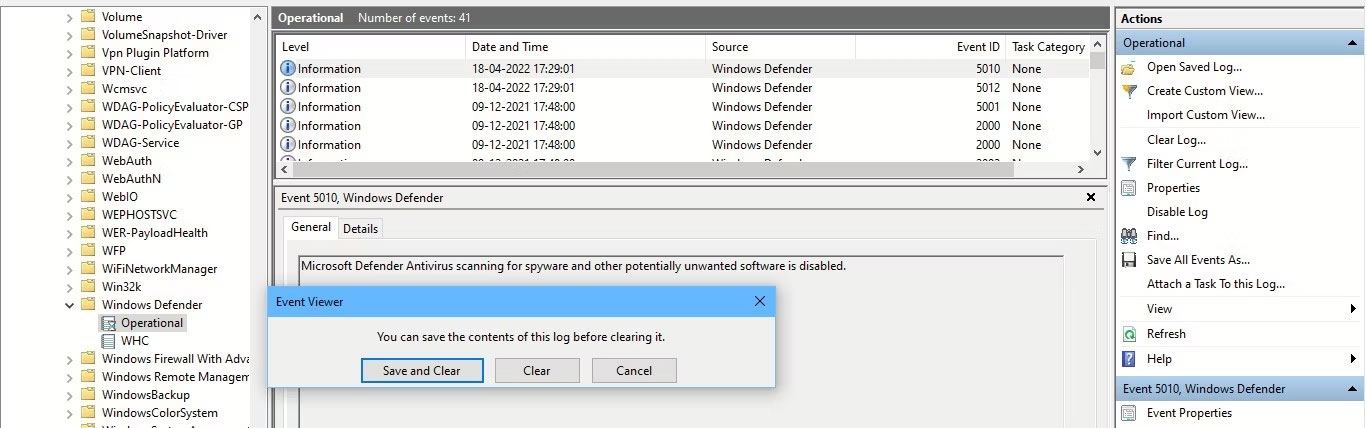
9. Chọn Clear để xóa Protection History. Nếu bạn muốn lưu nhật ký Protection History để tham khảo sau này trước khi xóa chúng, hãy chọn Save and Clear.
3. Cách xóa Protection History của Microsoft Defender qua PowerShell
Nếu bạn muốn Protection History tự động xóa sau một số ngày cụ thể thì sao? Bạn cũng có thể sử dụng lệnh PowerShell để làm điều đó.
1. Nhập PowerShell vào thanh tìm kiếm. Nhấp chuột phải vào Windows PowerShell bên dưới kết quả phù hợp nhất và chọn Run as administrator. Hoặc chọn Run as administrator trên ngăn tìm kiếm bên phải.
2. Nhấp vào Yes trên lời nhắc UAC xuất hiện.
3. Cửa sổ Administrator: PowerShell sẽ mở ra. Nhập hoặc sao chép và dán lệnh sau rồi nhấn Enter:
Set-MpPreference -ScanPurgeItemsAfterDelay 7
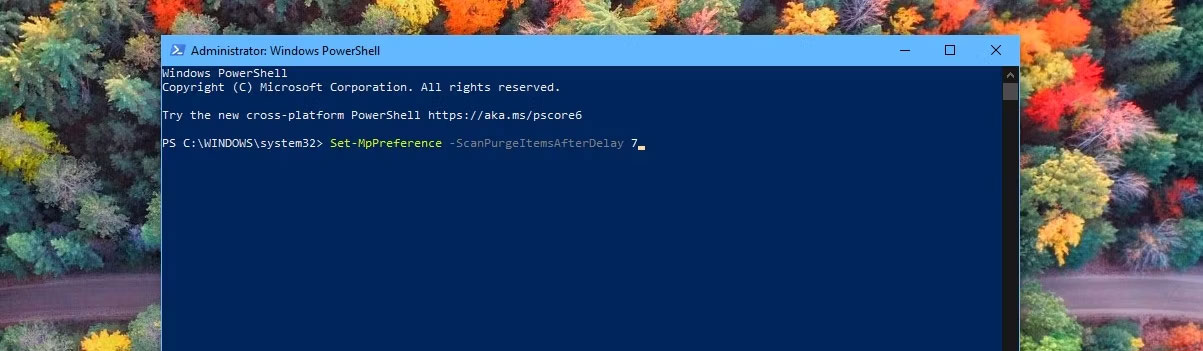
Số 7 ở cuối lệnh là số ngày sau đó nhật ký Protection History sẽ bị xóa. Chỉ cần thay đổi số đó để chỉ định thời điểm bạn muốn xóa Protection History. Và lịch sử sẽ được xóa tự động.
4. Cách xóa Protection History của Microsoft Defender bằng Group Policy Editor
Nếu có PC chạy Windows 10 Pro, Windows 11 Pro hoặc phiên bản cao hơn, bạn cũng có thể sử dụng Group Policy Editor để tự động xóa Protection History của Defender. Mặc dù cũng có các giải pháp để truy cập Group Policy Editor trên Windows Home. Nhưng hãy xem cách xóa Protection History thông qua Group Policy Editor trong Windows Pro và các phiên bản cao hơn:
1. Nhấn phím Win + R để mở hộp Run. Nhập gpedit.msc để mở Local Group Policy Editor. Hoặc chỉ cần nhập gpedit vào thanh tìm kiếm và nhấp vào Edit Group Policy bên dưới kết quả phù hợp nhất để mở.
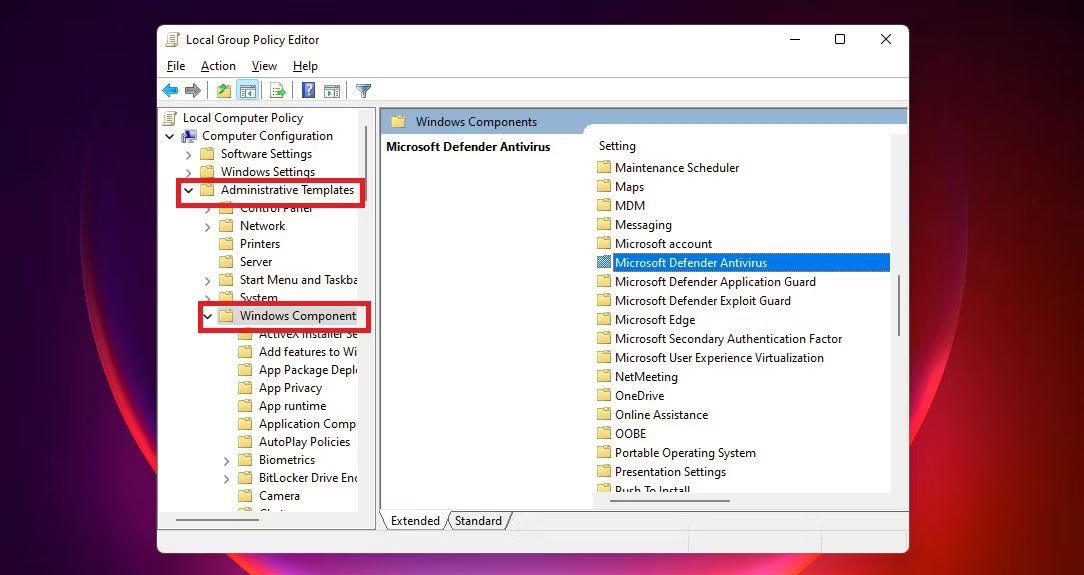
2. Trong Local Group Policy Editor, trên ngăn bên trái bên dưới Computer Configuration, hãy mở rộng Administrative Templates bằng cách nhấp vào mũi tên xổ xuống bên cạnh nó.
3. Bên trong thư mục Administrative Templates, nhấp vào Windows Components và danh sách các thành phần của nó sẽ xuất hiện ở ngăn giữa của Group Policy Editor.
4. Sau đó cuộn xuống để tìm Windows Defender Antivirus và nhấp đúp vào nó.
5. Trong danh sách các mục Windows Defender, nhấp đúp vào thư mục Scan.
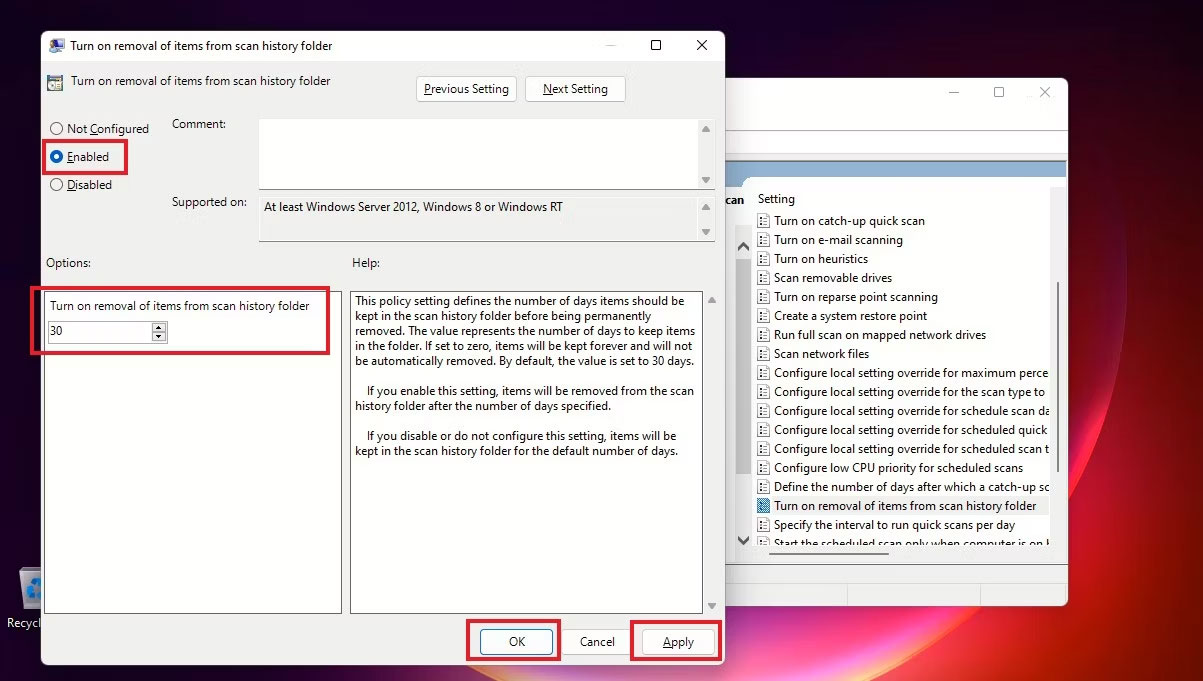
6. Ở bên phải, nhấp đúp vào Turn on removal of items from scan history folder. Hoặc nhấp vào Edit policy setting ở ngăn giữa. Cài đặt policy này xác định số ngày các mục sẽ được lưu giữ trong thư mục lịch sử quét trước khi bị xóa vĩnh viễn.
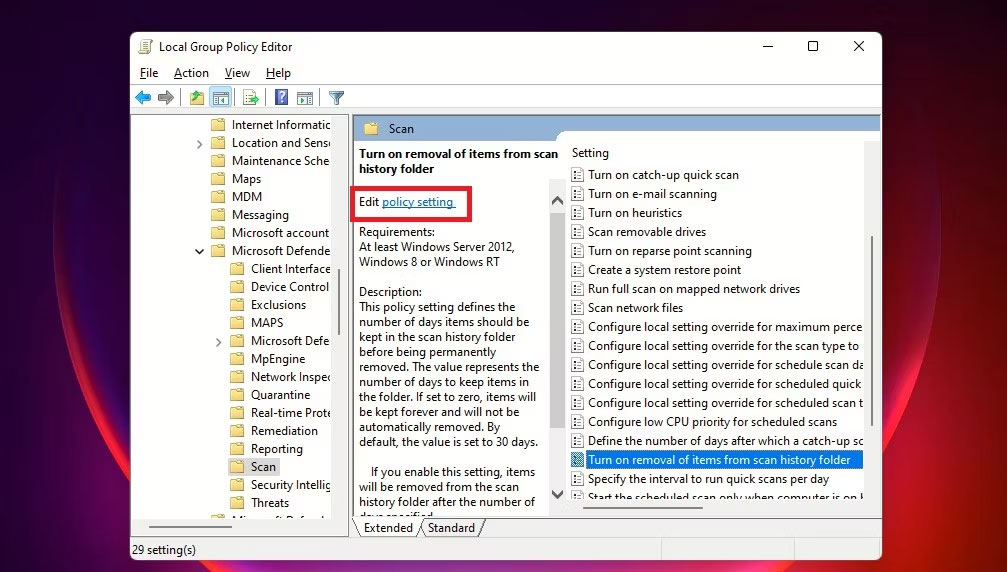
7. Tiếp theo, chọn Edit policy setting để mở cửa sổ policy Nó sẽ hiển thị Not Configured theo mặc định. Để đặt số ngày, hãy chọn nút bên cạnh Enabled. Sau đó, số ngày mặc định là 30 sẽ được đặt. Nếu bạn đặt số ngày thành 0, các mục sẽ được lưu giữ mãi mãi và không tự động bị xóa. Vì vậy, chỉ cần thay đổi ngày thành bất cứ khi nào bạn muốn xóa các mục. Cuối cùng, nhấp vào Apply > OK.
Giờ đây, bạn sẽ không cần phải xóa Protection History theo cách thủ công mỗi lần - các mục trong thư mục lịch sử quét sẽ tự động bị xóa sau những ngày bạn đã chỉ định.
