3 cách kích hoạt Telnet trong Windows 10 & 11
- Chủ nhật - 23/02/2025 21:48
- In ra
- Đóng cửa sổ này

Bất chấp các vấn đề về lỗ hổng, Telnet vẫn được người dùng Windows sử dụng làm giao thức client-server. Giao thức này chủ yếu được sử dụng để cấu hình phần cứng mạng ban đầu, truy cập từ xa, kiểm tra và chuyển tiếp cổng, cũng như các tác vụ khác không liên quan đến việc truyền thông tin nhạy cảm.
Bạn có thể bật Telnet trên máy tính Windows 10 và 11 thông qua công cụ Command Prompt hoặc giao diện người dùng đồ họa (GUI). Sau đây, bài vết sẽ chỉ cho bạn nhiều cách để bật Telnet trên máy tính Windows.
1. Bật Telnet trên Windows bằng Control Panel
Bạn có thể bật Telnet Client bằng Control Panel cổ điển. Vì đây là tính năng tùy chọn, bạn có thể bật tính năng này bằng hộp thoại Windows Optional Feature. Bạn có thể sử dụng tính năng này để thêm hoặc xóa các tính năng tùy chọn của người dùng khác trên Windows.
Để bật Telnet Client bằng Control Panel:
- Nhấn Win + R để mở Run.
- Nhập control và nhấp vào OK để mở Control Panel.
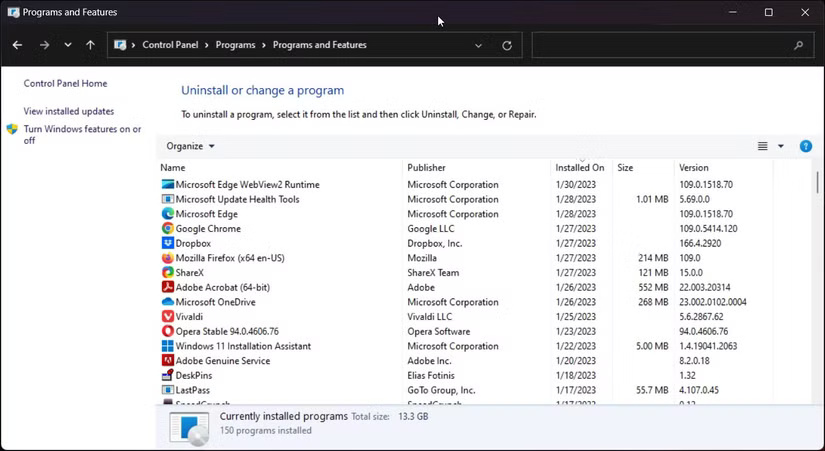
- Trong Control Panel, nhấp vào Uninstall a Program trong Programs and Features.
- Trong ngăn bên trái, nhấp vào Turn Windows feature on or off.
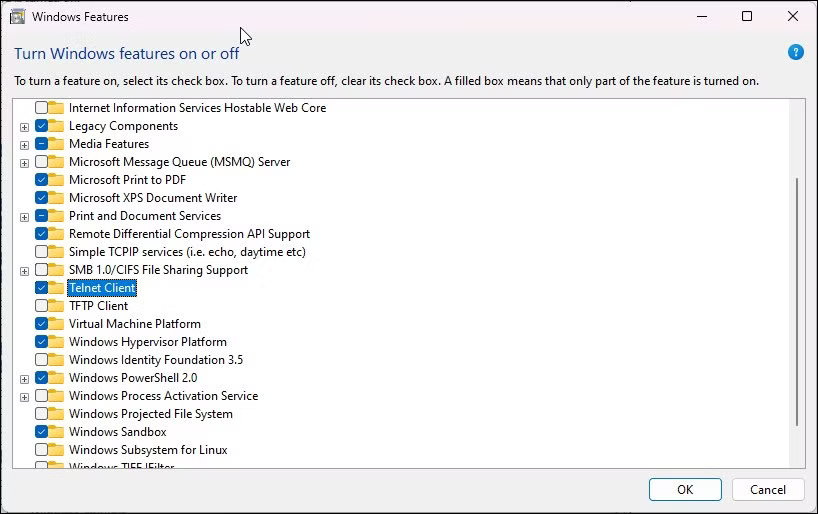
- Trong hộp thoại Windows Features, cuộn xuống và chọn Telnet Client.
- Nhấp vào OK và đợi tính năng cài đặt. Sau khi cài đặt, hãy khởi động lại PC để áp dụng các thay đổi và bật tính năng.
Nếu bạn cần tắt Telnet:
- Mở hộp thoại Windows Features và bỏ chọn Telnet Client.
- Nhấp vào OK và đợi tính năng gỡ cài đặt.
- Nhấp vào Restart now để khởi động lại PC và áp dụng các thay đổi.
2. Bật Telnet Client bằng Windows PowerShell
Bạn có thể sử dụng cmdlet Enable-WindowsOptionalFeature để bật Telnet Client bằng Windows PowerShell. Hữu ích nếu bạn không thể bật tính năng bằng hộp thoại Windows Features và nó cũng nhanh hơn phương pháp GUI.
Để bật Telnet bằng Windows PowerShell:
- Nhấn Win + X để mở menu WinX.
- Nhấp vào Windows Terminal (Admin) và nhấp vào Yes để mở ứng dụng Terminal với quyền admin. Nếu bạn đang sử dụng Windows 10, hãy nhập PowerShell vào Windows Search và mở Windows PowerShell với quyền admin.
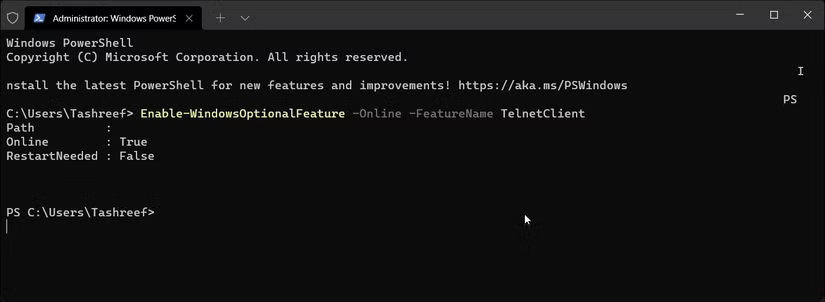
- Trong cửa sổ PowerShell, hãy nhập lệnh sau và nhấn Enter để bật Telnet:
Enable-WindowsOptionalFeature -Online -FeatureName TelnetClient
- Quá trình này có thể mất vài phút, vì vậy hãy đợi hoàn tất và trả về báo cáo trạng thái. Nếu thành công, bạn sẽ thấy kết quả là Online:True.
- Nếu bạn muốn tắt Telnet Client, hãy sử dụng lệnh sau thay thế:
Disable-WindowsOptionalFeature -Online -FeatureName TelnetClient
- Đóng PowerShell và khởi động lại PC.
3. Cài đặt Telnet Client bằng Command Prompt
Nếu thích Command Prompt hơn PowerShell, bạn có thể sử dụng lệnh DISM /Online để bật các tính năng tùy chọn trên máy tính Windows 11 của mình.
Thực hiện theo các bước sau để cài đặt Telnet bằng Command Prompt:
- Nhấn phím Win và nhập cmd.
- Nhấp chuột phải vào Command Prompt và chọn Run as administrator.
- Trong cửa sổ Command Prompt, nhập lệnh sau và nhấn Enter:
dism /online /Enable-Feature /FeatureName:TelnetClient
- Command Prompt sẽ bắt đầu bật tính năng và hiển thị thông báo hoạt động đã hoàn tất thành công.
- Nếu bạn cần tắt Telnet, hãy nhập lệnh sau và nhấn Enter:
dism /Online /Disable-Feature /FeatureName:TelnetClient
- Chờ thông báo thành công.
- Nhập exit và nhấn Enter để đóng Command Prompt.
